Electronic Treatment Plan Overview
1. Overall Concept
When a client receives a service, the servicing department needs to provide an “Individual Treatment Plan” that needs to be reviewed and approved. When a client is receiving multiple different services, the group of plans must be reviewed in aggregate to make sure there is consistency, no overlap, etc. The combined “package” needs to be reviewed and approved.
The imPowr Treatment plan module aims to address both needs:
- Provide a flexible way for clinicians to create individual plans and manage review and approval.
- Provide a way to package plans to assess, review, and approve in aggregate.
Shown visually, the process looks something like this:

2. Core Requirements
Provide the tools to perform the “typical” treatment plan process:
• Provide Clinicians with the ability to electronically create Service-Specific treatment plans.
• Provide the Clinic Admin a way to track and quality-check those service-specific treatment plans.
• Provide a way for the clinic administrator to consolidate plans into a “package” which can then be reviewed.
• Provide a way for the Medical Director to approve and sign those packages.
3. Additional Requirements
Provide a way to handle edge cases such as:
• When an individual plan is submitted but later needs modifying.
• When an individual plan is submitted, QA-checked, and combined into a package but later needs modifying.
• When a package of plans is created and approved but the package sheet later needs modifying.
• When one or more individual service plans in the package are non-electronic (e.g., came from external source).
4. General Requirements
General requirements are that:
• Key steps are tracked in the audit trail.
• Electronic signatures meet HIPAA requirements.
• Any change to a signed document invalidates all signatures.
Clinician Workflow: Typical
1. Login
Clinician logs in and the dashboard appears.
2. View list
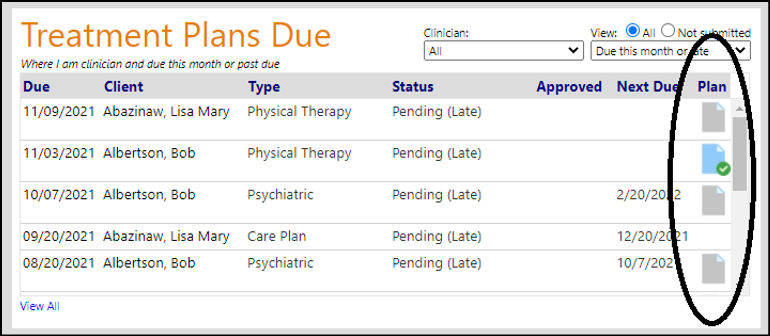
On their dashboard they see a list of “Treatment Plans Due”. The gray icon is a non-started plan. The blue icon is a started one.
3. Enter the plan
The Clinician clicks the document icon and fills out the treatment plan.

4. Save the plan
4.A. Save while working on it
The clinician can save the plan and come back later to finish it by clicking Apply or Save.

4.B Plan is done, submit it.
When the clinician is done, they can electronically sign the plan and click “Save & Submit”. This will tag the plan as “submitted” and the plan will disappear from the work list in Step 2 above.
Clinician Workflow: Alternative
1. Login
Clinician logs in and the dashboard appears.
2. View list
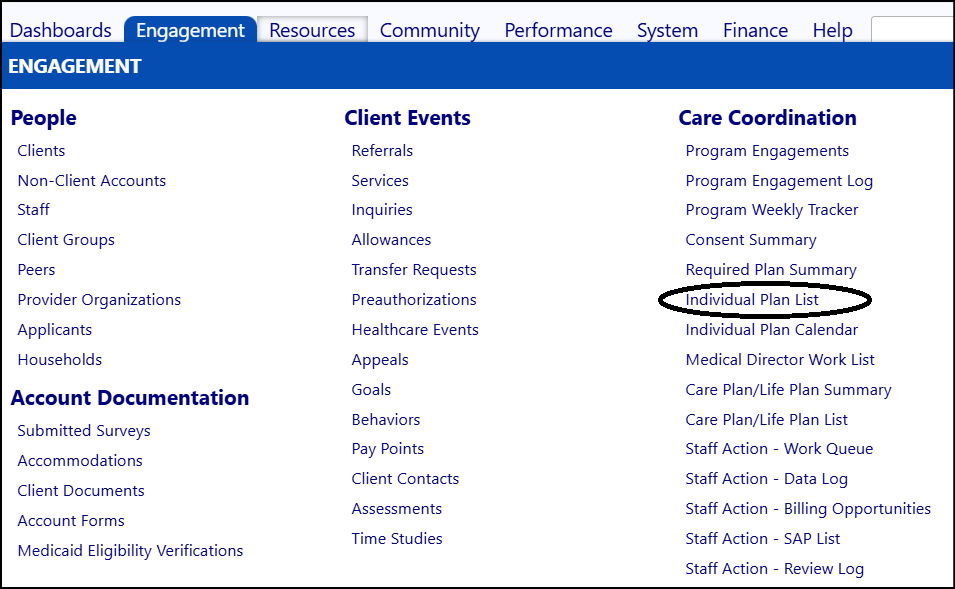
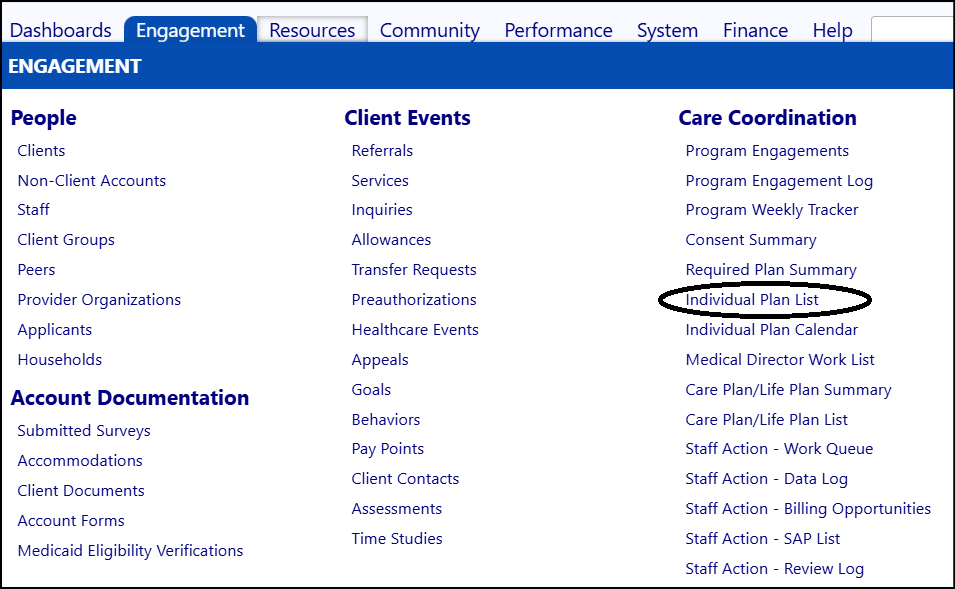
The clinician goes to the menu item “Individual Plan List” (note that their menu may look different since it is role specific).
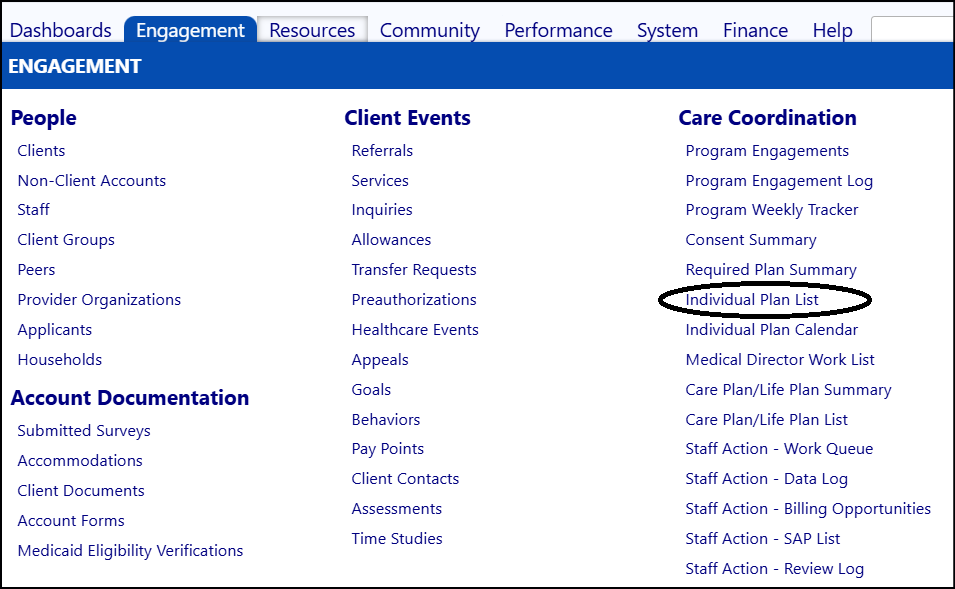
Click the menu item and the plan list appears, showing their clients and with a document icon for each plan. The gray icon is a non-started plan. The blue icon is a started one.

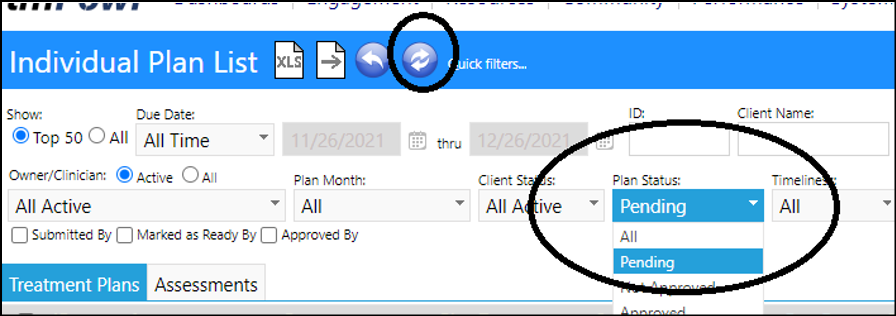
The clinician filters for “Pending” status and clicks ‘refresh’ to see all plans that are due in the period and not yet submitted.
3. Enter the Plan
The Clinician clicks the document icons for those plans and the treatment plan appears. Depending on its status – it may be editable or not. For ones that are editable, proceed as described for the typical workflow.
## Reviewer Workflow: QA Checking Submitted Plans
### 1. Login
The reviewer logs in and the dashboard appears.
2. Call up work screen
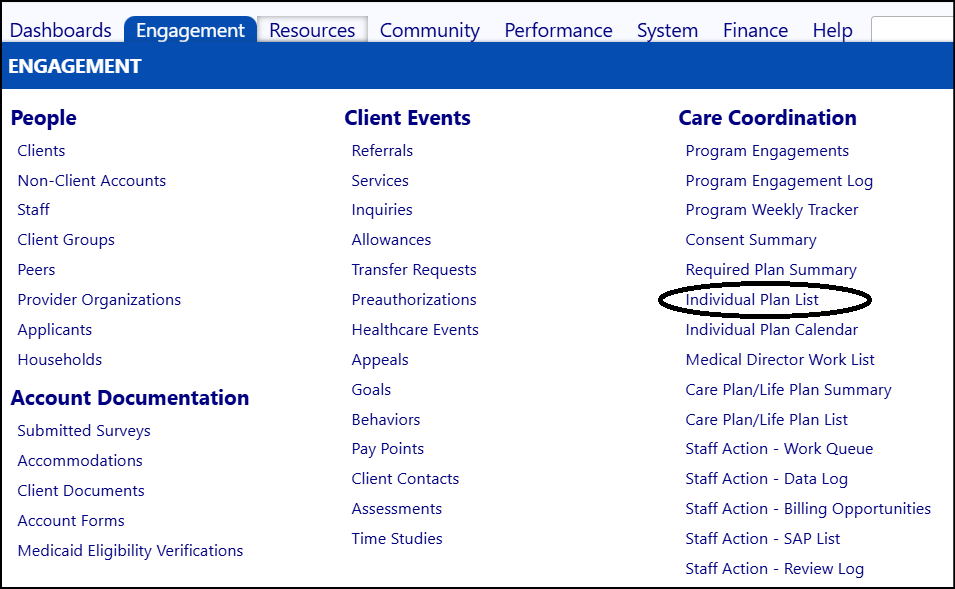
The reviewer goes to the menu item “Individual Plan List” (note that their menu may look different since it is role specific).
3. List appears
Click the menu item and the plan list appears, showing all clients and with a document icon for each plan. The gray icon is a non-started plan. The blue icon is a started one.

4. Filter
The reviewer filters for “Submitted” status and clicks ‘refresh’ to see all plans that are submitted but not yet reviewed.

5. Inspect the Plan
The reviewer clicks on the document icon to view the document. The plan appears as locked and read only. A message explains why.

The reviewer inspects the document.
5.A. Plan is Good
If the plan looks good, they click “Close” to close the form and then click the orange “Ready” button to indicate that they reviewed the plan, and it is ready for “Packaging”.

5.B. Plan has issues
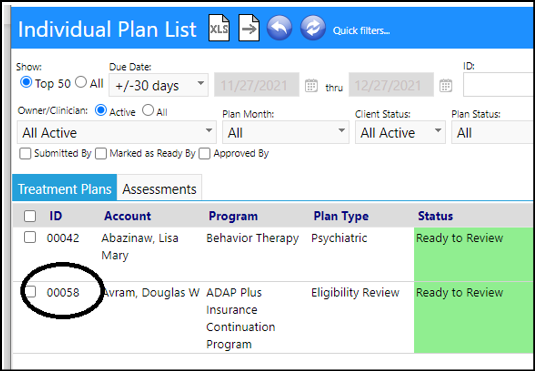
If the plan has issues, the reviewer clicks “Close” to close the form. The reviewer then clicks the plan ID# to get to the plan information screen.

The plan information screen appears. Click “Edit” to get into Edit Mode.

The reviewer manually sets the status from “Submitted,” back to “Pending” and clicks Save.

The plan reappears on the clinician “Due” list.
6. Repeat until done
The reviewer repeats the process for all submitted plans.
Reviewer Workflow: Clinician Provides Hard Copy Plan
1. Login
The reviewer logs in and the dashboard appears.
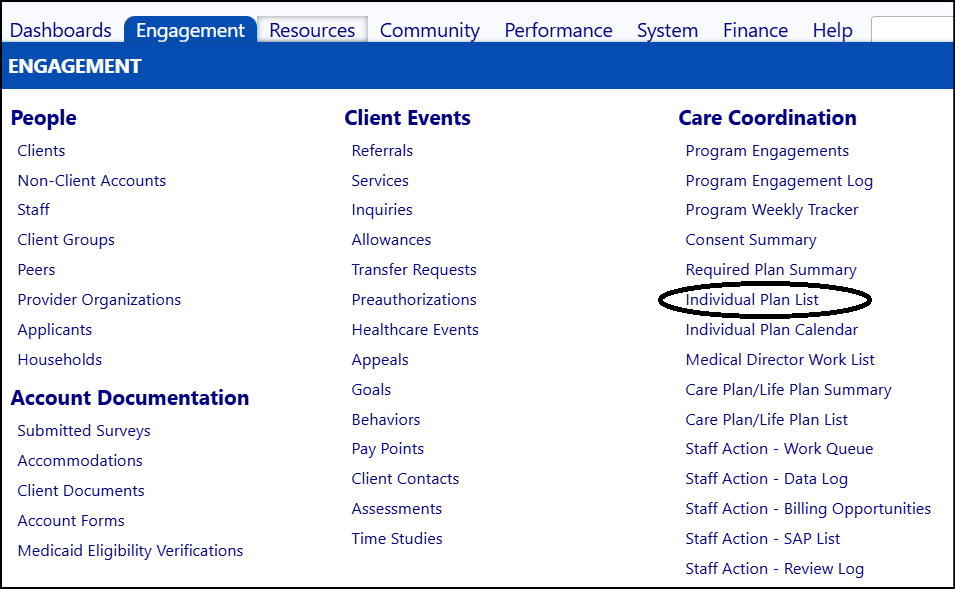
2. Find Plan to Manually Update
Go to the Treatment plan list and filter as needed to find the treatment plan to update. Note that the reviewer’s menu may look different based on security rights.
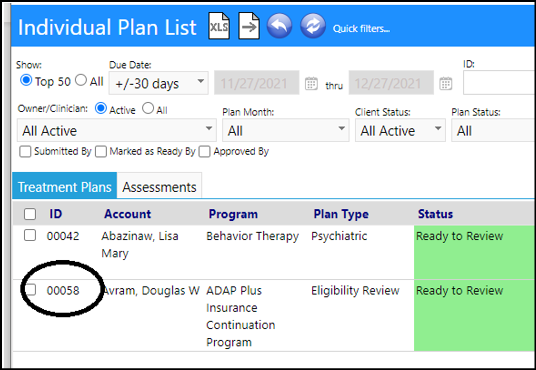
3. Display Plan Details
Click the ID for that plan to display the plan details.
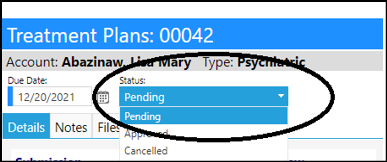
4. Reset Status
Enter Edit mode by clicking “Edit” and then :
- Set the status to “Submitted”.
- Upload the document on the documents tab.
- Enter submitter name and submission date.
Click “Apply” or “Save”.
5. Appearance in Package

Reviewer Workflow: Create Packages for Approval
1. Login
The reviewer logs in and the dashboard appears.
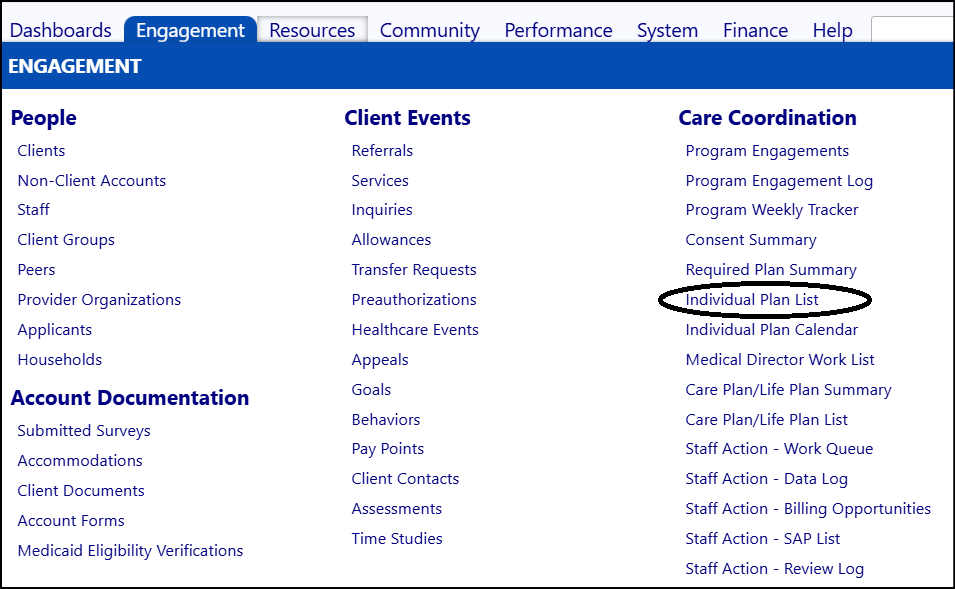
2. Call up work list
The reviewer goes to either the menu item “Individual Plan List” or the menu item “Required plan Summary” (note that their menu may look different since it is role specific). Click the menu item and the plan list appears, showing all clients and with a document icon for each plan.
3. Optionally filter the List
There are a few options for filtering that you may find useful depending on personal preference:
- You can filter for a specific client and see if all their plans are submitted.
- You can filter for the status “Ready to Review” and confirm all plans are ready for packaging.

4. Select a client to “package”
Whatever way you may choose to filter, ultimately there is a list of plans, each of which has a client. You can pick the client for packaging by:
- Click the checkbox by a client ID and then click “Package”.
- Do not click any client and then click “Package” to go directly to the package screen with no client selected.
5. Package screen appears
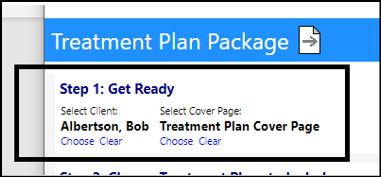
5.A. Client & Cover Page
Validate that a client and a treatment plan cover sheet is selected. If not, select them.
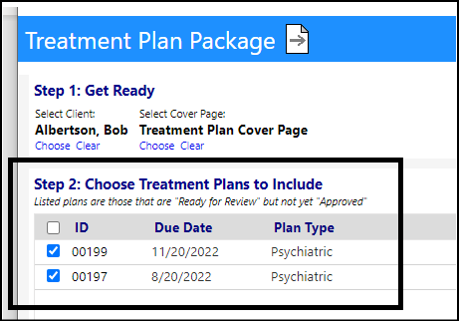
5.B. Plans to Package
The plans for that client that are “Ready to Review” but not yet “Approved” will appear. The default is that all are selected – but you can choose to ignore certain ones if you wish by unselecting the checkbox.
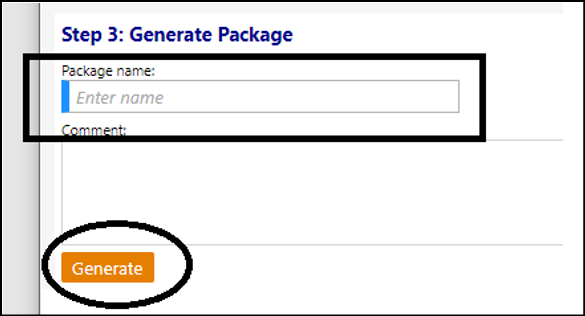
5.C. Enter a plan name and click ‘Generate’
A typical plan name might be “June 2021” or “2021 End of Year”. You can enter any name you wish. The only reason we have a name is so that you can select multiple versions and for system use in preventing people from overwriting an existing cover page.
6. Package is generated
The plan will appear. Look it over and if it looks good, you click “Save Cover Sheet & Publish”. This will create the package and cause it to appear on the Medical Director’s worklist. If it is not good for some reason, you can return to the “wizard” to select different plans, or you can just close the form without publishing. For medial directors that will eb signing a hard copy, you can use the browser to print to a printer or to print to a PDF.

Approver (Medical Director) Workflow
1. Login
The reviewer logs in and the dashboard appears.
2. Call up work list
The med director goes to the menu and chooses “Medical Director Worklist” (note that their menu may look different since it is role specific). Click the menu item and the list appears, showing all clients.
3. Choose the ‘Packages Tab”
Click the ‘packages tab’ and click the view icon.

4. Filter the list for unsigned

5. The package appears
If locked, it appears like this:

If unlocked and editable, it appears like this:

5.A. Package acceptable
Scroll down to the signature section and sign the package if needed. Click ‘save’ or ‘apply’ to save the updated header.

5.B. Package not acceptable
Let the Clinical Director know which plans or plans are problematic. The clinical director can then manually reset those plans to ‘pending’ and cause them to be kicked back to the Clinician for updating.
Refer to another workflow for resetting a previously submitted and approved treatment plan.
Once updated, the Medical director can go back to the Package list and review and sign the updated plans.
6. When Fully signed …
Linked treatment plans get set to “Approved”.
Reviewer Workflow: Edit Submitted Individual Plan
1. Login
The reviewer logs in and the dashboard appears.
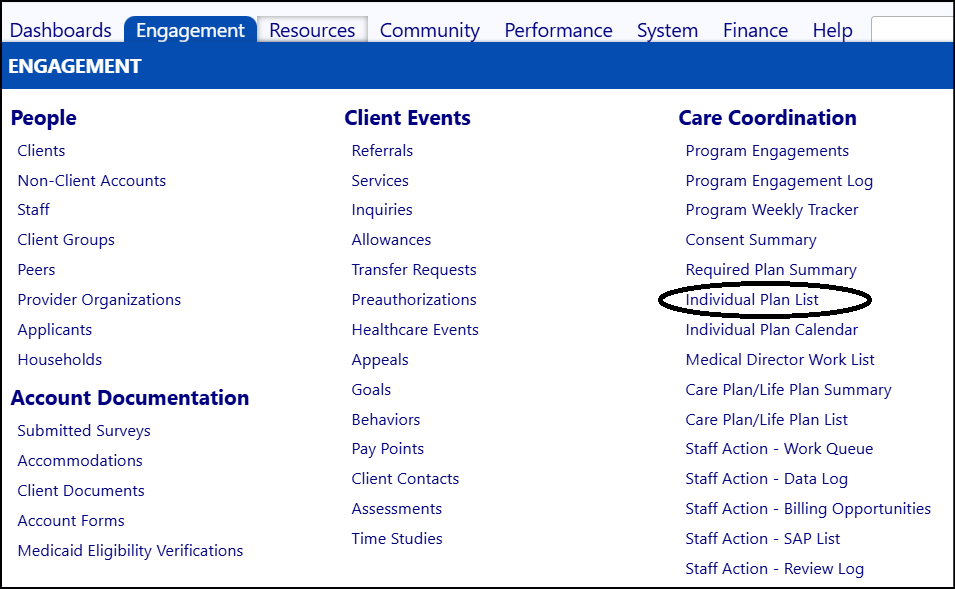
2. Find Plan to Reset
Go to the Treatment plan list and filter as needed to find the treatment plan that needs resetting. Note that the reviewer’s menu may look different based on security rights.
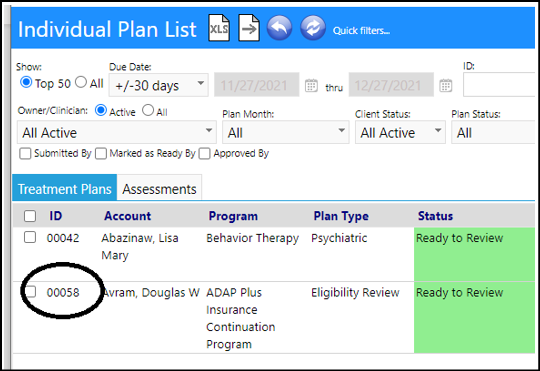
3. Display Plan Details
Click the ID for that plan to display the plan details.
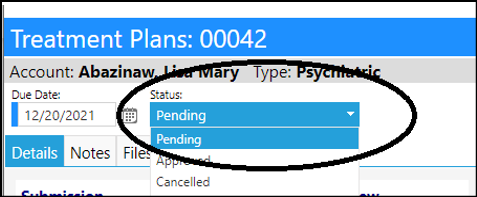
4. Reset Status
Enter Edit mode by clicking “Edit” and then set the status to “Pending”. Click “Apply” or “Save”.
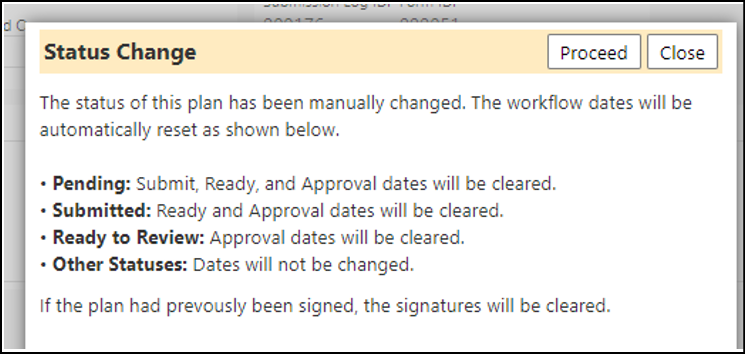
5. Confirm Reset of Dates & Signatures
A confirmation screen will appear warning you that dates and signatures will be reset. Click “Proceed” to confirm the status change.
Reviewer Workflow: Edit Individual Plan Already “Packaged”
1. Login
The reviewer logs in and the dashboard appears.
2. Find Plan to Reset
Go to the Treatment plan list and filter as needed to find the treatment plan that needs resetting. Note that the reviewer’s menu may look different based on security rights.
3. Display Plan Details
Click the ID for that plan to display the plan details.
4. Unable to Status
Go to edit mode. The status dropdown list will be locked. Mouse over the info balloon for a reminder.
