Account Side-Panel Enhancement - Refactored
- To accomodate multiple requests, some Account Side-Panels (Engagement > People > Clients > Client Account or Engagement > People > Staff > Staff Account) were refactored. Instead of displaying an overview, the Side-Panels now display icons which, when clicked, link the user to the associated documents page (filtered for the individual).
Wellness Related Documents:

DDPs, LCEDS, and Medical Documents:

Enhancement to Applicants - Multiple Changes
- When Saving an Application (Engagement > People > Applicants) and converting the applicant into an account (Engagement > People > Clients), part of the process includes migrating the collected data into the account. As part of the process, users can either let the system automatically migrate the data, migrate only the name and type of client, or allow the application processor to manually select which data to migrate.
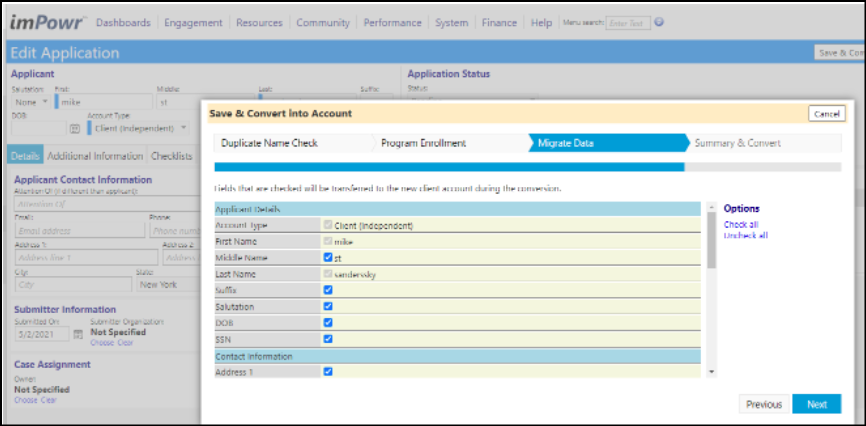
- These 3 migration options are set up in the New Account / Edit Account section in Configuration Options. Users need the appropriate privileges to access this configuration.
- YES (just do it - hide tab)
- NO (don't do it except for name and type - hide tab)
- MANUAL CHOICE (leave it as is - show tab)
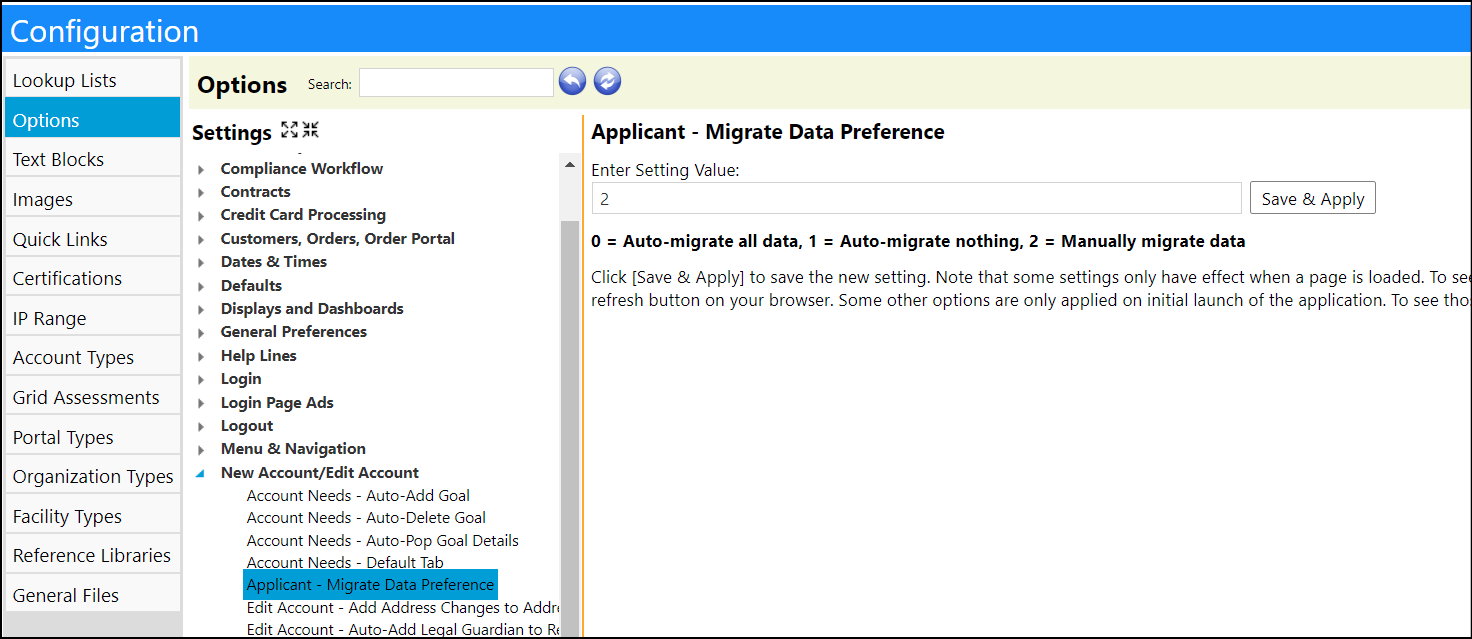
- The options defaults to 2 (manual merge, how it works now), but users can enter a setting of 0 to auto-migrate (all applicant fields will be brought over during the conversion and overwrite any existing account fields) or 1 to migrate nothing (only name and account type will be brought over to a new account, or if linking to an existing account, nothing will be overwritten).
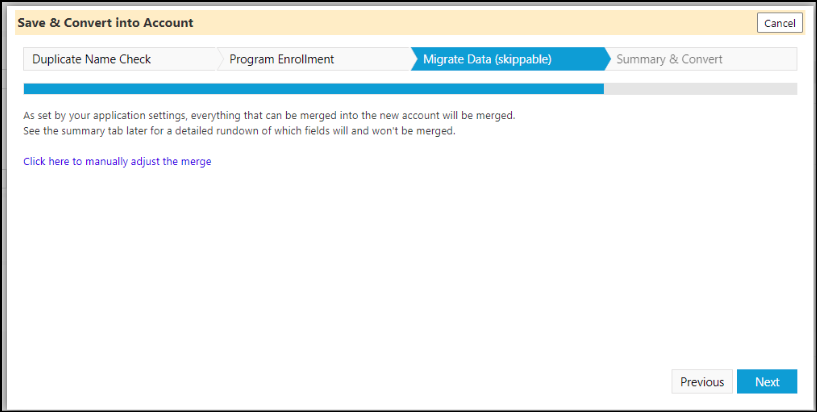
- Because it's not always possible to hide the visibility on certain tabs, sometimes users will see a displayed short message indicating they can skip the merge step and saying what will happen, and that they have the option to manually modify the merged data if they want.
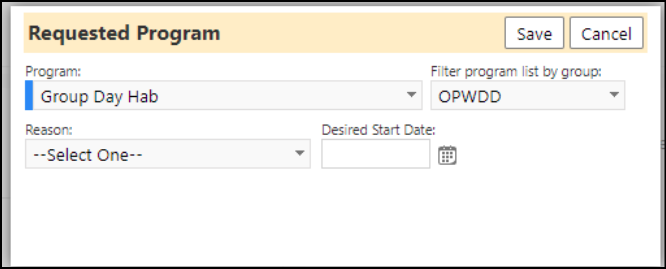
- When users edit an application (Engagement > People > Applicants), they can now optionally use the Program Group drop-down list to set which programs appear on the program selector.
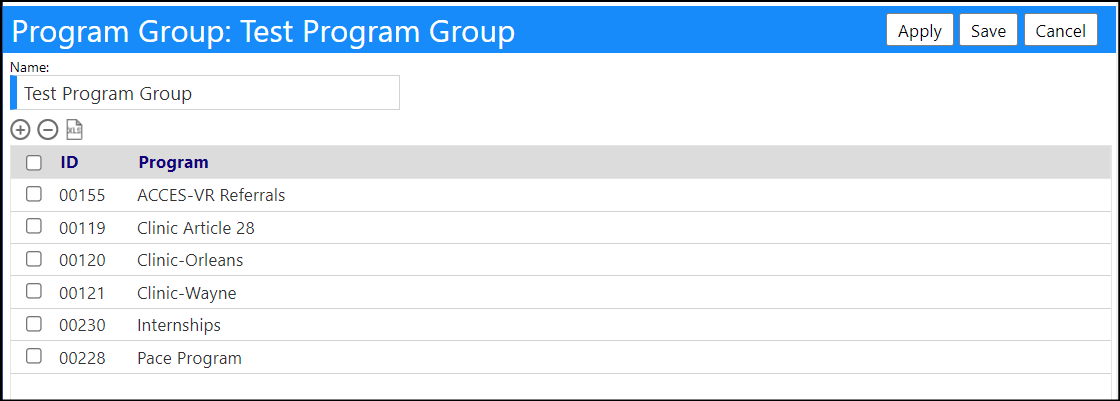
- This new feature will help them select the appropriate programs from a pre-defined group of programs, making it much easier to decide which programs are applicable to that person's role or activities.
- If no Program Group selected, all active programs are displayed; if a Program Group is selected, only the active programs in that group, are displayed.
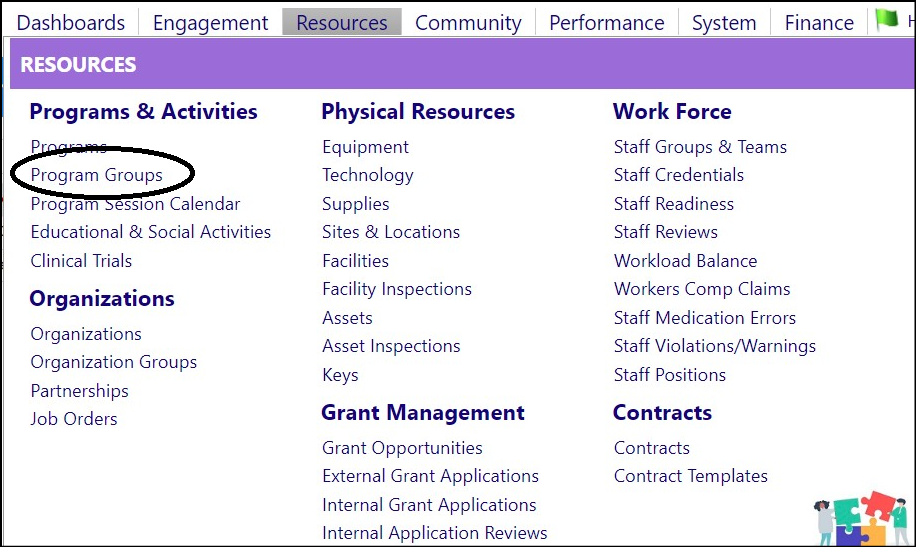
- Program Groups are created in the Resources menu, in the Programs & Activities section.

Enhancement to Asset Expenses - Invoice Information Now Being Captured
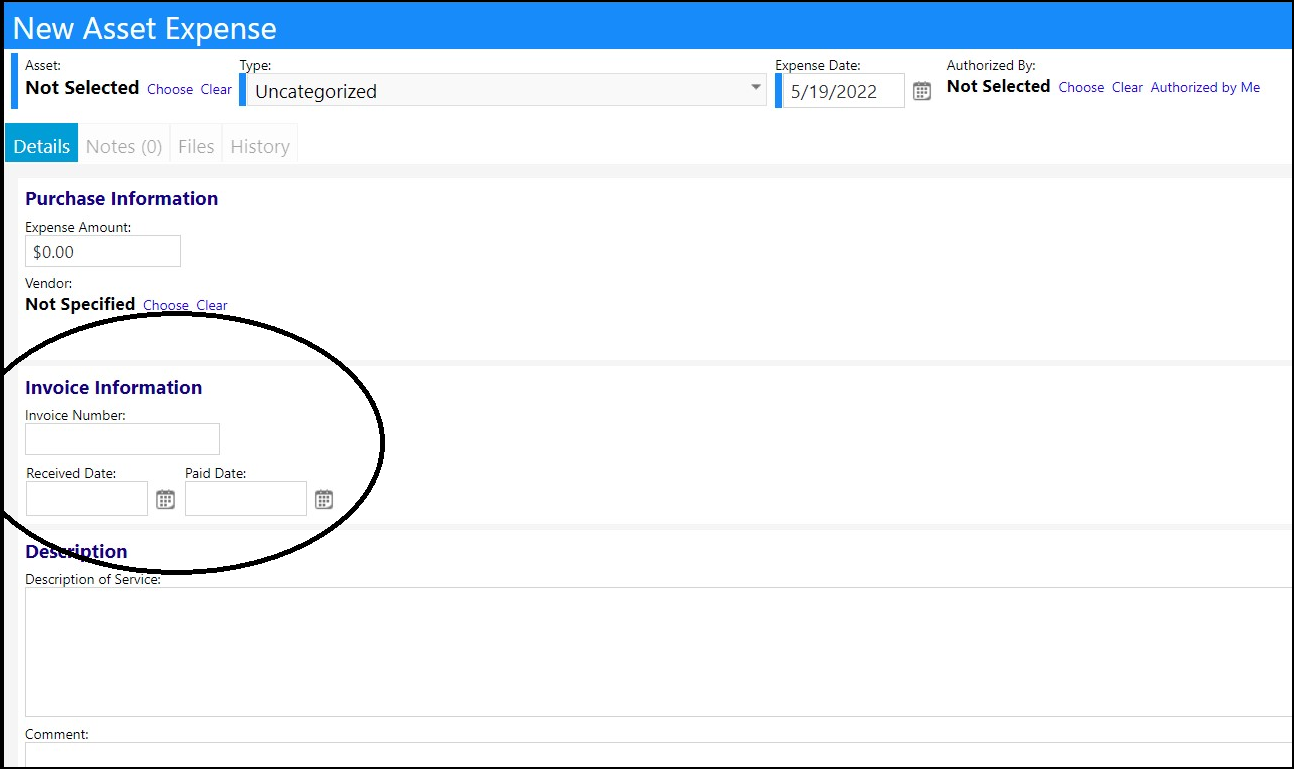
- Three new fields were added to Asset Expenses (Resources > Physical Resources > Assets > Expenses):
- Invoice Number
- Received Date
- Paid Date
- The data entered into the fields can be optionally displayed in the Asset Expenses Summary page (Finance > Financial Accounts > Asset Expense Summary). Users can filter the list by Invoice Number.
- The setup for this is in the Account Role in the Configuration section in the System menu (System > Settings & Security > Account Roles).


Asset Inspection Enhancement - Bulk Assignment / Re-Assignment of Technicians has been Added
- The ability to assign / re-assign technicians to Asset Inspections, in bulk, has now been added and can be applied to any non-completed inspections.
- After selecting the inspections, click the Reassign button.

Care Plan Enhancement - Multiple Changes
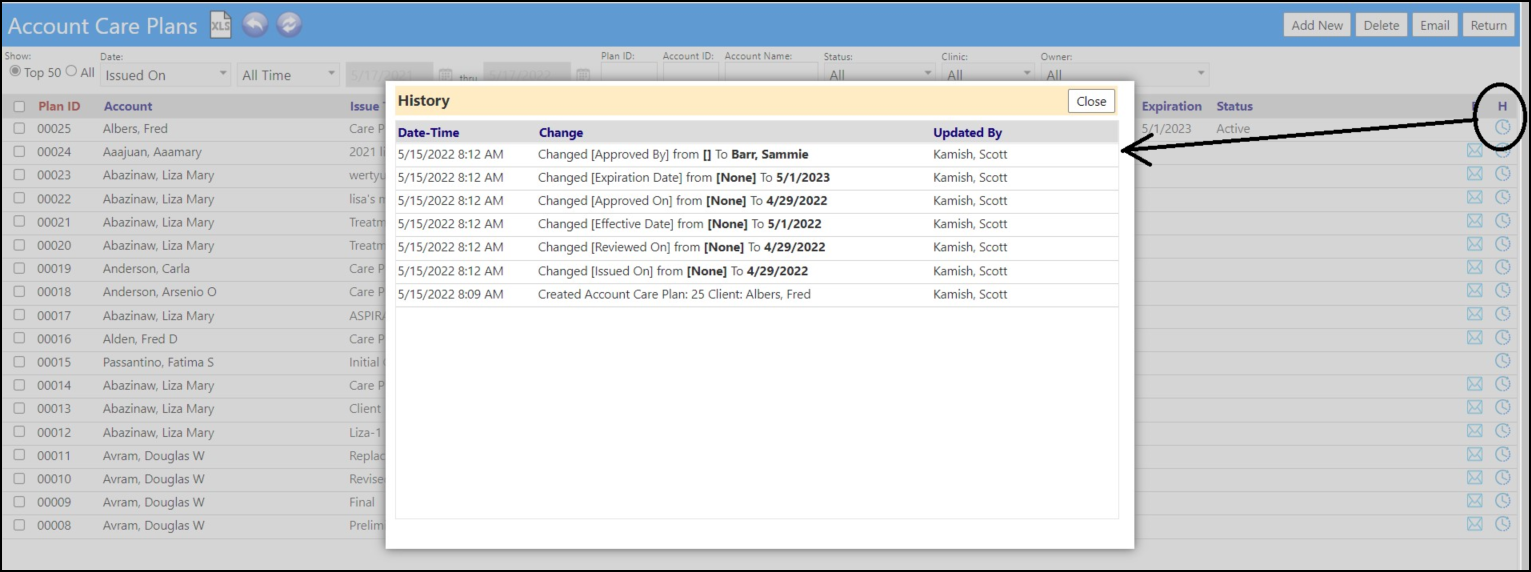
- A new History link has been added to the Care Plan grid (Engagement > Treatment & Assessment > Care Plans), so the users can see when each of the changes were made to the plan.
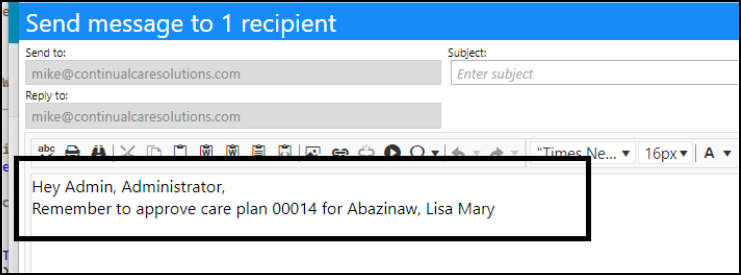
- When creating an email template (Performance > Communication > Email Templates) to use with Care Plans, users can now utilize Care Plan specific Reserved Words.

- From the Care Plan page, if you select a Care Plan by clicking in the checkbox to the left of it's name, and then click the Email button or click the email icon, you get to choose the Email Template. Once you do, the information maps into that template.

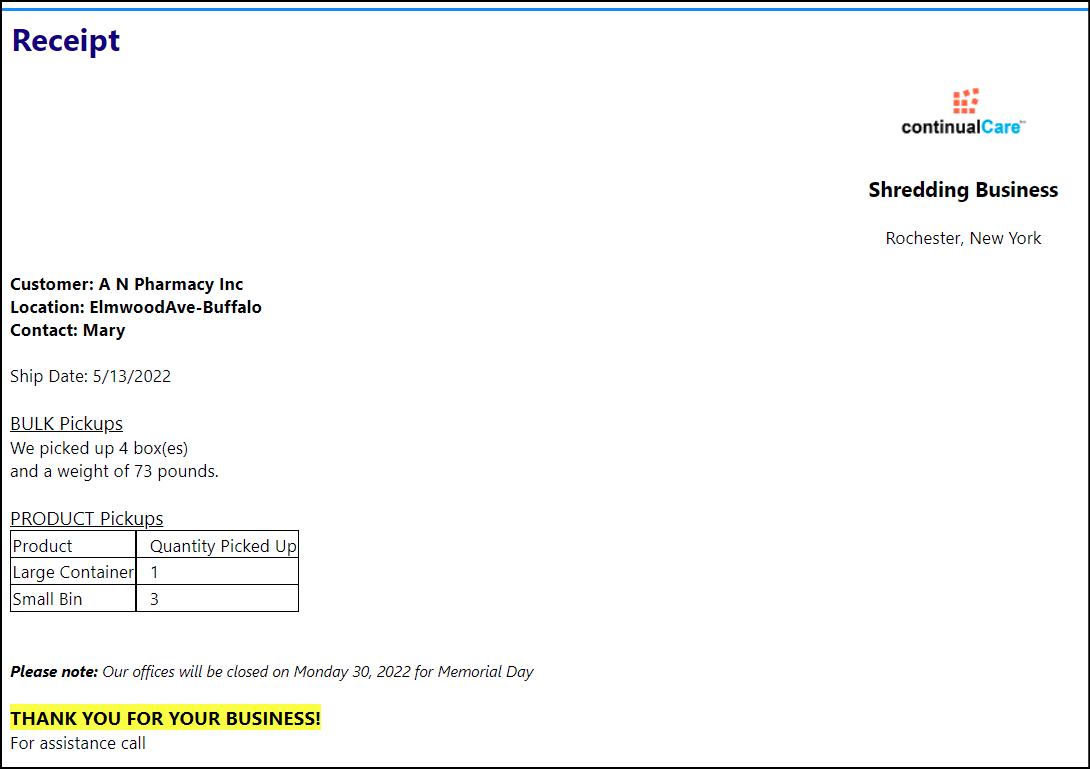
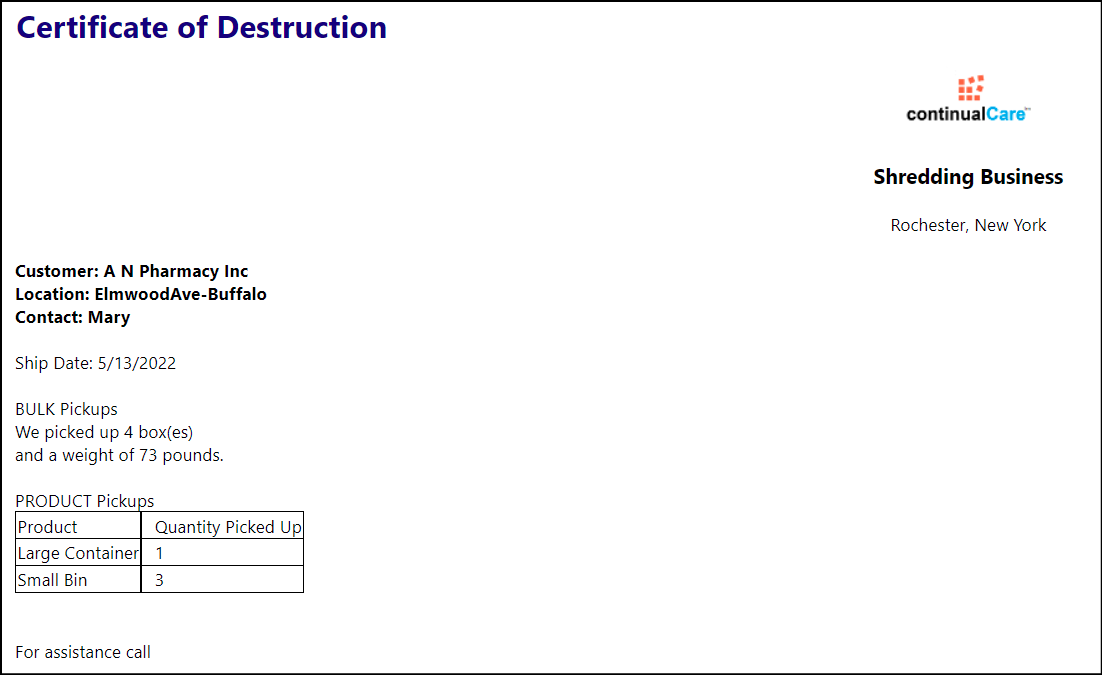
Enhancement to Entrepreneurial Tools - Receipt and Certificate of Destruction now Available
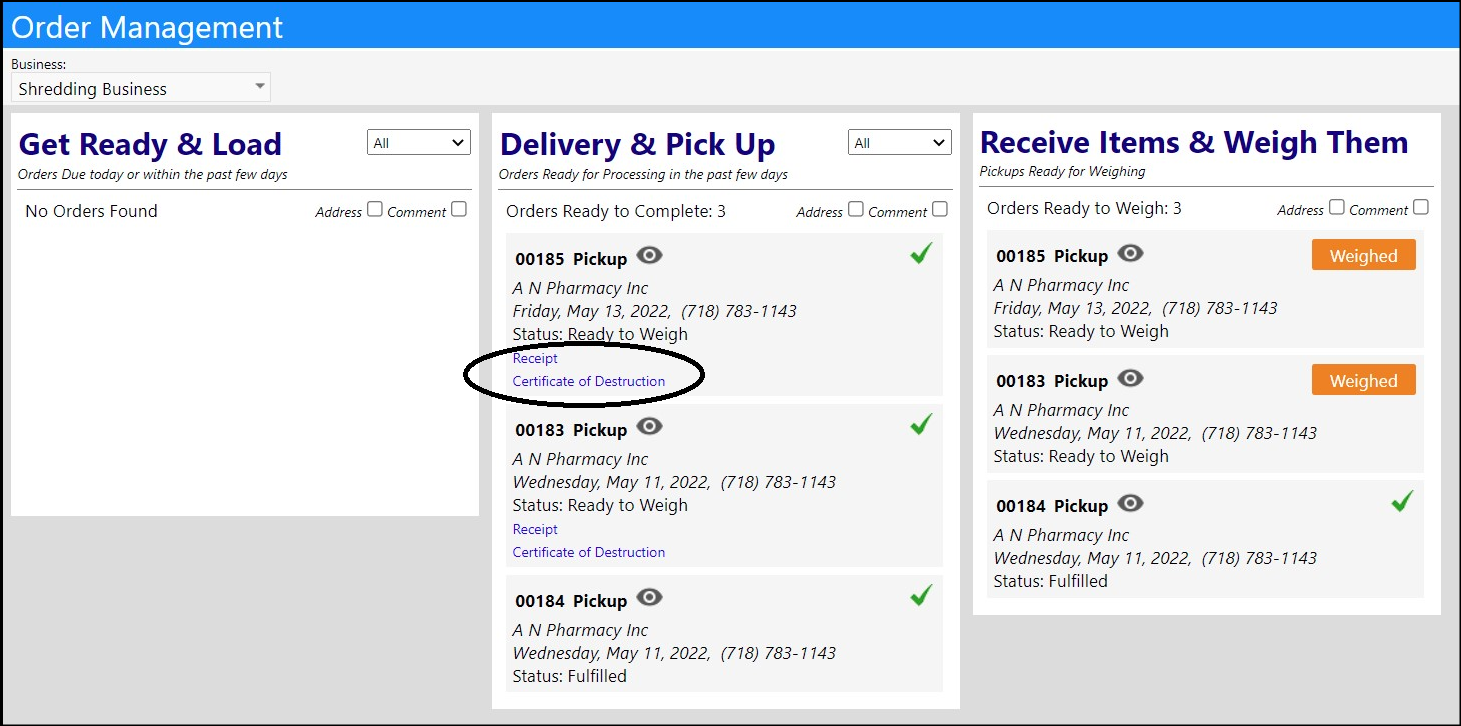
- Users can now provide Receipts and Certificates of Destruction as part of order procesings (Finance > Entrepreneurial Tools > Process Orders).
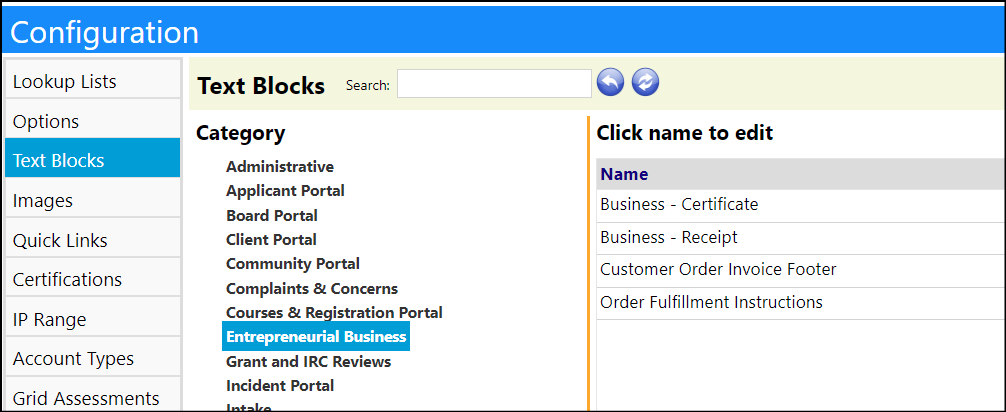
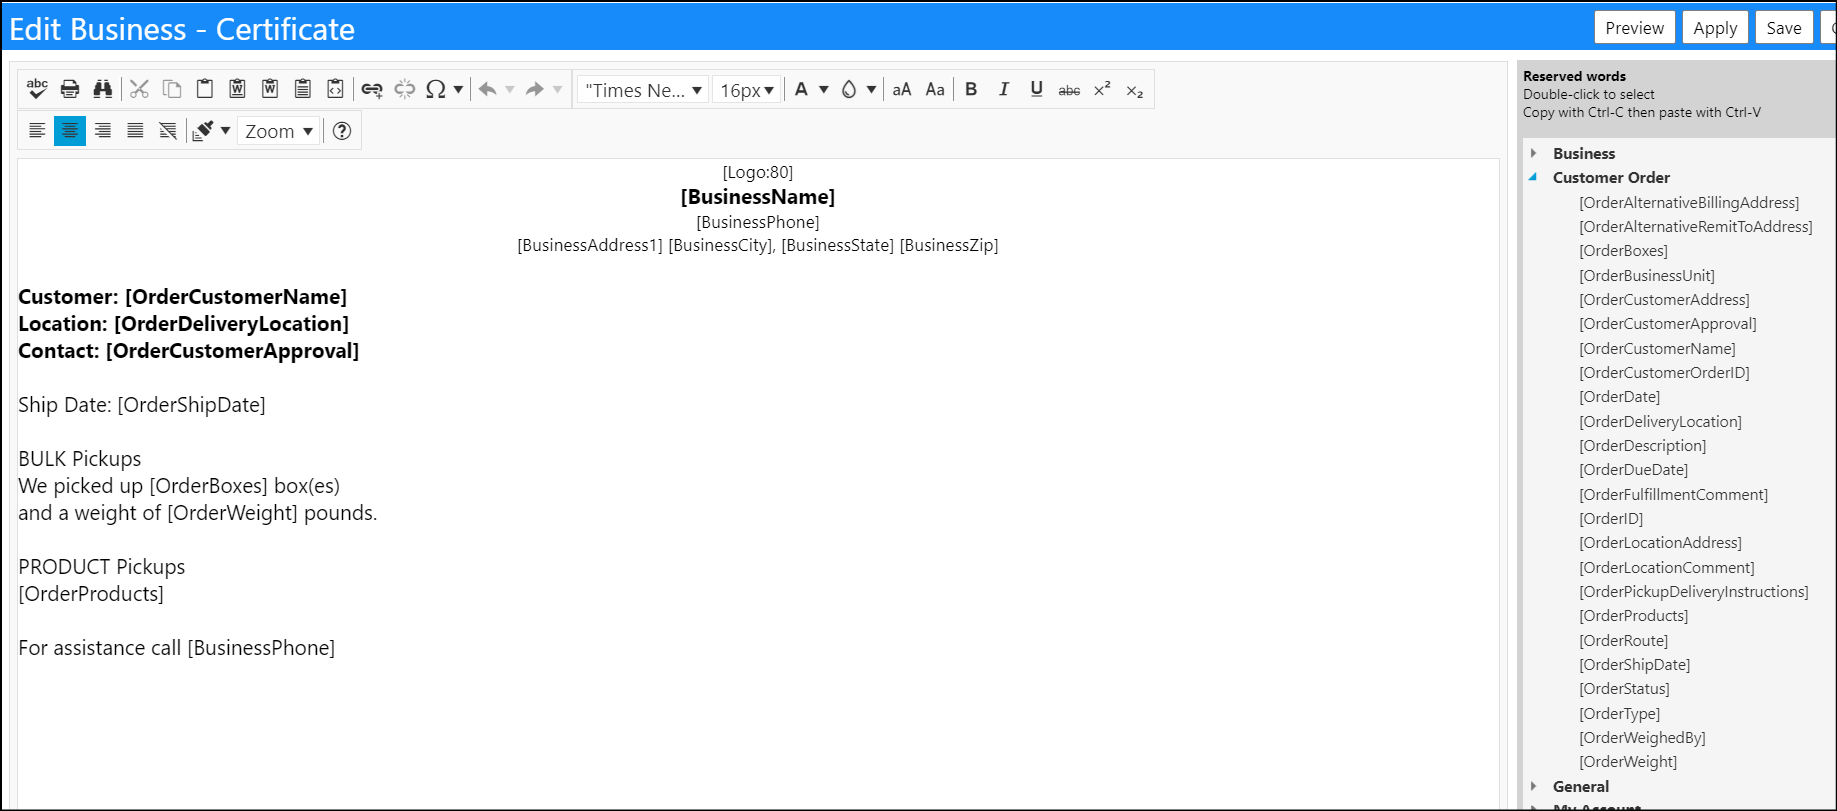
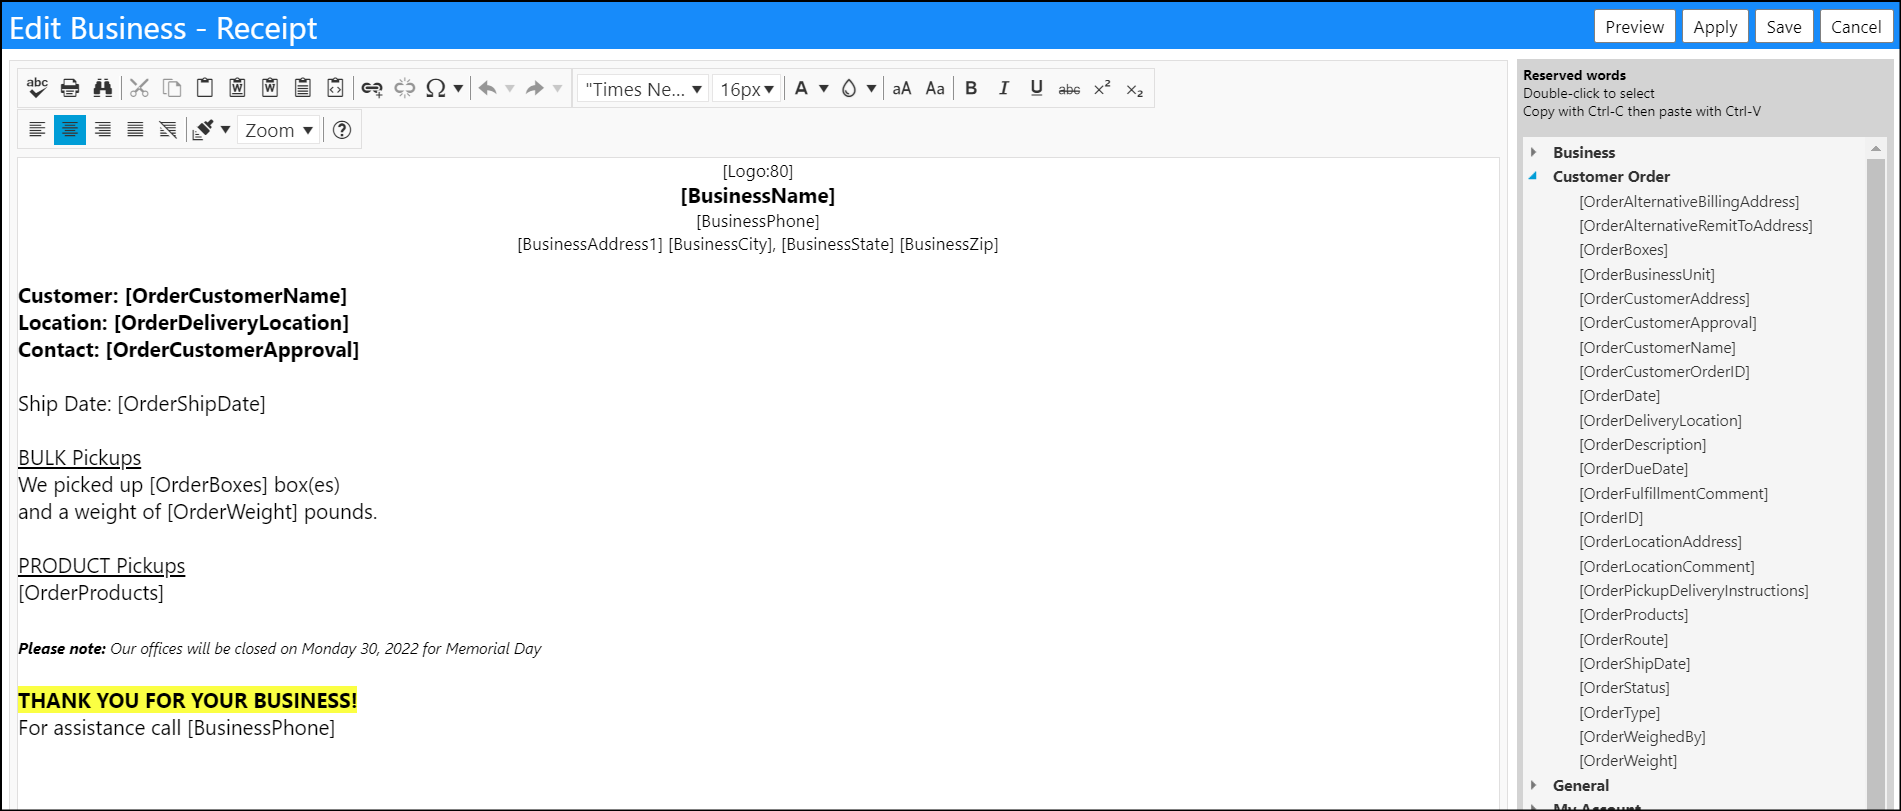
- The Receipts and Certificates of Destruction are created and edited in the Text Blocks in Configuration (System > Settings & Security > Configuration > Text Blocks), and utilize reserved words.
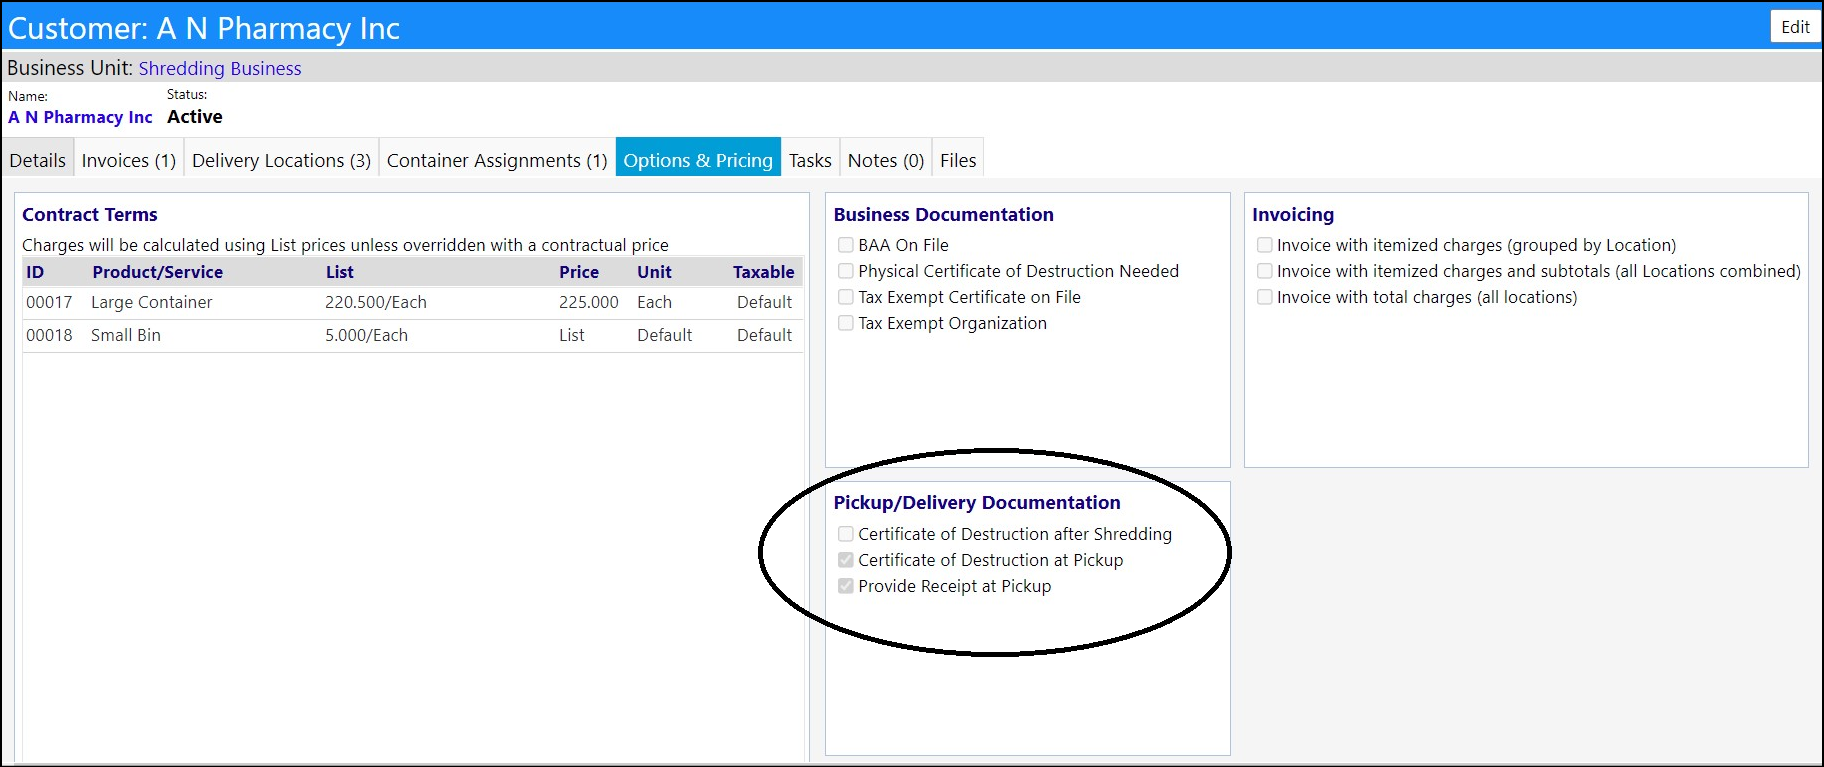
- Links to these documents display in the Process Orders when they are selected as part of the customer's Pickup and Delivery Documentation, found in the Options & Pricing tab, in their customer profile (Finance > Entrepreneurial Tools > Customers)
New Equipment List Import Wizard
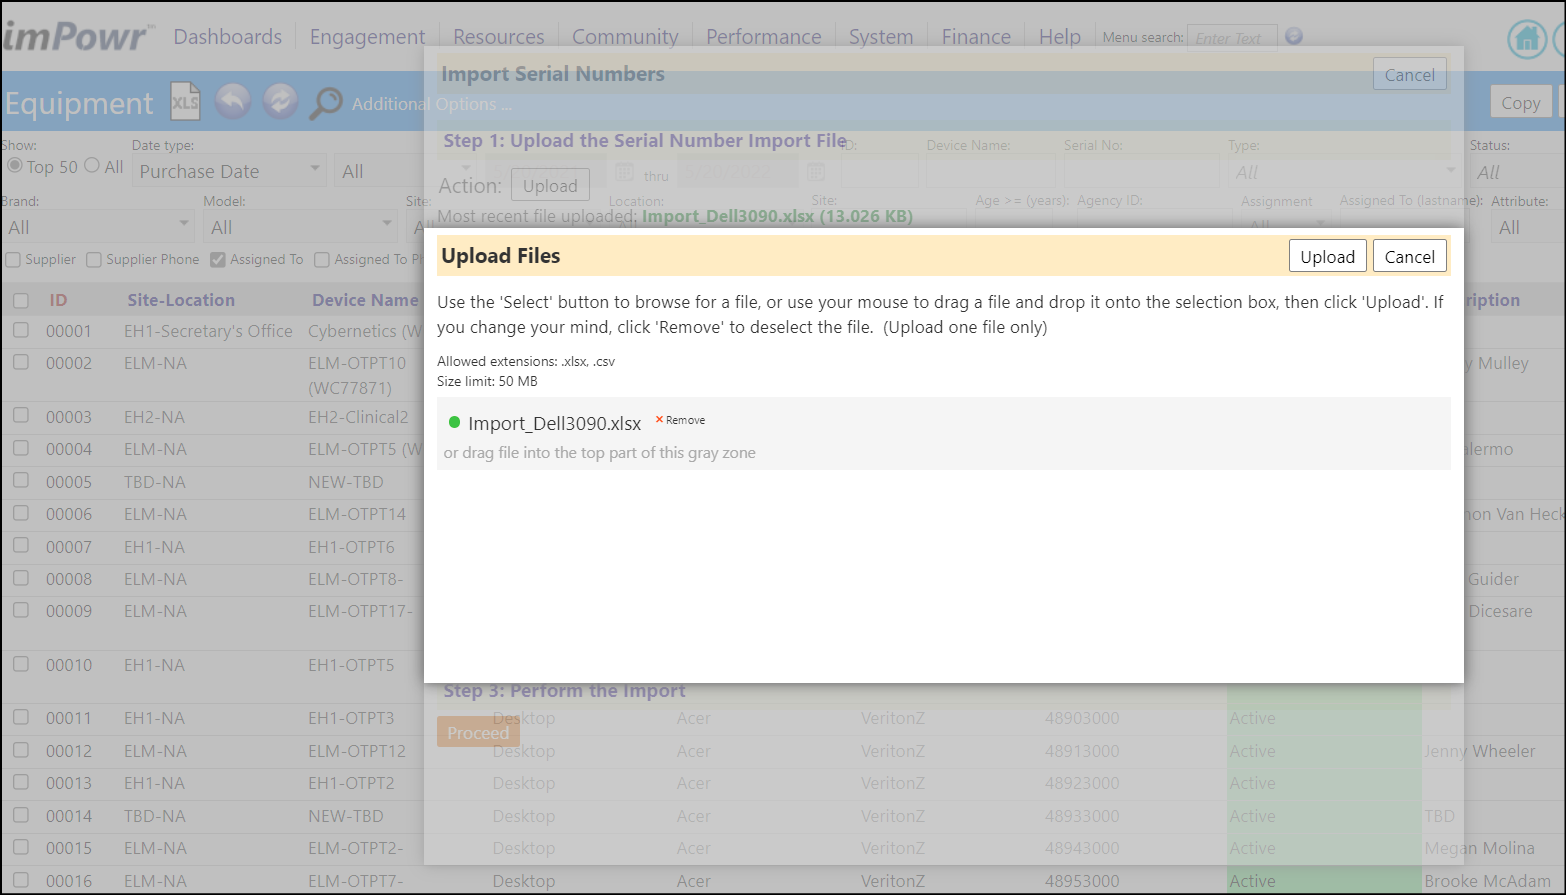
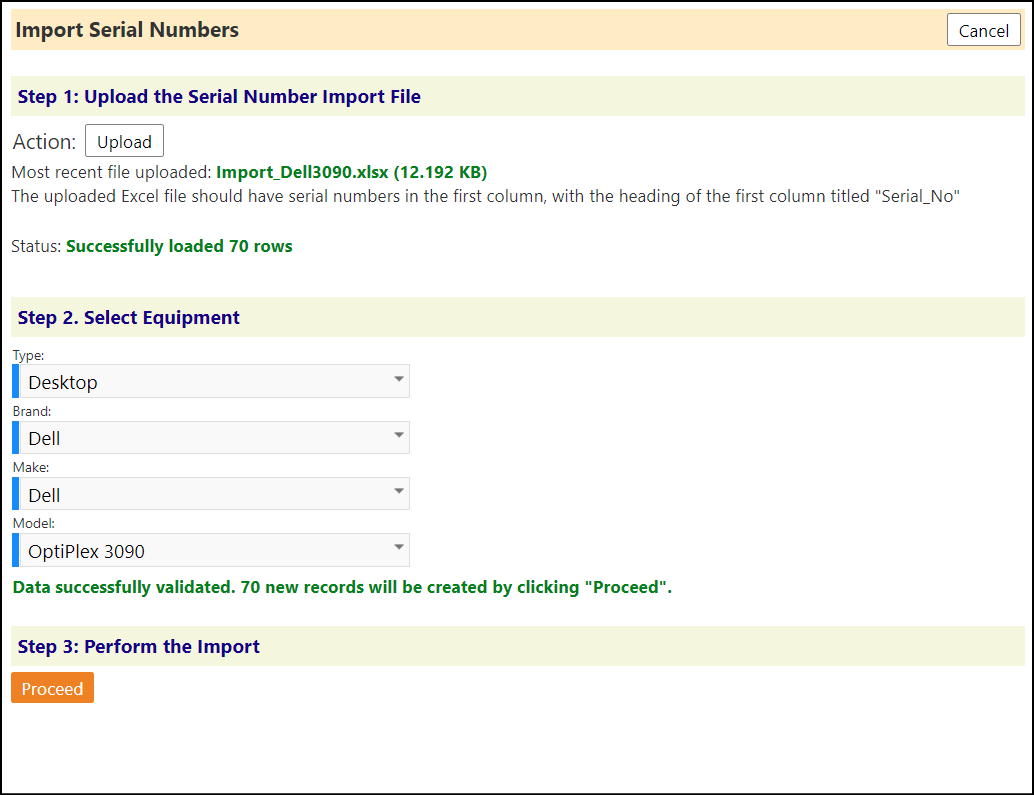
- An option has been added to the Equipment menu (Resources > Physical Resources > Equipment) for doing a simple import of serial numbers.
- The user chooses the type, brand, make, and model, and uploads the file and runs the import. The uploaded file would go into a temporary table, overwriting everything that is there. Then a stored procedure would be called when the person clicks import.
- The import procedure checks to see if the serial number exists for the equipment type, and if it does, it skips the record. If it does not exist, it adds the record.
- After the import is completed, the user will get a pop-up message that says "X items added" where X is the number of new records inserted into the list.


NOTE: To add a new Equipment Brand or Make (Brand and Make are basically the same thing, and in the data will usually have the same name when associated to an Equipment Type), users will either need to add 1 piece of equipment first, before doing the import, or just click the new equipment button and set them all up from the edit equipment screen without actually creating a new equipment record. In that screen, users must first select the Equipment Type. They can then click "New" next to the Brand, and enter the name of a new Brand/Make that will be associated with the Equipment Type currently attached to that equipment. Or, to add a new Model that is associated that with the Brand/Make currently attached to that equipment, select the Brand/Make and then click "new" next to the Model. (Users will only have to add the Brand/Make and Model once - afterwards they will be available for use anytime in the future.)
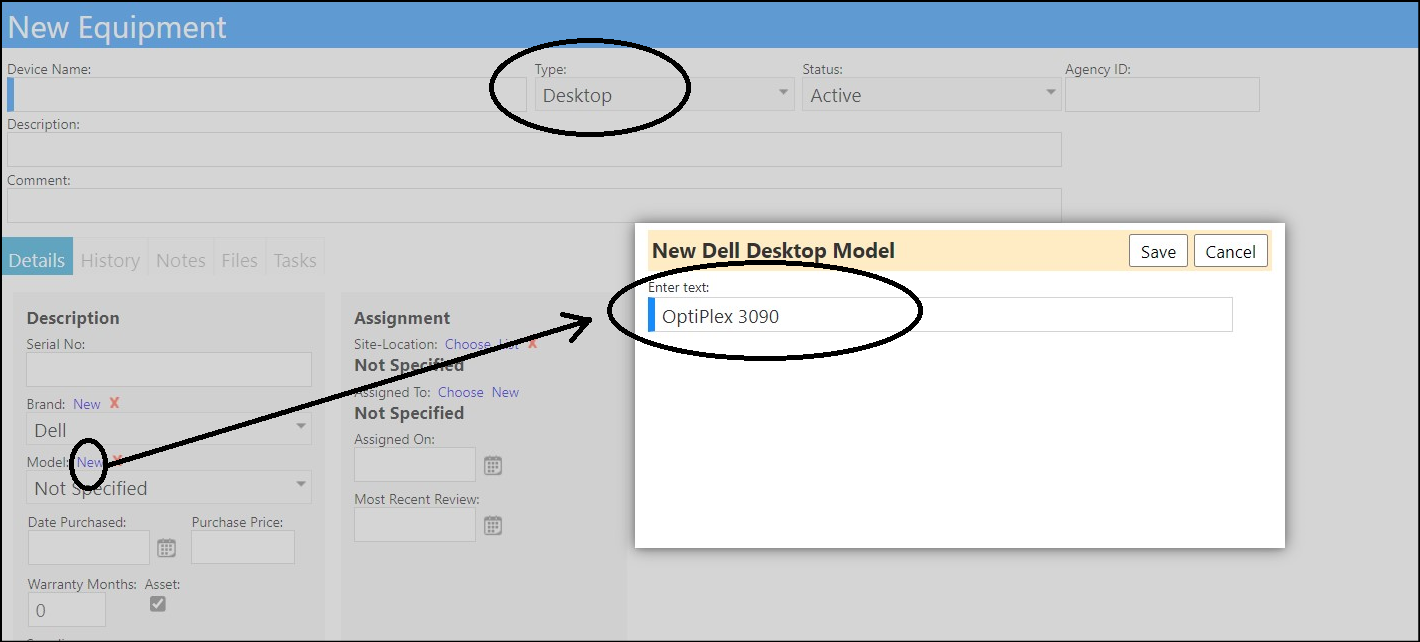
The Lookup Lists in Configuration (System > Settings & Security > Configuration > Lookup Lists) for Make and Model are just to adjust the names and colors after creating them. Adding a new one through a Lookup List will make it not associated with anything, and will be impossible to select from the interface (on the equipment screens, selecting a type filters the list of Brands/Makes, and selecting a Make filters the list of Models)
Facility Inspection Enhancement - Bulk Assignment / Re-Assignment of Technicians has been Added
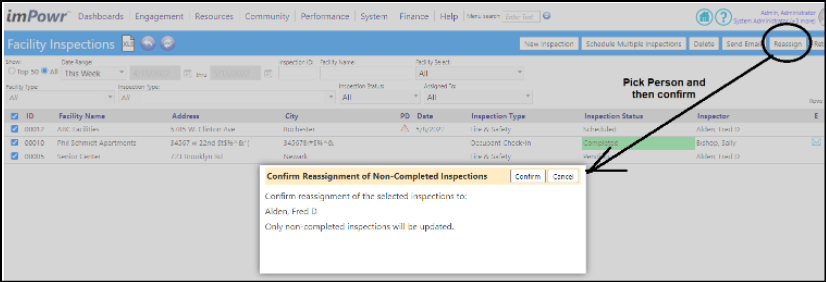
- The ability to assign / re-assign technicians to Facility Inspections, in bulk, has now been added and can be applied to any non-completed inspections.
- After selecting the inspections, click the Reassign button.
Enhancement to Forms - User Definable Formats Added
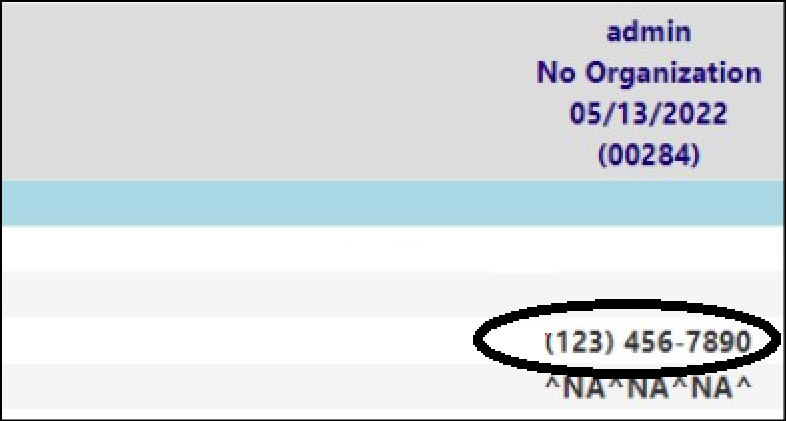
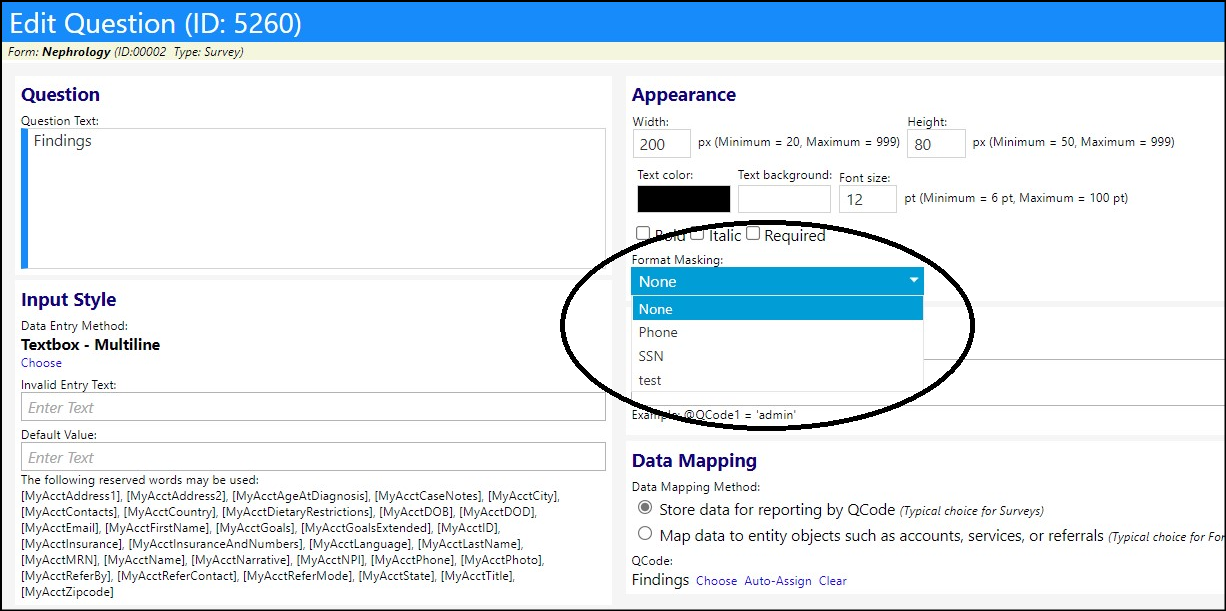
- When creating/editing a question on a form (Performance > Communication > Form Library), users can now specify a mask (format) for things like social security number, phone number, and time, when working with a textbox, multiline textbox, or wide textbox.
- After entering the format, when users fill out the form, the textbox will force them to type within that format . When viewing the submitted data, it will be formatted in the mask.
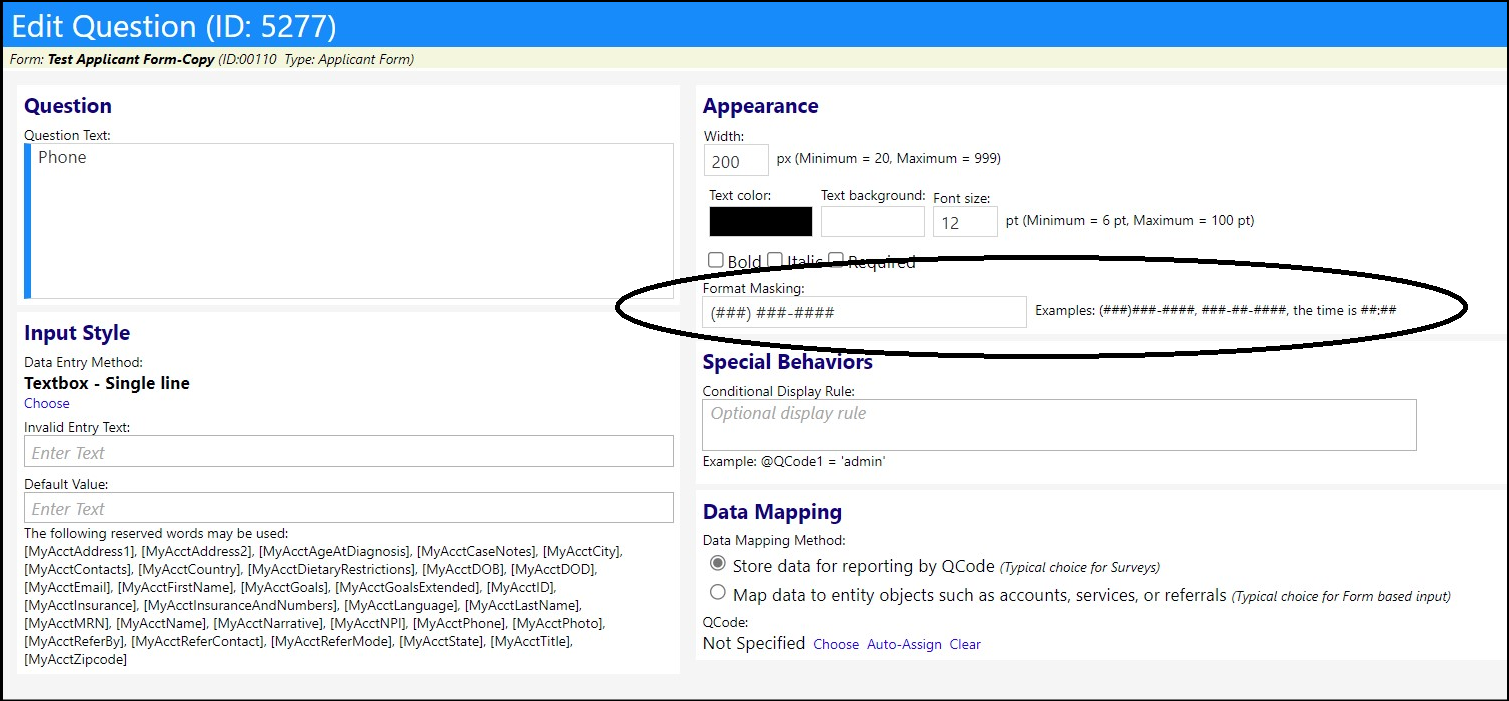
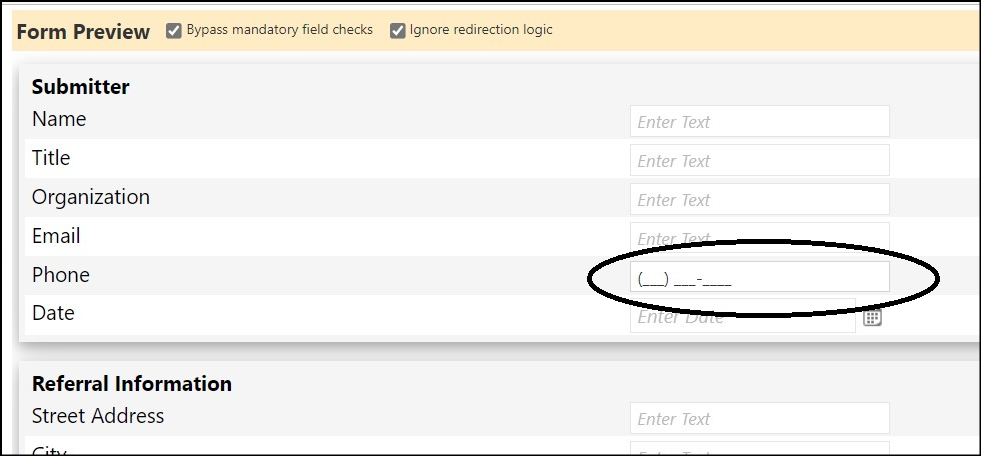
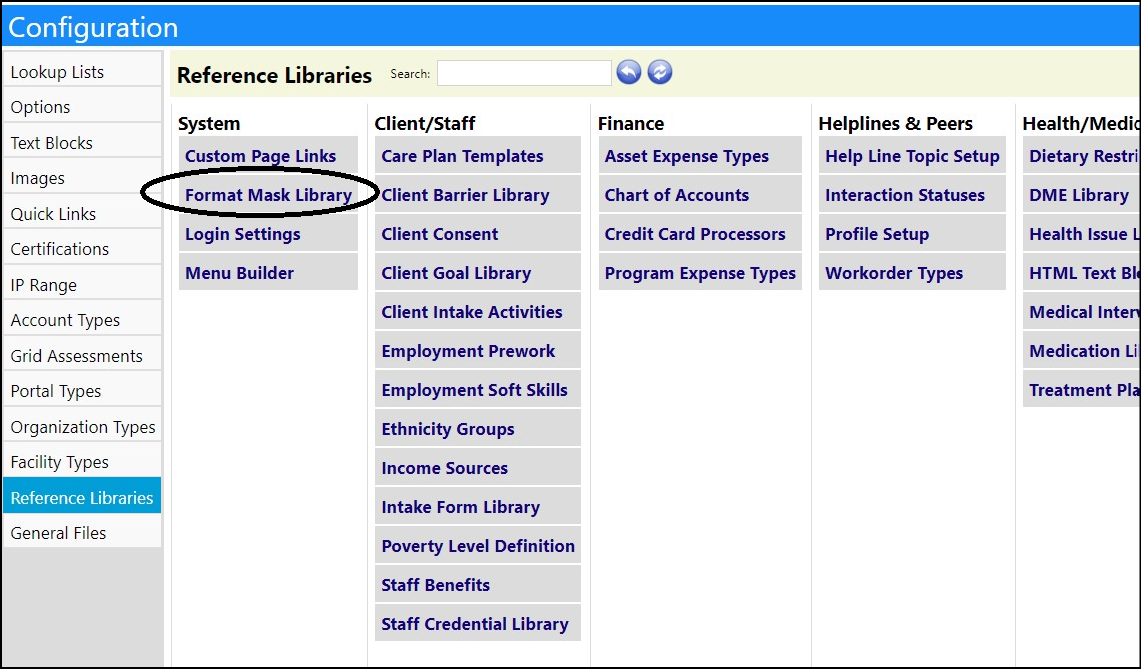
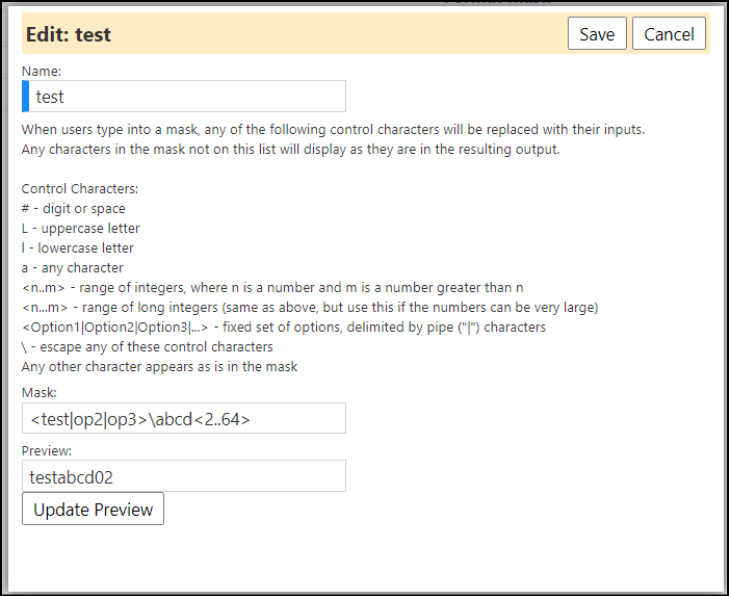
- In addition to the standard formats, users can now create their own formats in the Format Mask Library in the System section of the Configuration Reference Libraries (System > Settings & Security > Configuration > Reference Libraries > Format Mask Library).

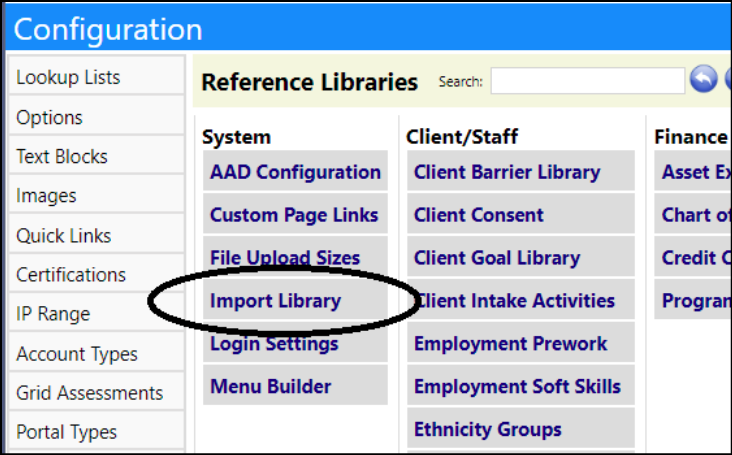
Change to Import Library Page
- The Import Library page has been moved from the System Menu to the Configuration Reference Libraries (System > Settings & Security > Configuration > Reference Libraries).
Medical Document Enhancement - New Security Privileges
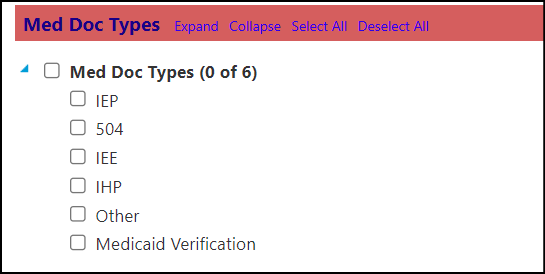
- Medical Documents (Engagement > Account Documentation > Medical Documents) now have privileges based on type of document.
- Similar to the security privileges applied to SOP documents (Performance > Planning > Policies, SOPs, and Form Letters) and Contracts (Resources > Contracts > Contracts), users can now restrict people from accessing various types of medical documents. Only the selected document types will be visible in the Medical Documents page.
Enhancement to Treatment Plans - Multiple Changes
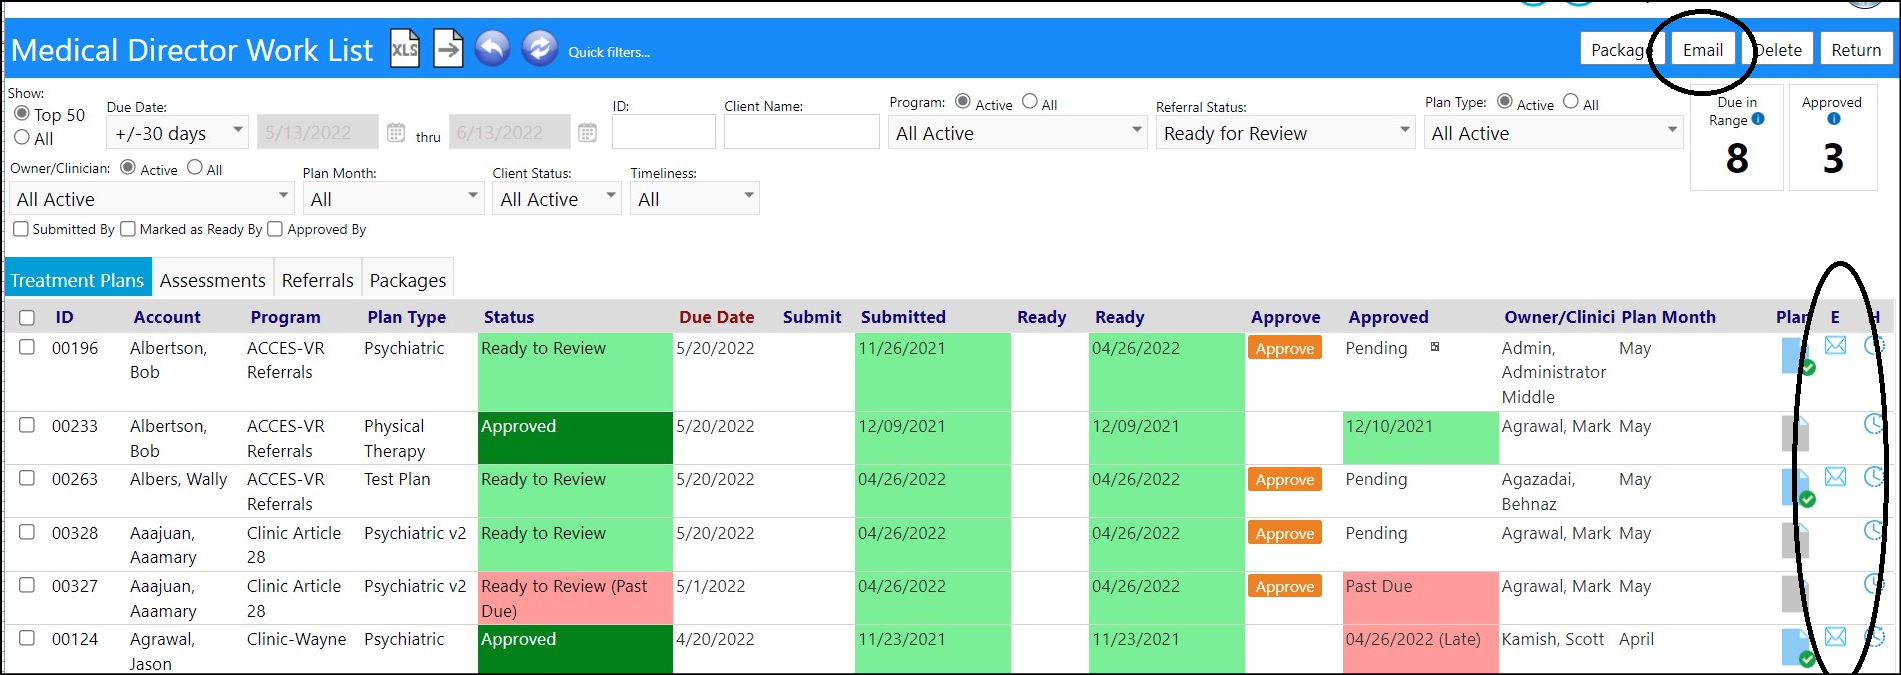
- The ability to send individual and group emails or email templates to the owner/clinician of a treatment plan has been added to the Individual Plan List and the Medical Director Work List display grids (Engagement > Treatment & Assessment > Individual Plan List AND Engagement > Treatment & Assessment > Medical Director Work List).
- On the Medical Director Work List, the individual email icon is only displayed on assessment and plan views where there is a clinician/owner listed on the grid.

