Changes to Account Assessments
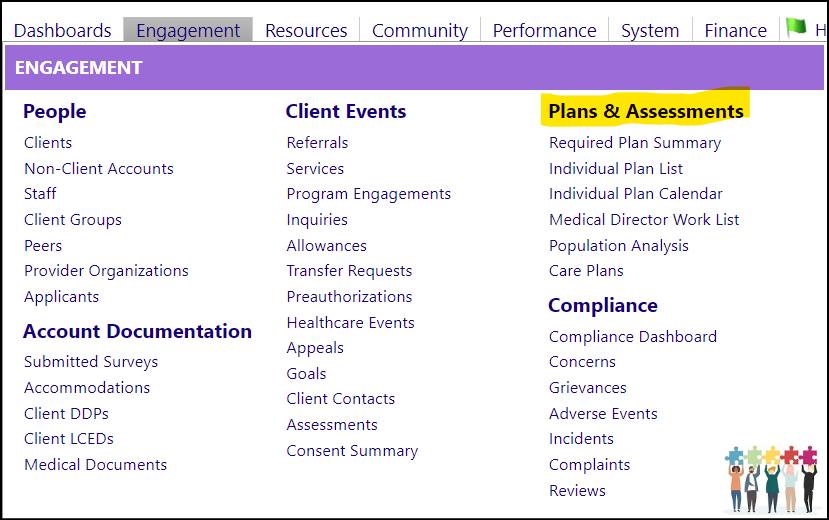
In the Engagement Menu, the menu item "Treatment & Assessments" was changed to "Plans & Assessments".
When in Assessments, the Treatment Plan month is now hidden.

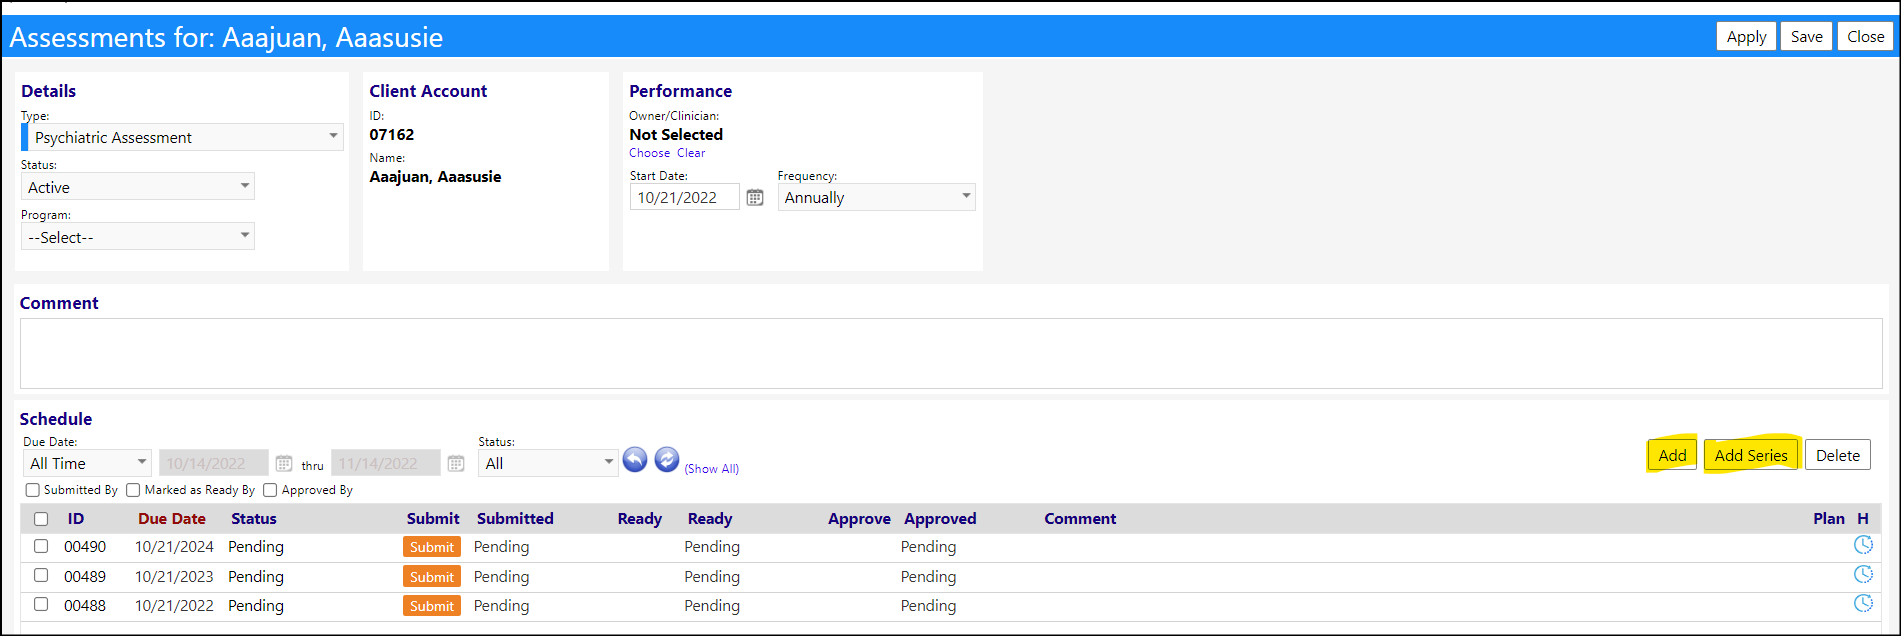
When in Assessments, the 'Build Due List' and 'Add Off Cycle Date' buttons have been renamed to 'Add Series' and 'Add', respectively.
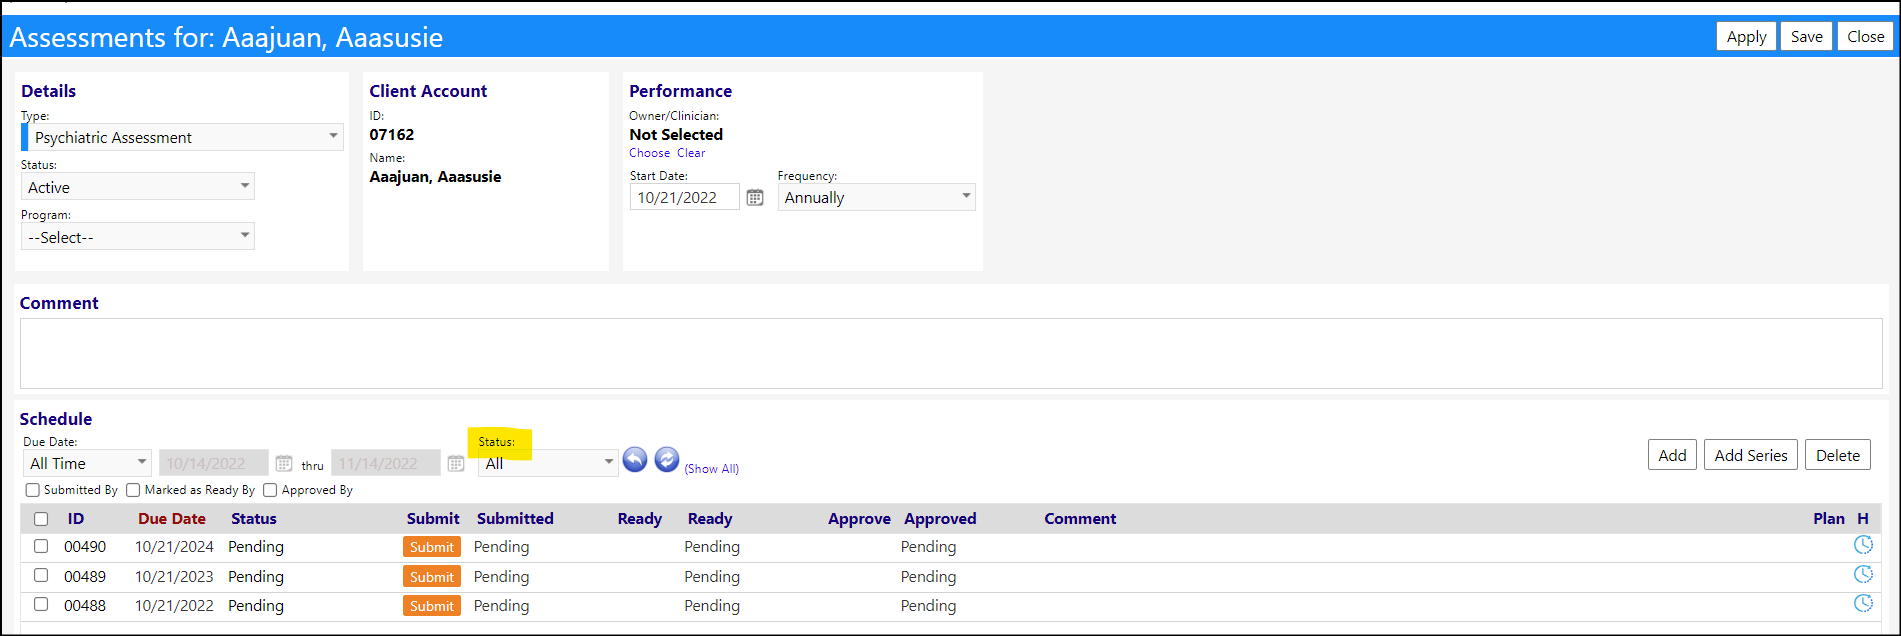
The 'Plan Status' has been renamed 'Status'.
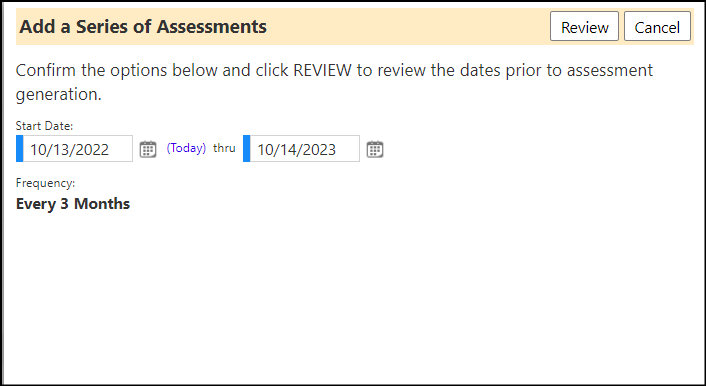
When you click on 'Add Series' a reconfigured window opens, only displaying and allowing entry of the start and end dates, and displaying the frequency.
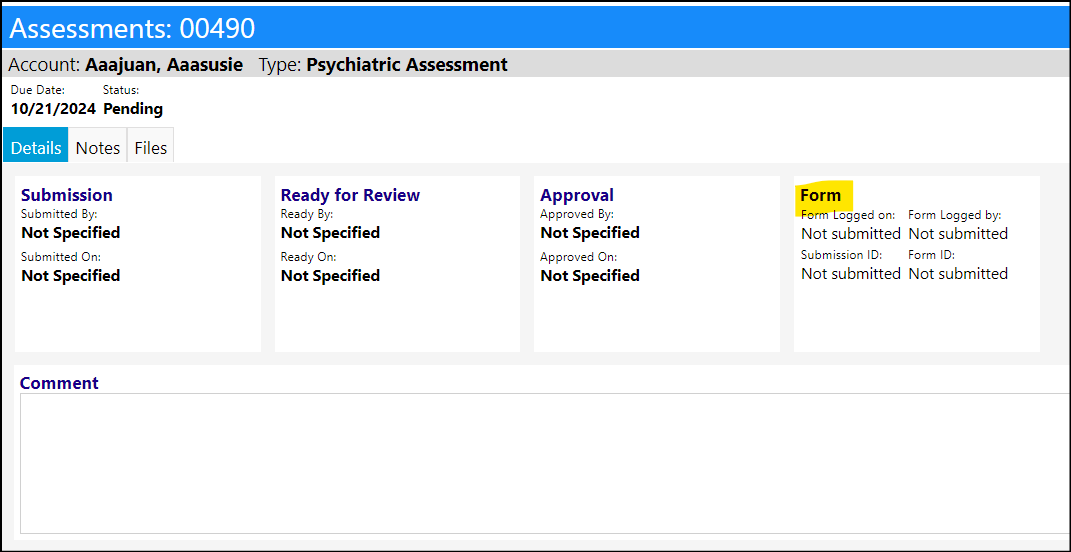
The 'Plan' panel has been renamed 'Form'.
Account Login Affirmation - Execution Settings have Changed
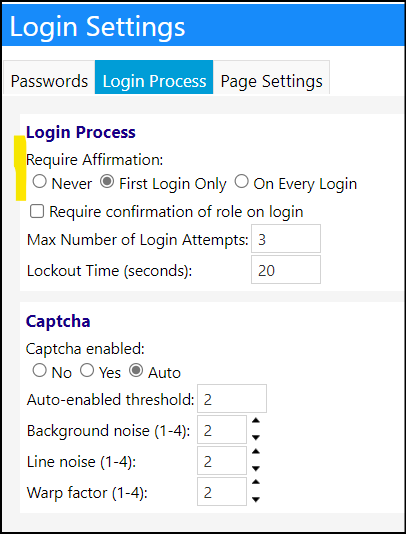
The Login Affirmation (restatement of the confidentiality policy, rationale, and the gathering of the individual's certification of their reading and acceptance of that policy) can be made to display on every login. Previously this setting was yes/no, but it's been changed by adding the ability to have it display and execute every time someone logs into imPowr.
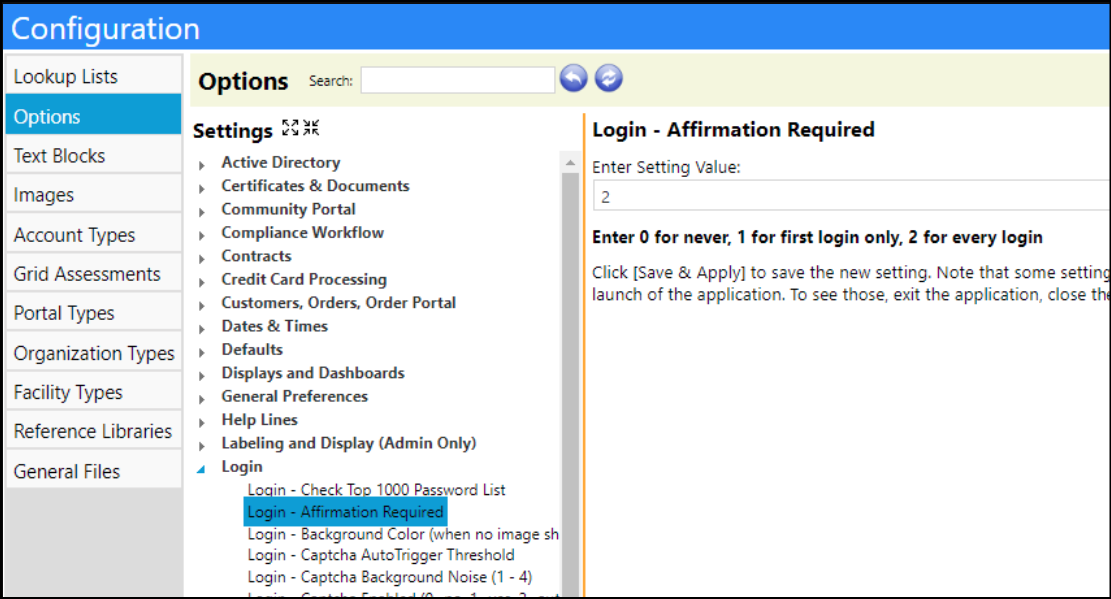
The settings can be modified on the login settings page (Configuration > Reference Libraries - Login Settings).
When logging in normally, if the setting is to Require Affirmation on either the 'First Login or On Every Login, the affirmation will appear in a popup on the login page. Scrolling to the bottom and clicking the orange affirm button will fully log the user in.
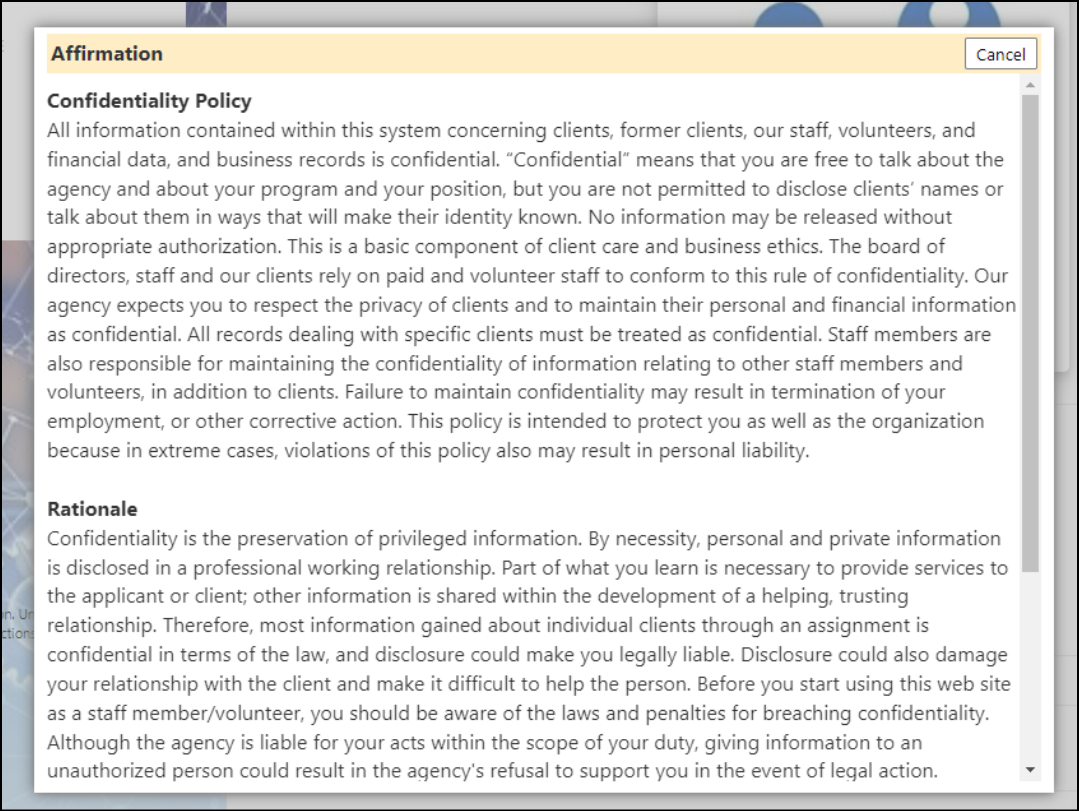
If the user logs in with SSO, they'll be sent to a full page to see the affirmation instead of getting the popup. The page works exactly the same as the popup.

Enhancement to Case Audits Audit Finding and Recommendation Categories
The "Audit Findings" and "Audit Recommendations" have been moved from the Lookup List section of Configuration to the Configuration Reference Libraries.
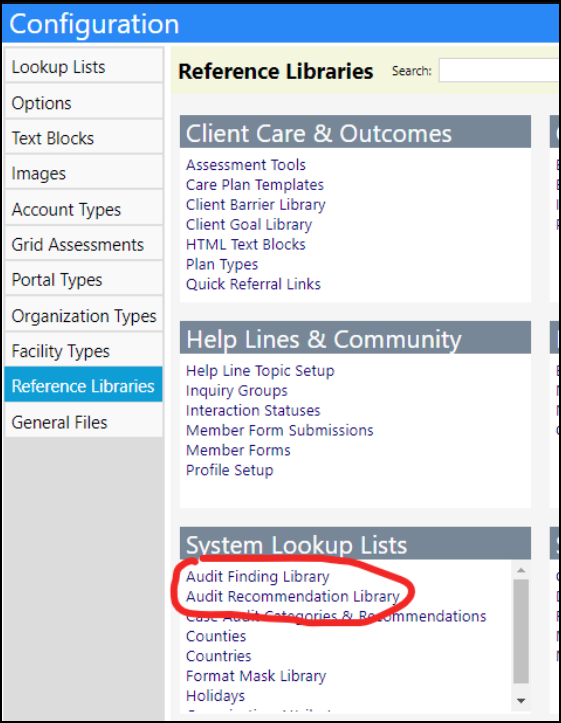
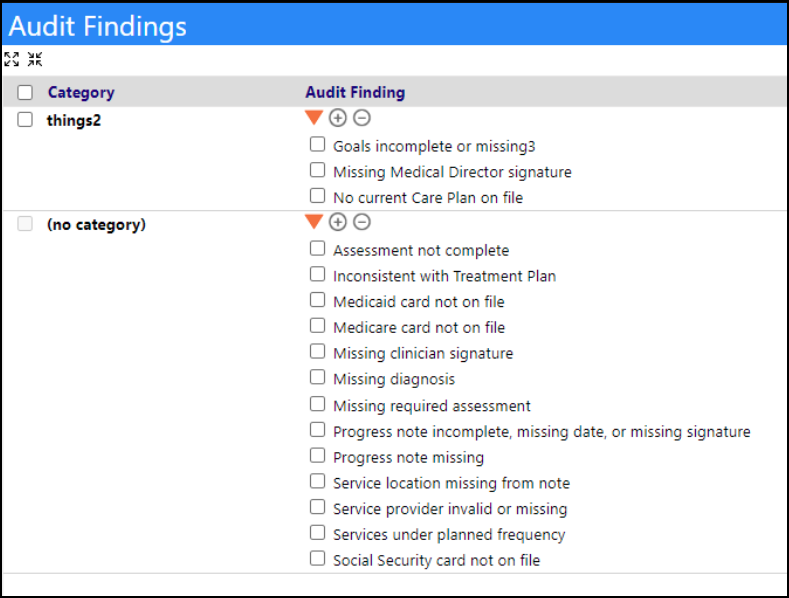
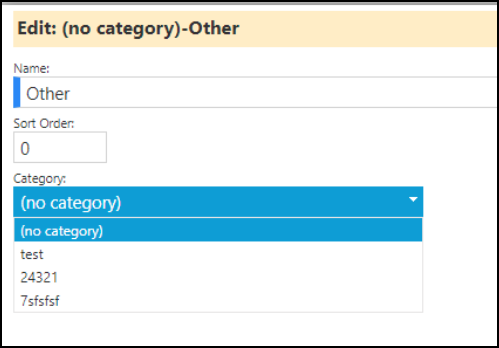
Both now support their own categories. All existing entries have been moved to the category "(no category)", until users move them to the appropriate categories.
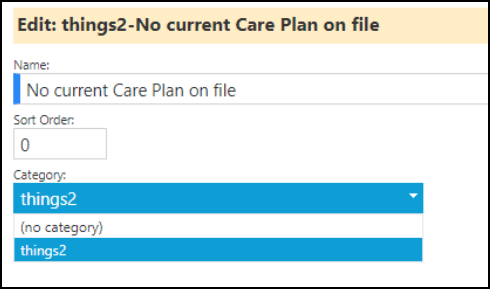
Clicking on edit, administrators can display which category the finding or recommendation is in and move them to a different category if desired.
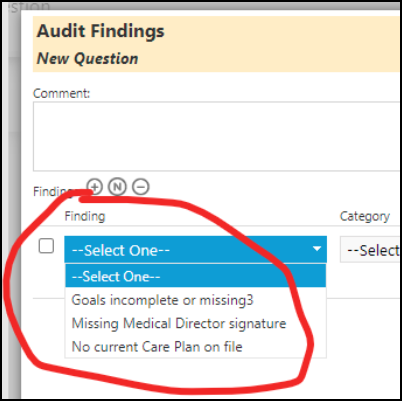
Once there are some categories defined, they can be used when editing a form. When editing one of the new audit questions, users will now get two new dropdowns.
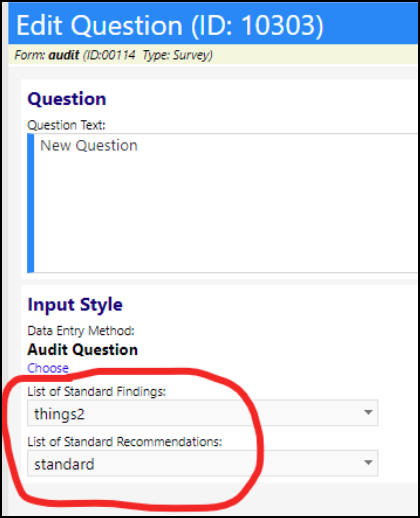
For all existing questions, they will be set to 'All' categories by default. By changing the category, users will be able to choose a subset of findings or recommendations that can be chosen for that particular question, making their findings and recommendations lists for that question much more manageable.
Organization Enhancement - Counties Added
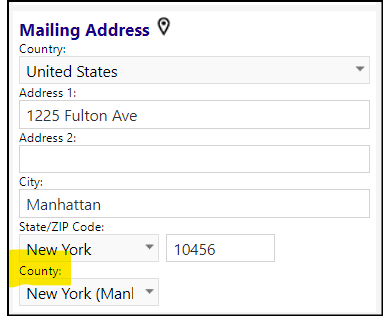
Users can now add a county to their organization. This will be useful for reports and data segmentation.
Program Reason for Leaving Enhancement - New Configuration
The setup of the Reasons for Leaving a program can now be done in Configuration Reference Libraries. In addition to the reason, administrators can also create categories for the various reasons.

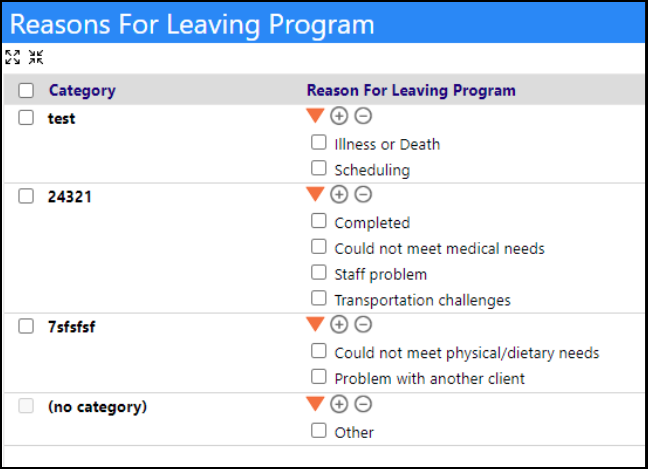
Clicking on a reason will allow users to move the reason to another category.
Changes to Program Workflows
When an making a decision in a decision block, marking a checkbox as completed, or marking a checkbox with a date as completed or NA, a new trigger processing routine will now run and will allow the system to automatically create tasks.
After setting up task triggers, users can auto-generate the tasks by completing their associated actions. The system triggers the task creation when the user checks the circle on that workflow widget, or for decisions, makes a decision.
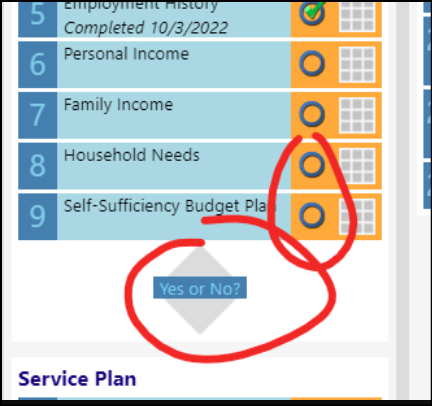
In this example, two task triggers initiated when the yes or no decision was completed. One task only created if "yes" was chosen. For this example that was chosen and when that decision was made, date it was completed was set to August 1st.

The first task on the list sets the due date to a month after completion, which was 8/1 in this case, so the due date is 9/1. In the example, the system was also instructed to to assign the task to the casac, which was anonymous user for this account program. The second task had a fixed due date, and was assigned to the team it was set to.

These settings are entered when the Action is set up when the Workflow Action is created.
Two new settings for program workflows have been added for when Action Step Numbers are displayed.
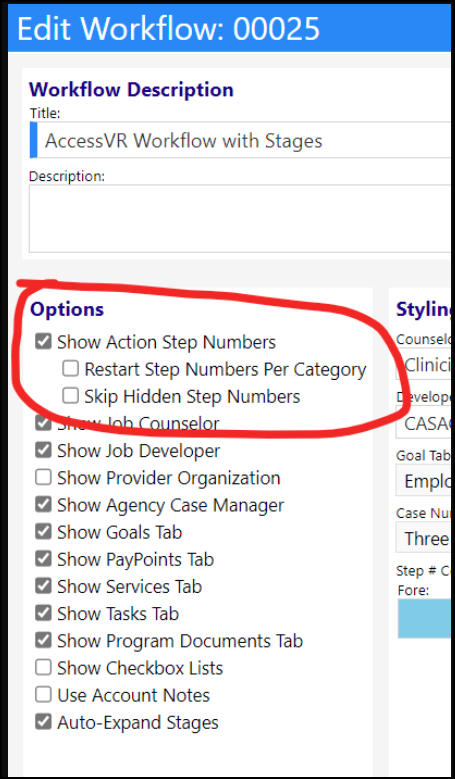
Restarting numbering per category does what it sounds like. Skipping hidden numbers will make sure every number that shows is sequential. Here's an example of both in use:
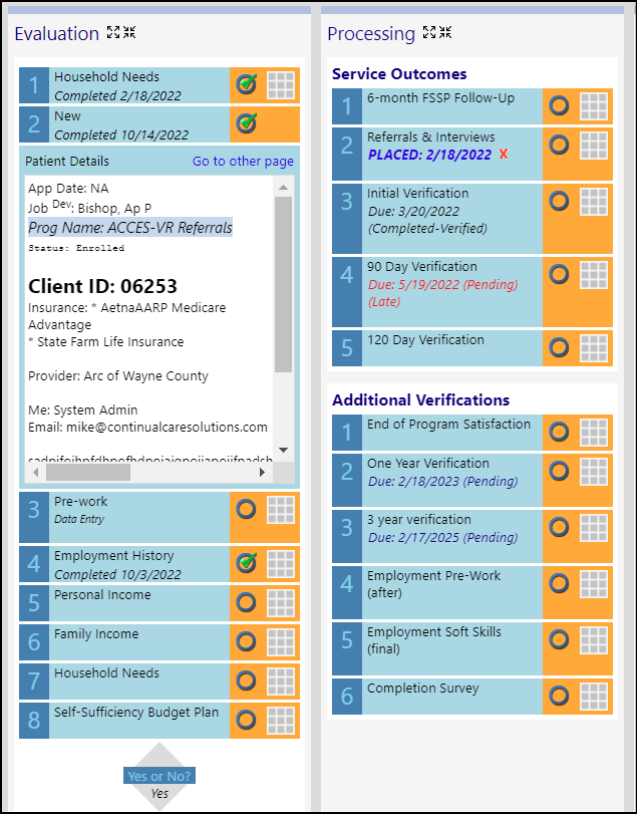
Skipping hidden numbers also skips monitor and decision steps (for example, between steps 2 and 3, previously that big text block would be step 3, but now it gets skipped because that action never shows the number). If a decision is made that makes a hidden action show, the numbers will recalculate to fit in that new step
A change was also made to the "clickable navigation bar" setting for program workflows. It is now called "auto-expand stages". If auto-expand stages is on, and decision is made that makes a new stage appear, that stage will automatically get expanded.
Provider Portal Enhancement - Availability Schedule Widget Added
The work availability schedule widget on the provider summary page is now available. It displays the days and time of day (morning, afternoon, or evening) when the client will typically be engaged in provider activities. This information will be used for making employment suggestions.
Click on any of the time slots to toggle them on or off, with green being on and gray being off.
- Users need to click save to save these to the database, which will update the info on the bottom of the widget.
- Each account program has its own schedule, so if a user clicks on a different program at the left side of the screen (in the Current Programs panel), they'll be able to enter a separate schedule based on that specific program.
- Timeslots can be selected or unselected by clicking on them.
- Timeslots which are in use by services or other features cannot be deleted. They would have to be changed in those entities before they can be changed here.
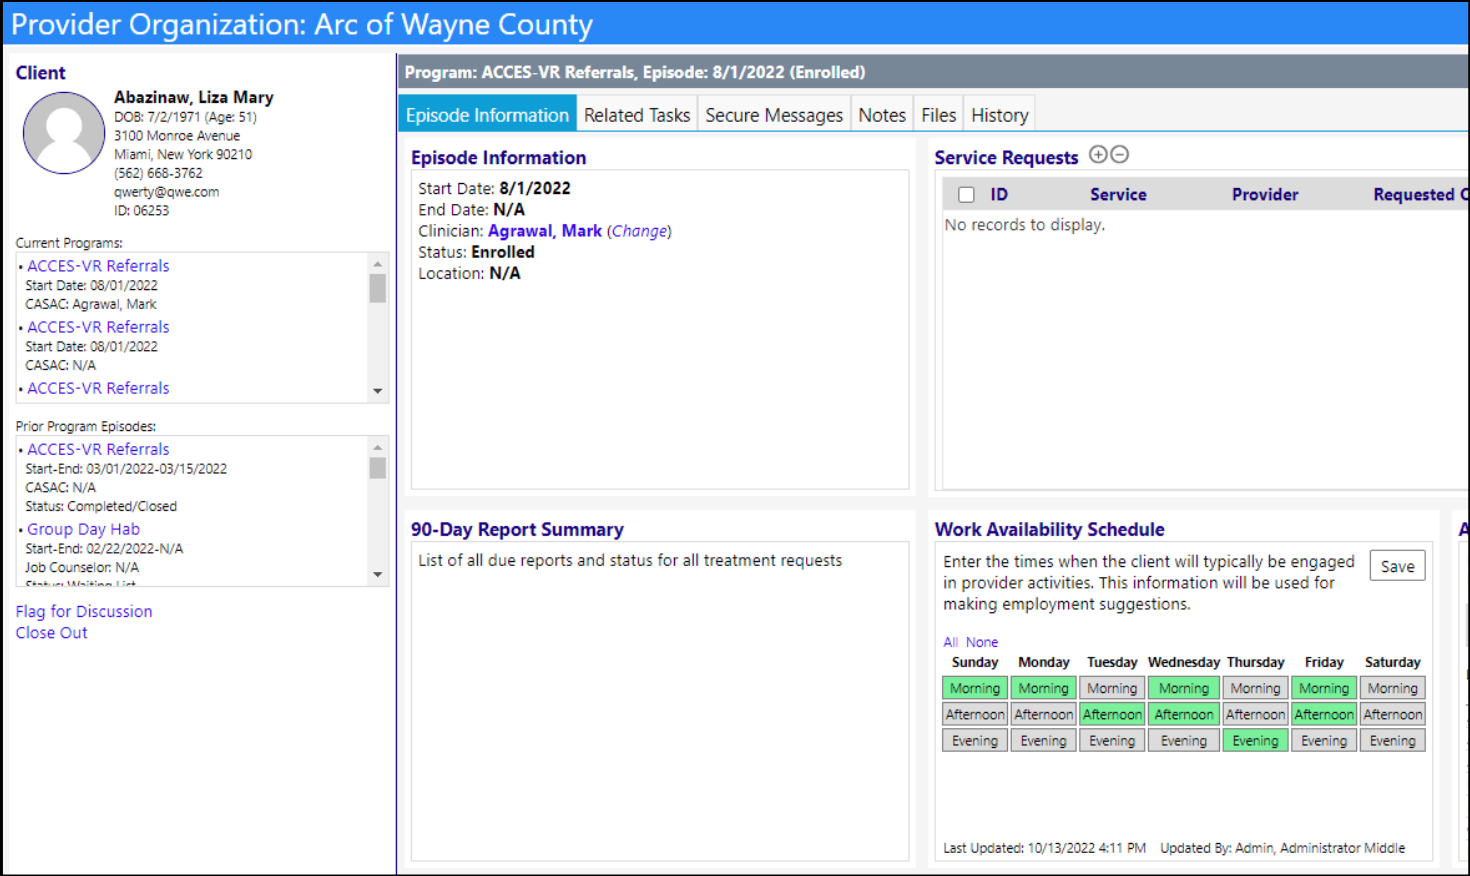
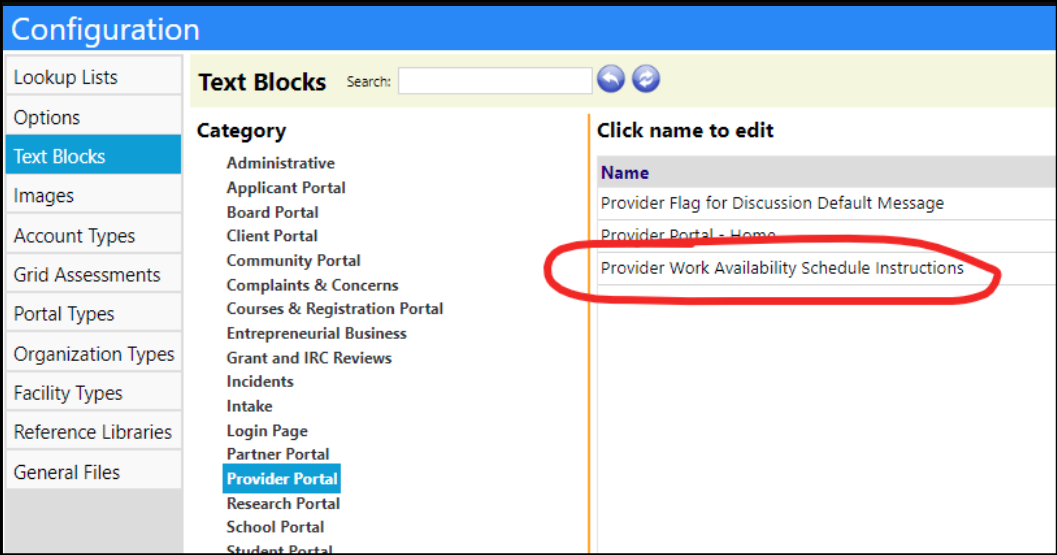
The instructions at the top of the Work Availability Schedule panel are configurable in Configuration (Configuration > Text Blocks), and they've been pre-filled a default value, but can be changed as desired.
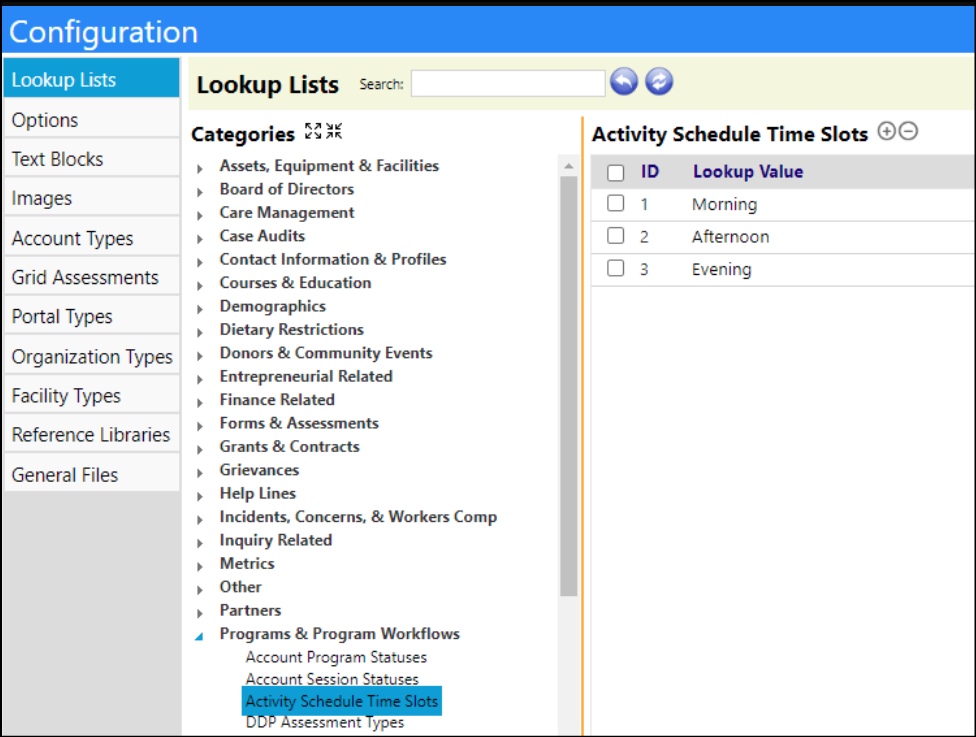
The time slots are also configurable in the Configuration Lookup Lists. They've pre-filled them with morning, afternoon, and evening, but can be changed.
Enhancement to Scheduled Notifications - Link to imPowr Added
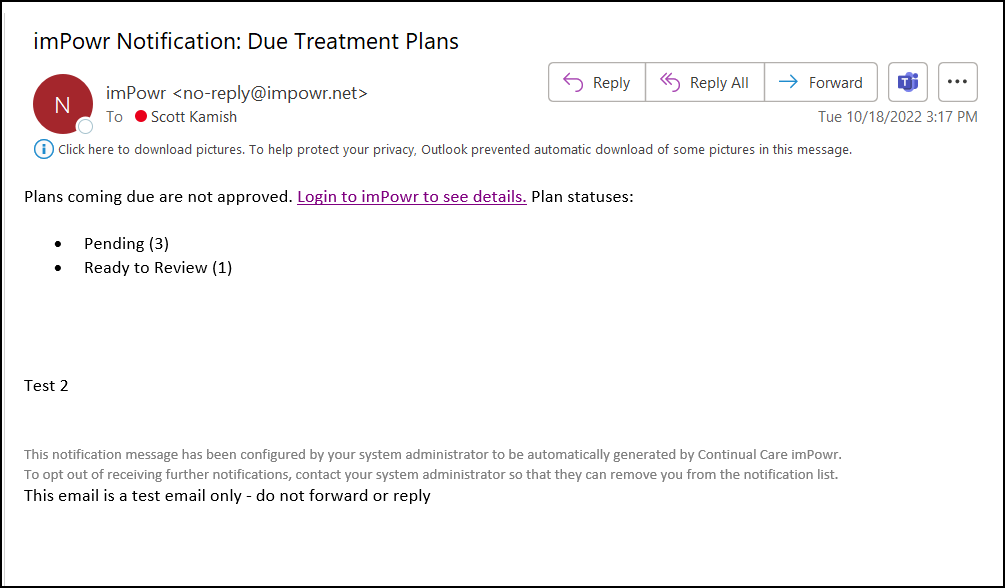
Text has been added to the Due Treatment Plans notification. A text link: "Login to imPowr to see details" has been added. Clicking it will log the user directly into imPowr, then immediately redirect them to the treatment plan list, filtered to ones where the user is the owner and to the date range the notification was looking at.
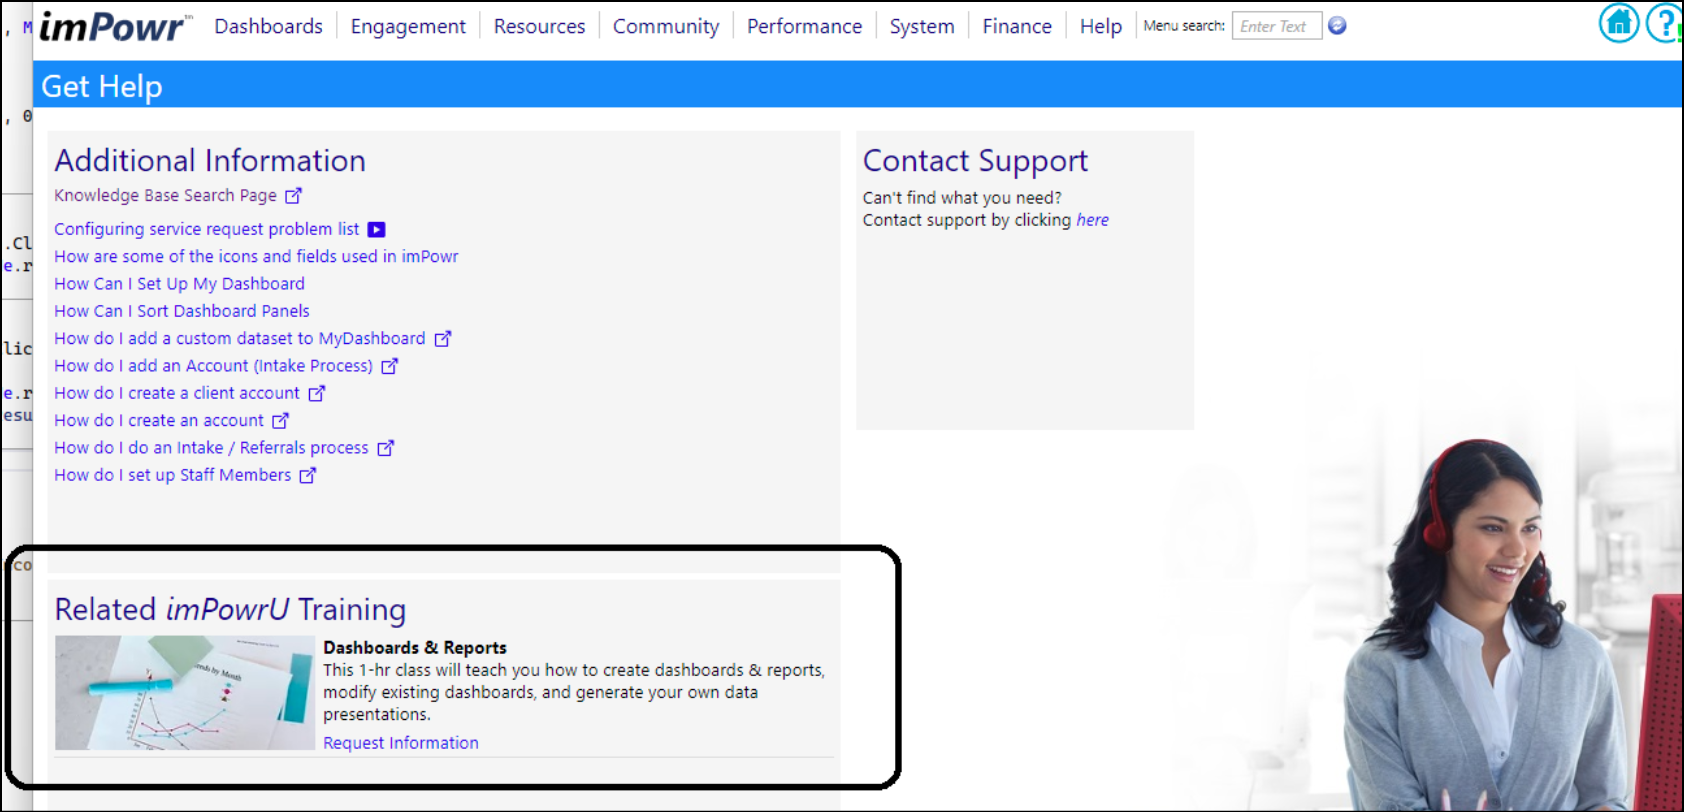
Self-Help Enhancement - Added imPowr University Class Request Links to our Self-Help Document and Video Links
We have added imPowr University Training Request links to the Documents and Video links on our Self-Help page. Users can access Self-Help by clicking on the ? in the upper right of a page. The training request links align with the list of classes users can find on the imPowr University home page. If no classes are mapped to the imPowr page then the section does not appear; if multiple classes are mapped, a scroll bar appears.
Enhancement to Tasks - Confirm Completion Option Configuration
As previously reported, the Confirm Completion popup had changed allowing users to optionally enter a Resolution and Notes. Prior to this change, when a Task was closed out, users would open the task, enter a resolution and/or note, save the Task, and then click Done to complete it. With the new Confirm Completion popup, the resolution and/or note can be entered into the popup and upon Confirmation of the Completion, the resolution text copies over into the Task, and the note is created within the Task (on the Notes tab).
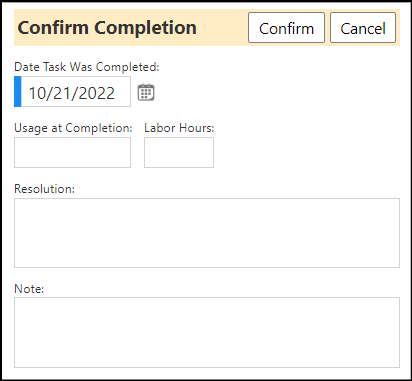
A change which was made to allow administrators to choose which fields they want displayed in the Confirm Completion popup.
The configuration for this is found by clicking on the Task Completion Dialog in the Configuration Reference Libraries (Settings & Security menu).

In this screen, Administrators can add a rule, selecting which boxes should display in the Confirm Completion popup, based on the Task related entity,
