New Account Cleanup Tools - Accounts and Staff With No Images
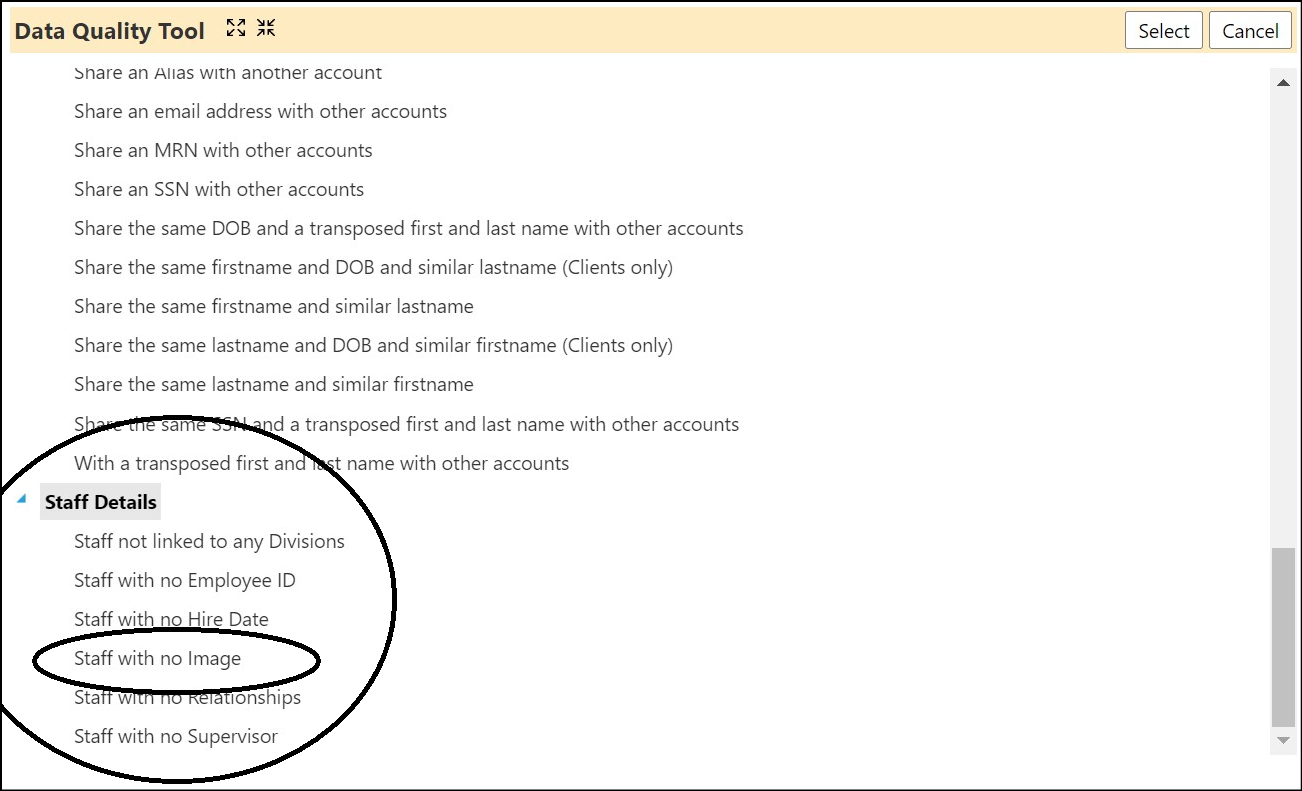
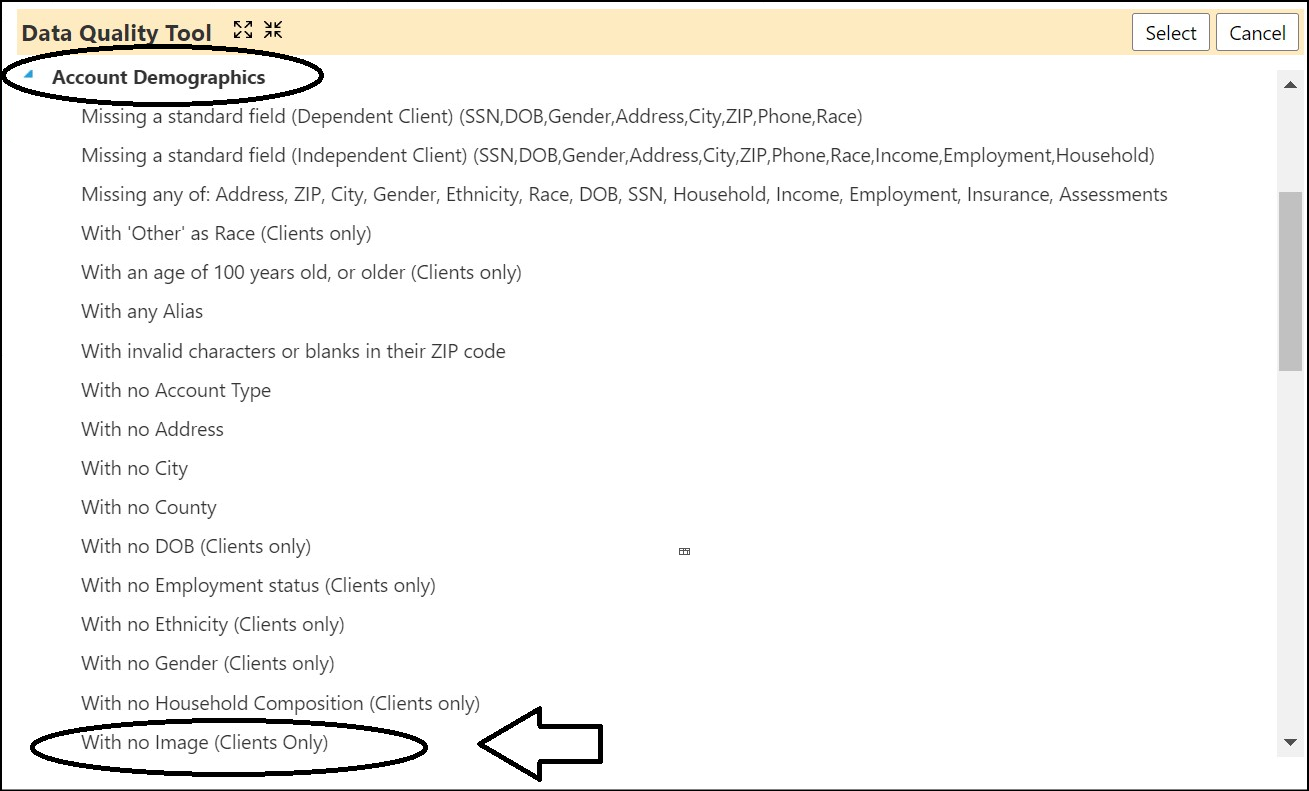
- Agencies can now quickly identify the staff and client accounts which have no images setup. 2 new Data Cleanup Tool options have been created: Staff with No Images (Staff with No Image found in the Staff Details section) and Clients with No Images (With No Images (Clients Only) - found in the Account Demographics section).
Account Profile Enhancement - Medical Panel Refactored
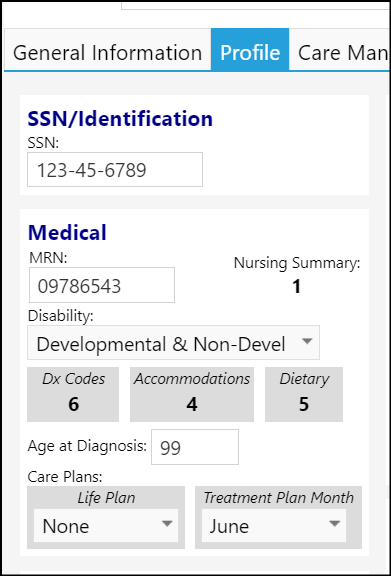
- The medical panel on the Account Profile has been refactored to make it easier to use.
- The panel now also includes some Care Plan information.
Care Plans Enhancement - Multiple Changes
- The Care Plans page has been refactored to make it easier to use.
- Plan types are now displayed as tabs on the page, enabling users to quickly see what plans fall under which type.

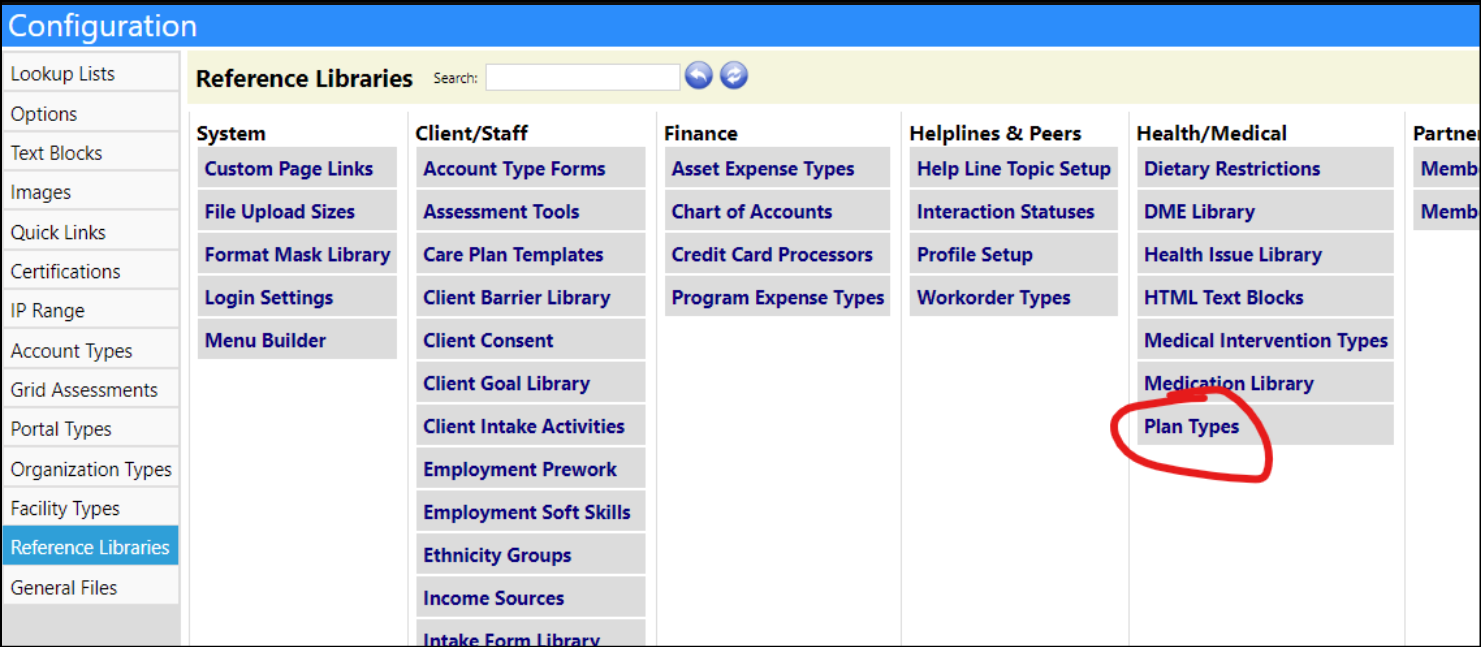
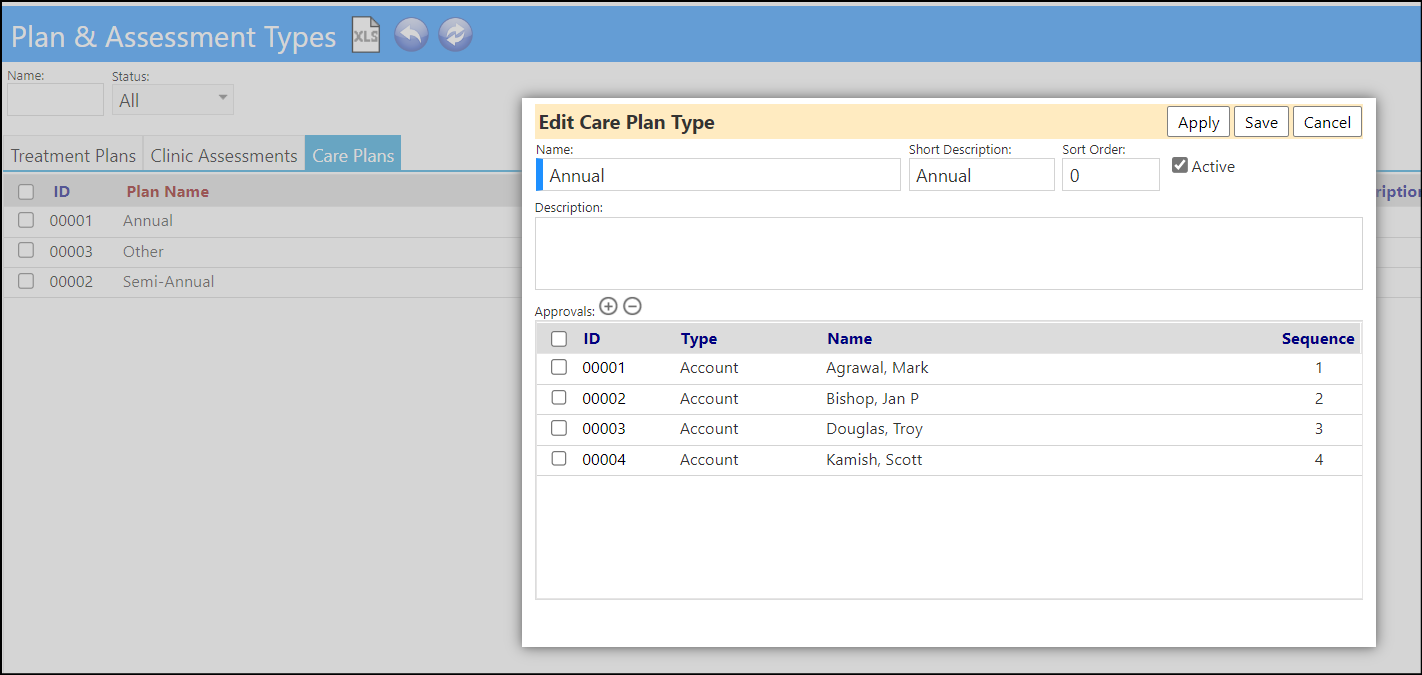
- Care plan types can now be edited in Plan Types in the Configuration Reference Libraries.
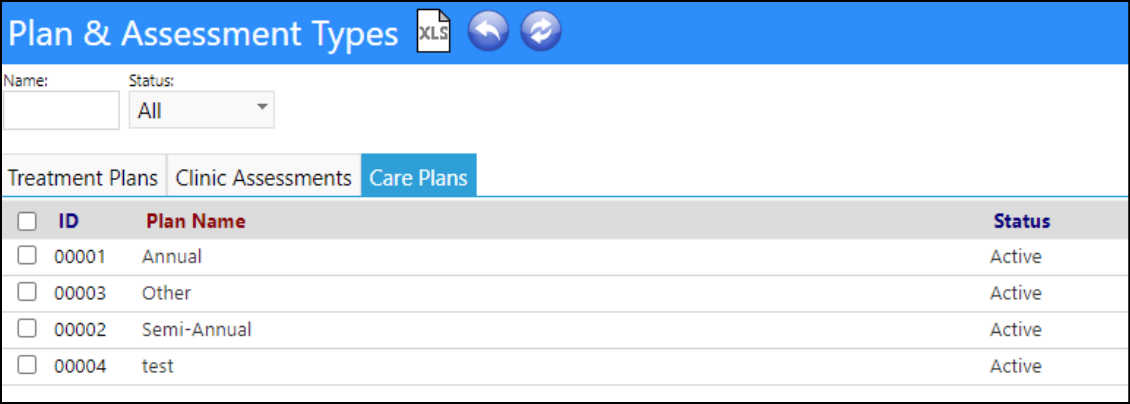
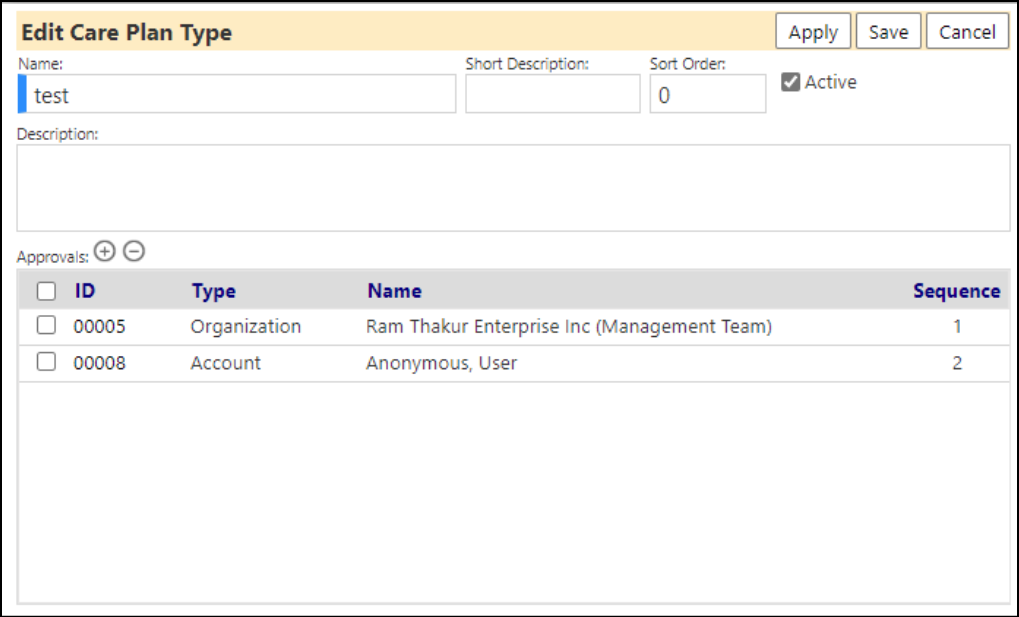
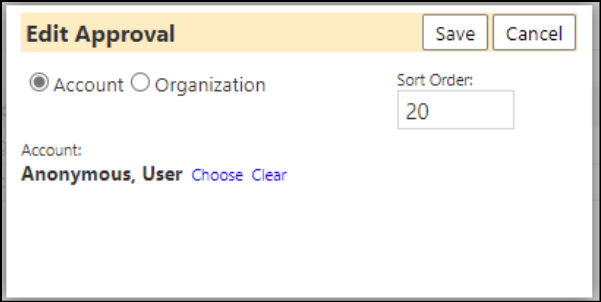
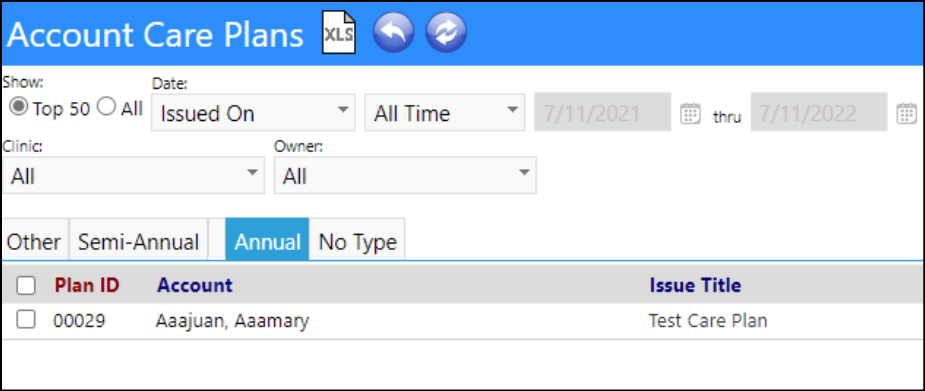
- The Care Plans page now displays each care plan type as a tab.
- If any care plan exists with no type, a "No Type" tab will show.
- The name of each tab comes from the Short Description field when editing care plan types, so if that isn't fill in, the tab will display with an empty name.
- New Care Plan list enhancements:
- Tabs added for each Care Plan Type.
- Radio buttons added for Plans, Amendments, and Plans with Amendments (privileges are enforced).
- Filters were added to the page to enable filtering the list for status, approvals, owner, clinic, account name, account ID, plan ID, and date range.
- Quick Filters were added (see below).

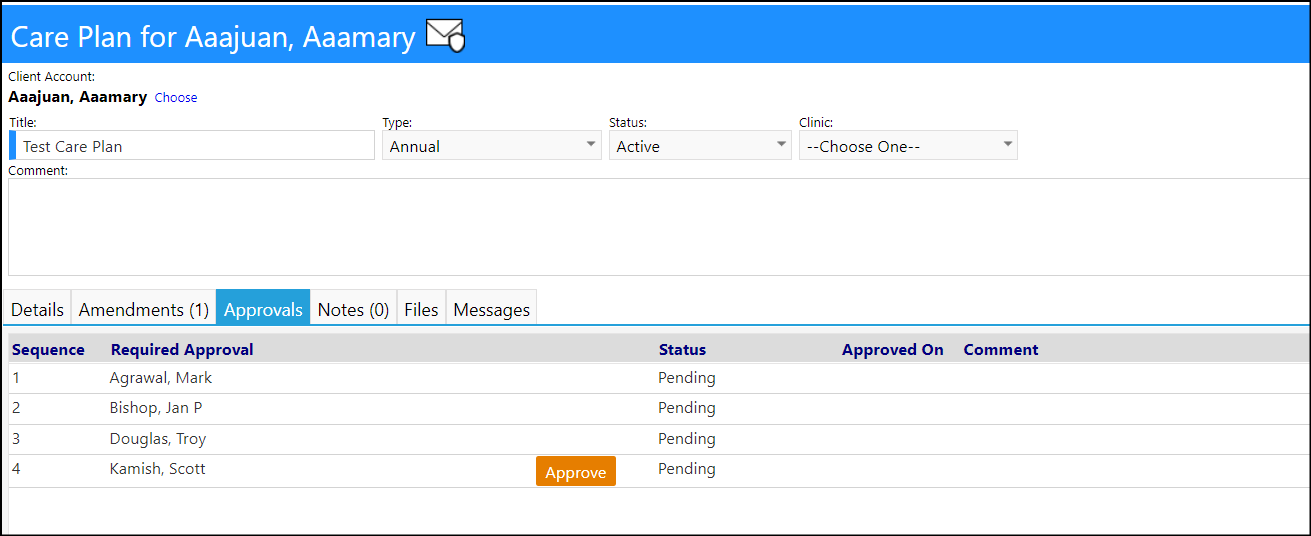
- Care Plans and their Amendments can have multiple approvals.
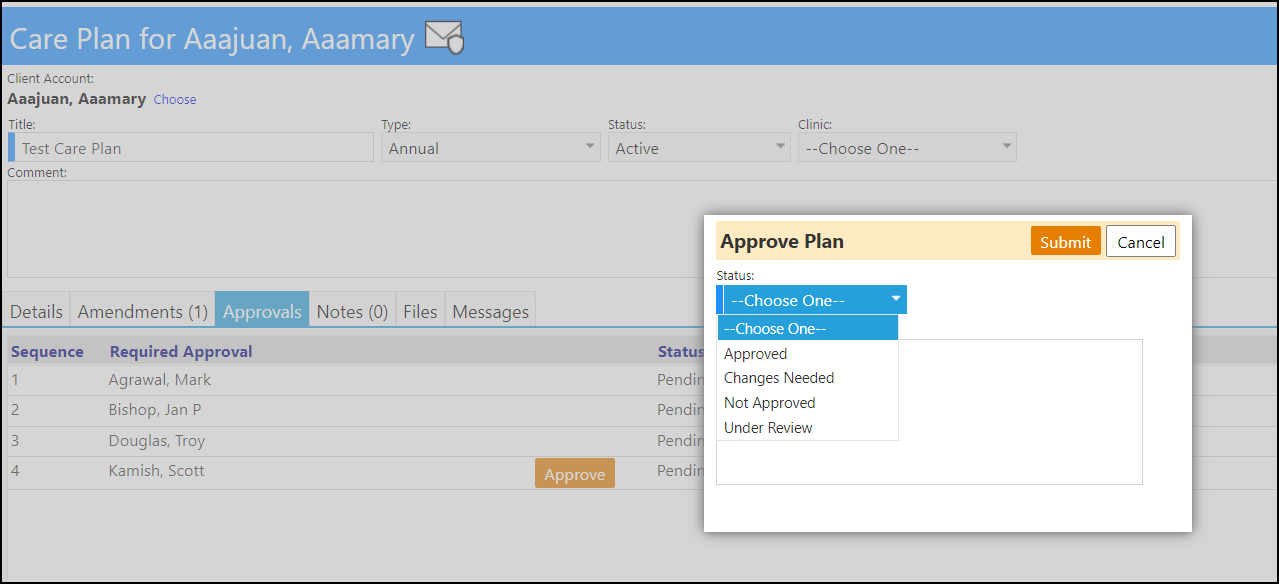
- Approval statuses are setup in Configuration Lookup Lists - under Care Plan Approval Statuses.
- The default approvers are setup in the Care Plan Types, in the Configuration Reference Libraries.
- On the Care Plan list, the number of approvals is displayed. For example, 1 of 4.

- A separate tab has been created for the approvers. Those who are listed will be provided with a button from which they can approve, unapprove, or select another approval status.
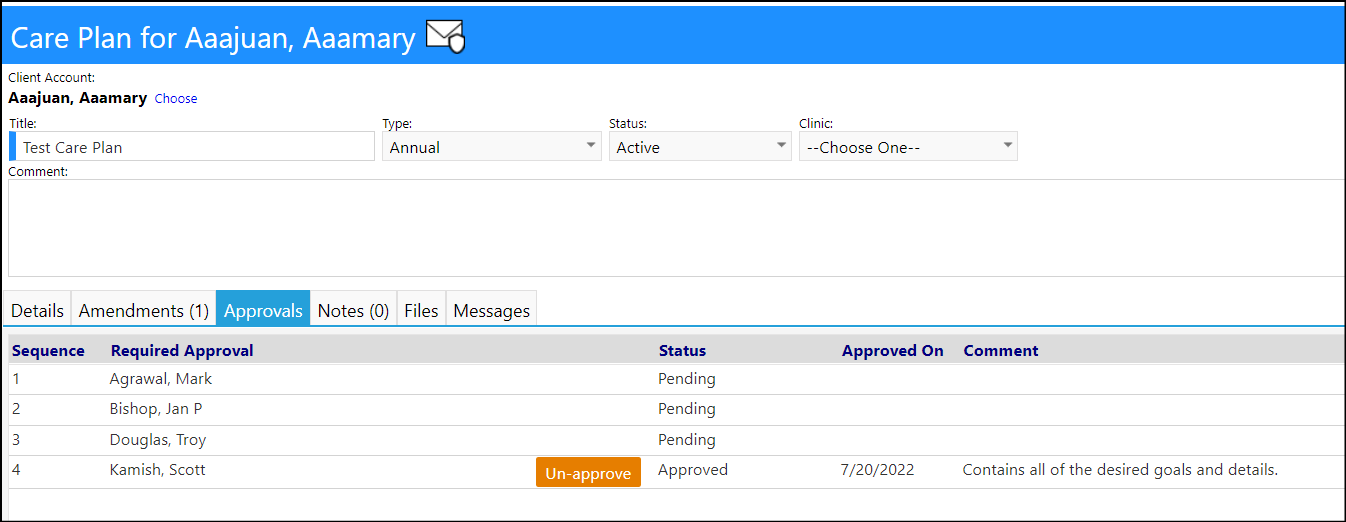
- Changes are captured in the Audit Trail

- Users can now send secure messages, related to the Care Plan or its Amendments.
- A new screen has been created for this - the screen allows users to enter a message using a basic word processor.

- Fill in the recipients, a subject line, and the content, then click "send" to send it and return to the page you came from. If you click "send & attach files" instead, you'll be able to attach files after the message is created.

- You can get to this screen from multiple places. There are a few on the Care Plan screen. The icon towards the right of the message grid is a reply button - instead of creating an entirely new message, you'll reply to the selected message. This will limit the list of recipients to only people who received the message you're replying to, and it'll pre-fill the subject line, but otherwise it's the same process.
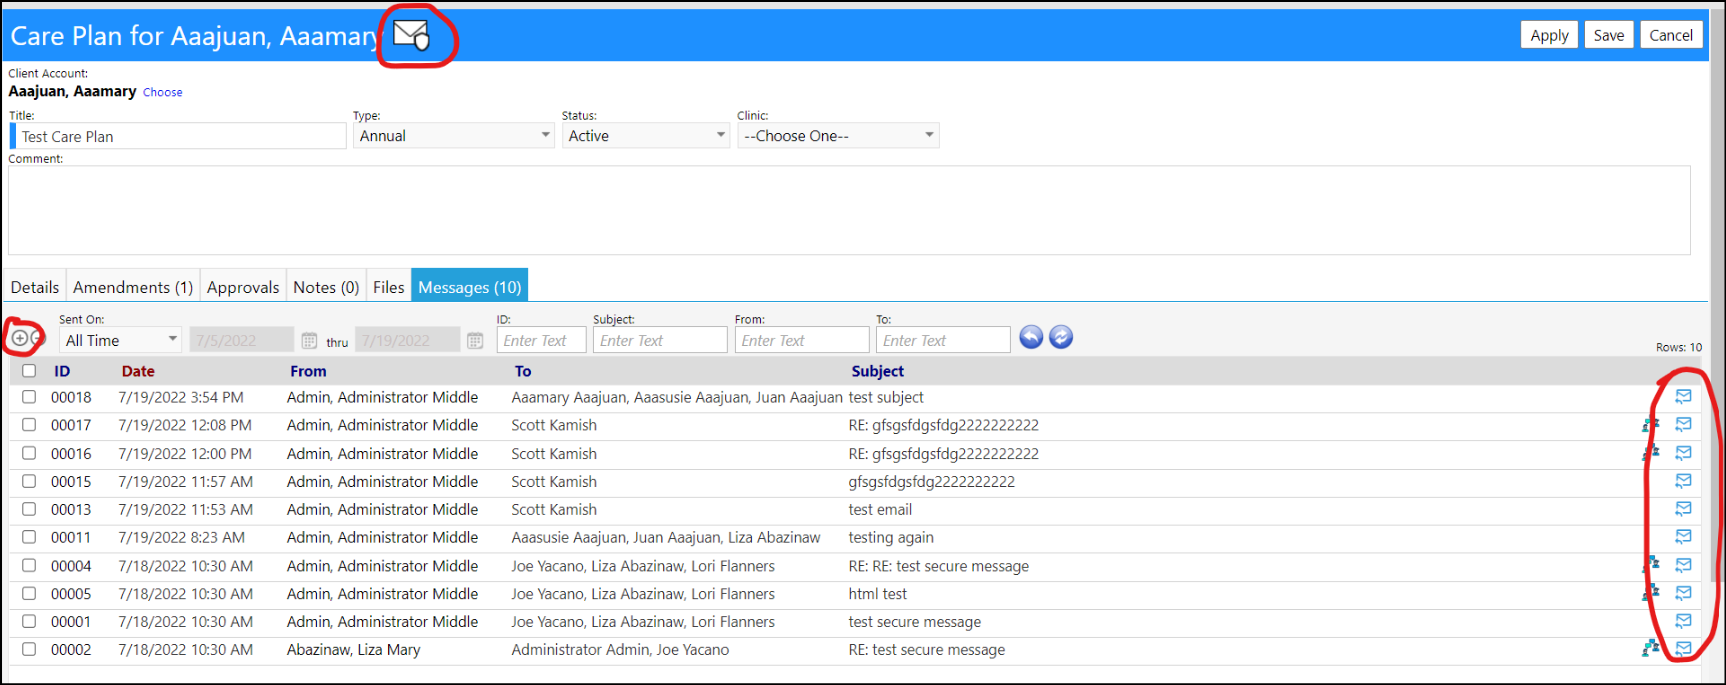
- You can also send a secure message from the Account Care Plan list.

- When viewing a message, you can also click on Respond. This works the same way as the Reply buttons on the list.

- When a secure message is sent, an email is sent to each recipient to tell them they got a message. The email won't contain the message content - it'll tell them to log into impowr to see the content. You can configure how the email looks from this application text block in Configuration.
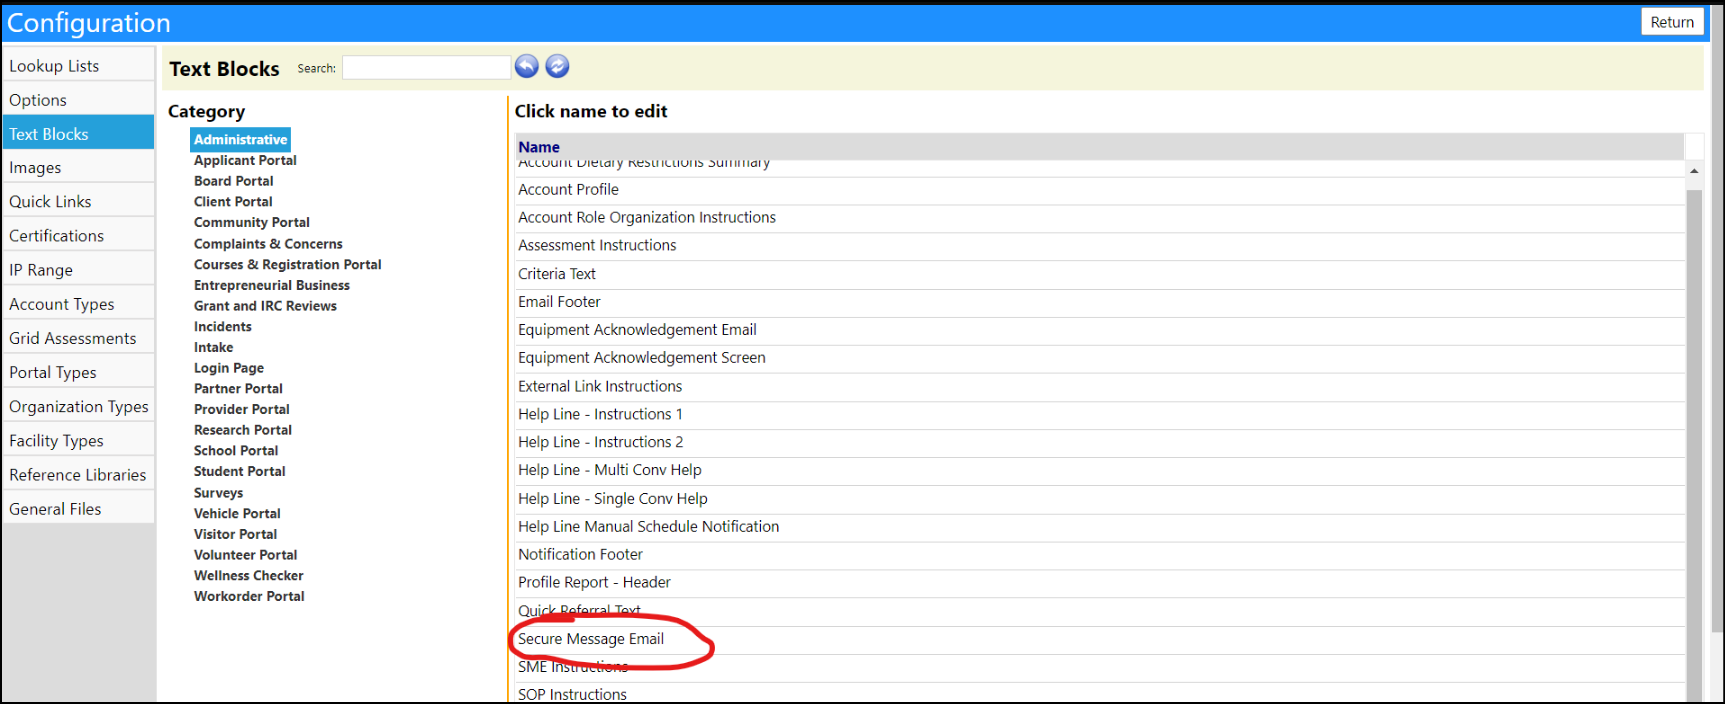
- This is how the email will look by default (the reserved words in this image will get replaced when it gets sent for real).

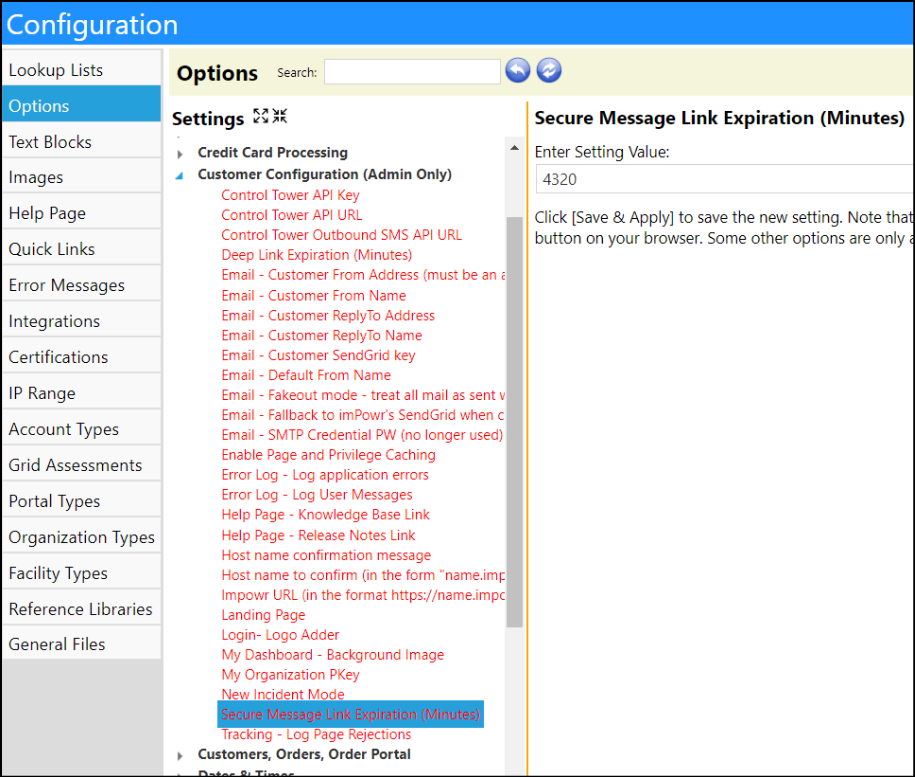
- By default, the "click here" link in these emails expires after 3 days and will no longer take you to the secure message. To change this, there is an application setting that only Continual Care can change.
- Clicking on an expired link will bring up a message that the link has expired.

-
Clicking the link in the email is the same as using the "share this page" button at the top of most pages. It uses the same underlying functionality to create a link that does not display what it actually points to in the system, forces you to log in, and once you're logged in, sends you directly to the page (in this case the secure message).
-
A new tab has been added for users to quickly view Secure Messages.

- The icon second from the right on each row will show you previous messages in that thread (ones that were responded to).


- Click the message to view it, respond, or resend it.

- When viewing a message you sent, you now get a resend button.

- Clicking this will resend the email to this message to all recipients and append "(Resent)" to the title of the message. This will refresh the original link that was sent, and it will send that same original link in the new email. So after resending the link, the link in the old email will work again as well.

- Resending a message also gets a unique audit message in the Audit Trail.

- There are new entity rights for secure messages. You need those in order to use this new functionality. Users without those entity rights will not be able to view the messages.

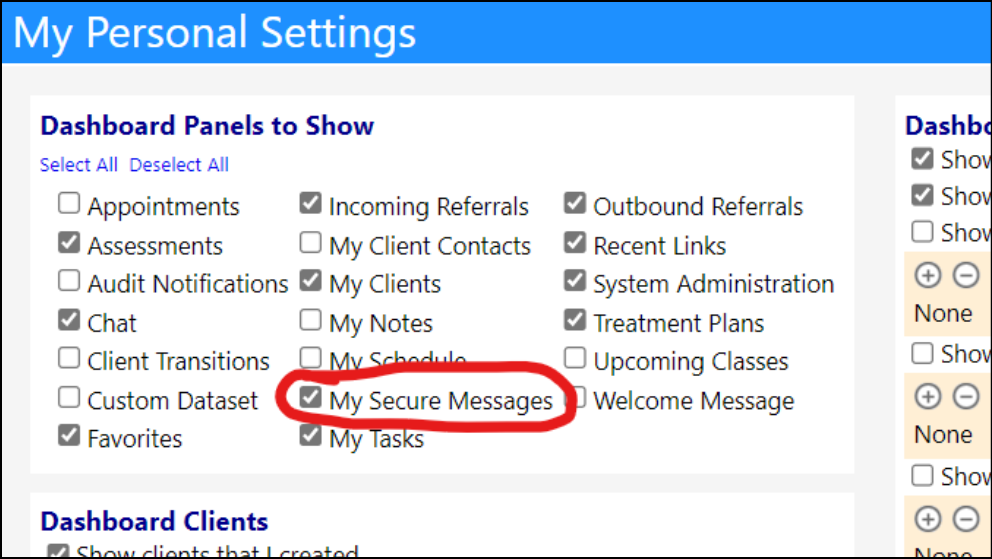
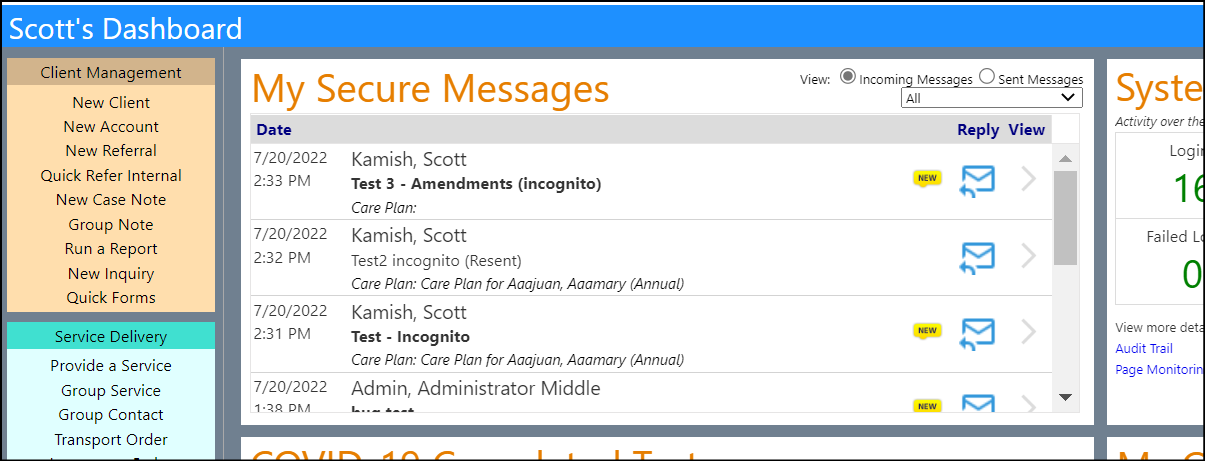
- My Secure Messages can also be added as a dock on the MyDashboard.
- After ensuring the My Secure Messages is added to the Account Role, users can select My Secure Messages to display on their MyDashboard.

- The new section for Secure Messages shows on the MyDashboard page. From here you can view or respond to the message.
- You can click on the entire row to go to the message.
- There is also a link to respond, and clicking on the italicized text below the subject line takes you to the linked entity.
- It will also show if a message is "new" (one that you haven't viewed yet)*
Enhancement to Entrepreneurial Tools - Multiple Changes
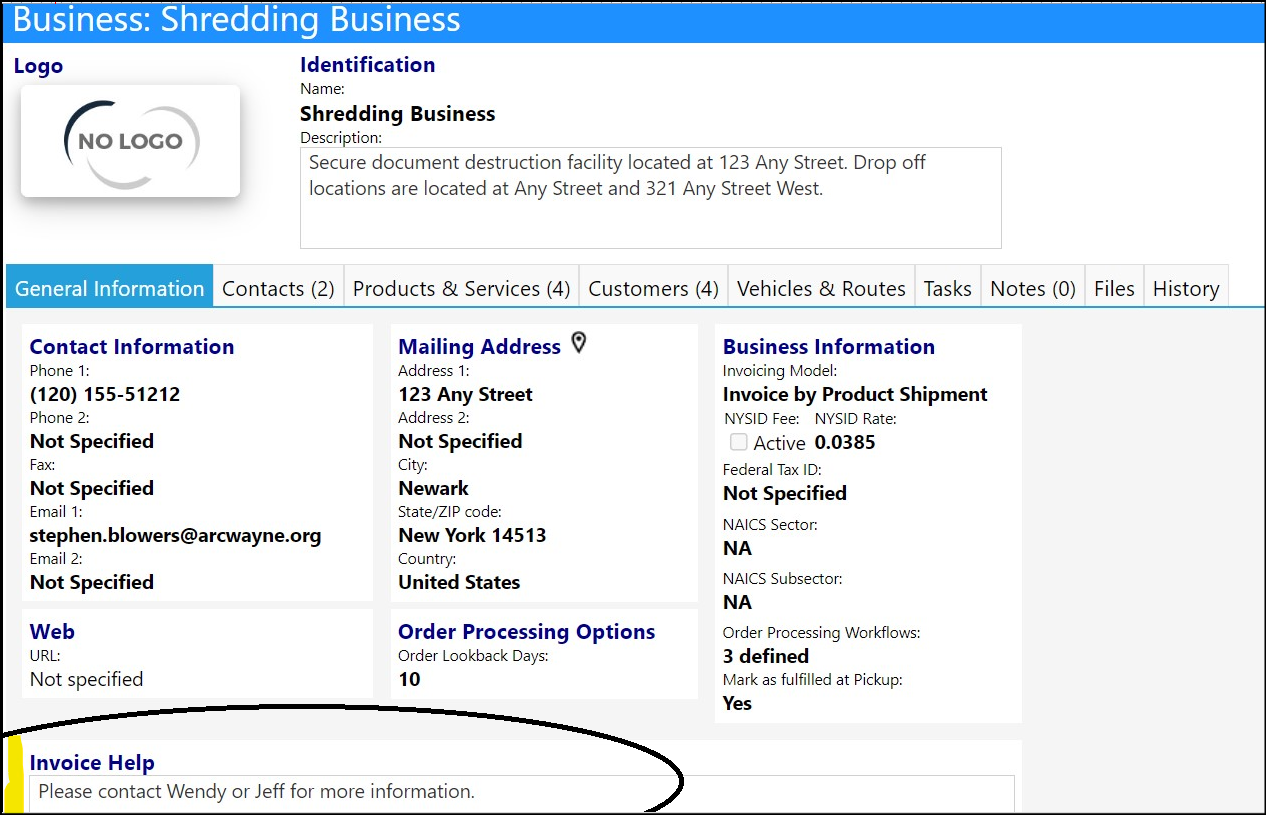
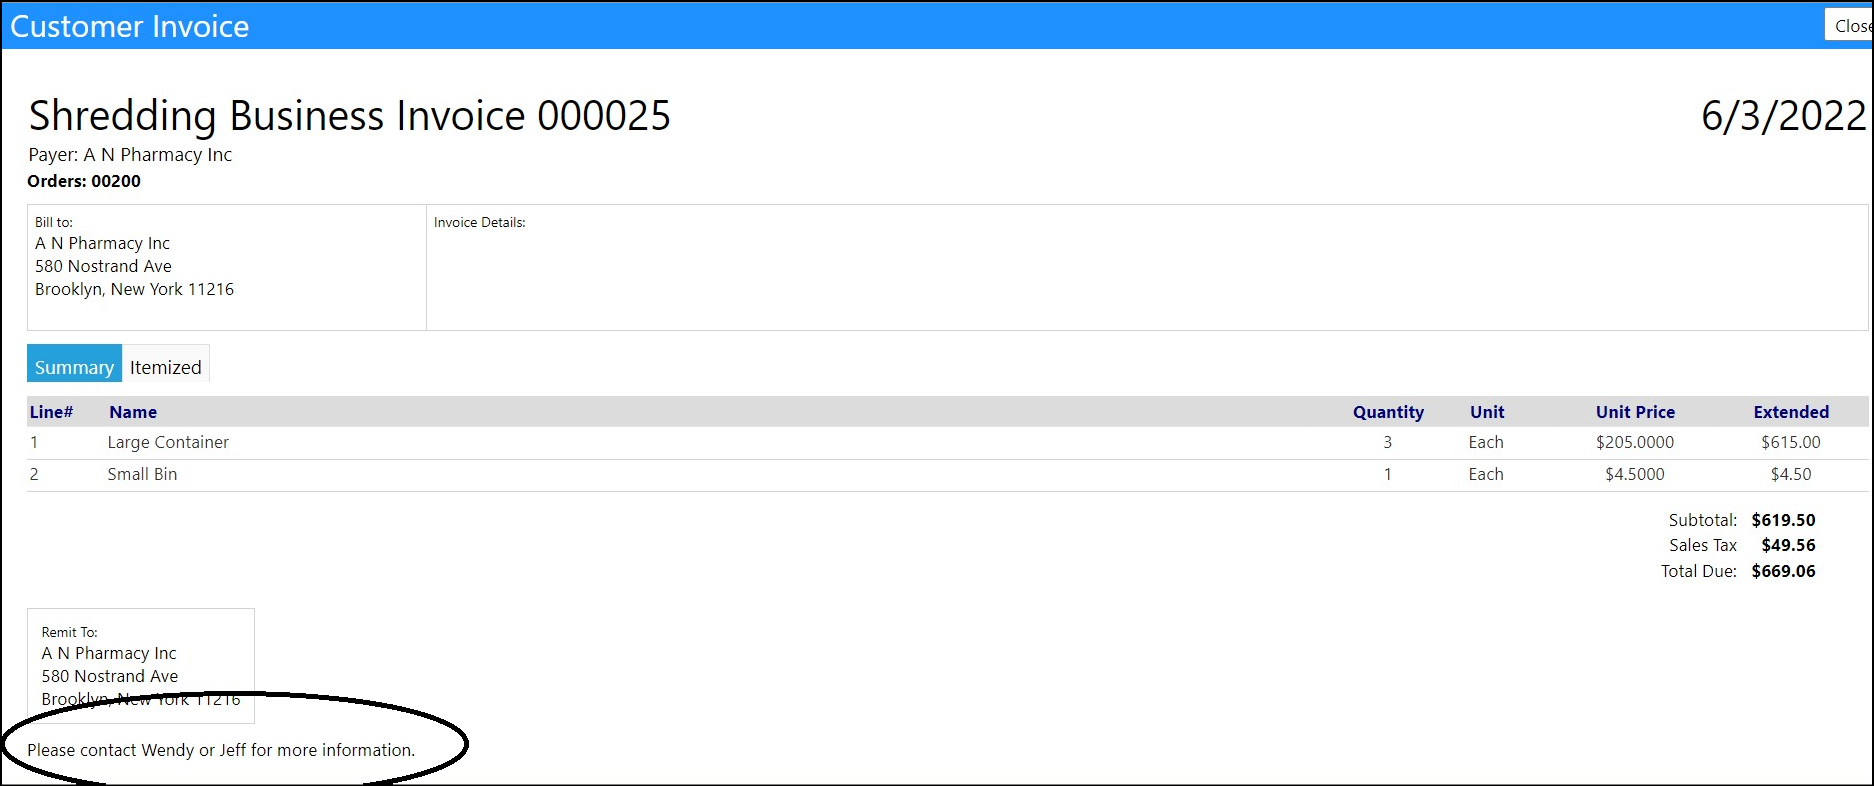
- Agencies can now create different Customer Invoice footer comments, specific to the business unit.
- Entering in the Invoice Comments on the bottom of the Business Unit, will customize the footer text on all customer invoices for that business, making them unique from other businesses that the agency may have.
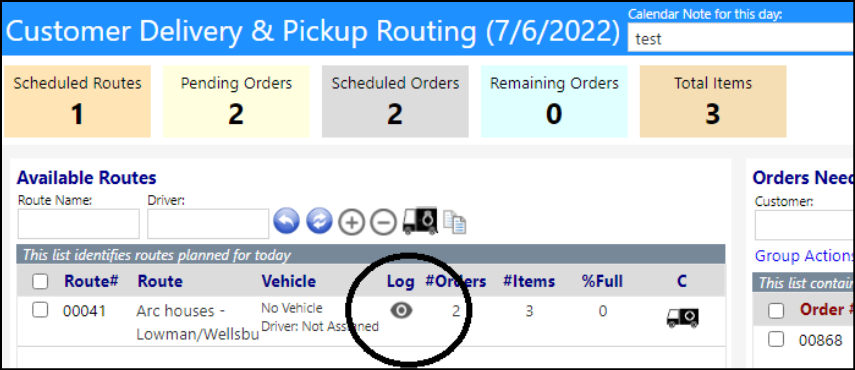
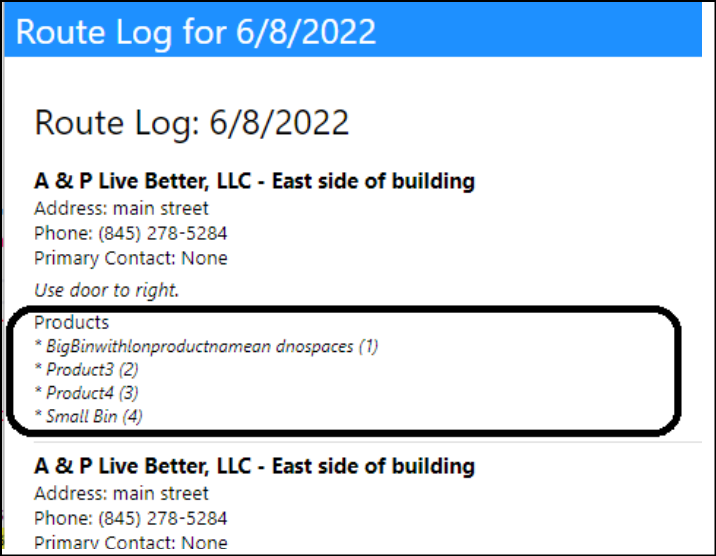
- Order products and quantities are now displayed in the Route Log, on a per customer/per customer location basis - captured from the Customer Order.
New Feature - Fire Drills
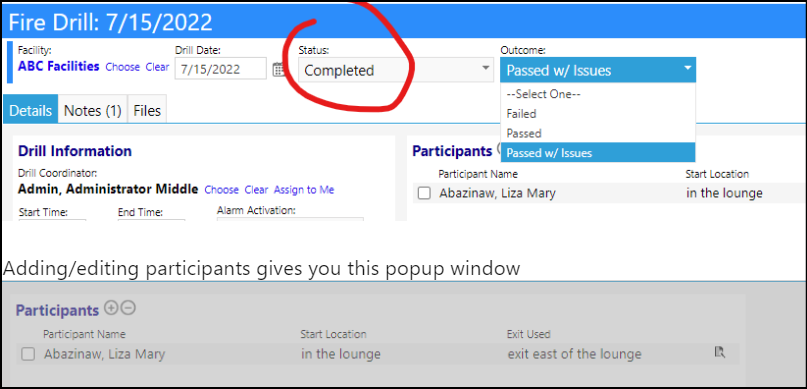
- A new feature was added to imPowr - the ability to manage and track Fire Drills, any outcomes, any observations, and the participants have now been added.
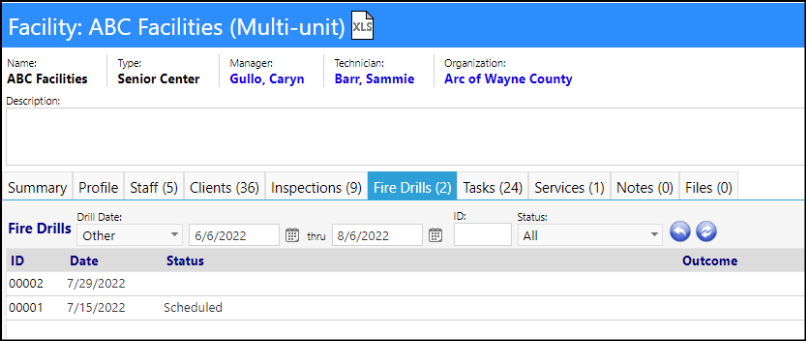
- This new feature can be found as a new tab in Facilities, and assuming the user has the appropriate entity rights in their accounr role, they will be able to view, add, edit, and delete Fire Drills.
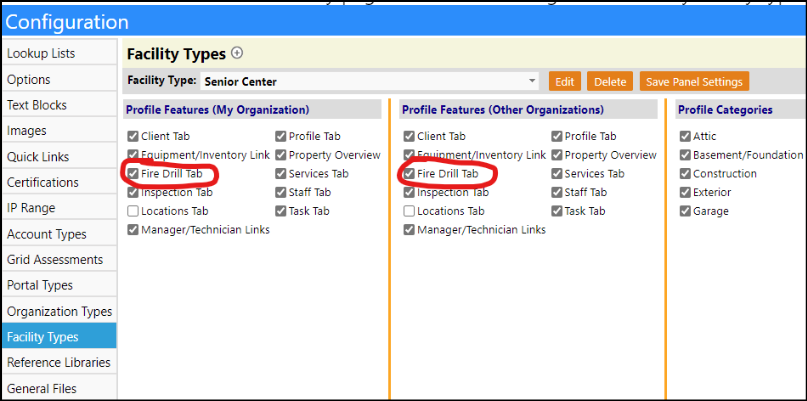
- The Fire Drill statuses are set up in Configuration Lookup Lists. Changes to the list require having the appropriate security rights. Facility Types must be configured to display the Fire Drill tab.

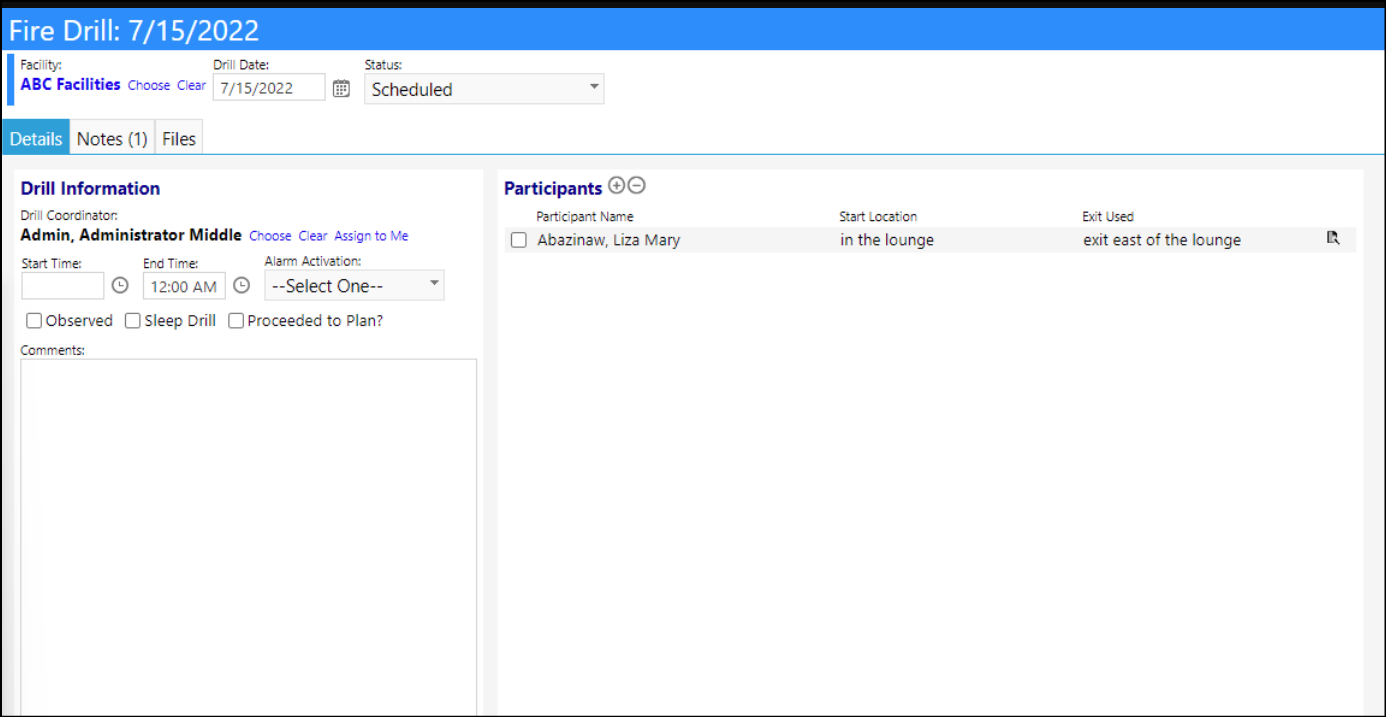
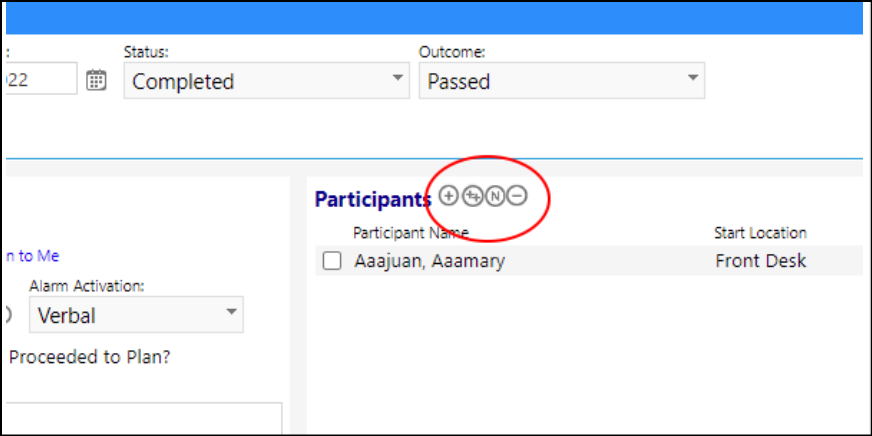
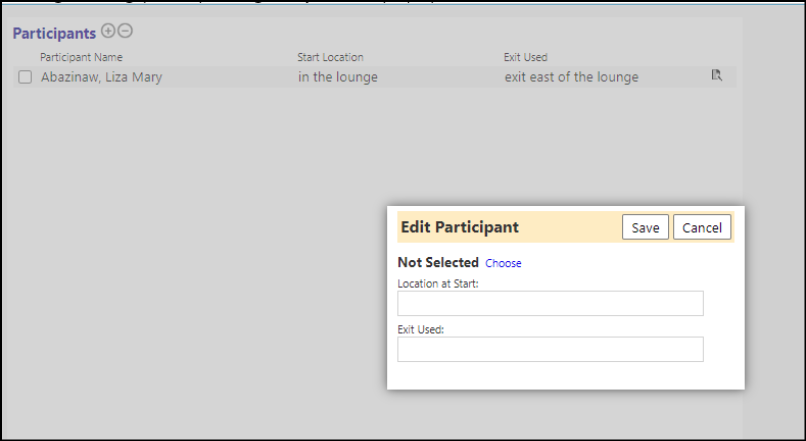
Users must set the status to a final status (such as Completed) in order to be able to set the Outcome.
Incident Enhancement - Now Linked to Healthcare Events
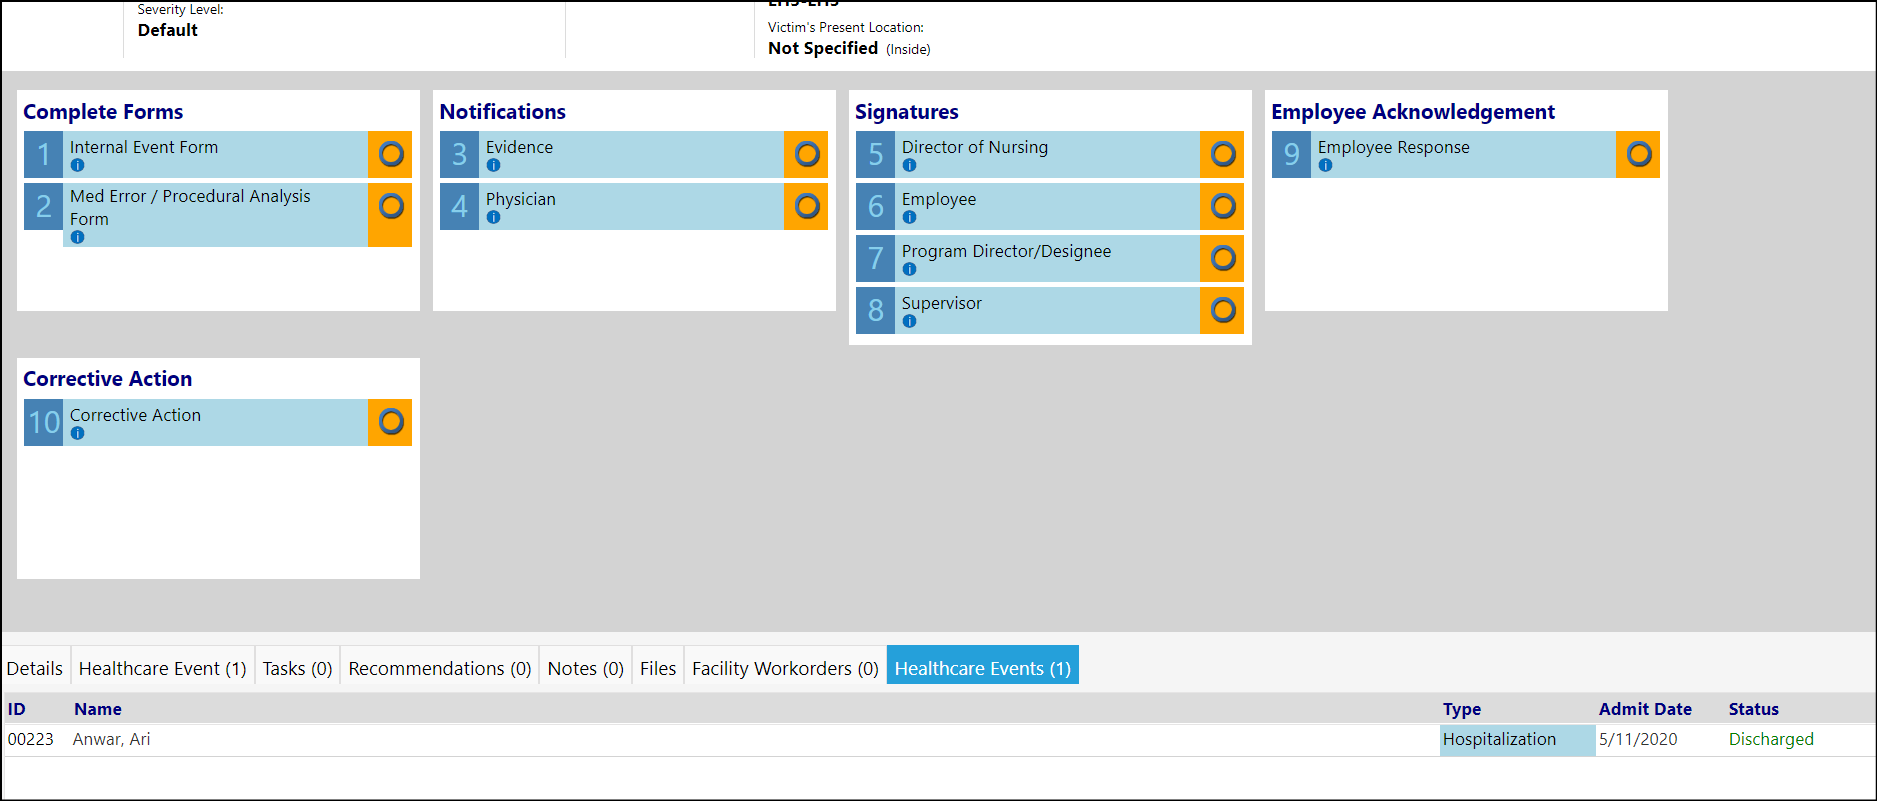
- A link between Healthcare Events and Incidents has now been provided. New tabs have been added to each so they can be associated with one another.

Enhancement to Workorders - Multiple Changes
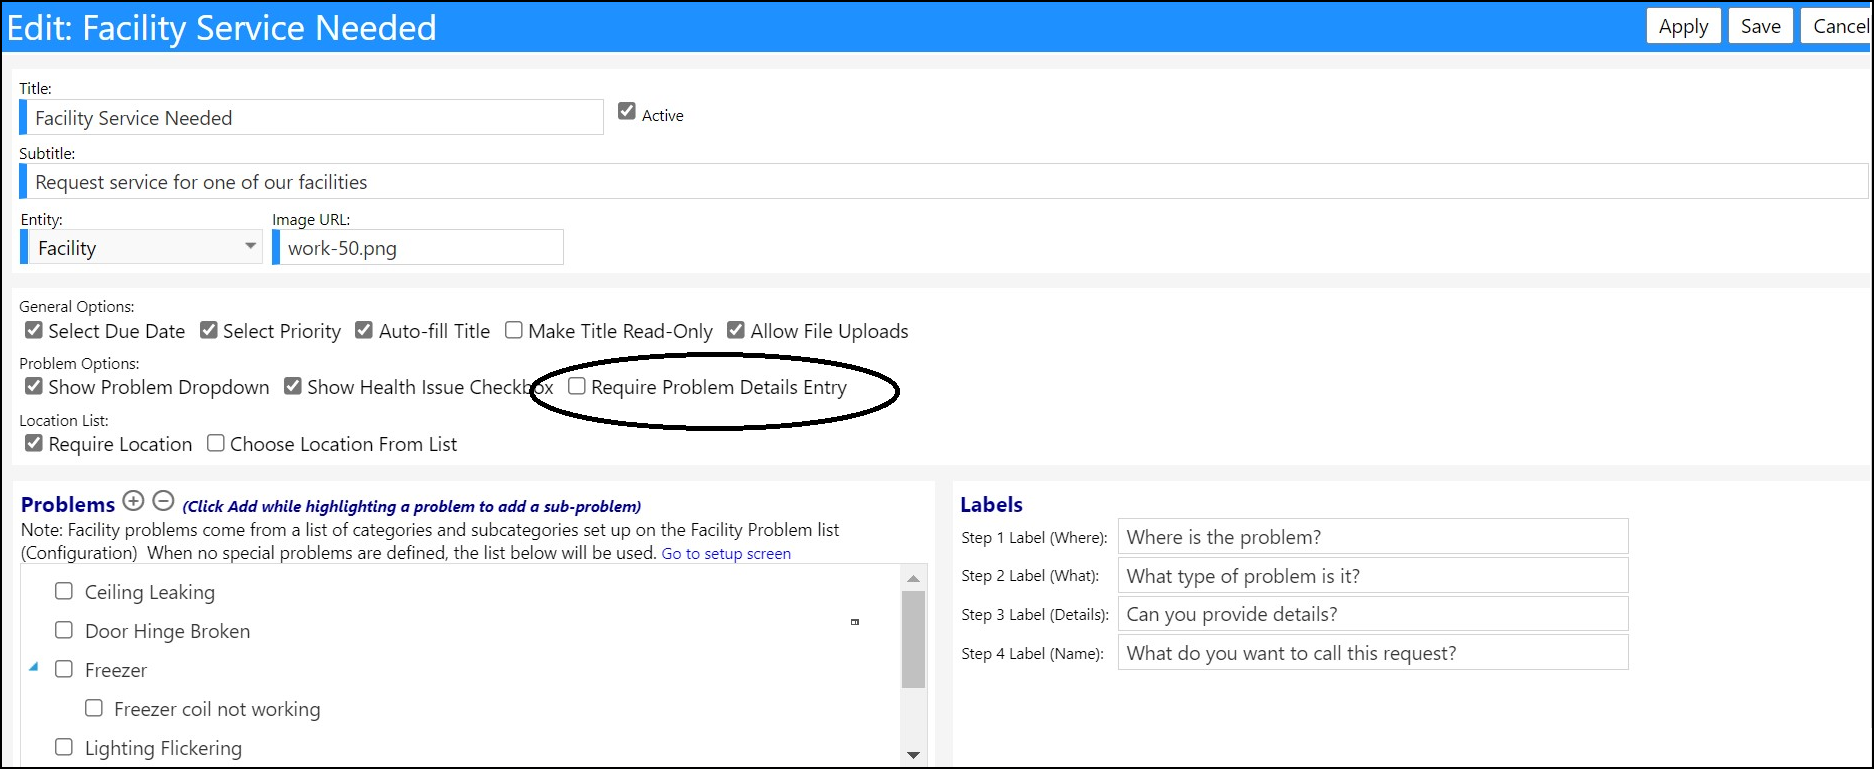
- Agencies can now optionally require problems to be entered when workorders are submitted.
- In the Workorder Type setup, in Configuration Reference Libraries, administrators can choose whether or not to make the entry of Problems required.
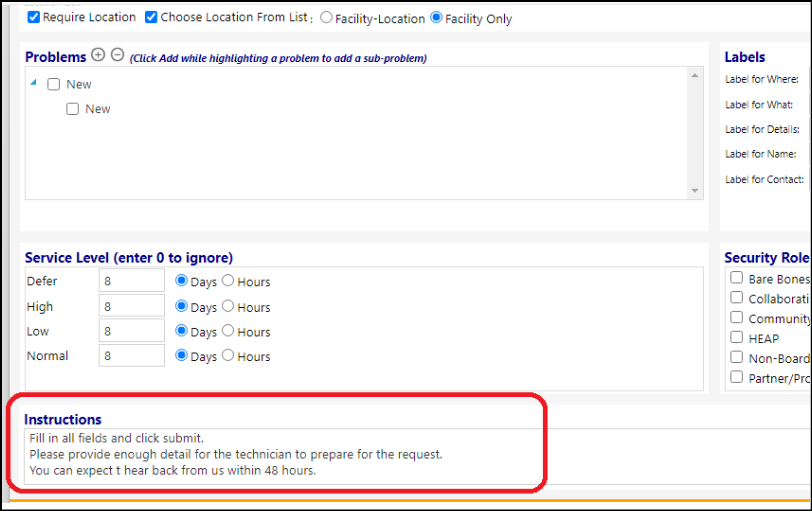
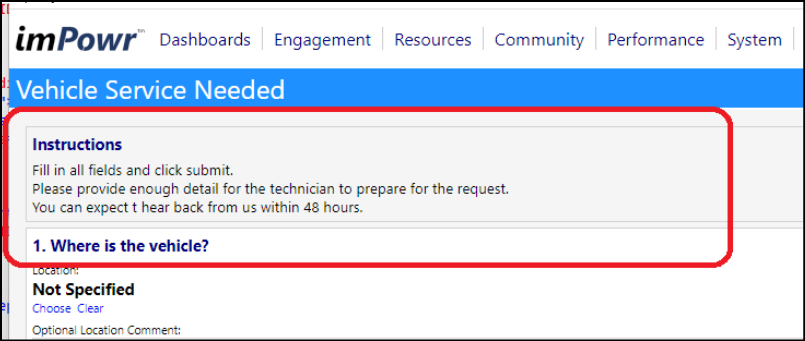
- Instructions can be optionally entered and displayed, on a per workorder type basis.
- The instructions are entered on the bottom of the Workorder Type setup page. The instructions display when the Workorder Type is selected.
- If no instructions are provided, the section is hidden.
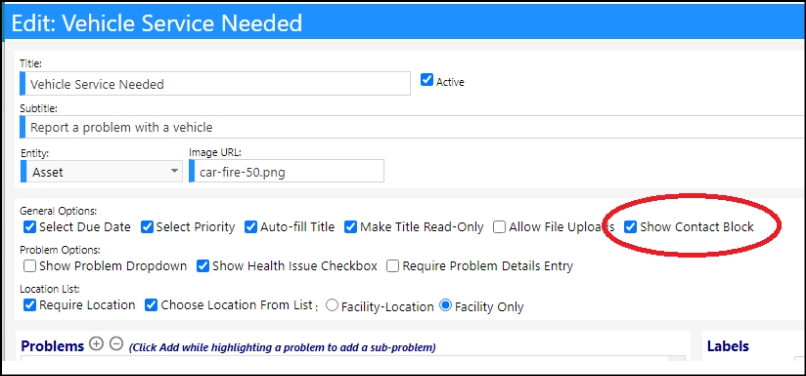
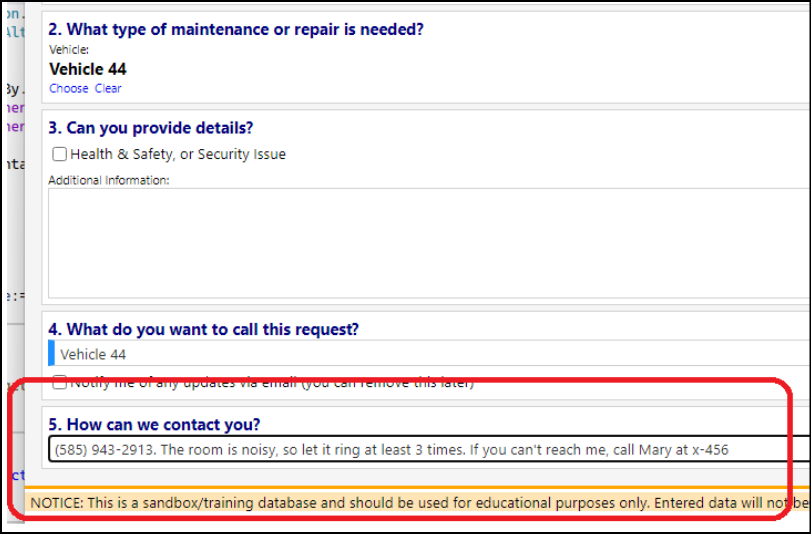
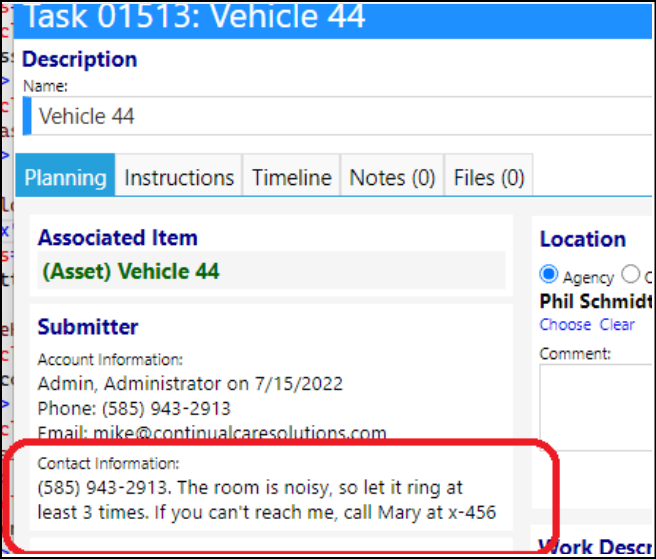
- When the option to include a Contact Block has been selected, Users can not only enter what they want to display above that contact information field, but the system will automatically populate the phone number of the submitter, which is found in the system, into that field.
- When a Technology workorder is submitted for system support, the reviewer can escalate the issue to Continual Care. All they need to do is ensure the Associated item indicates imPowr. They can then click on the button that is for Escalating to CCS.
- The escalated issue will create an email in Continual Care's support desk. Upon completion. The Continual Care support desk will work on the ticket and will provide the user with a response. The reviewer can then update the task in the system and close it out when appropriate.
