In addition to giving users access to the Dashboard page (via Account Roles), this article will explain the settings required to make various Dashboard tabs, widgets, and reports visible to users.
This article assumes the user has been provided with the proper Functional Rights in their Account Role to give them access to the Dashboards page.
Access and Edit the Activity Dashboard
- Access the Dashboard by clicking Activity Dashboard in the Summary Pages section of the Dashboards menu item.
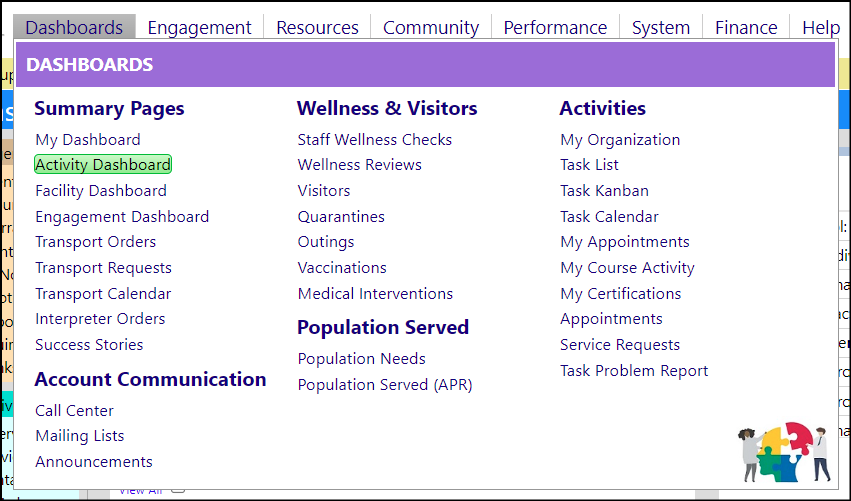
When the Dashboard page opens...
- Click the orange triangle on the left side of the screen to expand the screen and allow access to the dashboard configuration and editing tools.
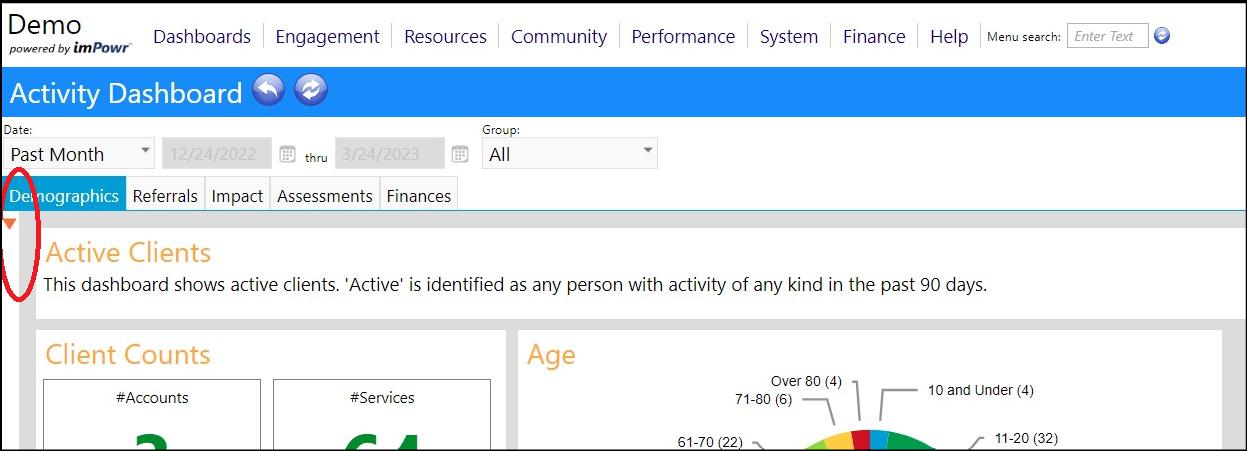
This will expand the configuration setup for the Dashboard.

- Click the arrow symbol in the Options box.
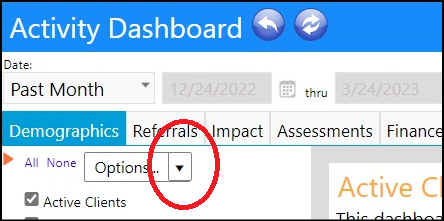
This will open up the Dashboard configuration setting Options.
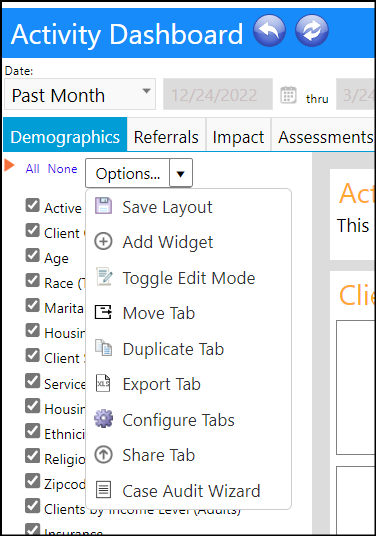
Configure Dashboard Tabs
- To add, remove, change the order of the tabs, or to add or edit the settings of which Account Roles are permitted to access the tab, click Configure Tabs.
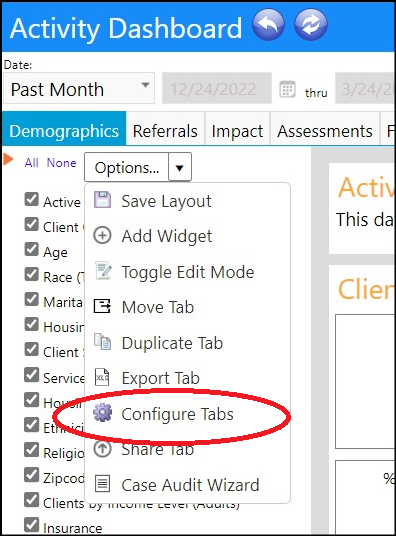
This will open the Tabs list.

Tabs List
-
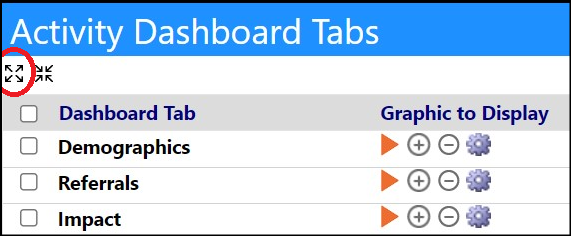
Expand the entire list of tabs by clicking on the Expand symbol.
-
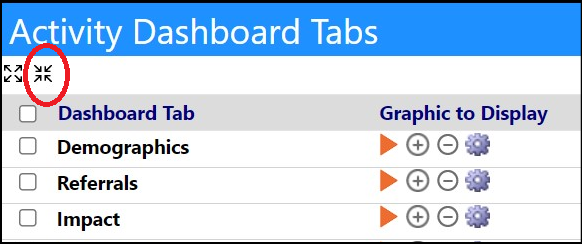
Collapse the list by clicking on the Collapse symbol.
Displaying tabs in your dashboard
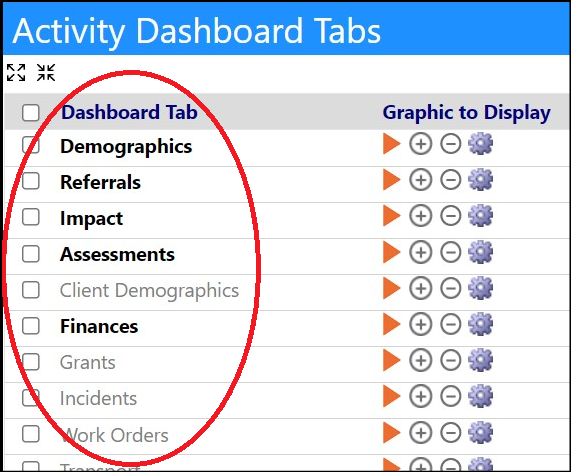
- To display or hide an existing tab from your dashboard, select the tab and click on either the Hide or Show button.

The tabs in the list that are being shown in your dashboard are displayed in bold.
Changing the name of an existing tab
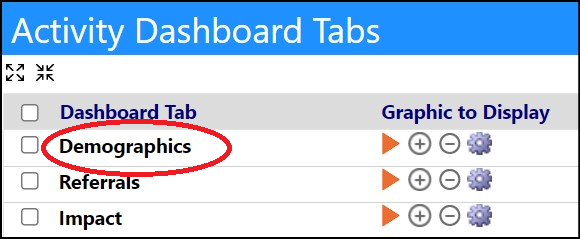
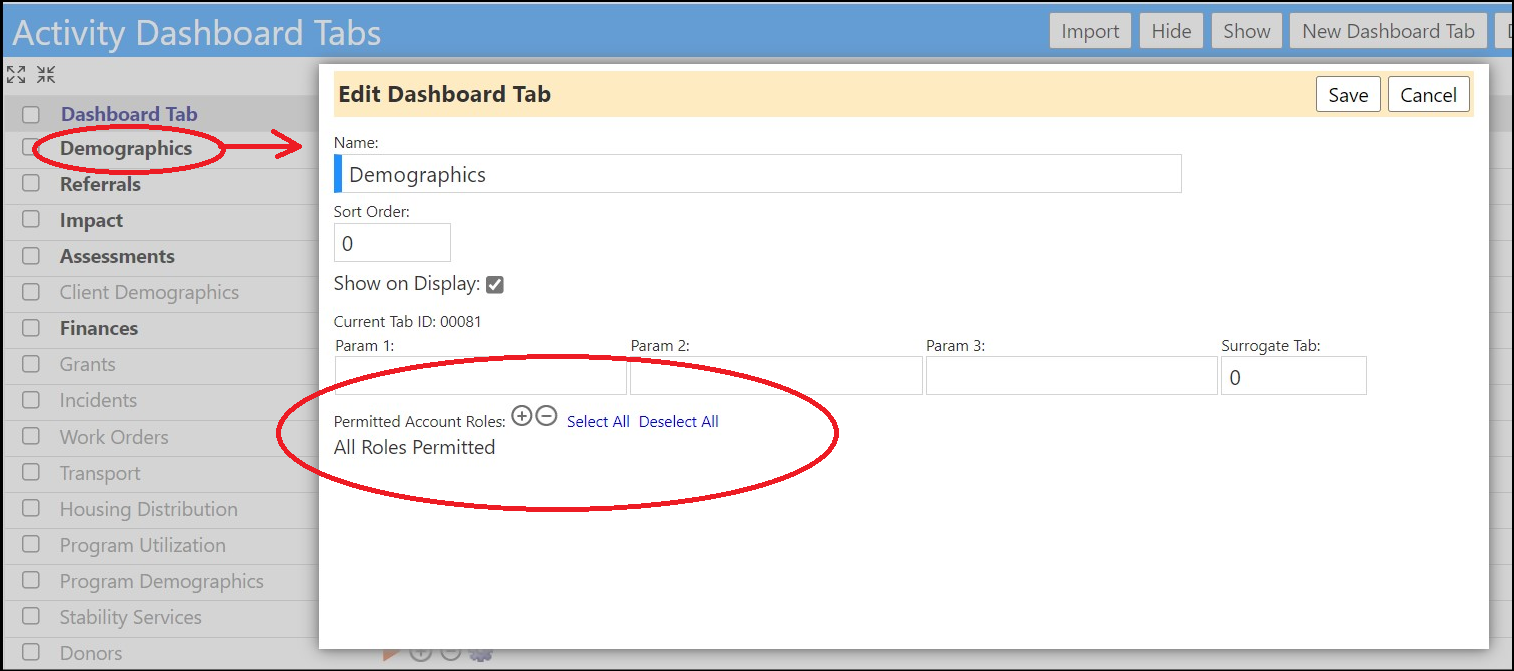
- To change the name of an existing tab, click on the tab name.
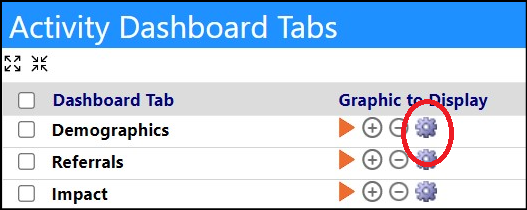
You can also click on the Setup Security button for that tab.
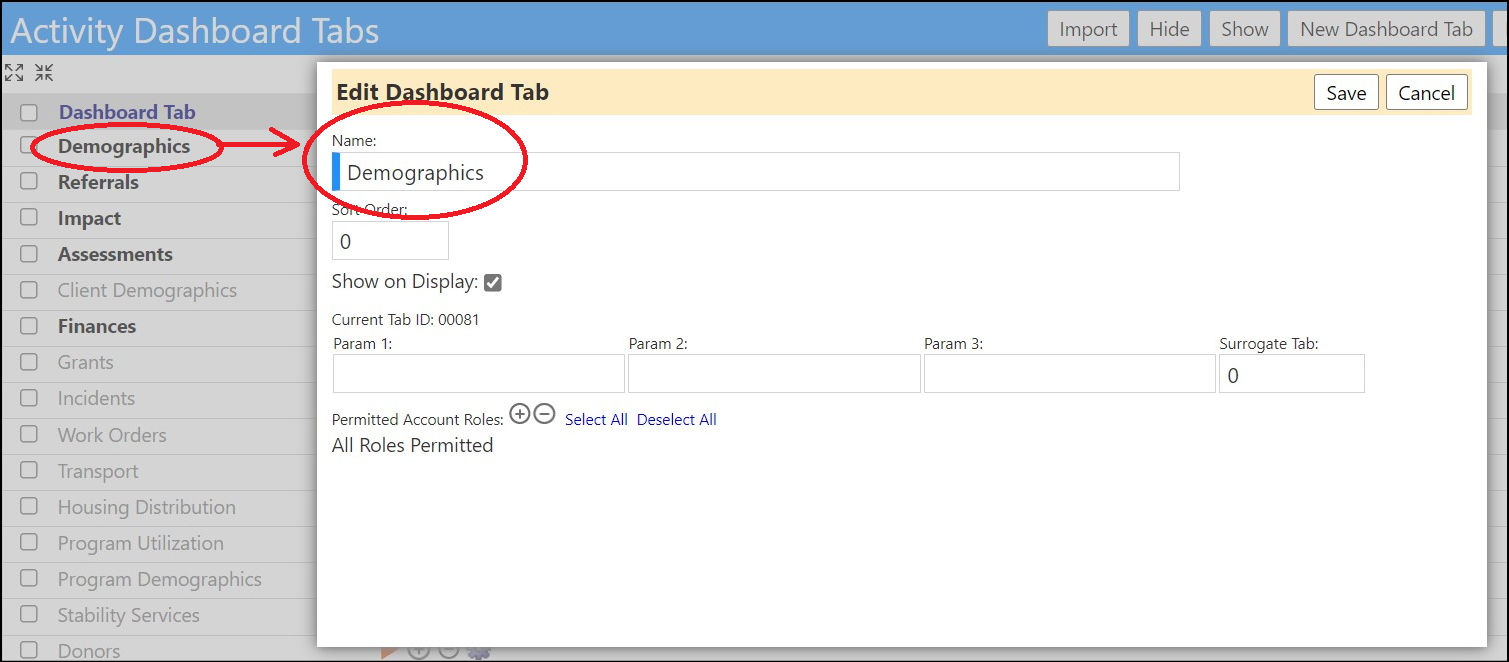
Either method will pop-up the Edit Dashboard Tab window. In here you can change the name of the tab. Be sure to Save your changes when you are done.
Changing the order of your dashboard tabs
- To change the order in which the tabs are displayed in your dashboard, click on the name of the tab or the Setup Security button for that tab.
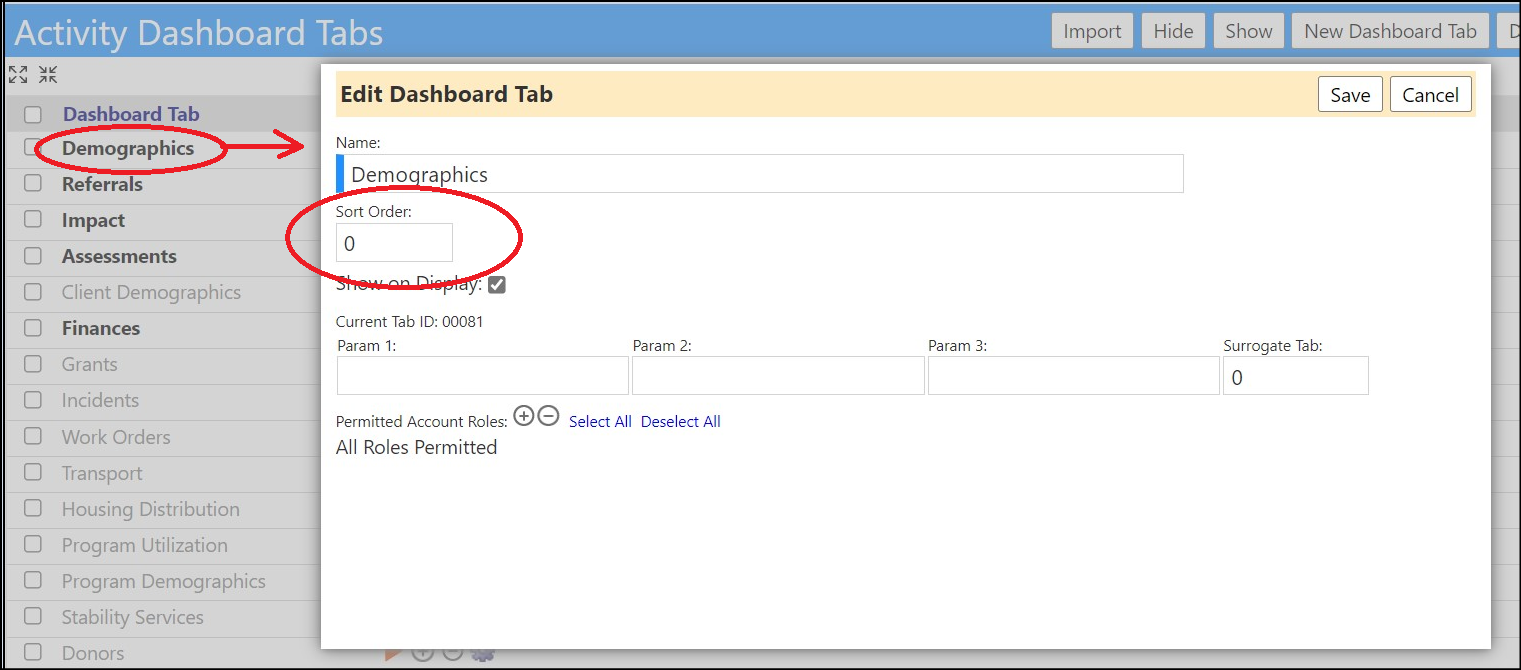
That will pop-up the Edit Dashboard Tab window. In here you can change the sort order of the tab. (The tabs sort in numerical order, with the lower numbers displaying first. Please note, if the sort order number is the same, the tabs will sort in alphabetical order.) Be sure to Save your changes when you are done.
Restricting who can view the tab in your dashboard
- To add or remove permissions resticting which Account Roles can view or access the tab, click on the tab name or the Setup Security button for that tab.
That will pop-up the Edit Dashboard Tab window. In here you can change the Permitted Account Role access to the tab.
Click on the Add '+' button to add Account Roles. Select the Account Role and click on the Delete '-' button to remove them. Be sure to Save your changes when you are done.
Adding new dashboard tabs
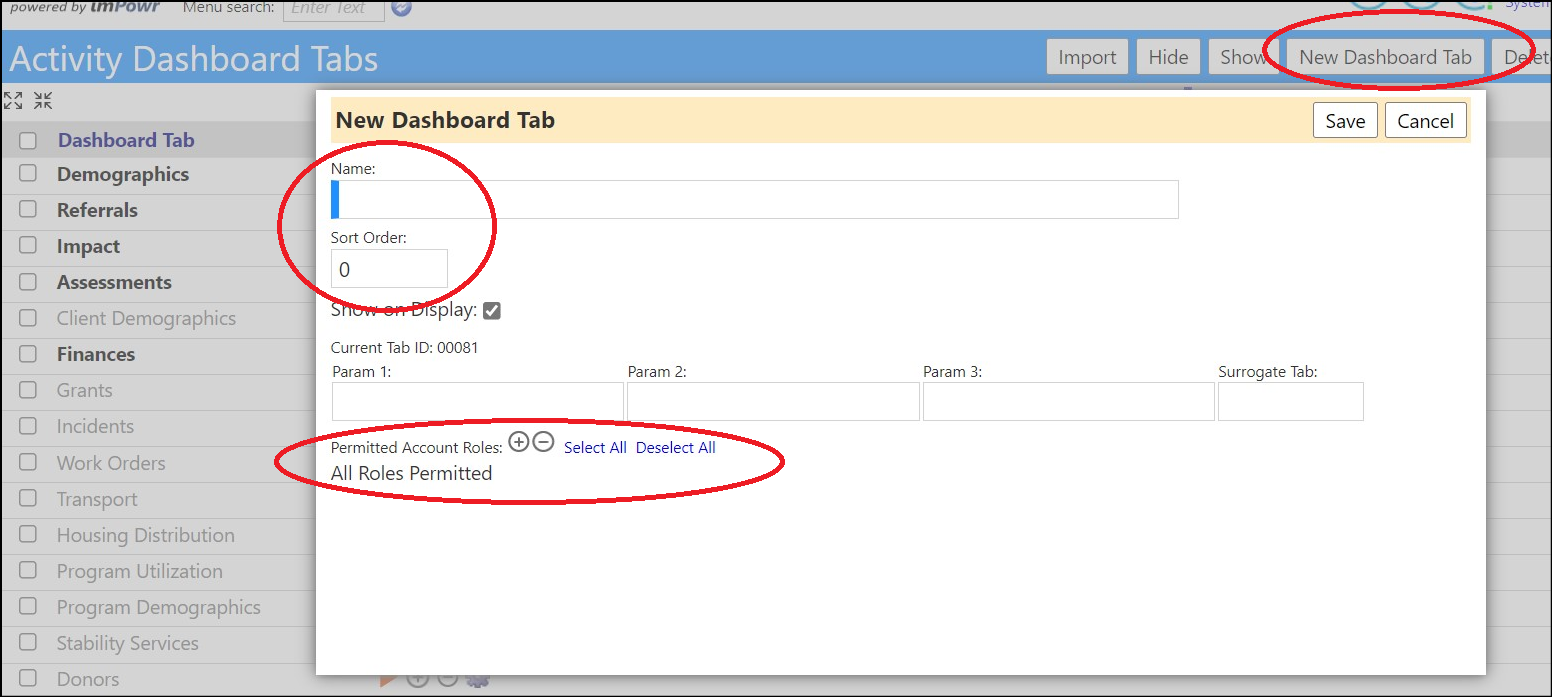
- To add a new tab to your dashboard, click the New Dashboard Tab button.

That will pop-up the New Dashboard Tab window. Add the new dashboard tab name, set the sort order, and add any desired Account Role permissions. Be sure to Save your changes when completed.
Removing dashboard tabs
- If you do not want to just hide a tab, you can also delete the tab completely. To delete an existing tab from your dashboard, select that tab and click the Delete Dashboard Tab button.

Duplicating dashboard tabs
- To copy a tab, click Duplicate Tab.
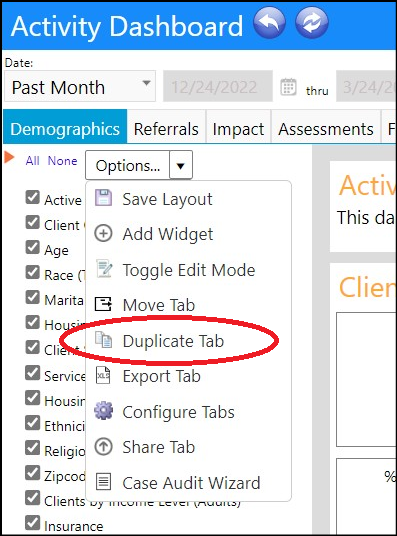
This will place an identical tab of the tab you are currently in, on your dashboard.
Sharing tabs with other instances
- To share a tab between instances, click Export Tab.
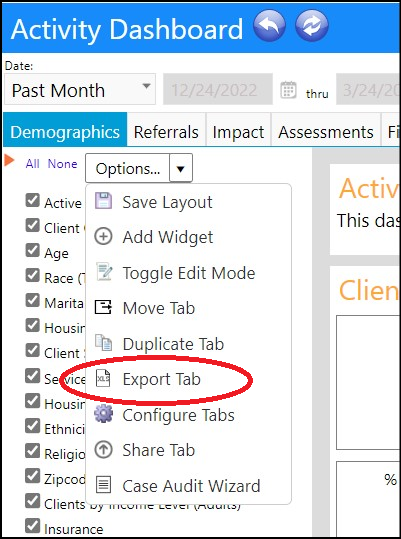
This will create an export file (in Excel) on your computer.
- Click the Import button when you want to import that tab into another instance.

That will pop-up the Import Dashboard window.
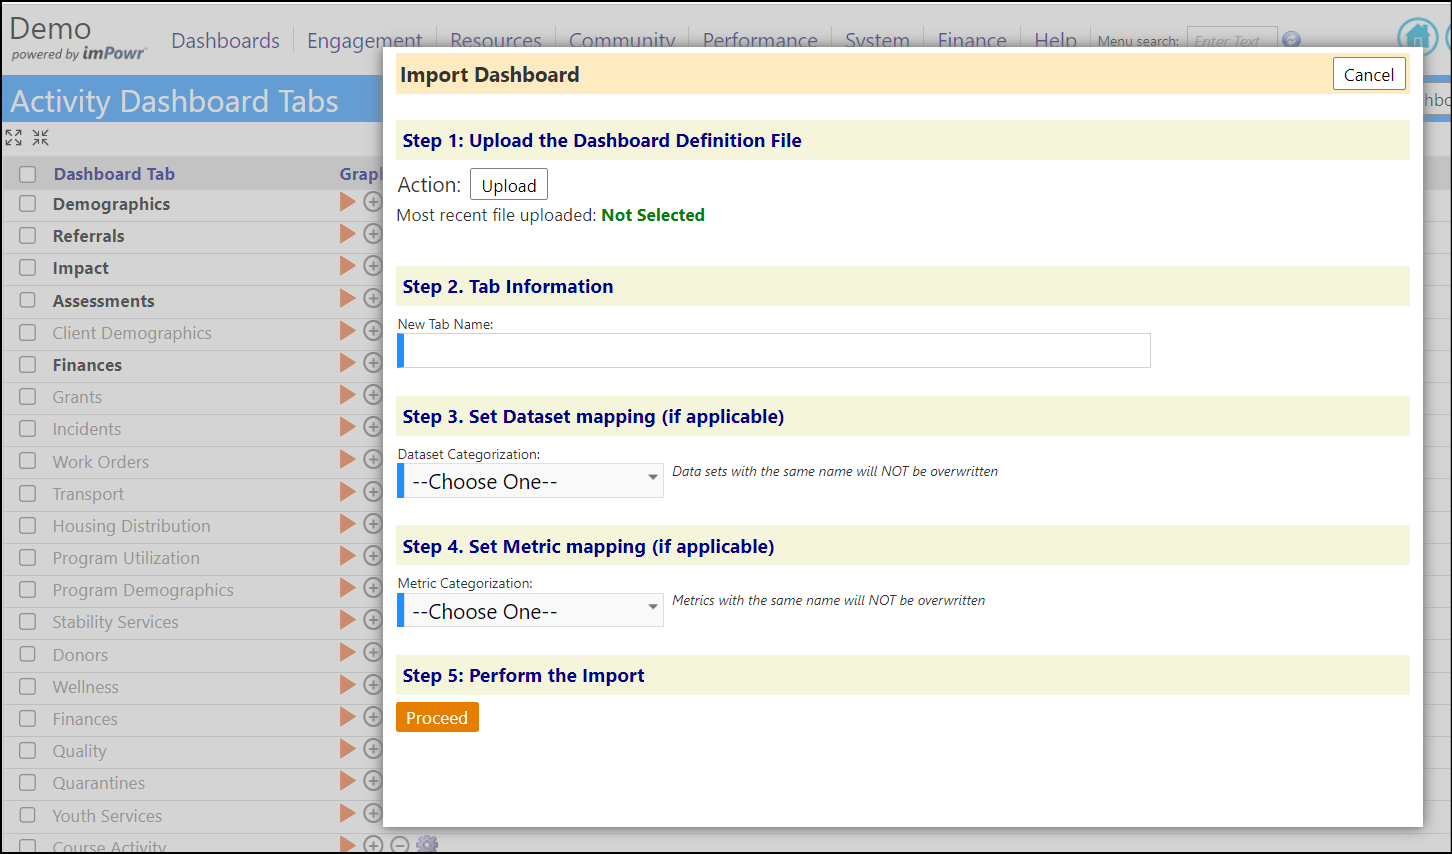
Click Upload and select the file you had exported to your computer. Enter the name you would like to use for your new tab. Select the datasets and or metrics that the tab reflects. Click Proceed.
A new tab will be created in your dashboard.
Viewing individual tabs in the tab list
- To expand a single tab to see the widgets already set up on that tab, click on the orange arrow to the right of the tab name. Conversely, to collapse the view of that single tab, click on the arrow again.
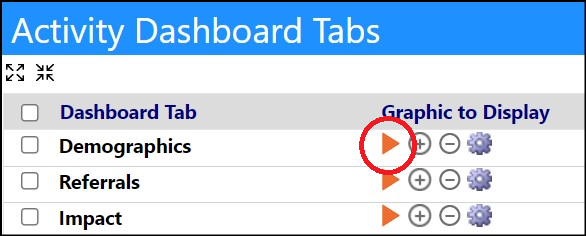
The tab will expand within the list.
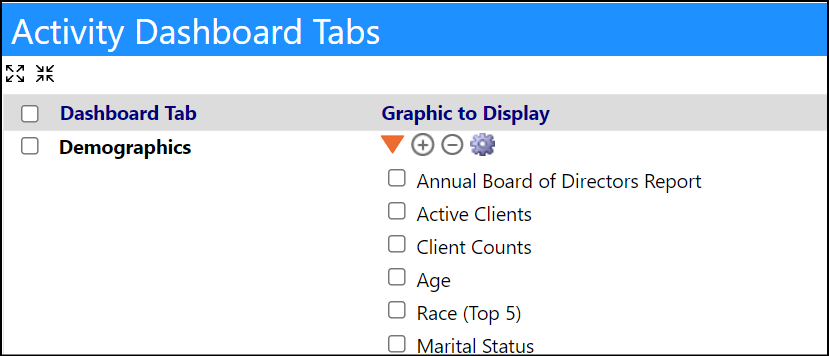
Adding and deleting widgets from within the tab list
The widgets within a tab consist of either a dataset, metric, or guage report, the metric history, or a text block.
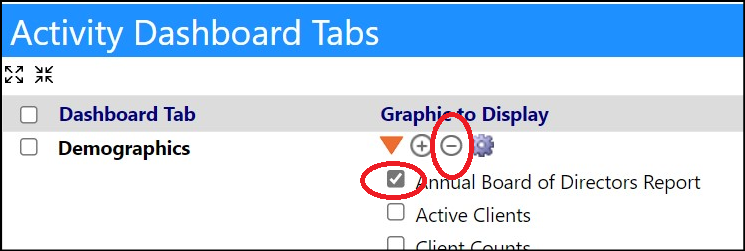
- If you are in the tab list and wish to delete a widget or report from an existing tab, select the widget, and click on the Delete '-' button.
To add a new widget or report to an individual tab, it is recommended that you go directly into the tab and click the configuration setup option of Add Widget (refer to the section on adding widgets and reports while in a tab).
Working with widgets and reports within an existing tab
As mentioned, the widgets and reports within a tab consist of either a dataset, metric, or guage report, the metric history, or a text block.
Moving widgets between dashboards
- After displaying the Options, to move your widget or report to a new dashboard in your instance, click Move Tab.
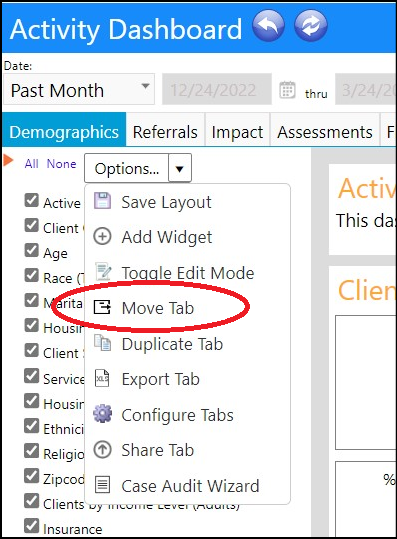
That will pop-up the Move to a New Dashboard window.
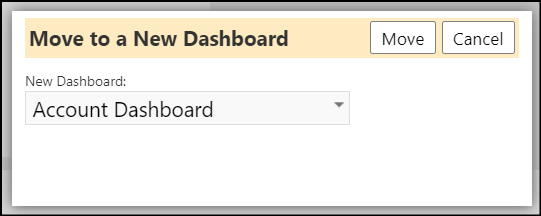
Select the new dashboard you wish to display your tab in, from the drop down list of dashboards. Click the Move button when you are ready to complete your activity.
Adding widgets or reports to the dashboard tab
- To add new widgets or reports to the dashboard tab you are in, click Add Widget.
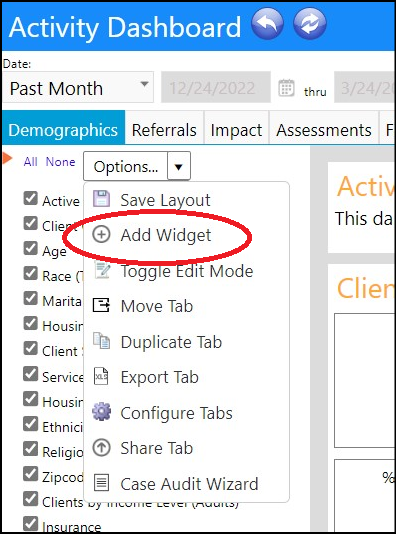
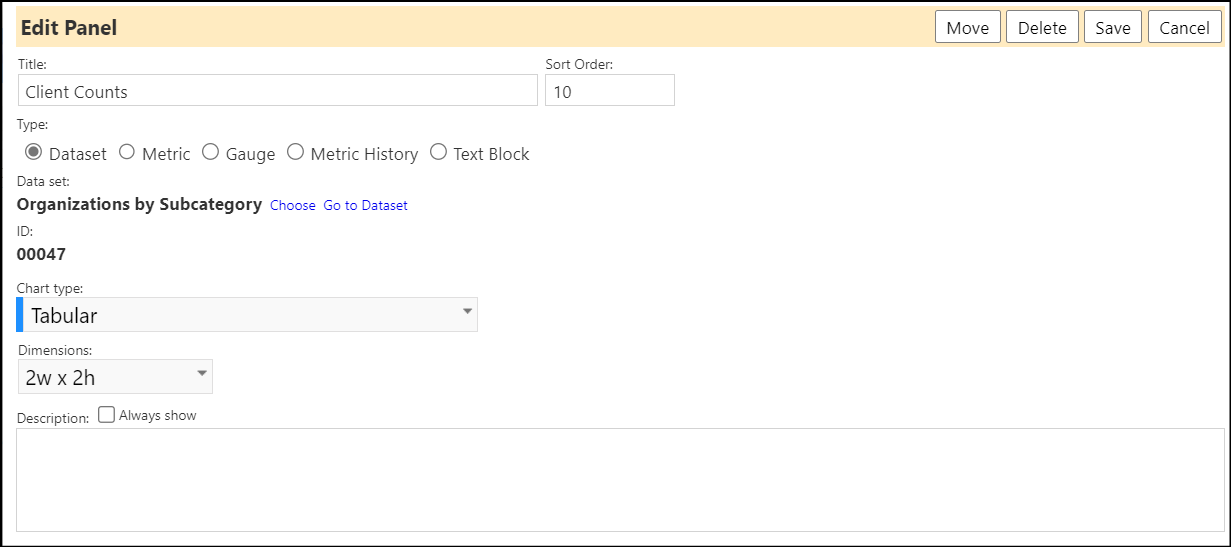
That will pop-up the Edit Panel window. In here, enter the Title for your panel where your widget or report will be displayed. Enter the sort order, if desired. Select whether you will be adding a dataset or metric, guage, metric history, or text block to that panel.
If you have selected a Dataset, enter that dataset and choose the type of chart that you wish to use to display the data from the drop down list of types. Choose the size of the panel from the drop down list. The 'w' represents the width. The 'h' represents the height. The numbers are units. If you wish the panel to extend across the screen, select one of the '100% x h' dimensions. If you want to select a panel size that better accomodates your data, but is not currently listed, select the 'Custom' dimension. (The numbers entered are based on pixels - there are approximately 72 pixels per inch, so size your panel appropriately.) You can also move the dataset widget (report) to another tab by clicking on the Move button and selecting that tab from the drop down list.
Example:
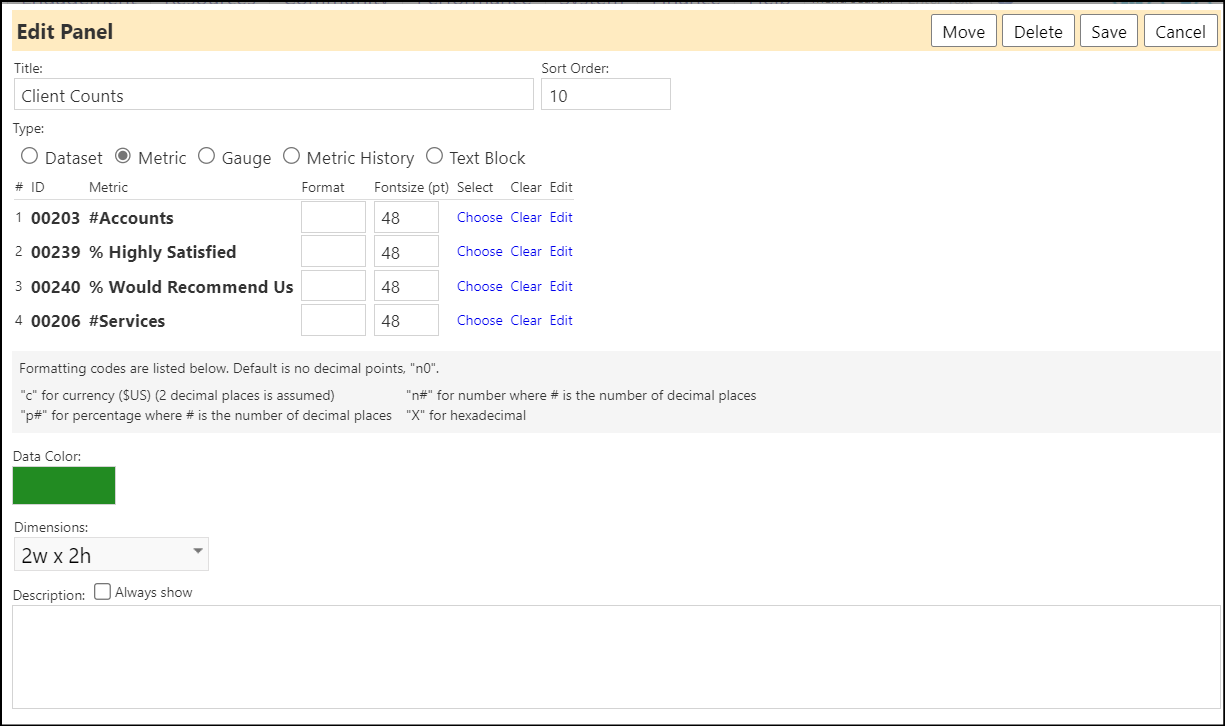
If you selected Metric, enter the metrics you wish to display. You can display up to 4 individual metrics in a single panel. The name of the metric is what will display on the dashboard. Follow the instructions to select the format of the metrics you will be displaying. You can also move the metric widget (report) to another tab by clicking on the Move button and selecting that tab from the drop down list.
Example:
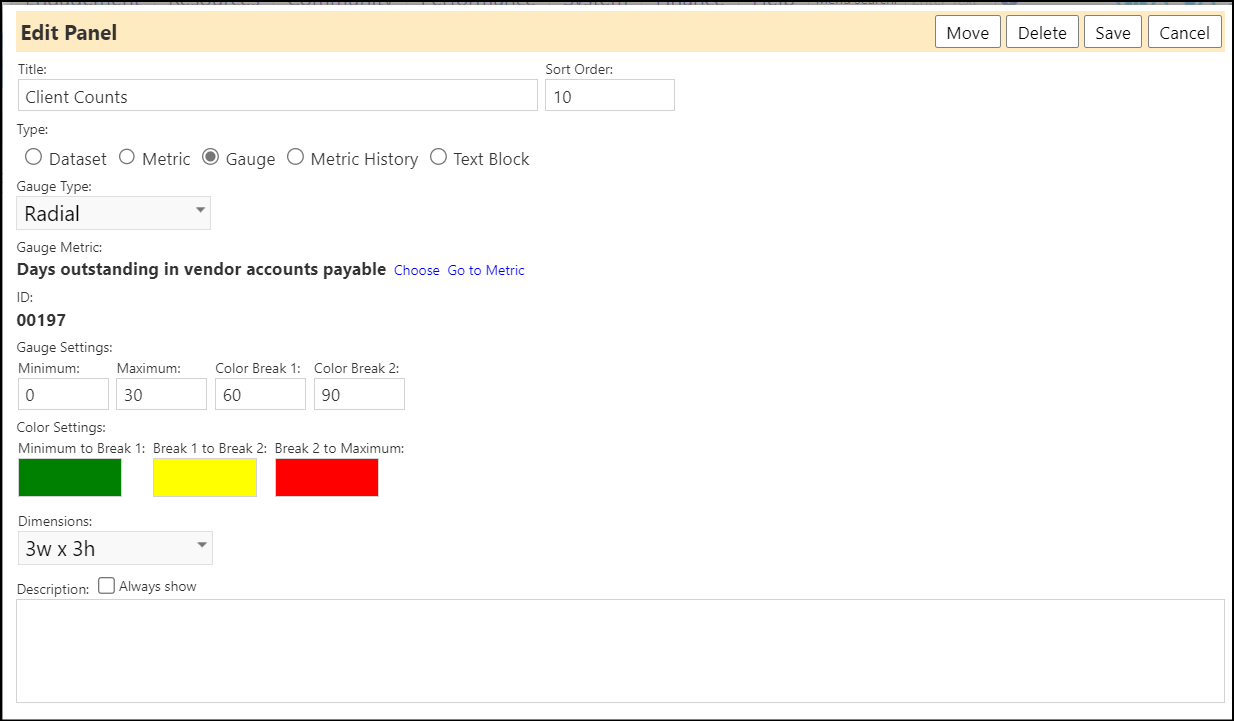
If you selected Guage, select the guage type of display, the metric, the guage settings and the colors for the specific guage transitions.
Example:
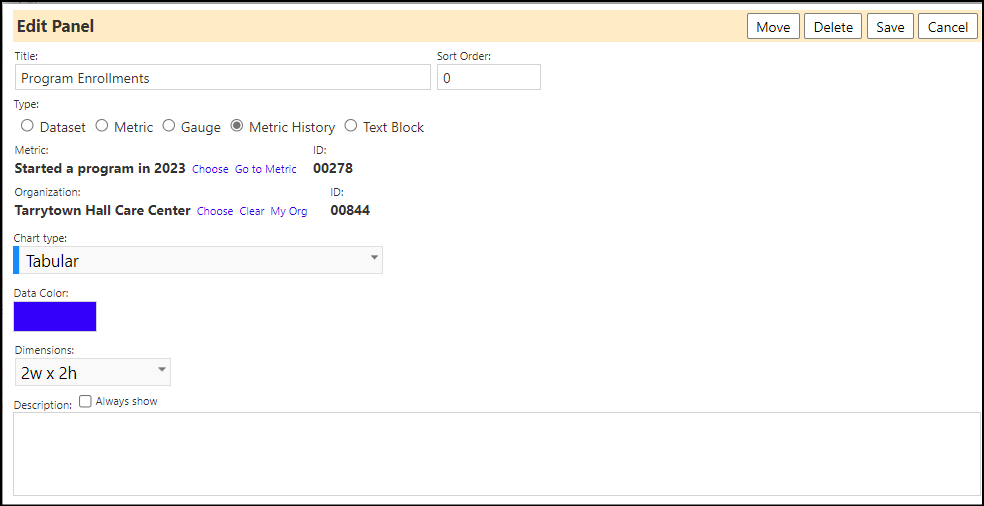
If you selected Metric History, select the metric, organization, chart type, and panel size.
Example:
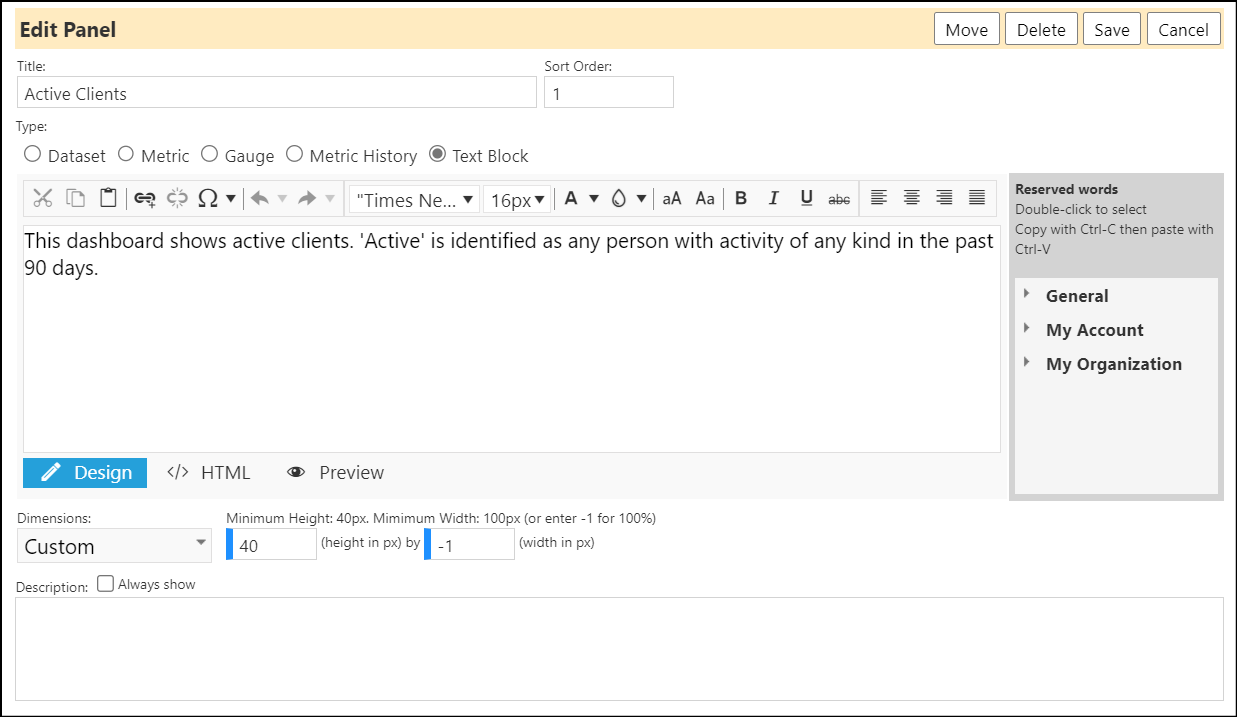
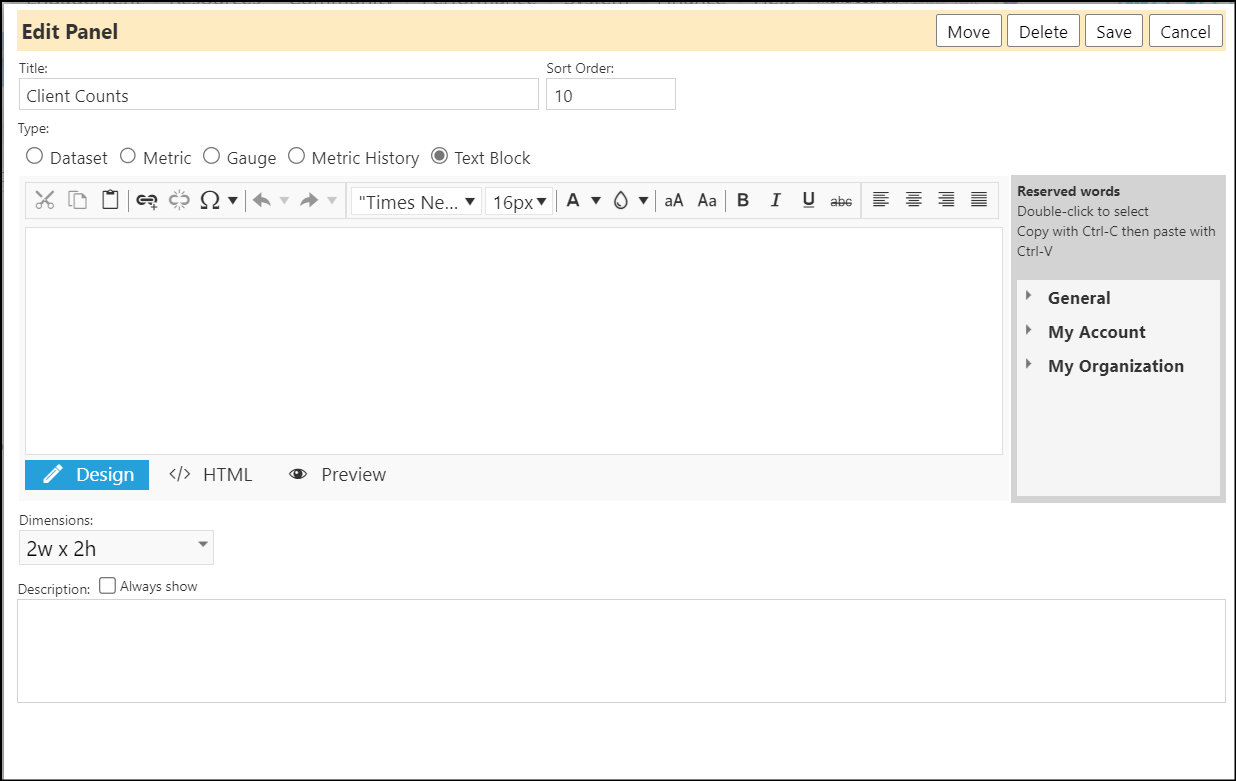
If you selected the Text Block, the settings associated with the Text Block will open. In here, you can add a name for the Title of your panel, if any, change the sort order of this block compared to the other widgets (reports) in this tab, and change the text and size of your Text Block.
Example:
You can also add any Text notes or Description that you wish to display and accompany of your widget or report. Select the "Always Show" checkbox if you wish to display your description. Be sure to click Save when you are done with your entries.
Example:

The Text blocks Display in the dashboard without any datasets or metrics.
Example:

You can always change any of the above settings by entering the Edit Mode on a particular widget.
Removing or Editing widgets or reports in a tab
- To delete or edit widgets or reports on the tab you are on, click Toggle Edit Mode.
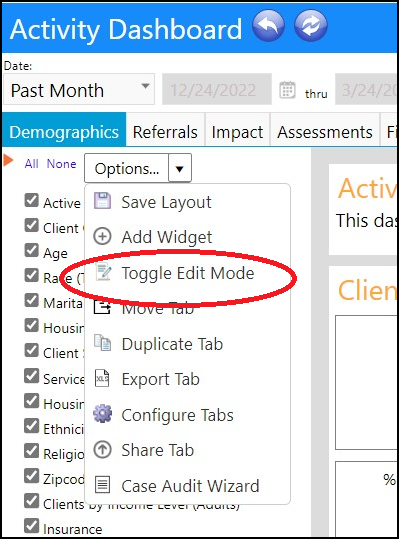
Clicking on this button will cause the Edit icon to display on your panels.
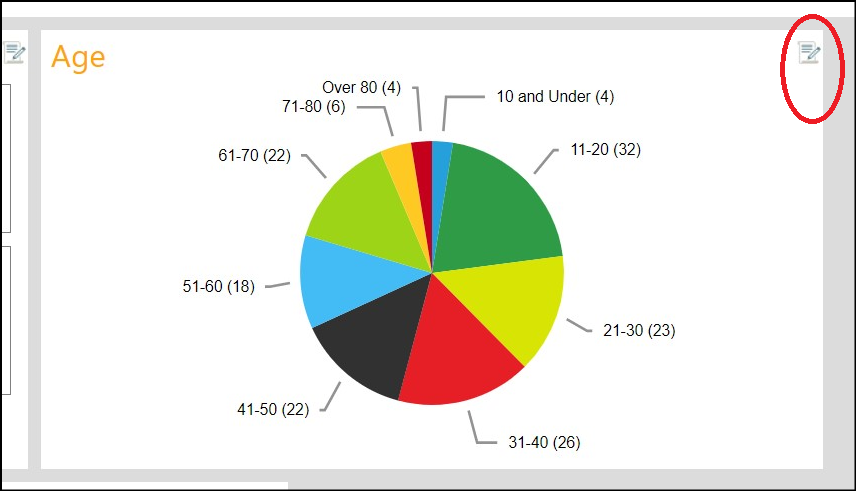
- Clicking on the Edit icon will pop-up the Edit Panel window. In here, you can choose to delete the widget or report by clicking on the Delete button. You can also change the Title of your and sort order of the widget or report within the panel, the selection of the dataset or metric for your widget or report, the wording of the text block, the type of chart display, the size of the panel, and the text instructions/description. Be sure to Save your changes and toggle Off your Toggle Edit Mode when you are done with your changes.
Note: if you selected the Text Block, the settings associated with the Text Block will open. In here, you can change the Title of your panel, if any, change the sort order, and change the text and size of your Text Block. You can also move the Text Block to another tab by clicking on the Move button.
Showing or Hiding widgets or reports in the dashboard tab
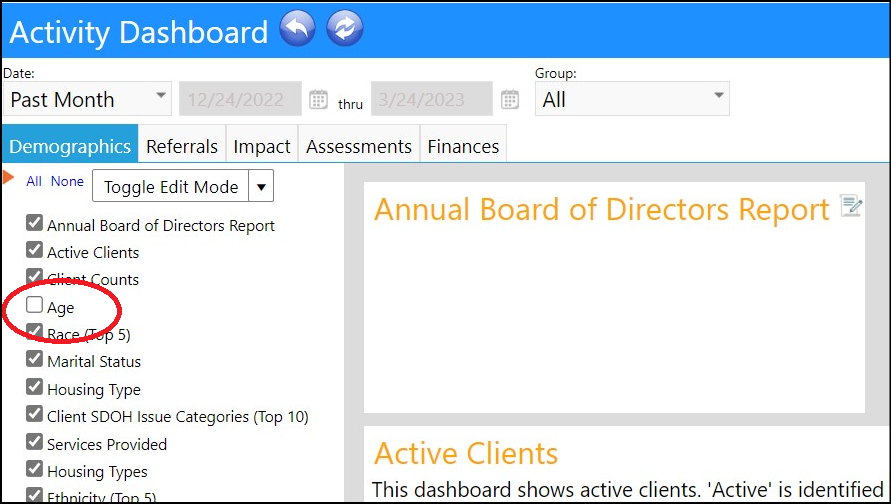
Once you are done setting up your widgets or reports, if you should decide you no longer want to display report, but do not want to delete it, just remove the checkmark to the left of the widget or report name. This will hide that widget or report from being displayed in the dashboard, but will retain everything you had set up, so you can turn it back on and display it at a later time.
Saving your changes
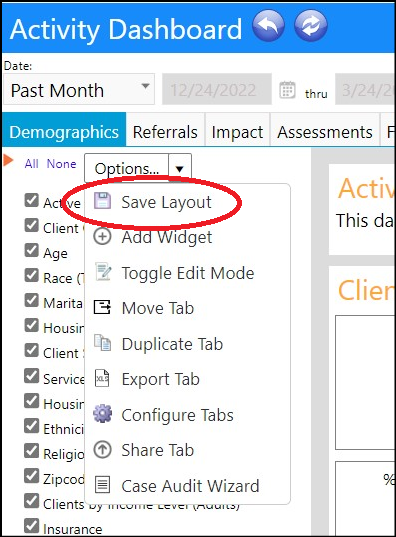
To save the changes you have made on your current tab, click Save Layout.
Like with any setup configuration, if you have any questions, please reach out to anyone at Continual Care Solution for further assistance.