This article will tell you how to set up board meetings and add attendees, notes, and files.
Set up Board Meetings:
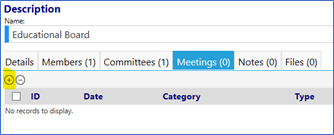
- Click on the Meetings tab.

- Click on the ‘+’ to Add a Meeting (conversely, check the box to the left of the Meeting ID and click on the ‘-‘ to remove an existing Meeting).
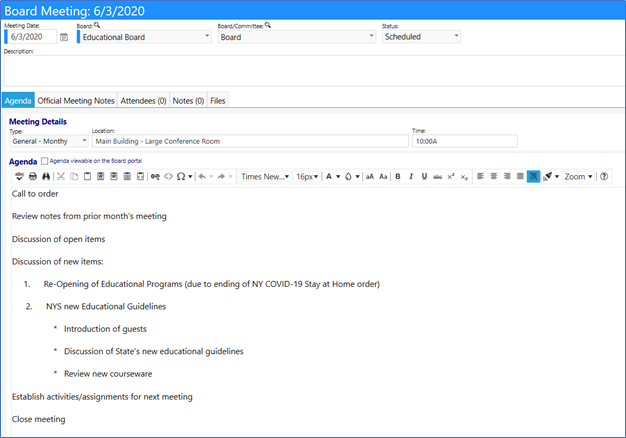
- Enter the Meeting Date.
- Select the Board from the drop-down list.
- Enter the Board/Committee from the drop-down list.
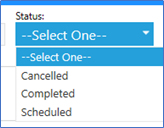
- Enter the meeting Status from the drop-down list.
- Enter a Description for the meeting.

- Click on Apply to save your entries.
Note: Clicking on Apply saves your entries but allows you to remain on the
same page. Clicking on Save will save your entries but will close the page.

Set Meeting Agenda:
- Enter the Meeting Details Type from the drop-down list .

- Enter the Location of the meeting.
- Enter the time.
- Enter the meeting Agenda.
- Check whether or not you wish the Agenda viewable on the Board Portal.

- Click on Apply to save your entries.
Note: Clicking on Apply saves your entries but allows you to remain on the
same page and activates tabs, if any. Clicking on Save will save your entries
but will close the page.
Enter Official Meeting Notes:
- Click on the Official Meeting Notes tab.

- This is the section where you would enter Meeting Notes captured from your meeting.
- Select whether you want these notes Viewable on the Board Portal after the meeting is completed by clicking in the checkbox.

- Click on Apply to save your entries.
Note: Clicking on Apply saves your entries but allows you to remain on the
same page. Clicking on Save will save your entries but will close the page.
Add Meeting Attendees:
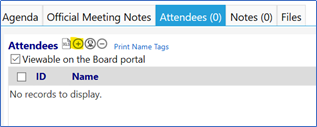
- Click on the Attendees tab.

- Click on the ‘+’ to Add an Attendee (conversely, check the box to the left of the Attendee ID and click on the ‘-‘ to remove an existing Attendee).
- Select an Account from the list of names.
- Save your selection.
Note: The Meeting Attendees list consists of Board Members Only. To add
someone who is not a Board Member, add them as a Guest.
- Click on the
 to add a Guest to the meeting.
Note: Guests must be set up in the system as a Client, Client Family, Family
Account, Staff Member, or Individual Account before they can be selected as a
guest.
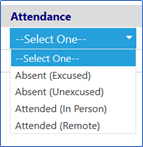
- During or following the meeting, the person taking notes may select the Attendee’s meeting attendance from the drop-down list of attendance.
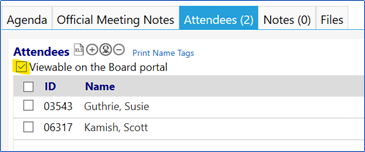
- Select whether you want the list of Attendees Viewable on the Board Portal by clicking in the checkbox.
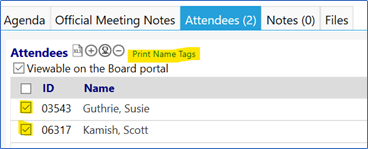
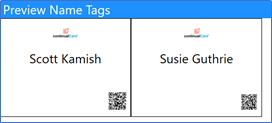
Note: to print name tags for meeting attendees, check the boxes to the left of
the Attendee IDs and click on Print Name Tags. You will be provided with the
option to size the name tag labels and preview them before printing.
- Click on Apply to save your entries.
Note: Clicking on Apply saves your entries but allows you to remain on the
same page. Clicking on Save will save your entries but will close the page.
Add Meeting Notes:
- Click on the Notes tab.

- Click on the ‘+’ to Add a Note (conversely, check the box to the left of the Note ID and click on the ‘-‘ to remove an existing Note).
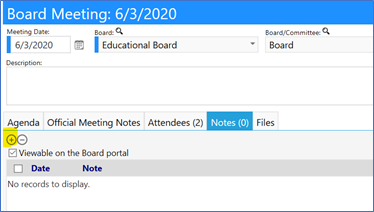
- Enter your note.

- Click on Save.
- Your newly added note will appear in the Note list.
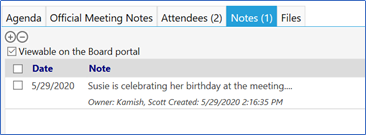
Note: If you want to delete the note, check the box to the left of the note
and click on '-'.
- Select whether you want the list of Attendees Viewable on the Board Portal by clicking in the checkbox.
- If you wish to edit the note, click on the checkerboard to the right of the note. This is the note’s Edit button.

- Edit the Note as desired and click on Save once complete.
Add Meeting Files:
- Click on the Files tab.
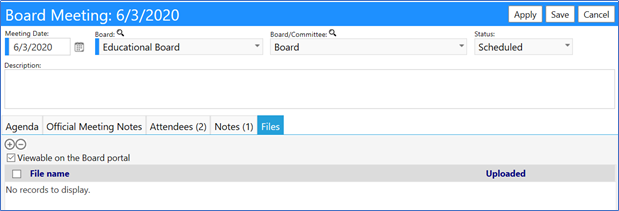
- Click on the ‘+’ to Add a File (conversely, check the box to the left of the File ID and click on the ‘-‘ to remove an existing File).
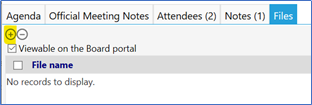
- Add your File by clicking on Select and picking a file from your computer.

- If the file selection is acceptable, the name of the file will display with a green button to its left.

- If the file did not load properly, a red button will display.
- If the file is too large or is of a type not accepted for upload, a yellow button will display, and an alert box will inform you of the issue:
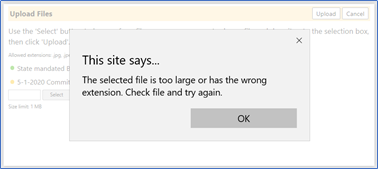
- When you click on OK, a red button will be displayed to the left of the file name.
- If you Click on Upload, only those files which have a green button will be added to your Committee files… Click on’ X Remove’ to remove that entry.
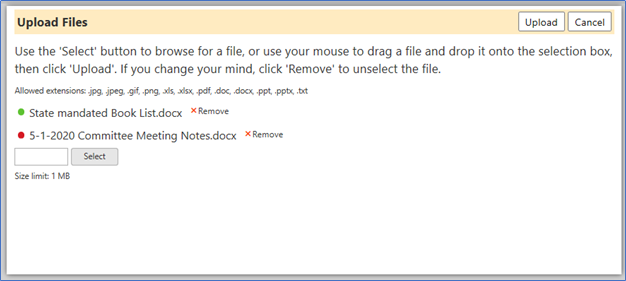
- Click on Upload to add the File to the Meeting.
- Your newly added File will appear in the File list.

- Click on Apply or Save to save your Files.
Note: Clicking on Apply saves your entries but allows you to remain on the
same page. Clicking on Save will save your entries but will close the page.
Your meeting will now appear in the Meetings list:

Attaching Board Notes:
Board members can use the Notes tab as a place to store notes related to their
board, separate from Committee or Meeting notes.
- Click on the Notes

- Click on the ‘+’ to Add a Note (conversely, check the box to the left of the Note ID and click on the ‘-‘ to remove an existing Note).
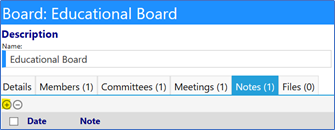
- Enter your Note.

- Click on Save.
- Your newly added note will appear in the Note list.
Note: If you want to delete the note, check the box to the left of the note
and click on ‘-‘.
- If you wish to edit the note, click on the checkerboard to the right of the note. This is the note’s Edit button.

- Edit the Note as desired and click on Save once complete.
Attach Board Files:
Board members can use the Files tab as a place to store files related to their
board, separate from Committee or Meeting files.
- Click on the Files tab.

- Click on the ‘+’ to Add a File (conversely, check the box to the left of the File ID and click on the ‘-‘ to remove an existing File).

- Add your File by clicking on Select and picking a file from your computer.

- If the file selection is acceptable, the name of the file will display with a green button to its left.

- If the file did not load properly, a red button will display.
- If the file is too large or is of a type not accepted for upload, a yellow button will display, and an alert box will inform you of the issue:
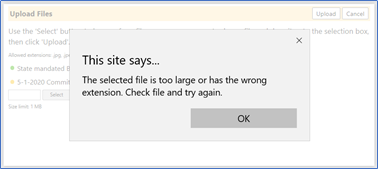
- When you click on OK, a red button will be displayed to the left of the file name.
- If you Click on Upload, only those files which have a green button will be added to your Committee files… Click on X Remove to remove that entry.

- Click on Upload to add the File to the Meeting.
- Your newly added File will appear in the Files list.

Click on Save to save your Board and all of the entries you have
made.