This article tells you how to use visitor trackers in the visitor portal.
Overview:
The approach involves these steps…
-
Initial setup (Administrator):
- Create a list of questions and attestation statement.
-
Visitor Portal User captures each visit to identify who the visitor is visiting, answer Wellness Questions, and to Attest to the truth and accuracy of their Wellness answers.
- They click a link to invoke a visitor login form.
- Portal Users enter their name and who they will be visiting, submit a wellness questionnaire, and upon submittal, their visit history and wellness attestation is tracked in the system.
-
Administrators and auditors can log into imPowr at any time to view the responses.
- View the wellness submissions made and a quick assessment of risk.
- View a history of visits and trace who else the visitor came in contact with.
- Export the data to Excel.
Configuring the list of wellness questions and attestation text:
- Refer to the section on creating or editing wellness questions and attestation text.
Configuring the Visitor Portal Messages:
- Refer to the section on creating or editing Visitor Portal Messages.
Preparing for Activation of the Visitor Portal:
A Staff Member will need to sign in to the Visitor Portal to activate it, after any time it is turned off and before Visitors can begin to use it. Once signed in, it can remain that way for as long as the system allows it to remain turned on without any activity.
Staff members with this responsibility will need to have the appropriate account roles assigned to them, which give them access to the Visitor Portal.
Setting Up or Editing the Staff Member Account Role so they can sign into the portal
If not already completed by Continual Care Solutions, go to the account role screen and either set-up or confirm the Account Role user rights…then provide Visitor Portal access to your staff portal users (see below).
- Click on System.
- Click on Account Roles in the Settings & Security section of the System menu:
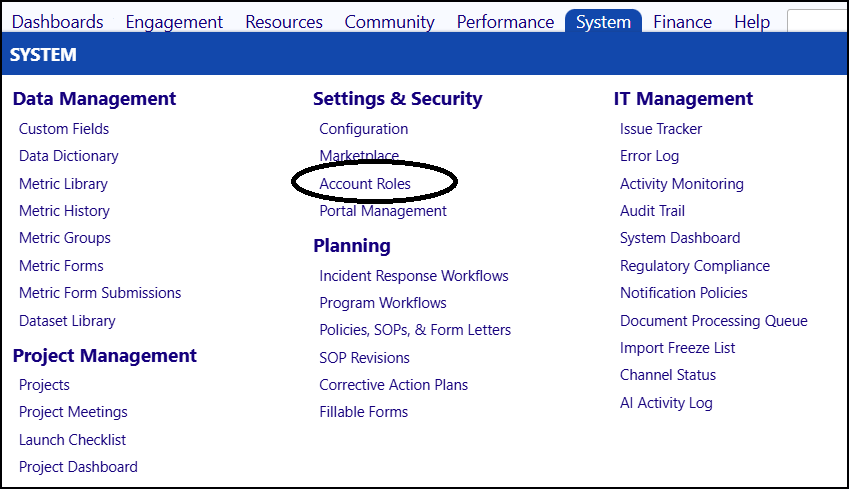
The Account Role rights will be displayed:
![]()
- Click on Portal Rights “Edit”.
![]()
- Scroll down to Portal – Visitor and expand the entry by clicking on the arrow to the left of the selection box.
- Ensure the Visitor Portal Login is selected – if not, check the box to select.
![]()
- Click on Save to save your Portal Rights selection.
- Click on Save and exit the setup screen and save your Account Role settings.
User Workflow:
NOTE: For the remainder of this document, we will assume the appropriate Account Role has already been established, the Visitor Portal is made available, and the Staff Member has been set up as a Visitor Portal User. The Staff Member should also have been provided with the following link to access the portal:
https://xxxxxx. impowr.net/forms/Home?P=13 Where “xxxxxx” is your imPowr website name.
Staff Member Logging In (Visitor Portal Activation):
- Launch the application by accessing your imPowr website.
NOTE: It is a good idea to save the link as a favorite for future use, to avoid having to type it in every day. The way you do that varies by browser. In Chrome you can just click the ‘bookmarks’ star that appears at the upper left of the browser window.
- When the login screen appears…
![]()
- Enter the Staff Member’s (Visitor Portal User’s) Login or Email address.
- Enter their password.
- Click Sign in.
NOTE: Users may find it convenient to have their browser remember their log in credentials, so they don’t have to enter it every day.
After a successful login, you will be directed to the Visitor Portal visitor screen.
Troubleshooting:
If the Visitor Portal does not seem to activate after taking these steps, please try the following before contacting Continual Care Solutions:
Access the Configuration screen in the Settings & Security section of the System menu.
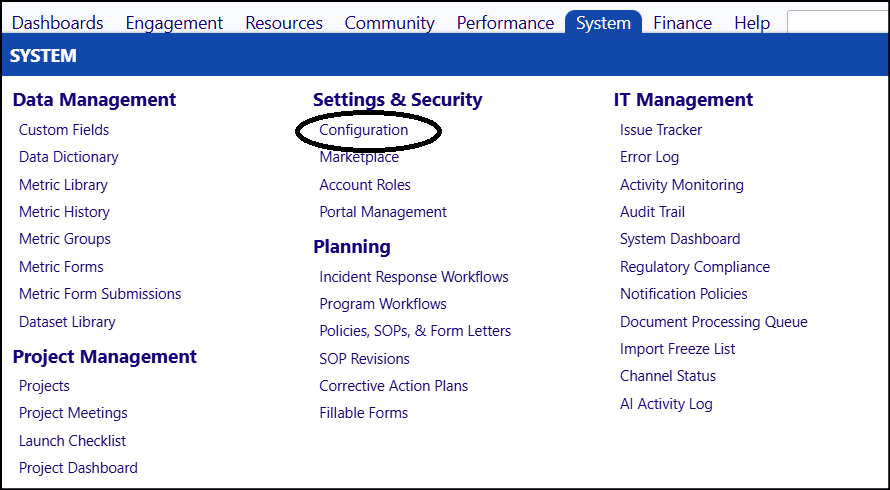
- Click on Portal Types.
- Select the “Visitor Portal” portal type.
- Make sure Portal Active is checked. If it is not, check the Portal Active
- Click on Save Settings.
![]()
- Click on Options and select
- Click on Visitor Wellness Check – Active.
- Make sure the Setting value is “yes”. If it is not that value, change it to “yes”.
- Click on Save & Apply.
![]()
Visitor Logging In:
When a visitor comes to the portal, the following is the first screen they see:
![]()
The initial welcome message is user configurable (refer to the section on text configuration).
Clicking the “New Visitor” button, the Visitor Portal displays Visitor sign in screen with both the questions you set up as well as the visitor attestation for their responses:
![]()
The Instructions are user configurable – please refer to the section on configuring Visitor Portal Messages.
The fields with a blue bar (First, Last, and Who you are visiting today) are mandatory, as are the Wellness Questions and the Attestation & Submission. All other fields are optional.
- Select an answer for each question and attest to the accuracy of your entries.
- Click Submit
NOTE: On a mobile device, the screens may look a little different and you may need to “zoom in” with your fingers to make the text a little larger and easier read.
![]()
Depending on the submitted response, the visitor will receive one of the following messages:
![]()
![]()
After a few seconds, the message will go away, and the screen will return to the “New Visitor” display to await another visitor.
![]()
Viewing Entries - Administrator View:
- Log in to your imPowr website, as the Administrator Role.
- Click on Dashboards in the menu.
- Click on Visitors in the Wellness & Visitors section:
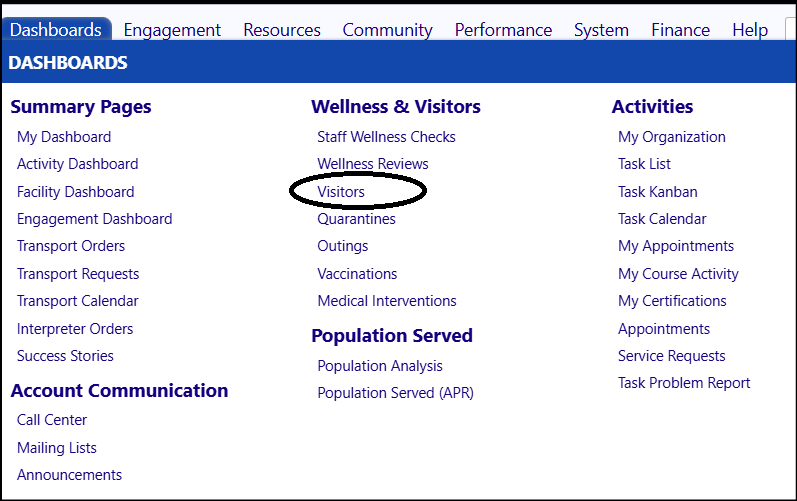
The Administrator view of the Visitor Tracker will be displayed:
![]()
View the list and filter further, as needed.
Note that the List displays the Most Recent Visit, the Most Recent Wellness, and the Most Recent Person Visited.
- Click on the Visit ID to see a history of the Visitor’s most recent visit as well as their past visits and Wellness Check attestations:
![]()
- Click on Edit to add or change any of the Visitor’s contact information or comments.
- Click on Save when completed with your updates or changes.
![]()
![]()
Based on the Staff Portal User’s response, and the risk rules you set up when you set up your questions, the level of Risk is established.
- Click the Export icon on top of the window to generate an export of the summary.
![]()
Deleting a Visit Attestation:
There may be times when a Visit is added in error or is done for training or Testing purposes. These may be deleted – but only one at a time and a special privilege is required. This privilege should be restricted to only those permitted to make that compliance related assessment.
To delete a visit…
- check the box to the left of the visitor’s name.
- Click on Delete.
![]()
Visitor Tracker Questions:
When a user submits a Visit they have to answer specific wellness related questions and either receive a message indicating their response indicates a potential risk and they should reschedule their visit for another day, or their responses are acceptable, a message indicating they can continue with their visit is displayed.
Those wellness questions and the messages are fully customizable.
To create the wellness questions, access the Configuration screen in the Settings & Security section of the System menu.
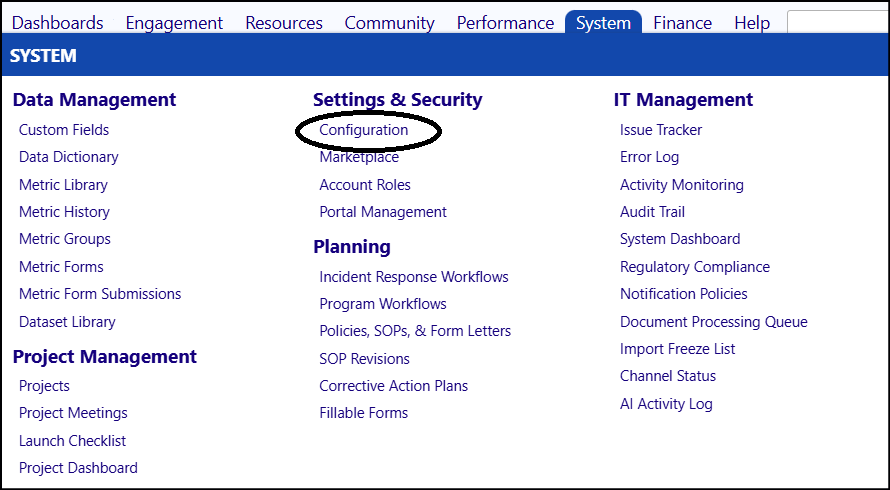
- Select Portal Types from the list:
![]()
- Select the “Visitor Portal” portal type and click Additional Settings.
![]()
- Fill out or Edit the Attestation and Questions
- Ensure your Risk Response determinants are appropriate.
- Click Save.
![]()
There are 4 types of questions which may be asked:
- Yes/No
For these kinds of questions, the Staff Member can only answer with a Yes or a No. Depending on what you set up as your Risk Response, the “At Risk” indication may or may not occur. The “At Risk” Response is set by you entering what you want the trigger to be, in the Risk Response field. If you indicated the trigger would occur if someone were to answer “Yes” for this question… if they did answer the question in that way, they would get a Wellness of “At Risk” regardless of how they answered their other questions; comparatively, if they answered “No” for that question, for that question, there would be no concerns and their potential “At Risk” status would only be based on the other questions.
- List
These kinds of questions allow the Staff Member to select their answer from a drop-down list of answers. The drop-down list must be created for them in the set-up. Answers are separated by a pipe symbol (“|” found on the key above the Enter key on your keyboard). For example, to create a drop-down list of the letters A, B, and C, I would create the List Choice as A|B|C. Depending on what you set up as your Risk Response, the “At Risk” indication may or may not occur. The “At Risk” Response is set by you entering what you want the trigger to be, in the Risk Response field. If you indicated the trigger would occur if someone were to select one specific answer from the drop-down list for this question… if they did answer the question in that way, they would get a Wellness of “At Risk” regardless of how they answered their other questions; comparatively, if they selected a different answer for that question, for that question, there would be no concerns and their potential “At Risk” status would only be based on the other questions.
- Text
This kind of question allows a user to enter free text. The answer is not tracked and is not used to trigger any kind of Risk. It is not common to use this type of question in the Visitor Tracker, but it could be used for purposes such as “Enter your Visitor Badge number”, etc.
- Temperature
This kind of question allows the temperature to be manually input into the field – so there is a record of the temperature and it is kept as a record with the other Wellness Check responses.
NOTE: You may add or edit questions at any time. You may only delete a question if no data has been collected for it. Please review the Log Count next to the question in the set-up page. If any number greater than ‘0’ exists, then data has been collected (i.e., the question has been responded to by someone) and the question can no longer be deleted (but it still can be edited and its sort order changed).
- Click on Save when completed with your set-up/changes.
Visitor Tracker Messages:
Portal Instructions, Thank you (wellness pass), and At Risk (wellness fail) messages are completely user-configurable and can be set-up in the configuration page.
To change the Visitor Portal messages…
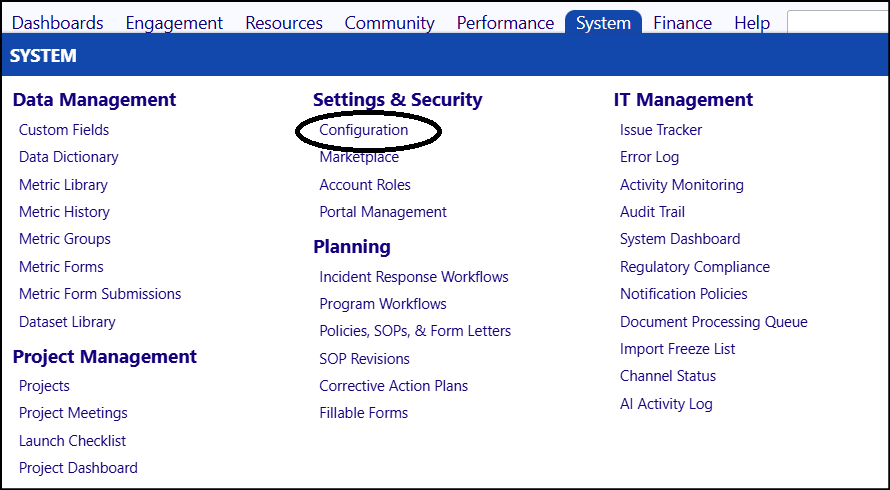
- Remain in the Configuration in the Settings & Security section of the System menu:
-
Select Text Blocks.
-
Select Visitor Portal.
-
Select the message(s) you wish to modify:
- Visitor Portal Health Attestation.
- Visitor Portal Instructions (Detailed).
- Visitor Portal Instructions (Initial).
- Visitor Portal Thank you.
- Visitor Portal Wellness Fail.
![]()
![]()
![]()
![]()
![]()
![]()
Note: both text and pictures can be entered into the documents. Feel free to add in pictures, graphics, change fonts, font sizes, etc.
- Click on Save when you are completed with your changes.