This article will tell you how to set up and view wellness checks.
Overview:
The approach involves these steps…
-
Initial setup (Administrator):
- Create a list of questions and attestation statement.
- Create a security role for users that gives them access to the staff portal.
- Upload a list of all Staff Portal Users and send them a link. (Continual Care will upload the initial list of Users – please provide their name, email, manager’s name, and manager’s email)
-
Staff Portal User logs into the system each day to answer Wellness Questions and to Attest to the truth and accuracy of their answers.
- They click a link to invoke a login form.
- Staff Portal Users log in with their email address and employee id, and upon login they answer the questions and click ‘Submit’.
-
Administrators and auditors can log into imPowr at any time to view the responses.
- View submissions made and a quick assessment of risk.
- Export the data to Excel.
Configuring or Editing the list of questions and attestation text:
Create or Edit a list of questions and attestation text, by going to the Configuration page and accessing the Portal setup tab:
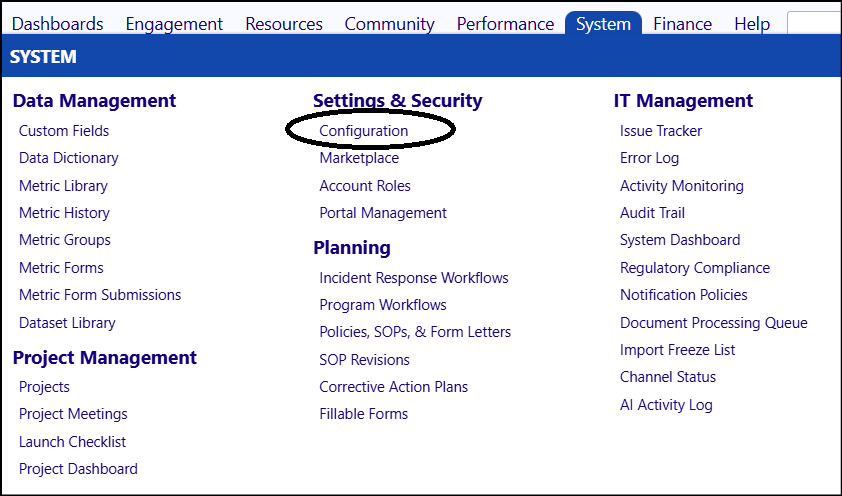
- Click on Configuration in the Settings & Security section of the System menu:
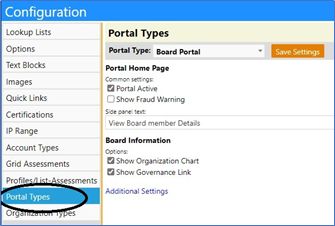
- Select Portal Types from the list:
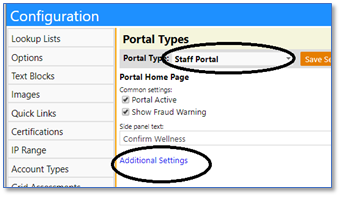
- Select the “Staff Portal” portal type and click Additional Settings
- Fill out or Edit the Attestation and Questions
- Ensure your Risk Response determinants are appropriate
- Click Save
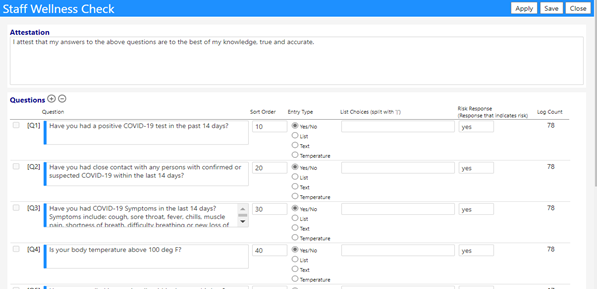
There are 4 types of questions which may be asked:
- Yes/No
For these kinds of questions, the Staff Member can only answer with a Yes or a No. Depending on what you set up as your Risk Response, the “At Risk” indication may or may not occur. The “At Risk” Response is set by you entering what you want the trigger to be, in the Risk Response field. If you indicated the trigger would occur if someone were to answer “Yes” for this question… if they did answer the question in that way, they would get a Wellness of “At Risk” regardless of how they answered their other questions; comparatively, if they answered “No” for that question, for that question, there would be no concerns and their potential “At Risk” status would only be based on the other questions.
- List
These kinds of questions allow the Staff Member to select their answer from a drop-down list of answers. The drop-down list must be created for them in the set-up. Answers are separated by a pipe symbol (“|” found on the key above the Enter key on your keyboard). For example, to create a drop-down list of the letters A, B, and C, I would create the List Choice as A|B|C. Depending on what you set up as your Risk Response, the “At Risk” indication may or may not occur.
The “At Risk” Response is set by you entering what you want the trigger to be, in the Risk Response field. If you indicated the trigger would occur if someone were to select one specific answer from the drop-down list for this question… if they did answer the question in that way, they would get a Wellness of “At Risk” regardless of how they answered their other questions; comparatively, if they selected a different answer for that question, for that question, there would be no concerns and their potential “At Risk” status would only be based on the other questions.
- Text
This kind of question allows a user to enter free text. The answer is not tracked and is not used to trigger any kind of Risk. It is not common to use this type of question.
- Temperature
This kind of question allows the temperature to be manually input into the field – so there is a record of the temperature and it is kept as a record with the other Wellness Check responses.
Note: You may add or edit questions at any time. You may only delete a question if no data has been collected for it. Please review the Log Count next to the question in the set-up page. If any number greater than ‘0’ exists, then data has been collected (i.e., the question has been responded to by someone) and the question can no longer be deleted (but it still can be edited and its sort order changed).
If not already completed by Continual Care Solutions, go to the account role screen and either set-up or confirm the Account Role user rights…then provide Staff Portal access to your staff portal users (see below).
- Click on System
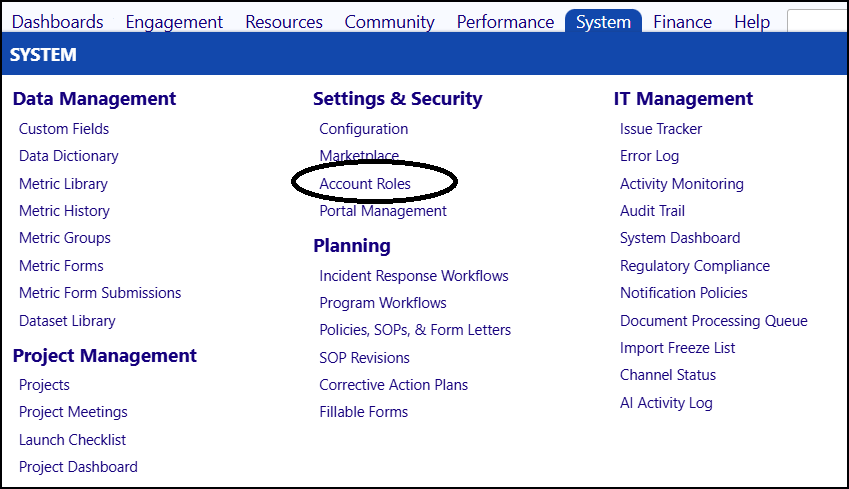
- Click on Account Roles in the Settings & Security section of the System menu:
The Account Role rights will be displayed:

- Click on Portal Rights “Edit”

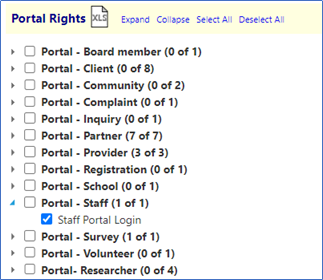
- Scroll down to Portal – Staff and expand the entry by clicking on the arrow to the left of the selection box
- Ensure the Staff Portal Login is selected – if not, check the box to select
- Click on Close.
- Click on Save and exit the setup screen
Making the Portal available to Staff Portal Users:
NOTE: In order to set an Account up for Portal Access, not only must the Portal exist in the system and be viewable, but the Account Role must also be set up. The person setting these up must have the System Administrator Mode. The initial set-up will be made by Continual Care Solutions – subsequent set-ups will need to be made by the Administrator.
- Provide an initial list of staff names, email addresses, and Employee ID numbers to Continual Care Solutions and the Staff Portal User names will be imported by Continual Care. Additional Staff Portal Users may be manually added via the usual account management tools and add/delete process. The portal can be made available to them following these next steps.
Adding additional Staff Portal Users:
Ensure the Account is a Staff Portal User:
Because we only want specific Staff Portal Users to be able to view the Portal, we will need to set up their access:
- Login to your imPowr website
- Go to the Engagement menu
- Click on Staff in the People section
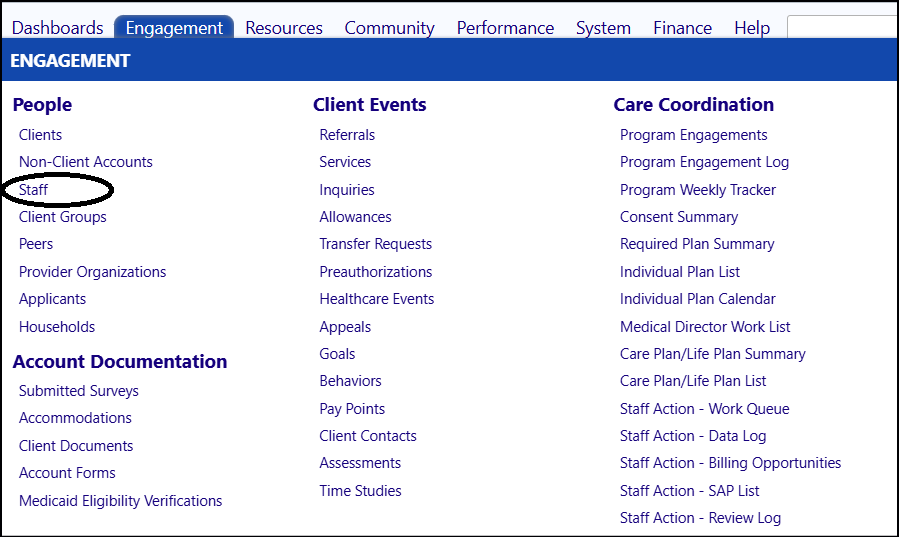
- Select your Staff Account or Add a new Account
- Make sure the Account has the Account Type of Staff Member
Set up the appropriate Account Role for the Staff Account:
Ensure the Staff Account is set up with the proper Account Role to allow them access to the Portal.
- Click on System.
- Click on Account Roles in the Settings & Security section:
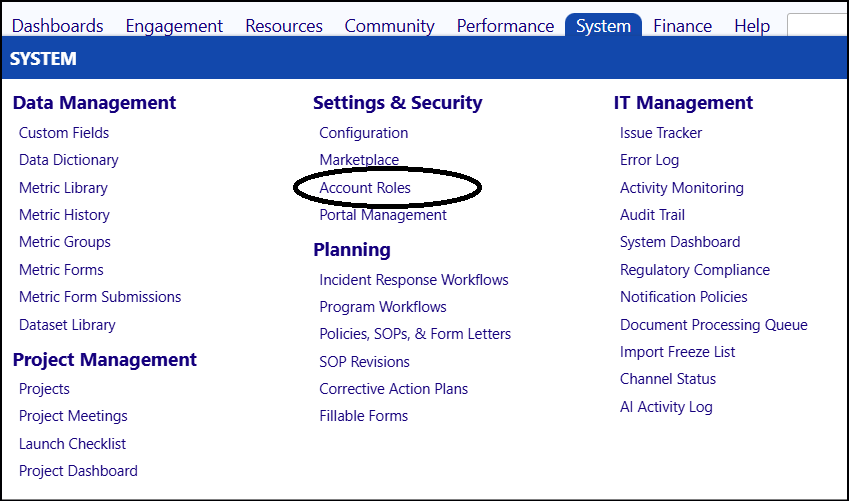
- Select the Staff Member Account Role:
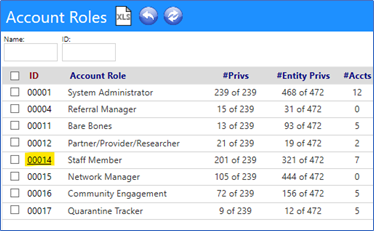
- Confirm the Portal is listed in the Portal Rights for the Staff Member Account Role
View the members who have access to that Role. If the Account is not listed, you need to add it to the list.
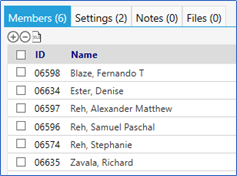
- Click on the ‘+’ sign to add a new user (conversely, if you want to delete a user, select the account by clicking on the checkbox to the left of their ID, and click on the ‘-‘ sign)
- Choose Account by entering a check to the left of the account name
- Click on Save
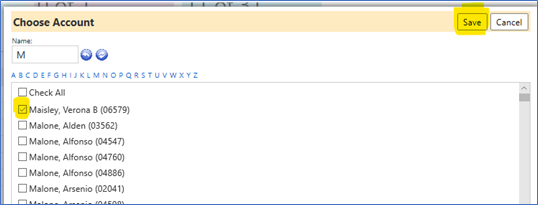
The Account will be added to the Account Role Members list and will be granted the Account Role Rights.
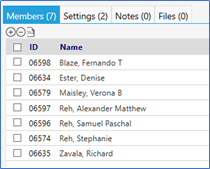
- Click on Save to save your changes

The name should now appear in the list for that Account Role.

Making the Portal Visible on the Account Individual’s screen:
- Click on the System menu
- Click on Configuration (in the Settings & Security section)
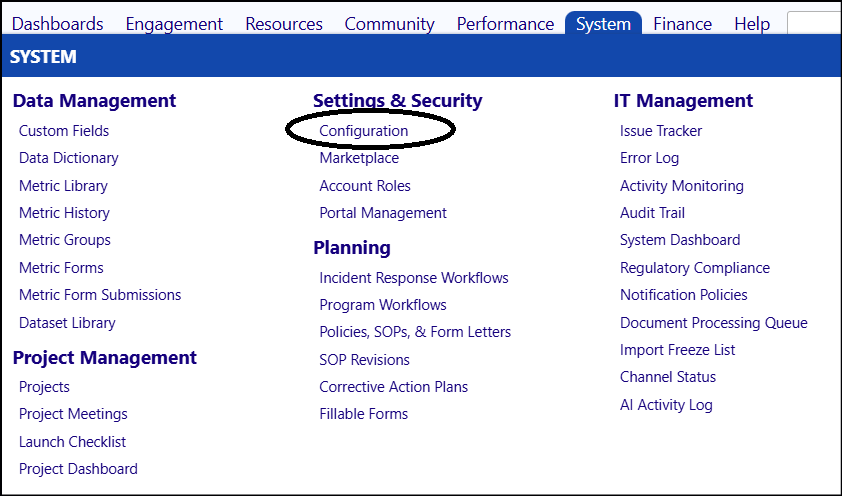
- Click on Options
- Expand the Menu & Navigation section by clicking on the arrow to the left of “Menu”
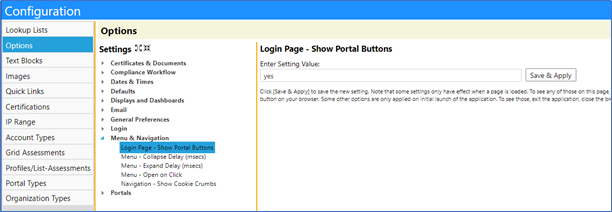
- Select the Login Page – Show Portal Buttons is set to ‘yes’. If not, change it so it says ‘yes’ (without this, the user will not be able to see the icon for the Portal)

- Click on Save & Apply
- Click on Portal Types
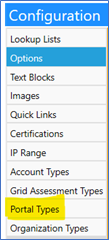
- Select the Staff Portal, Portal Type you desire from the dropdown list of Portals
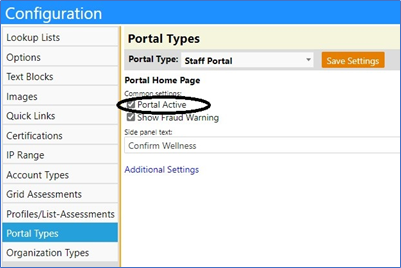
- Ensure the Portal Active box is checked to make the ‘Portal Active’
- Save Settings and exit this page
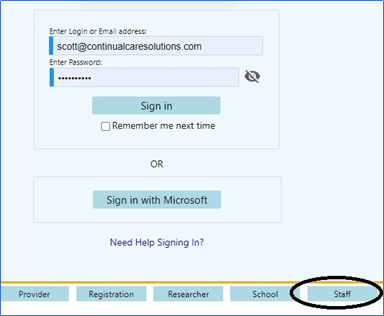
When you sign out of your website, the Portal button will be visible below the login screen:
Staff Member Access to the Staff Portal:
NOTE: For the remainder of this document, we will assume the appropriate Account Role has already been established, the Staff Portal is made available, and the user has been set up as a Staff Portal User.
The user should also have been provided with the following link to access the portal:
https://xxxxxx. impowr.net/forms/Home?P=13
Where “xxxxxx” is your imPowr website name.
First Time Logging In (Staff Portal Users):
- Launch the application by accessing your imPowr website
Note: It is a good idea to save the link as a favorite for future use, to avoid having to type it in every day. The way you do that varies by browser. In Chrome you can just click the ‘bookmarks’ star ( ) that appears at the upper left of the browser window.
- When the login screen appears…
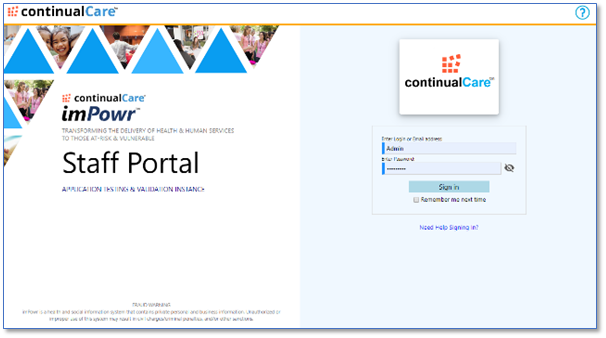
- Enter the (Staff Portal User’s) Login or Email address
- Enter an initial password (at this step, you can enter any characters – these will be changed later)
Note: To see what you entered, you can click the little “eye” icon next to the password entry field.
- The system will prompt for a new password
Note: Make sure you enter a ‘strong’ password (something hard to guess). Certain common words will be explicitly not allowed (like ‘1234’ or ‘password’), so enter something with a mix of upper- and lower-case letters, numbers, and characters. When done, click ‘Update Password’.
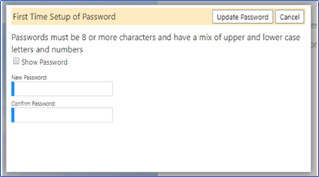
After updating your Password, you will be redirected back to the sign-in screen.
- Enter the (Staff Portal User’s) Login or Email address
- Click Sign in
Note that users may find it convenient to have their browser remember their log in credentials, so they don’t have to enter it every day.
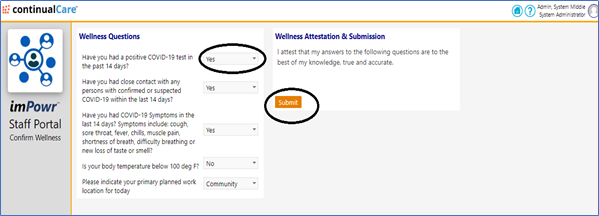
After a successful login, you will be directed to the Staff Portal screen. The Staff Portal displays the Wellness Questions and the Wellness Attestation & Submission.
The questions appear.
- Select an answer for each question and attest to the accuracy of your entries
- Click Submit
Note that on a mobile device, the screens may look a little different and you may need to “zoom in” with your fingers to make the text a little larger and easier read.
Viewing Entries - Administrator View:
- Log in to your website, as the Administrator Role
- Click on Dashboards in the menu
- Click on Staff Wellness Checks in the Wellness & Visitors section:
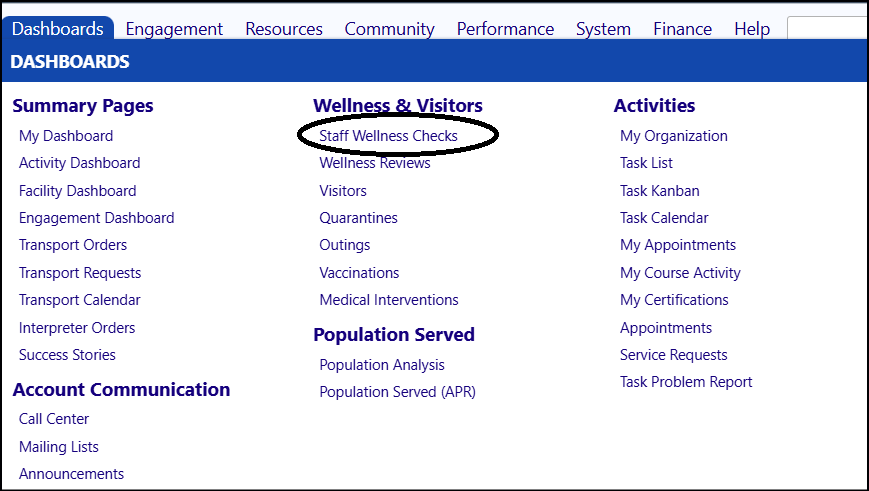
The Administrator view of the Wellness Check will be displayed:

- Select the “Submitted” tab
- Select the “All” radio button
- Click on the Refresh button

View the list and filter further, as needed.

- Click the Staff Portal User ID number to see the Staff Portal User’s reported attestation details.
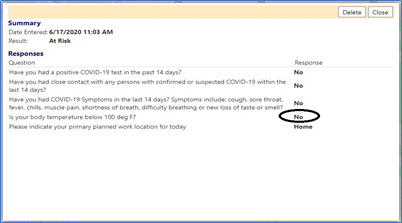
Based on the Staff Portal User’s response, and the risk rules you set up when you set up your questions, the level of Risk is established.
- Click the Export icon on top of the window to generate an export of the summary

-
Supervisors and Administrators can always see their own Wellness Checker reports, but they also can filter the reports to view…
- Their own reports, those of any supervisor, and those of all staff (basically, all staff),
- Only their own reports and those of their direct reports,
- Or only their own reports and those of their direct and indirect reports. (The indirect reports reflect the reports of a Supervisor’s direct reports.)
-
Click on the desired selection in the drop-down list filter (this applies to both the Submitted and Not Submitted Wellness Check tabs) to quickly see whether your reports submitted a Wellness Check or not

The settings to allow this kind of filtering, is done within the privileges found within the Account Role set-up.
- Click on System
- Click on Account Roles in the Settings & Security section:
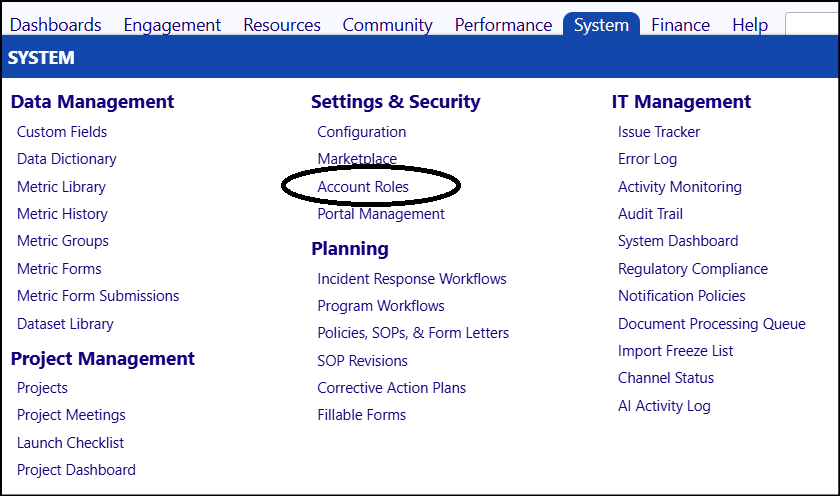
- Select the Staff Member Account Role:
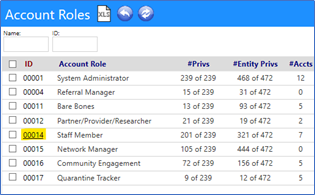
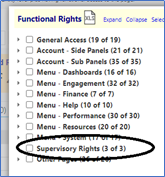
- Open the Staff Member Account Role and click on Functional Rights
- Select the Supervisory Rights privilege and Save your selections (Note: If no privileges selected, the Supervisor or Administrator can only view their own Wellness Checks)
- Note that you may have to refresh your login to view these changes on your screen

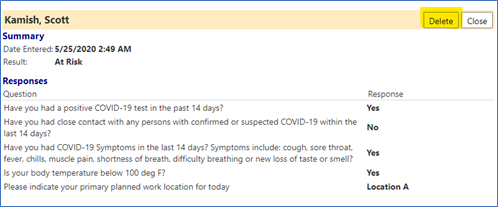
Deleting a Wellness Attestation:
There may be times when an attestation is added in error or is done for training or Testing purposes. These may be deleted – but only one at a time and a special privilege is required. This privilege should be restricted to only those permitted to make that compliance related assessment.
Viewing who has not completed their Attestation:
- Click on the “Not Submitted” tab

- Filter or refresh the data, if desired
- Click on the Staff Portal User’s ID for more information about the Staff Portal User
- Export a list of those who have not completed their attestation by clicking on the export button:

Email Messages:
Wellness Tracker gives you the ability to send a message out to anyone who has Not Submitted a Wellness Check (such as sending them a reminder or asking them to see someone regarding it).
To send an email, please do the following:
- Select the person or persons you wish to email by clicking in the checkbox to the left of their name
- Click on Send Email

A word processor will open.
- Enter a subject and your message (change the font, font size, coloring, background, highlights, add pictures, etc.)
- Click on Send
- An email will be sent to your identified recipient emails (and responses to your email will be sent to your email tool’s inbox, e.g., Outlook or Gmail)

Note: you can send the same message to one or more recipients using the previously mentioned process. If you just want to send a message to a single recipient, you can also click on the email symbol to the right of their name, and it will open the word processor for you to compose your email and proceed as indicated.

Wellness Tracker Messages:
When a user submits a Wellness Check they either receive a message indicating their response indicates a potential risk and they should contact their supervisor before returning to work, or if their responses are acceptable, after they submit their response, they are immediately returned to the login screen.
Because users did not know whether or not their submittal was successful or if they system just kicked them out, an option exists to allow the display of a customized message which thanks them for their submittal and acceptable response so there is no longer a question of whether or not their submittal was completed.
- To set-up the ability to use a customized message, click on Configuration in the Configuration section of the System menu
- Select the Options
- Select the Staff Portal – Wellness Check Thank You in the Portals Settings
- Ensure the settings are set to “yes”
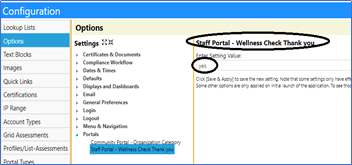
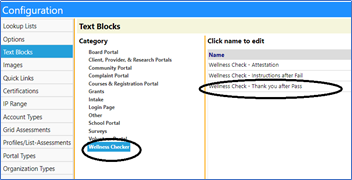
The Thank you message, as well as the At-Risk message are completely user-configurable and can be set-up in the configuration page.
To change the Wellness Check messages…
- Click on Configuration in the Settings & Security section of the System menu:
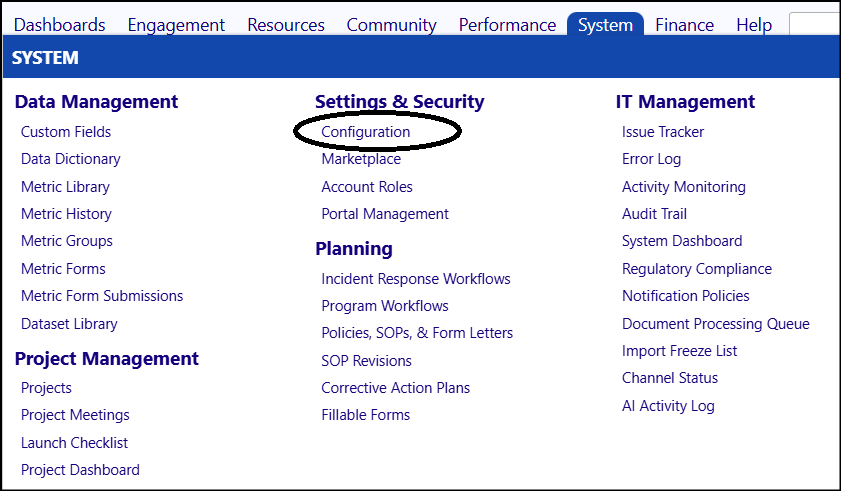
-
Select Text Blocks
-
Select Wellness Checks
-
Select the message you wish to modify
- Wellness Check – Attestation
- Wellness Check – Instructions after Fail (this is the At-Risk message).
- Wellness Check – Thank you after Pass
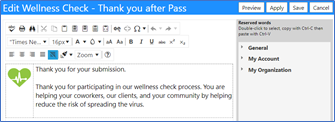
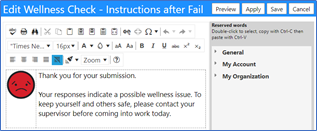
Note: both text and pictures can be entered into the documents.
Wellness Check Documented Review/Approval:
Supervisors can document when they review and approve the Wellness Checks which were completed
To create a Wellness Check Review…
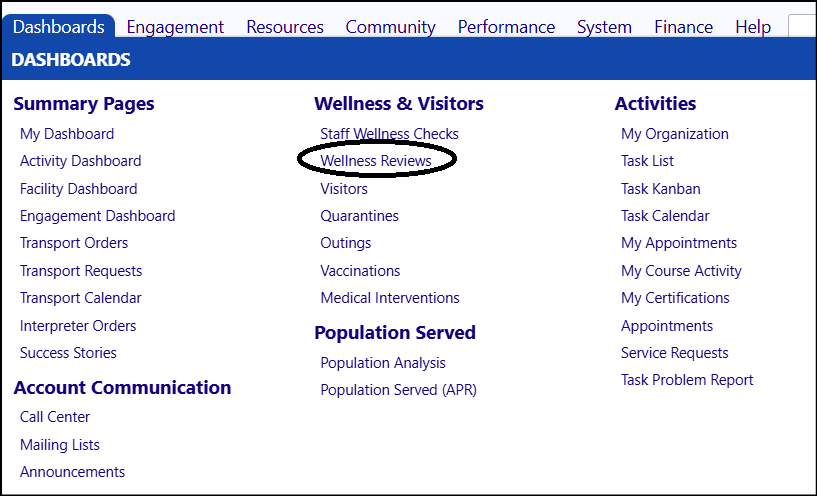
- Click on Staff Wellness Review in the Wellness & Visitors section of the Dashboards menu:
- Click on New Wellness Review

- Select the Review Date by clicking on the Calendar Pop-up

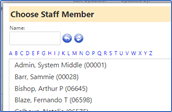
- Choose the Reviewer by clicking on Choose and Choose Staff Member.

- Add any desired Comments
- Click on Apply

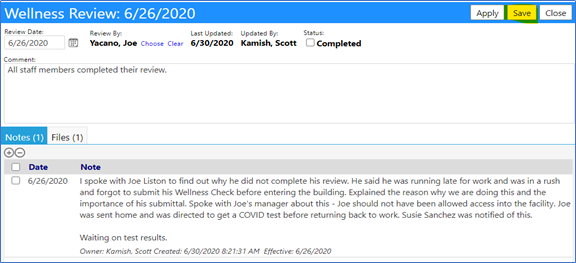
Clicking on Apply causes the review to be saved but allows you to remain on the same page. This activates the Notes and Files tabs.
- Add a Note by selecting the Note tab
- Click on the ‘+’

- Enter your note as a Public, Private, or Restricted Note
- Click on Save when complete, to save your entry

- Add a File by selecting on the File tab
- Click on the ‘+’

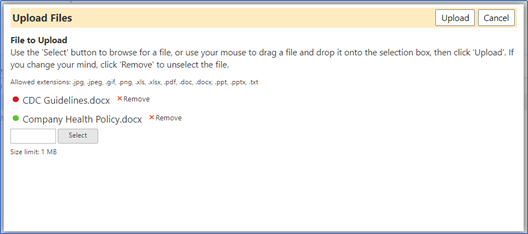
- Select and Upload your file.
Note: if your file is too large, the file name will be displayed with a Red dot to the left of the file’s name and you will be provided with a warning message indicating the file is too large. If the file is properly sized and is of the proper type, you will see a Green dot to the left of the file name. Just Remove those with a Red dot and click on Upload.

- Notes and Files may be deleted by selecting the checkbox to the left of the note or file name and clicking on the ‘-‘
- Click on Save to save your Wellness Review
Completing your Review:
- Select your review by clicking on its ID

- Click on Edit
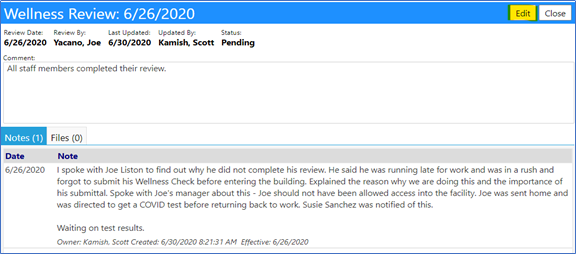
- Check the Completed button
- Click on Save
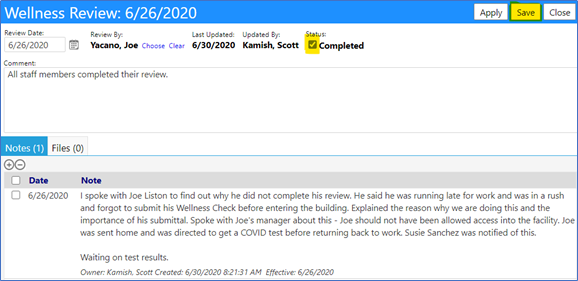
Your approval is now documented, and your completed review appears in the Wellness Reviews list:

Note: You can create reviews in advance. When completed, just access your review, update it, and the click on the Completed box, before clicking on Save.