This article will explain the steps needed to create and use Peer/Advisor Matching and Subject Matter Expert (SME) Matching.
Peer/Advisor and Subject Matter Matching Setup
Step 1: The first step needed in order to prepare for Peer/Advisor Matching or matching to a Subject Matter Expert, is to set up the categories and items you will want the Matching to be done with.
Setup the Matching Categories
-
Access Configuration from the Settings & Security section of the System menu.
-
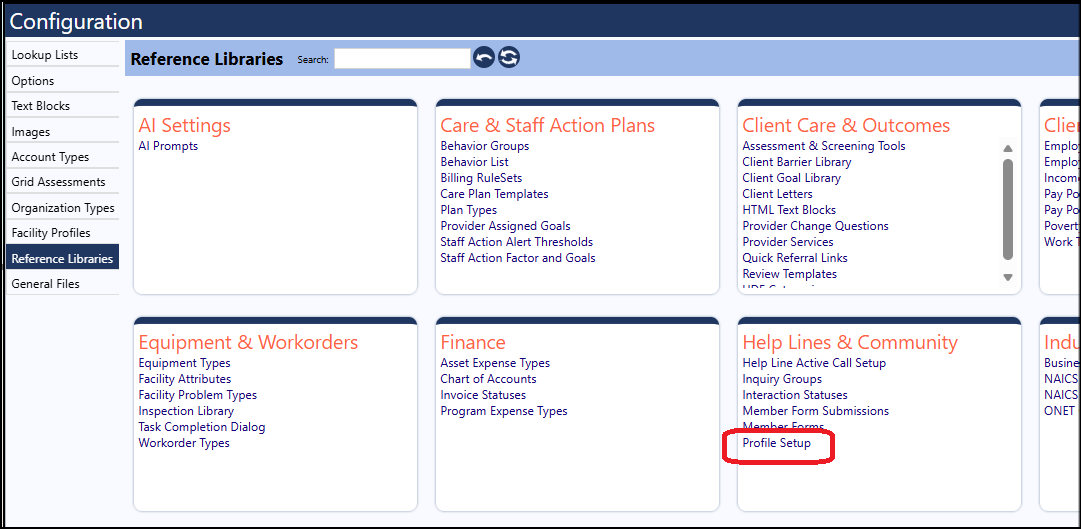
Select Reference Libraries.
-
Click Profile Setup.
- On each tab, select the items you wish to use for peer match – i.e., the items that most relate to how you identify peers for your helpline. When you search for Peers/Advisors or Subject Matter Experts, you will be selecting areas you wish to match against, from this list.
Setting up a group of Favorites
- Instead of always selecting the individual items when you do your Peer/Advisor/SME Matching, you might want to just select a pre-defined group of matching items: “Favorites”. The available choices for the items which will go into this Favorites group will be the various Categories of Matching items you created in the above step – for example, Current receptor status, Breast surgery, or Genetic (inherited) mutations, etc.
In terms of Peer/Advisor and Subject Matter Matching, a "Favorite" is just a shortcut for adding search criteria to a list. The use of Favorites saves time because instead of having to enter each of the individual search criteria, the selection of a Favorite captures all of your search criteria with a single selection.
Setting up each of your Favorites’ groups
- Go to the Configuration Reference Libraries
- Click on Profile Setup in the Help Lines & Community panel
- Select the Favorites tab.
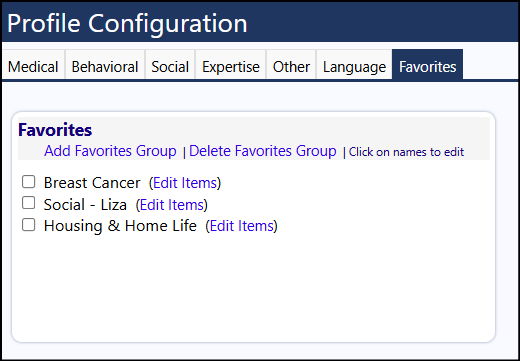
- Click "Add Favorites Group". (Favorites are optional – they can be used so the system will remember which matching items you always want in your Peer/Advisor/SME Matching.)
- Enter the Name for your grouping of Favorites. Choose a name that will be easy to understand.
- Enter a Sort Order for the New Favorite group, if there will be more than one group of Favorites.
In imPowr, the lower the sort order number, the more towards the top of the list the item will display.
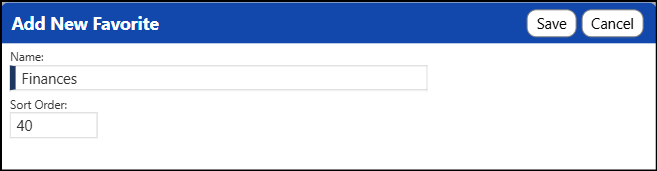
- Click Save to save your entries.
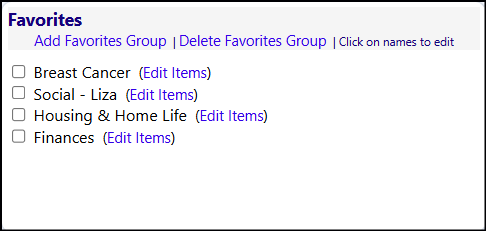
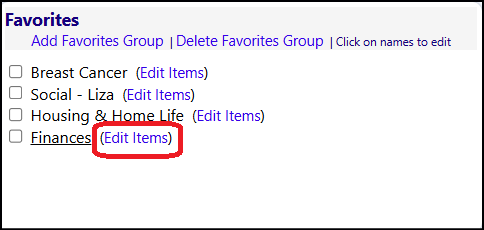
The New Favorite (group) will display in the Matching Profile Configuration list.
Add the categories to select from for each of your groups
- Access your Favorite so you can add categories for Matching, to that group, by clicking on Edit Items.
- Choose from the available categories to Match on for that Favorite item, by selecting them from the list of Available Choices and clicking on the arrow pointing to the right (Selections). (Conversely, remove choices by selecting them from the list of Selections and clicking on the arrow pointing to the left (Available Choices).)
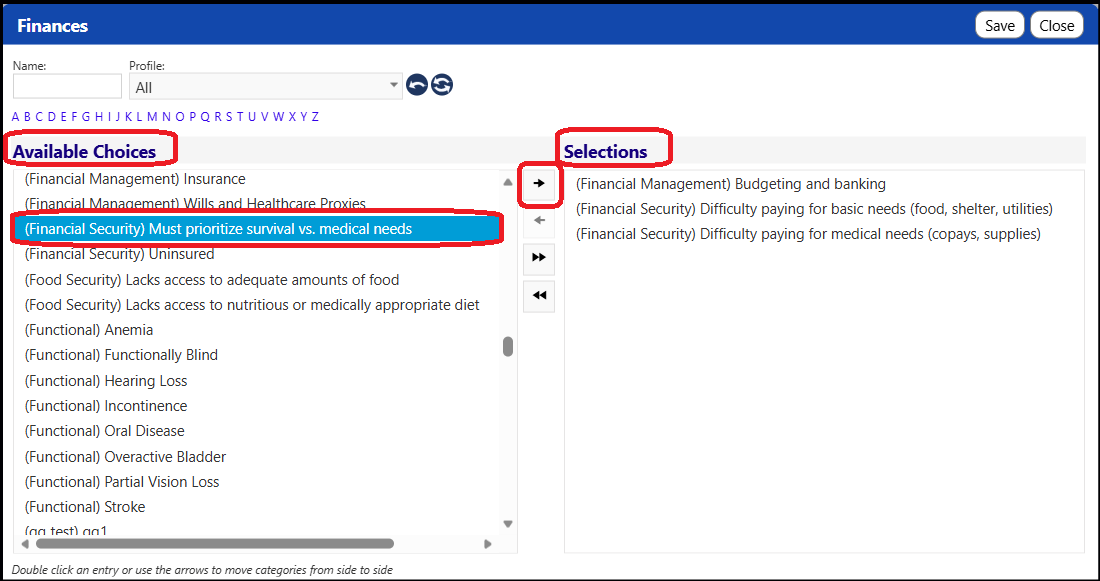
- Click Save when you are completed with your selections.
- Click Return to exit your Configuration Screen.
You have now established a group of Favorite categories to match a Peer/Advisor or Subject Matter Expert with.
Setting up the Match Criteria for Individual Peers/Advisors or Subject Matter Experts (SMEs)
Step 2: Once you have established the categories you wish to match on, you will need to define which of those apply to the volunteers who have offered to be a Peer/Advisor or Subject Matter Expert.
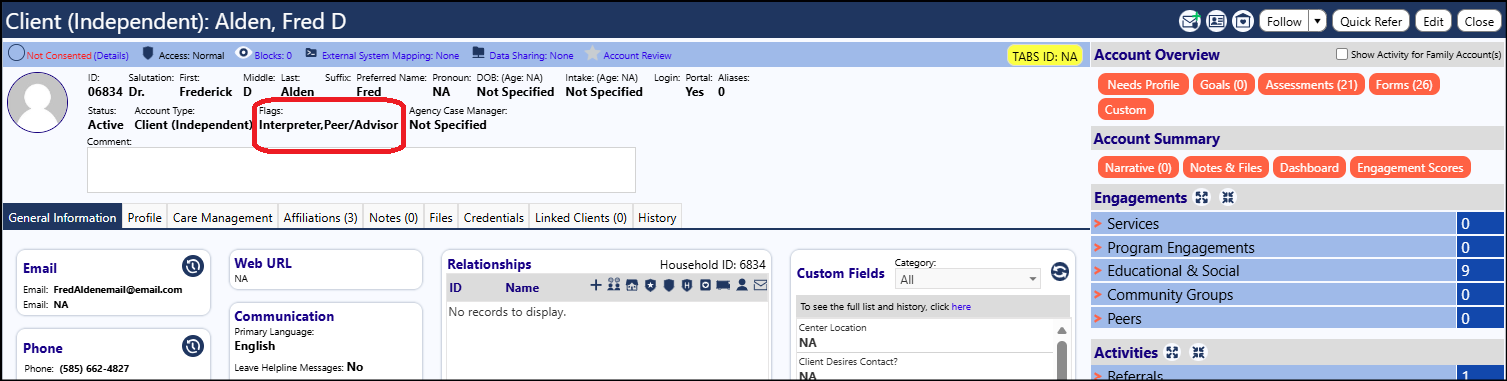
Flag the account as a Peer/SME/Advisor
An account can be designated as a Peer/Advisor via the Flag setting on their
Account Profile (Engagement > People > Accounts (either Staff, Individual, or Clients).
- Access the account by selecting one of the 3 types of IMPOWR Accounts in the People section of the Engagement menu: Clients, Non-Client Accounts, or Staff accounts.
NOTE: Clients are those who are receiving services from your organization. Non-Client Accounts are those who neither Clients or Staff and are just volunteering to help. And Staff are those who work for your organization and are on your payroll.
- Locate the Account who has volunteered as a Peer/Advisor or SME:
NOTE: If the account does not currently exist, you will have to add them to IMPOWR by clicking on the Edit button on the top right of the displayed window.
- Click on their ID to open their account.
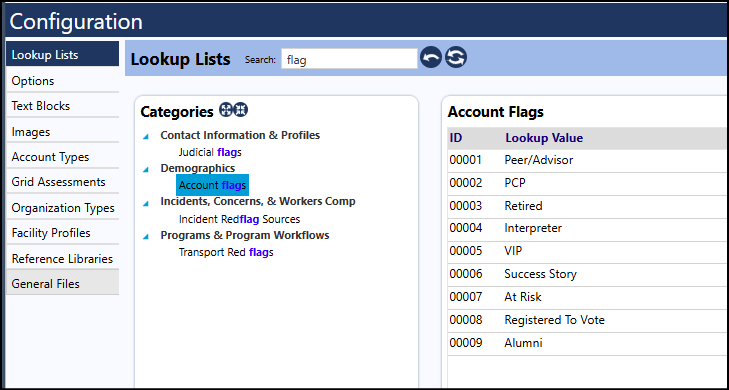
- Add a Peer/Advisor Flag setting on their Account Profile from the Flags drop down list:
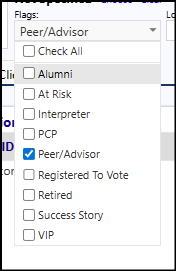
NOTE: The Peer/Advisor flag designator is not user Configurable in the Configuration Lookup Lists per se. But you can change one of your existing flags by clicking on one of the flags and renaming it. NOTE: Do not change the Success Story flag because it has some functionality behind it, which will break if the name is changed.
Setup the criteria you wish to use for Peer/Advisor/SME Matching
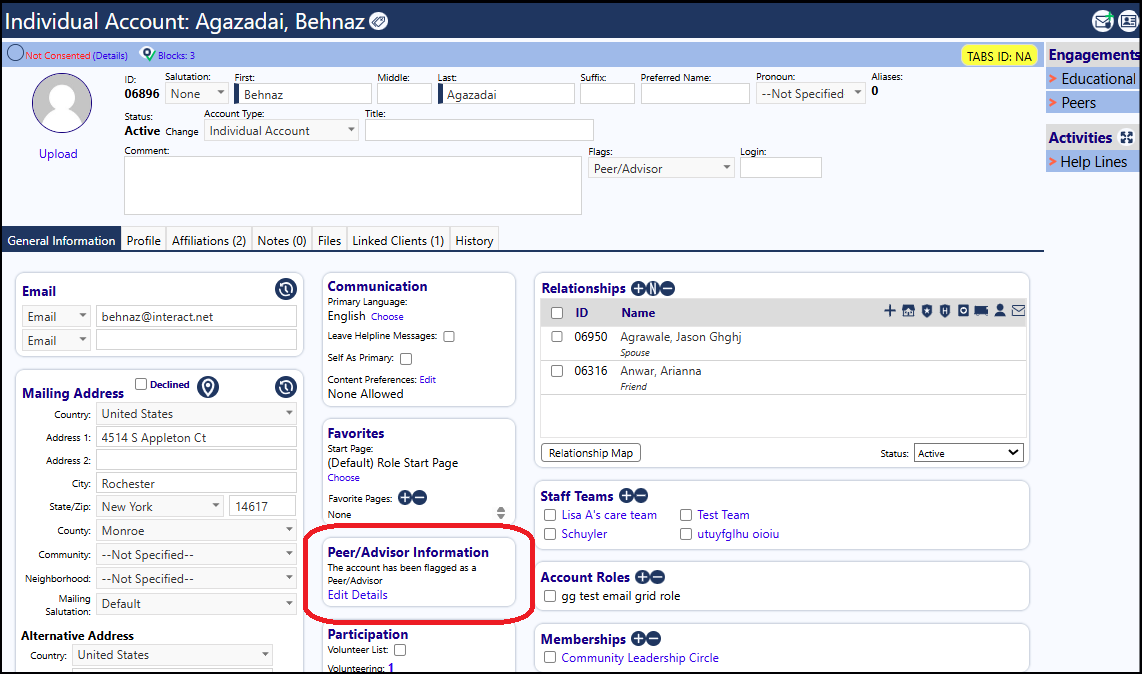
Once identified as a Peer/Advisor or Subject Matter Expert, their Matching criteria is set up in the Peer/Advisor Information panel in the General Information tab in the Account profile.
-
Click Edit Details in the Peer/Advisor Information panel on their account screen.
-
Enter the criteria for which you want this account to be selected as a Peer/Advisor/SME when other accounts are trying to find a Peer/Advisor/SME to match with.
-
Chose individual items from one or more sections on this page.
- Check or Uncheck the boxes to add or remove items.
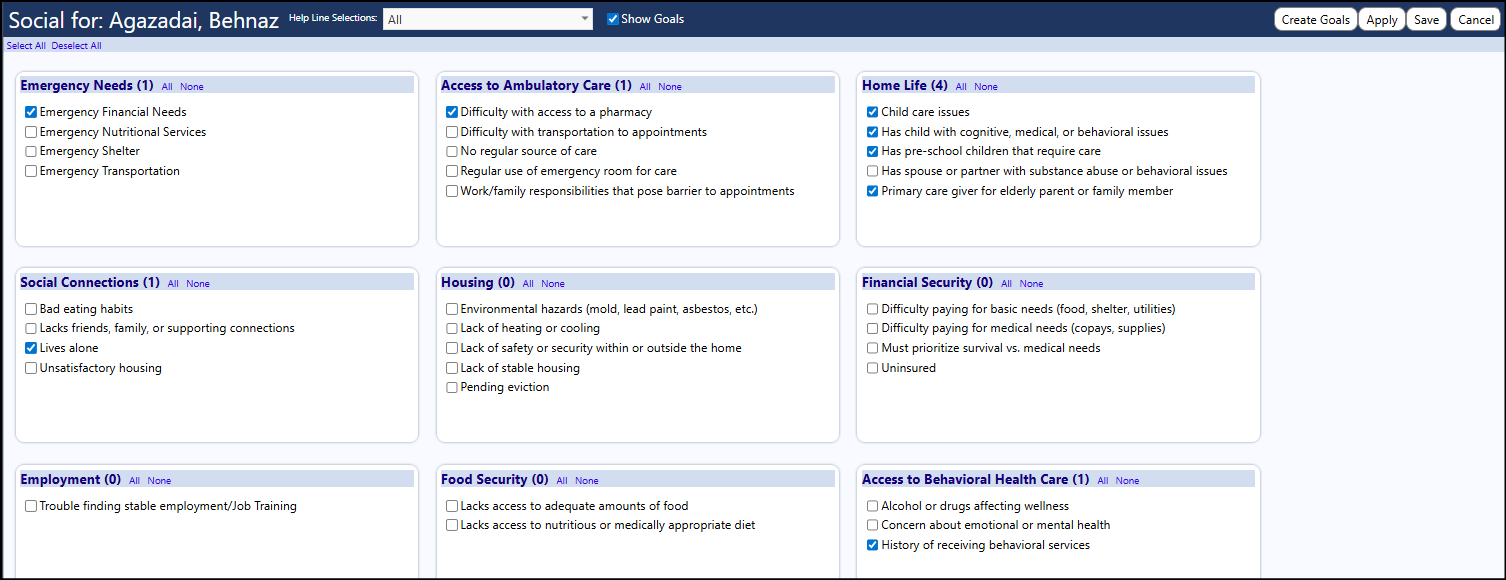
- Click Save when done.
The Peer/Advisor/SME Matching criteria is now set up for that account – repeat as necessary for other Peer/Advisor/SMEs.
Once the Peer/Advisor/SME Matching criteria is entered in imPowr, you are ready to match clients to Peer/Advisor/SMEs.
Peer/Advisor/SME Matching Methods
Step 3: There are multiple ways to do a search in the system, to suggest a possible Peer/Advisor/SME. You can access the Peer/Advisor Profile Matching screen by one of the following methods:
- Click on "Explore" in the edit mode for Clients (Engagement > People > Clients).

- Proceed with Peer/Advisor/SME Matching:
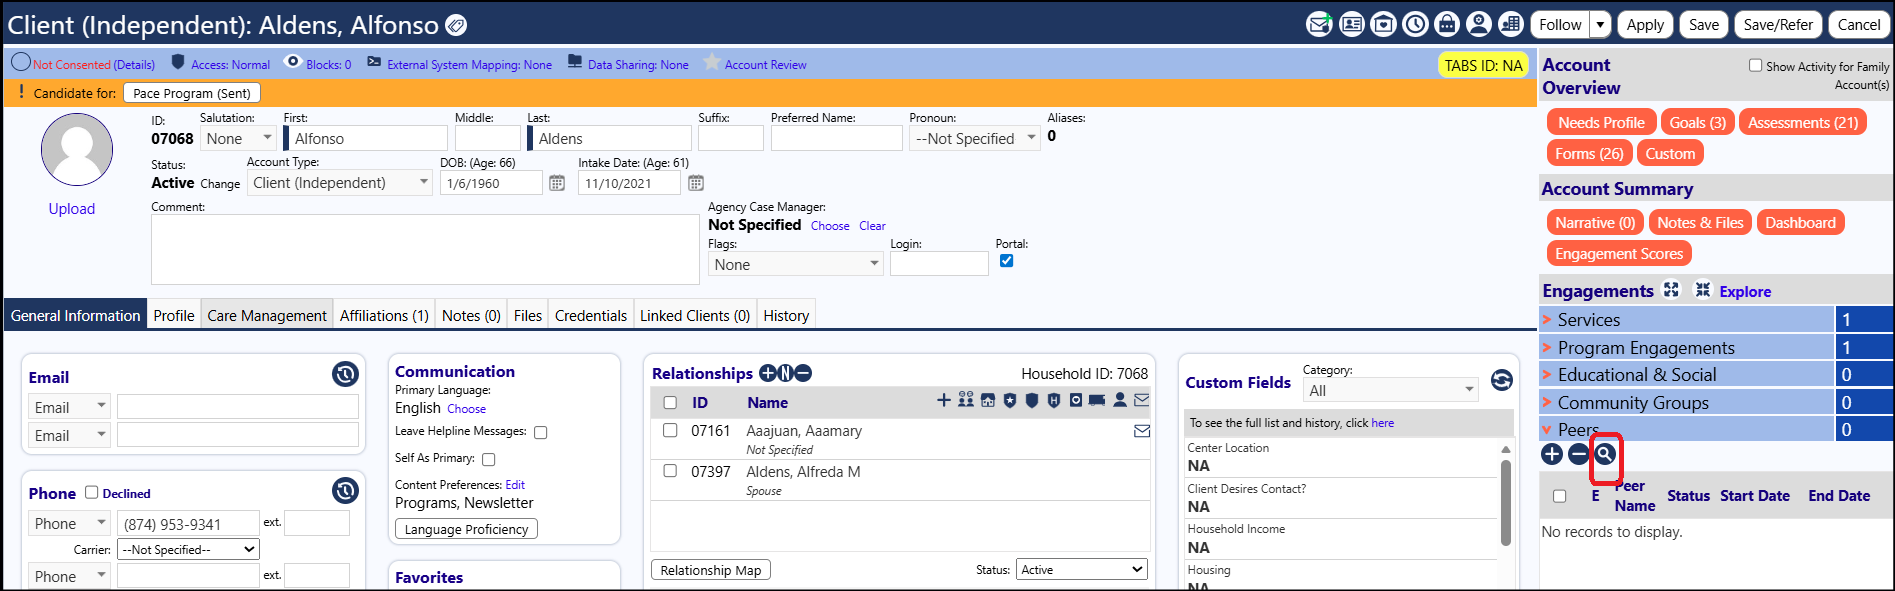
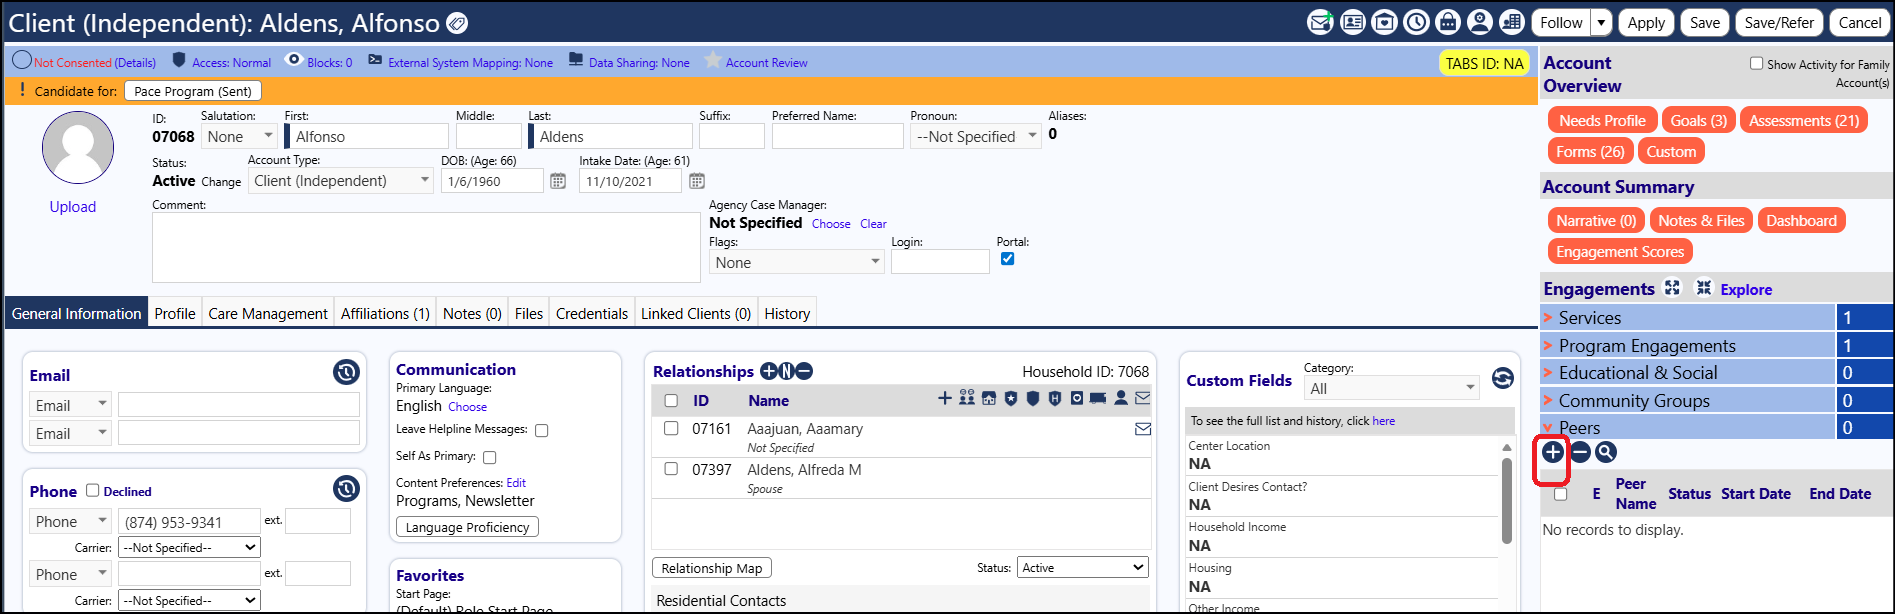
- Click on the “Find” icon, in the Peers side panel, when in the edit mode for Clients (Engagement > People > Clients).
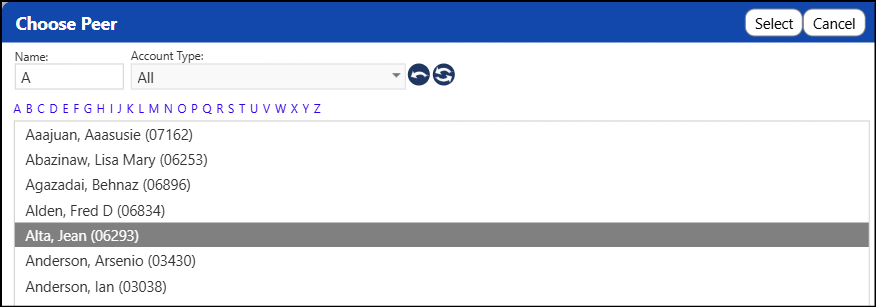
- Select a known Peer/Advisor (not Peer matching) by Clicking on the “+” icon, under Peers, in the edit mode for Clients (Engagement > People > Clients).
!
- Choose the Peer you want linked as this account’s Peer by highlighting that account and clicking on Select. This person will become the Peer/Advisor to this account.
- Enter a Start Date and Save:
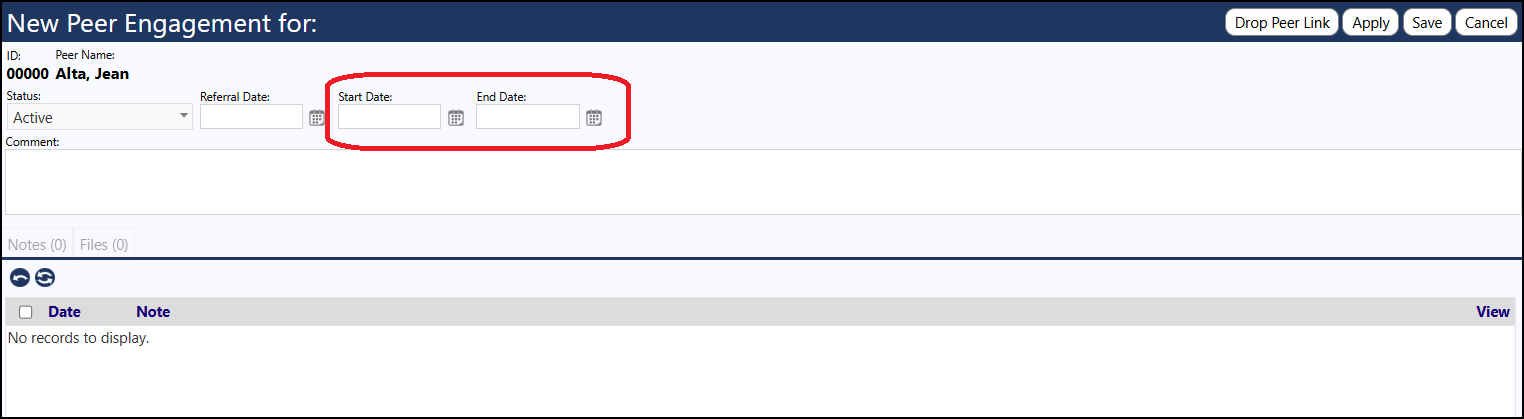
The Peer/Advisor/SME - Client link will now be established.
(All 5 options, with the exception of the last option, work the same way and actually use the same screen.)
Peer/Advisor/SME Matching Process:
Choose one of the following methods to select the items to match a Peer/Advisor/SME with an account:
Selecting Match Categories and items or selecting Favorites
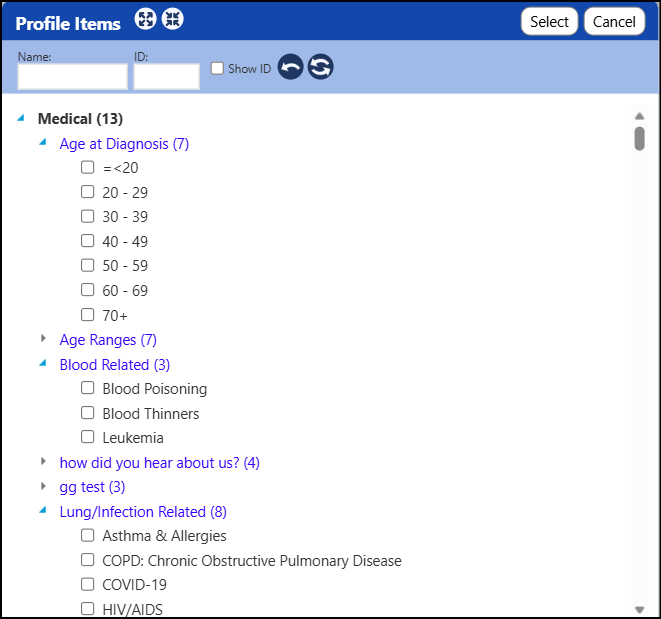
- Using one of the Find a Peer/Advisor/SME methods previously noted (other than the last 2 methods), select the individual profile items to match on by clicking on the '+' and selecting one or more items.
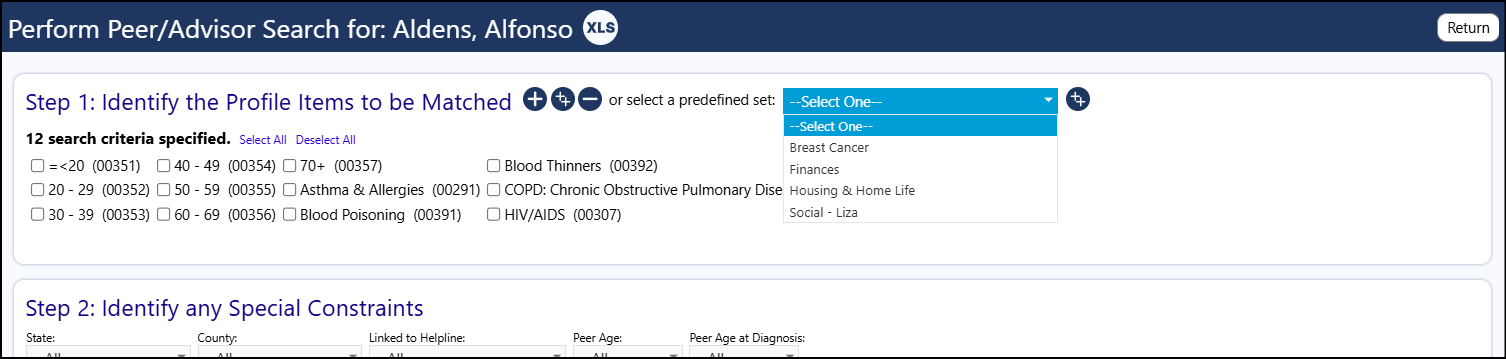
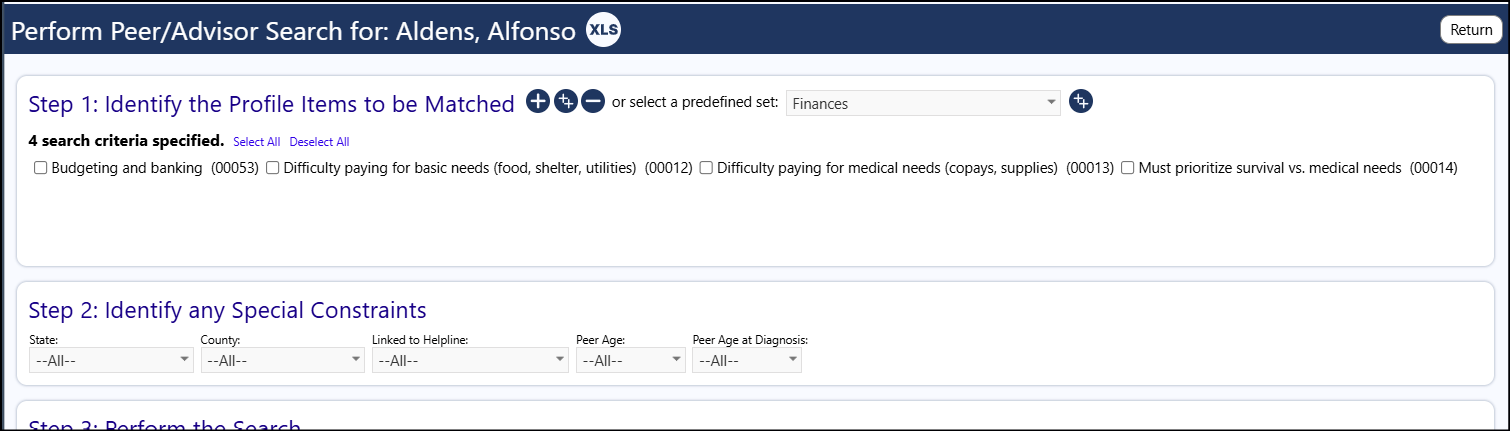
- You can optionally select a predefined set from the drop-down list containing the Favorites Group that you set up previously.
- Click the ‘++’ button to display the profile items to be matched on, as well as make any necessary changes to your list.
-
Refine your search criteria by checking the boxes of those you wish to match a peer with.
-
Add/remove other categories as desired with '+/-' icons. It's no different than if you selected those manually.
- You can add additional favorites by clicking a new favorite and then ++.
The search then only looks for matches in the selected categories.
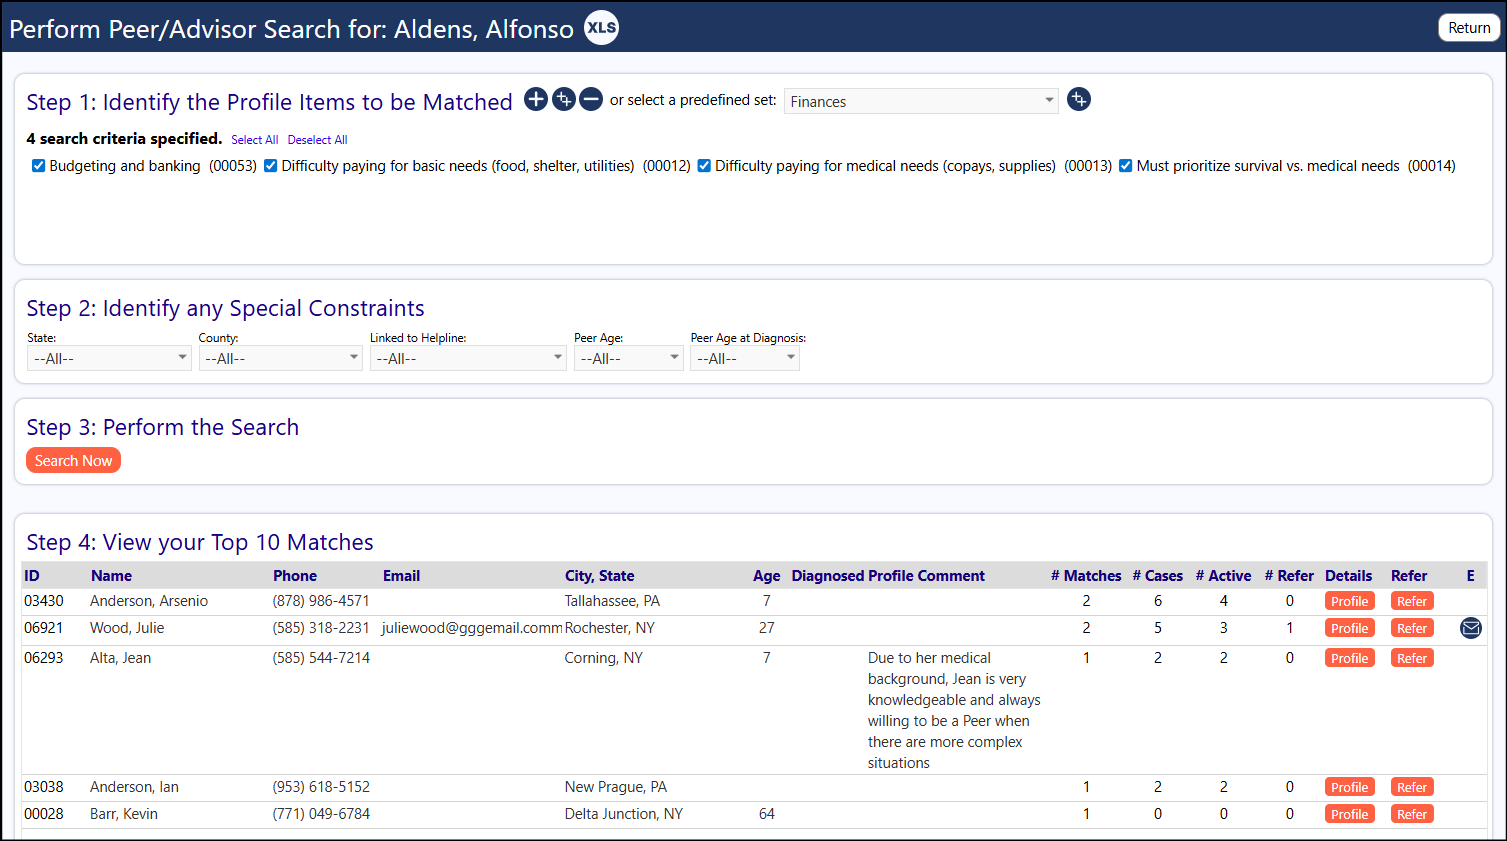
- Click on Search Now, to perform the search.
Example:
Example:

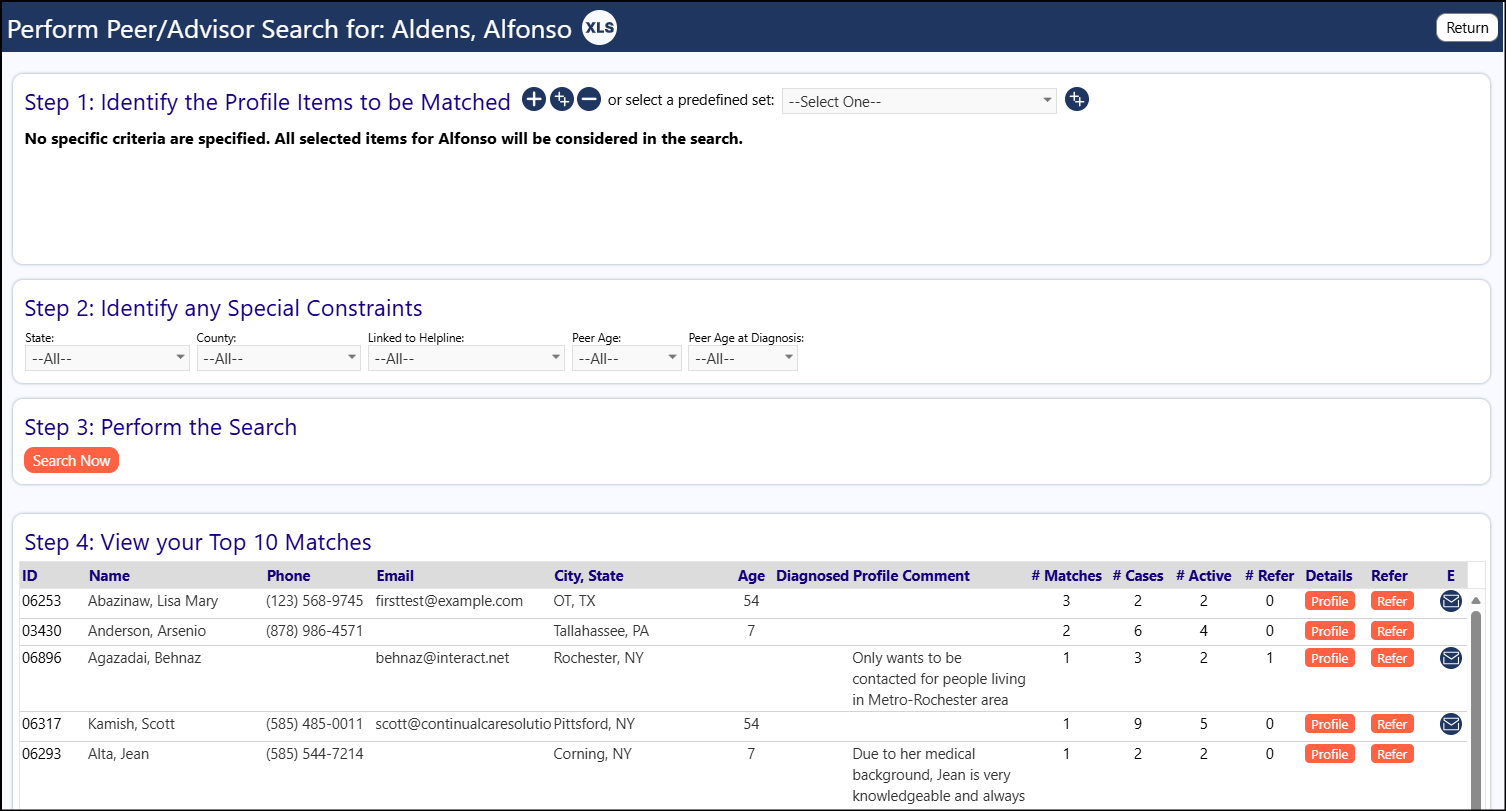
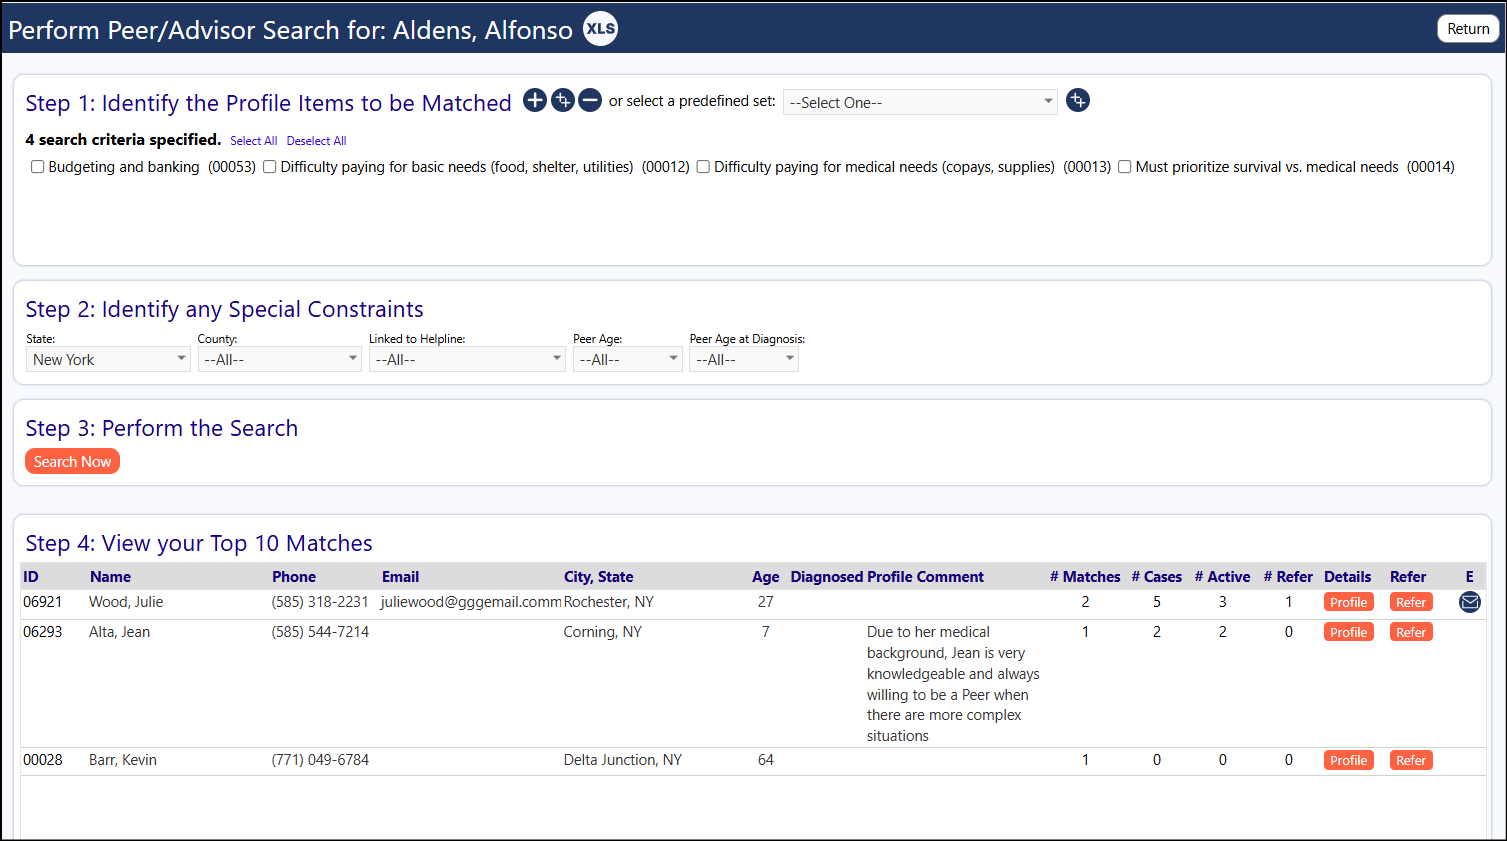
- View your top 10 matches in the bottom of this screen. Click on the Matches Found or the ‘eye’ at the results found for the Peer/Advisor category.
Example:
Your Match results will now display.
Specifying Special Constraints, like specific States of Counties
- Select the State the caller is located in, within the drop-down located in the middle section of this screen (this is optional and would only be used if the caller only wants to be matched to someone in their state).
Example:

- Click on Search Now, to perform the search.
Example:
Your Match results will now display - only 3 possible peers have been identified compared to the 5 previously matched.
NOTE: After performing that search, the next time you access the
Peer/Advisor/SME Matching screen and click on 'Find a Peer based on Areas of Expertise', it will remember you last entries, even though you have not yet selected a Favorite. It remembers the prior search in session. Logging out does not end your session. The browser doesn’t recognize a log out because that is an application function not a browser function. The only way to end a session is to close ALL instances of the browser on your system.
From the Peer/Advisor/SME Match Results screen, you can view how many Profile Match items each Peer/Advisor had with the list of Profile Match items you selected. You can also see how many Accounts, each Peer/Advisor is set up to be the Peer/Advisor for, how many of those accounts are active in the system, and how many referrals each individual has received to be a Peer/Advisor.
Selecting the Peer
- Click Profile button to view the Peer/Advisor’s Account Profile.
- Click Close to return to the Profile Match Screen.
- Click Refer to select that individual as a Peer/Advisor for your client.

After confirming your selection of the Peer, the Peer/Advisor Profile will display for your selected Peer/Advisor.
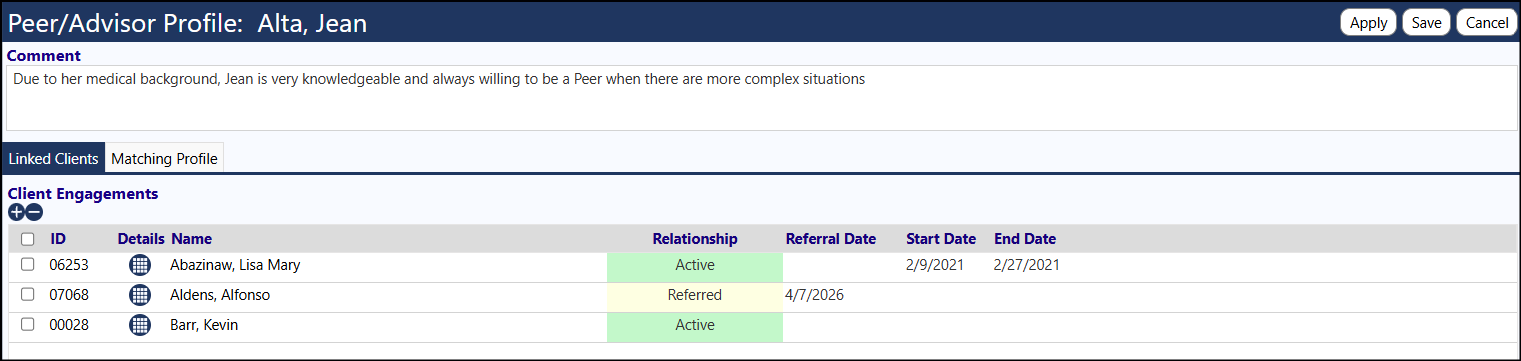
From this screen, you can view the other people this Peer/Advisor is assigned to, and their relationship, the referral date, the date they began as a Peer/Advisor and the date their Peer/Advisor relationship ended.
- Change the status of the relationship by clicking on the Edit button to the left of your name.
- Select a status from the drop-down list.
- Enter a Start Date and End Date (if there is one).
- Click Save to save your entries; click Apply to save your entries but remain on the page so you can enter in any notes or attach any files.
- When you are all done, click Save.
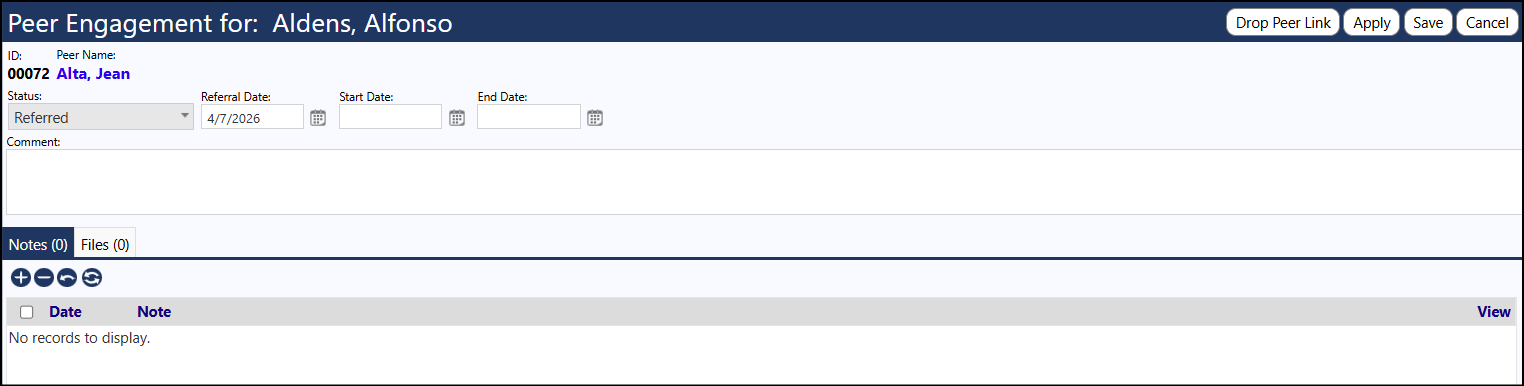
NOTE: To remove the link between your client and this Peer/Advisor, select your client account by checking the box to the left of your name and clicking the Drop Peer Link.

- When you are done with all of your changes, click Save.
NOTE: Peer Matching remembers the prior search in your session.
If you were to select a new favorite for another search, the search criteria captured previously will display along with the new search criteria from the new favorite. This is expected behavior and was designed to perform in this way, so the system 'remembers' your last selection- saving you from having to re-enter information.
To turn this off and start with a fresh new search, you must close out of all browsers. Logging out of IMPOWR does not end your session. The browser doesn’t recognize a log out because Peer/Advisor/SME Matching is an application function not a browser function. The only way to end a session is to close ALL instances of the browser on your system. If you close all browsers and relog in, you can perform a new search without any 'remembered' search criteria from a previous search.
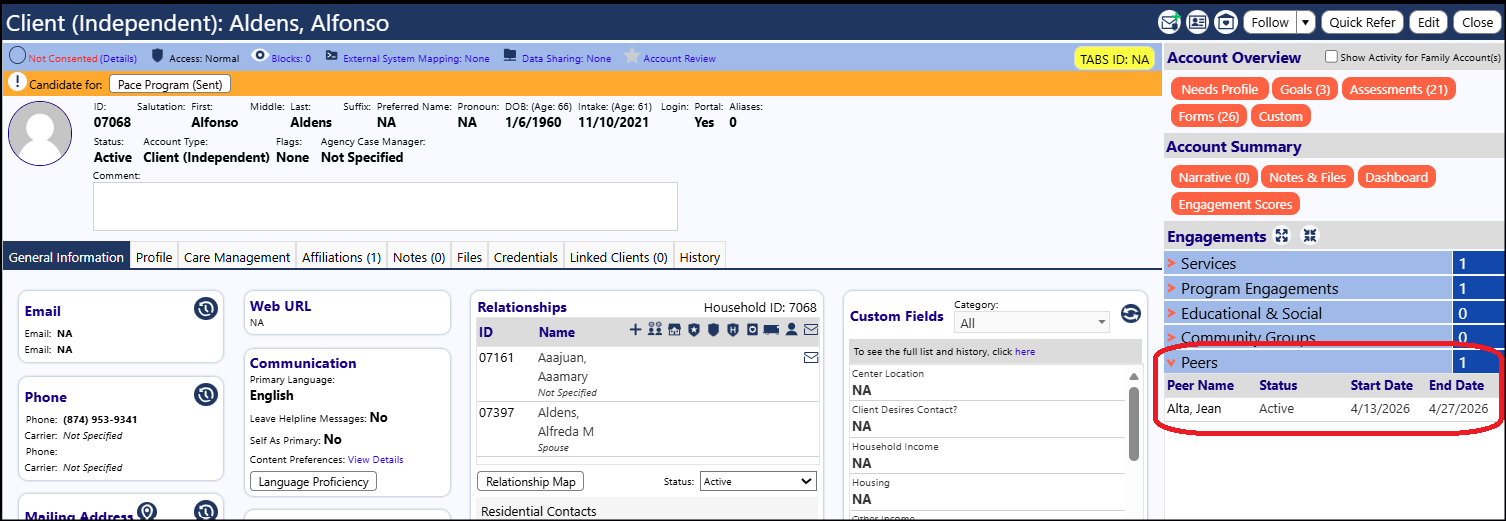
View the Peer/Advisor - Account Relationship
To View which Peer/Advisor/SME has been assigned to an account, you can either…
- Expand the account's side panel, in the Account Profile (Engagement > People > Clients) and view the name of the assigned Peer/Advisor/SME.
This example is for Clients, but you could have easily also selected Non-Client Accounts, or Staff as the person receiving a Peer/Advisor.
-
Click on the Peer/Advisor’s name to view their Account Profile.
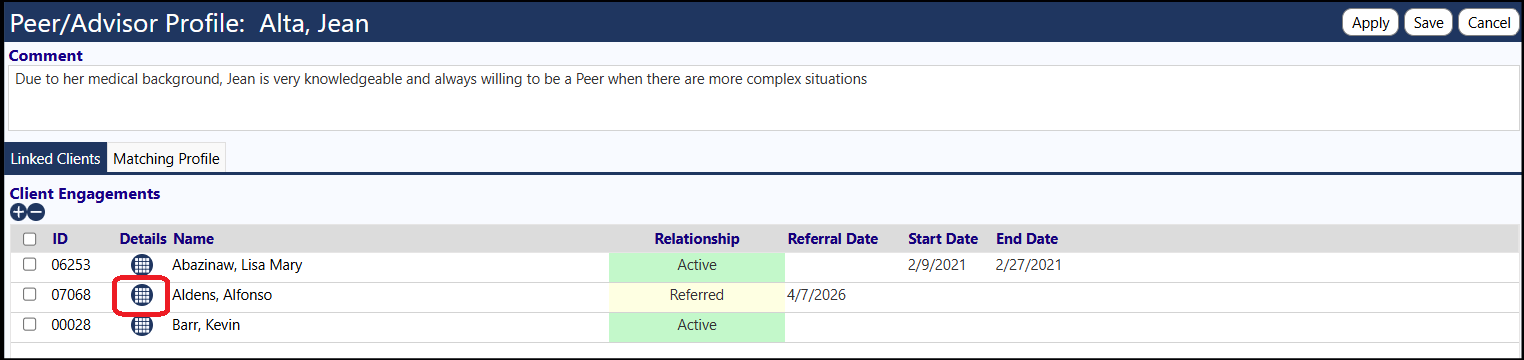
-
In the Edit mode, click on the checkerboard (Edit) next to the Peer/Advisor’s name. You can view the matches, view the others the Peer/Advisor is assigned to, or Remove the Peer/Advisor/Client Link.
-
In the Edit mode, you can also select the Peer/Advisor by adding a checkmark to the left of their name and clicking the ‘-‘ button to delete the entry.
-
Click on Peers in the People section of the Engagement menu.
- Click on the Peer/Advisor/SME’s ID to view their account profile.
- Click on the Profile icon to the left of the client’s name to view the Peer/Advisor/SME’s matching profile as well as their linked clients.
- View the number of clients the Peer/Advisor/SME is working with, the number of those which are active and the number which were referred.
- This screen also allows you to find a new Peer/Advisor/SME, Activate a Peer/Advisor/SME, and Deactivate the Peer/Advisor/SME.
-
Click Return when done.