This article will explain the steps needed to set up and manage a helpline.
Create a helpline
NOTE: In the following step, a particular helpline will be set up. In order to add this helpline, the division for which it is assigned to, MUST already be set up in the Organization in imPowr.
After logging into imPowr, go to the Help Lines in the Help Lines section of the Community menu.
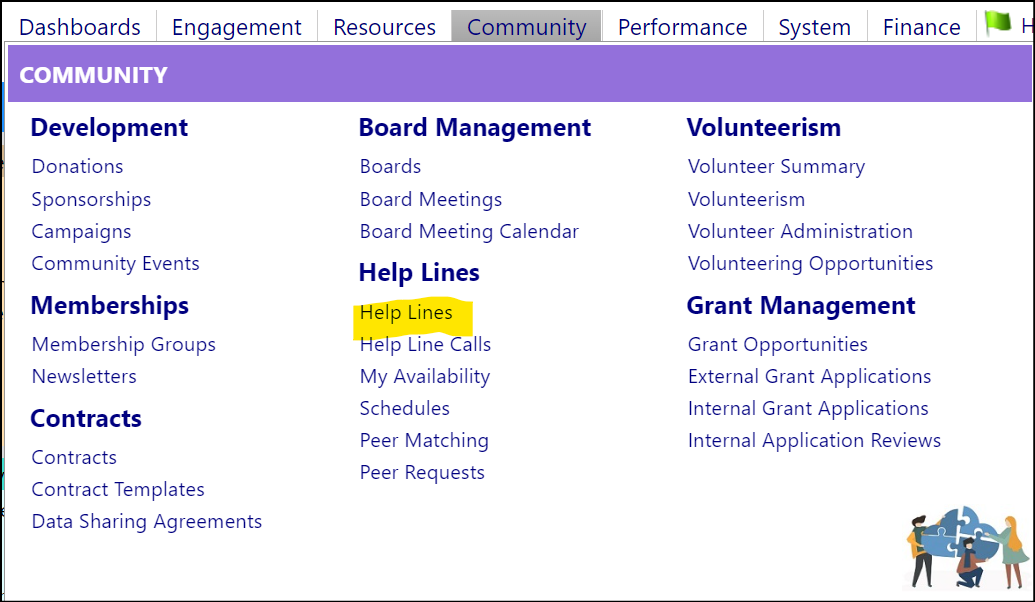
The Helplines which have been set up (if any) will display:

- Click New Help line to set up a Helpline.

- Enter a Helpline Name.
- On the Status dropdown list, select the status of ‘Active’ to turn the Helpline on, or ‘On Hold’ while you are building it.
- Select the appropriate Division and add any Comments desired (these comments are for your own internal use).

Example:

- Click Apply when done with your entries. This will activate the fields on the lower part of the screen.

Assign Staff and Volunteers to the helpline
NOTE: In the following step, the staff and volunteers associated with this particular helpline will be set up. In order to add these accounts, the individuals MUST already be set up and have accounts in imPowr.
- In the Accounts tab, click the ‘+’ to enter the accounts (staff and volunteers associated with this helpline):
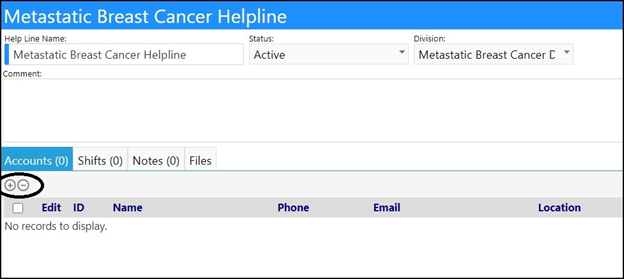
NOTE: If you wish to remove an entry you made, select the entry by clicking in the checkbox to the left of the entry, and click the ‘-‘ button.
- Choose the account you wish to add by selecting the account(s) and clicking on Save.
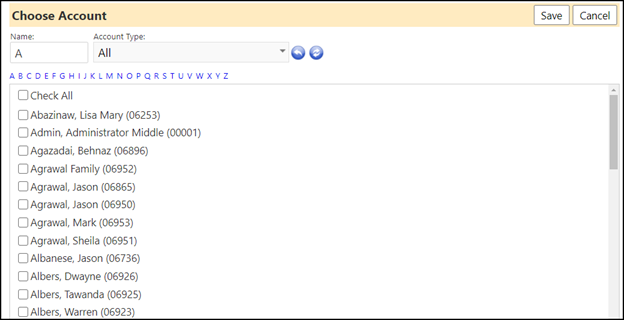
Tip: If you wish to display all accounts, click the Clear button  or delete the letter in the Name field, and click the Refresh button
  . If you wish to search by last name, either enter a letter into the Name field and click the Refresh button or click on one of the letters and refresh the screen. Please be aware that only a maximum of 50 names will be displayed per page. If the person you want to add has a last name that begins with the letter you are searching on, but does not appear in the list of names, please either search the entire list or modify your entries in the Name field to more than 1 letter, before clicking the Refresh button.
For example, for an account with the last name ‘Washington’, you might want to enter ‘Wa’ or ‘Wash’, etc. into the search field, and then click the Refresh button (do not use the ‘ character).
imPowr also allows for the use of wildcards in name field searches. Please use % for the wildcard. In the above example, if the account’s full name was ‘Jerome Washington’ (i.e., Washington, Jerome), you could have also either entered ‘%ing’ to display all names that have ‘ing’ in them or could have entered ‘%Jerome’ to find all accounts that have a first name of ‘Jerome’ (it looks for anything that has ‘Jerome’ in it). There is no need to enter a wildcard after your entry, because imPowr already assumes it is there, at the end of every text string.
After you click Save, the names will display in the list.
- Repeat the process for any other names you wish to add.

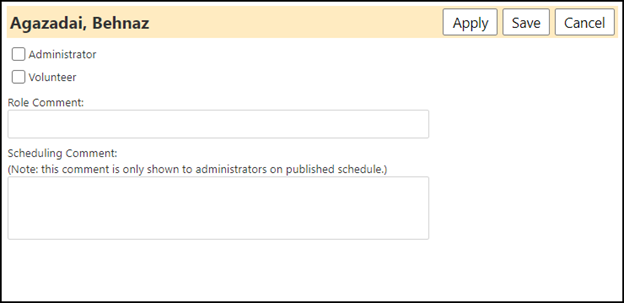
For each account that you add, you will need to specify the role they will have with the helpline, i.e., if they are an administrator, volunteer, or both.
- Click Edit to the left of the AccountID you for which you wish to specify the role:

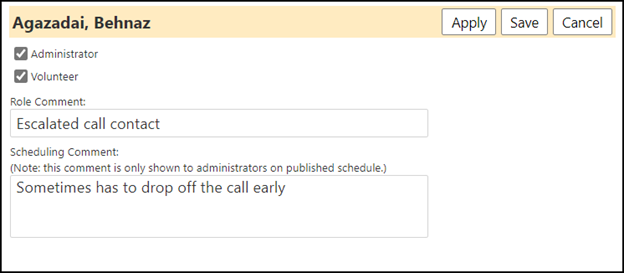
- Select the individual’s helpline role by check whether they are an administrator, volunteer, or both.
- Enter any Role Comments (these will only display when viewing your list of accounts - they are used for any internal comments about the individual that you may wish to capture).

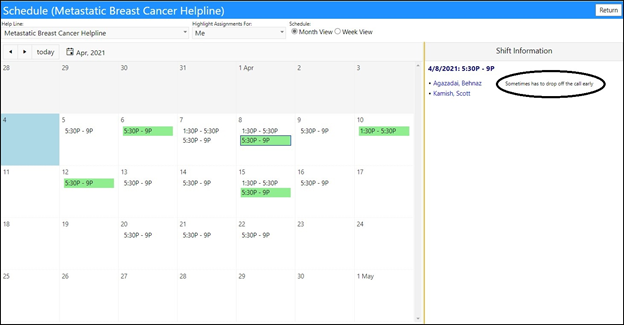
- Enter any Scheduling Comments (these will only be shown on published helpline schedules for administrators. They will be shown next to the Volunteer's name, on the month view, and below the Volunteer's name on the week view).
Example:

- Repeat these steps for your other Accounts.
Your entries will display in the Account list:

- Click Apply to save your entries.

NOTE: Apply and Save work similarly, but when you click Apply, your entries or changes are saved, and you remain on the same page. If you click Save, your entries or saves are saved, and you are exited from that page.
Tip: Be sure to add yourself as an Account and select the Administrator role (and volunteer role is you also volunteer on the helpline).
Define your helpline shifts
Now that people have been associated with the helpline, it is time to set up the helpline schedule of shifts, so people can be assigned to those shifts. Before you can do that, you must first define your helpline shifts.
- Select the Shifts tab.
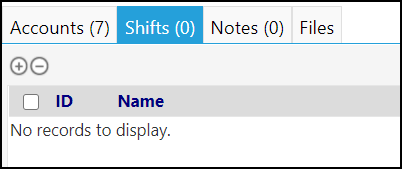
- Click the ‘+’ to add the helpline’s shifts.
NOTE: If you wish to remove an entry you made, select the entry by clicking in the checkbox to the left of the entry, and click the ‘-‘ button.
- Enter the Shift Name.
- Select the Shift Status from the drop-down list. (You can make a shift Active or Inactive – this was set up so you can also do temporary changes to your program.)
- Enter a sort order.
NOTE: The sort order is the order that you want the item to appear on the screen when the list of Shifts is displayed. The lower the number, the higher the Shift will appear in the list of Shifts. We typically recommend you do them in factors of 10, so you always have room to move another shift before it, without having to renumber your sort order if you were to add a new shift at a later date. You can use any numbers you want for this. You can change this at any time, if you do not like the order they Shifts are displayed in.
Example:
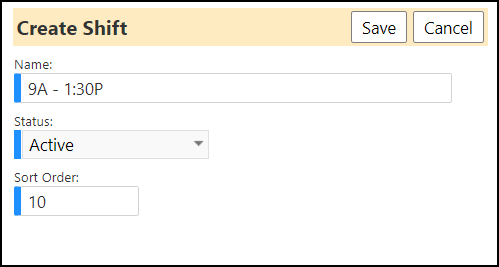
- Click Save to save your entries.
- Repeat for all other shifts you wish to add. Remember that you can add some you think you might want in the future or for holidays or other special occasions and make them inactive if you do not care to use them right now (you can always activate them at any time).
Your shifts will display in the list.

- If you wish to change any of them, click on the ID number for that shift. (This is also how you would change the status.)
This will bring you into the Edit screen for the entries you just made for that shift.
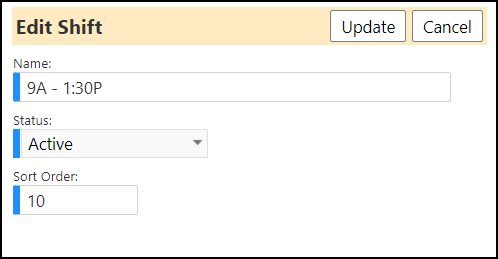
- Make any changes you desire and click Update.
Your changes will display in the list of Shifts.
NOTE: If you wish to remove any shift that you created, select the shift you wish to remove by clicking in the checkbox to the left of the entry, and click the ‘-‘ button.
Schedule your helpline shifts
Now that the shifts have been created, you need to build your list of shifts - defining which shifts occur on which days of the week. In other words, you need to schedule your shifts.
- Click the Go to Shift Builder button.

NOTE: If you get a message indicating the following…
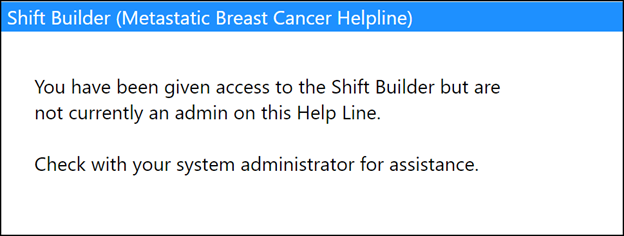
This means you were added to this helpline, but you were not set up as an Administrator. To correct this:
- Click Cancel to exit this screen.
- Select the Accounts tab.
- Locate your account (or add your account by clicking on the ‘+’ and going through the steps previously outlined).
- Click Edit (next to your AccountID).
- Change your setting to Administrator by checking the Administrator box.
- Click Save to save your entries.
- Click Apply to save all of your changes but remain in the same page.
You can now continue with building the shifts.
- Select the Shifts tab.
- Click the Go to Shift Builder button.

The Shift Builder screen will now display all of the shifts you have indicated were active, in a calendar view.
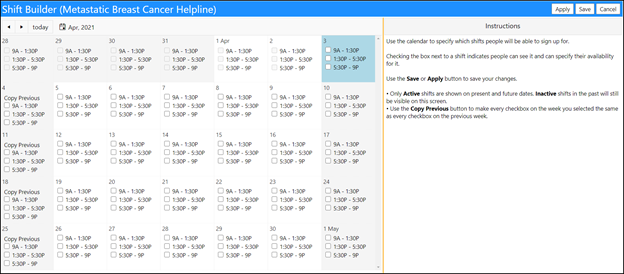
You have already identified what possible shifts you have, but this is where you will select which shifts are available on which days of the week so people will be able to sign up for the shifts.
Select the shifts that you want available on each day for people to see and specify their availability, by checking the box next to the shifts.
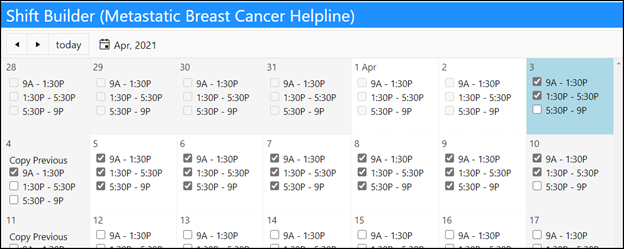
NOTE: Some boxes are grayed out – this means the date is already passed, so you cannot schedule a shift in the past. Also note that one box is colored while the others are gray. This is the current date. Only Active shifts are displayed on current and future dates in the Shift Builder. Inactive shifts will only be displayed in the past if they active in the past. Inactive shifts will not be displayed on current and future days.
To make it easier for you, so you don’t have to go through the entire calendar, we have implemented a way to copy your selections from the previous week into the current week – then if there are slight changes, it is easier to remove checkboxes than to add them.
- Copy the previous week’s selections, by clicking the Copy Previous words in the row after the week you wish to copy:
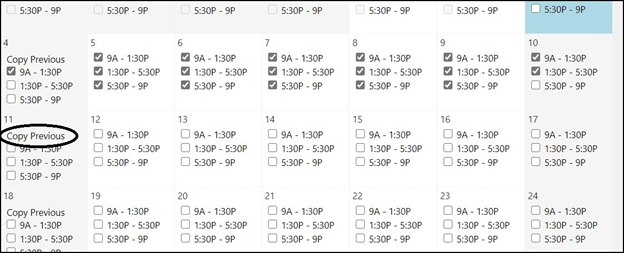
The selections from the prior week will immediately copy over.
- Repeat as needed for the remaining weeks.
- Make any changes to your selections that you wish, by checking or unchecking the box for that shift.
- Click Apply at any time to save your current entered selections and remain on this page.
- Click Save at any time to save your current entered selections and exit the page (and return at a later time if needed).
NOTE: you can always make changes to your selections, or continue your selection process, by returning to the Shift Builder screen.
Your selections for the month are displayed.
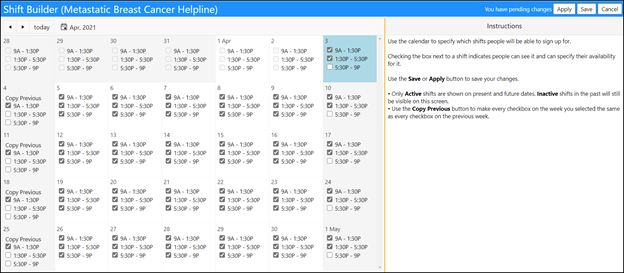
- Click Save when you are completed with your selections.
The shifts you have selected are the ones that your volunteers can indicate their availability for.
NOTE: If you have not done so already, you must make your helpline Active.
- Select your helpline by clicking on its ID.

- Once the helpline opens, select the status Active from the drop-down list of statuses.

- Click Save to save your change.
The shifts are now ready for the volunteers to look at and indicate if they are available to participate.
View the availability of Volunteers to work a shift
Once you have created and 'published' your shifts, Volunteers may look at them and indicated they are available to work that shift. At any time, you can view the volunteers who have indicated their availability for any of your helpline shifts.
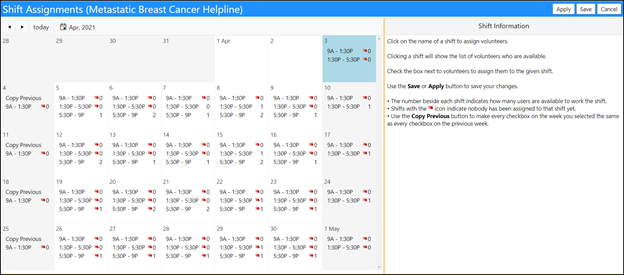
- Click the Shift Assignments button to view the available volunteers and schedule them for your shifts.

The Shift Assignments screen will display each shift that you had checked in the previous step. It will also identify if any volunteers are available to work the shift or if no volunteers are assigned to a shift.
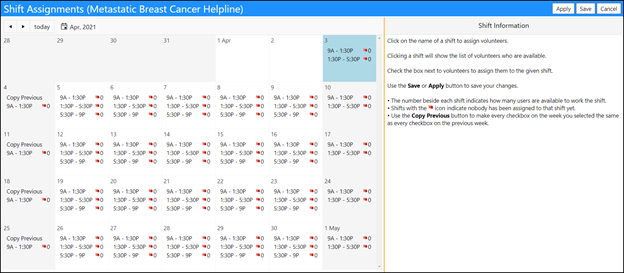
The way these days and shifts are read is the following:
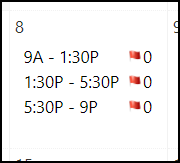
For this shift on the 8th of the month, there are ‘0’ people who have indicated they were available on each of the 3 shifts. I also know that because there are red flags informing me that no one is assigned to that shift.
If someone had been assigned to any one of those shifts, the number of people assigned would display, and if the shift itself was clicked on, the names of those available for that shift would display.
Assigning available volunteers to a shift
Once a volunteer has indicated they are available to work a shift, the shift scheduler must select volunteers for that shift.
To schedule available volunteers…
After logging into imPowr, go to the Help Lines in the Help Lines section of the Community menu.
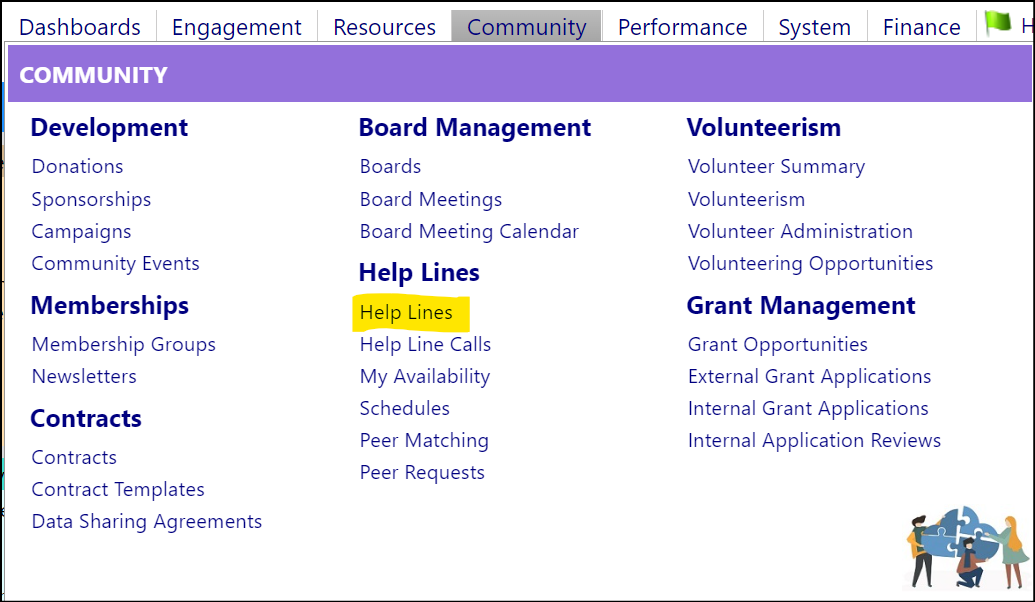
The Helplines which have been set up will display:

- Select your helpline by clicking on it’s ID.
- Select the Shifts tab.
- Click on Go to Shifts Assignments.

The shifts will display as will the number of volunteers who indicated they were available for that shift.
Example:
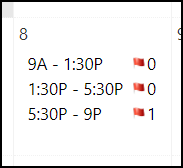
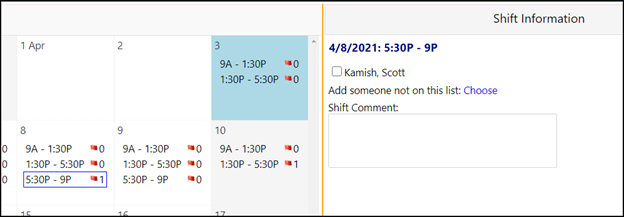
In this example, only 1 person indicated they were available for the 5:30P – 9P shift on the 8th of the month. And, because of the existence of the red flags, I can see that no one has been assigned to any of the 3 shifts yet (if you hover over the red flag with your cursor, you will see this message).
- Click the shift to see who had indicated they were available.
A box will display around the shift you selected.
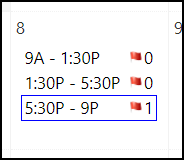
Had there been more than 1 person who indicated they were available for a shift; the number of available volunteers would be listed next to that shift.
On the right side of the screen, you can see the volunteer(s) who have indicated they were available for that shift:
If there are more than 1 person who had indicated they were available for that shift, you would see their names listed:
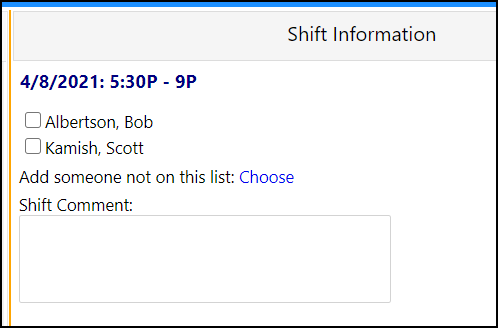
- Assign the volunteer(s) to that shift from the list of those who have indicated they were available to work that shift, by checking the box to the left of their name.
- Click Apply when you are finished with your selection(s).
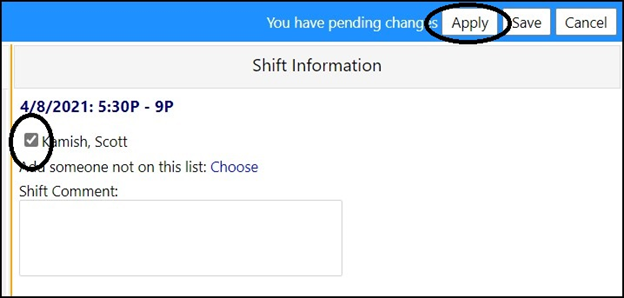
Note that the flag has now been removed from this shift, indicating one or more people have been scheduled:
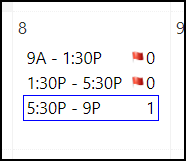
(The number of volunteers who have indicated they were available for that shift, still are displayed.)
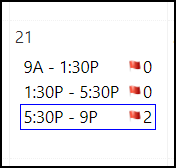
Had there been 1 person selected from the 2 available volunteers – or if both the available volunteers were selected for this shift, you would see the following:
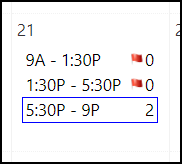
Clicking on the shift will display the names of those selected, on the right side of the screen:
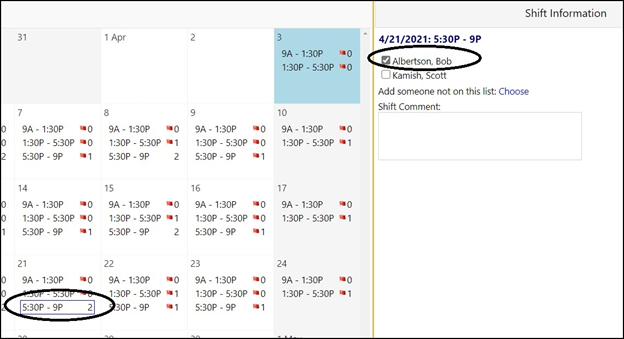
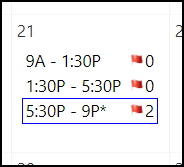
In the above example, even though there were 2 people who indicated they were available to volunteer for the 5:30P – 9P shift on the 21st of the month, only 1 person was selected.
NOTE: You may make changes to your selections at any time, by going into this screen, selecting the shift, and checking or unchecking the boxes of the available volunteers.
In the following example, 2 of the 3 shifts have volunteers assigned. There were 2 volunteers who indicated they were available for the 5:30P – 9P shift and only 1 volunteer available for the 1:30P – 5:30P shift. In order to see the names of the individuals, you would have to click on the shift and view the selected volunteers from the right side of your screen.
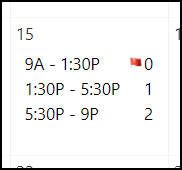
NOTE: As you select your volunteers, an asterisk will appear next to the shift. The asterisk indicates a volunteer selection has been made but has not yet been saved (i.e., asterisk indicates there are pending changes).
- Click Apply to save your selection (this will remove the asterisk).
- Click Save when you are finished with selecting your volunteers.
NOTE: You may always return to this screen and made whatever necessary changes are needed.
If you feel you need additional coverage for your helpline shift, but no one has indicated they were available, or wish to fill a slot that no one is available for, you can always manually assign a volunteer to a shift by selecting the shift and adding their name. (Typically, you would only add someone who had indicated they were available to work the shift, but imPowr does not have any restrictions for this – you can also add those who had not indicated they were available.)
- Click the shift. This will put a box around the shift, indicating it has been selected.
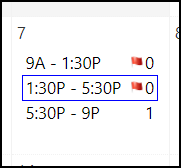
On the right side of the screen, there is a panel labeled Shift Information.

- Click Choose to add someone not on the list.
- Select their name by clicking on it.
NOTE: you can only select one name at a time.
- Click save when you are done with your selection.

NOTE: if see a flag next to that volunteer’s name, if you hover over that flag with your cursor, you will see that person may not have indicated they were available for that shift.
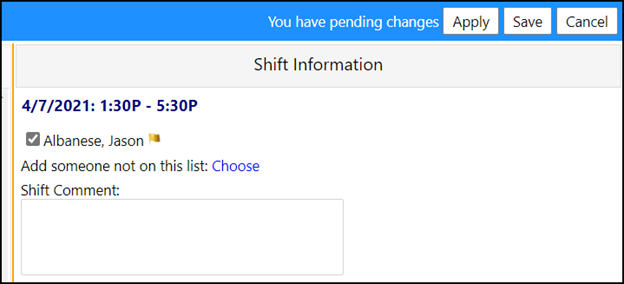
- Click Apply to assign that person to the helpline shift.
Even though you assigned someone to that shift, if there had been no volunteers who indicated they were available for that shift, no number would appear to the right of the shift. But, the red flag would be removed, meaning someone had been assigned to that shift.
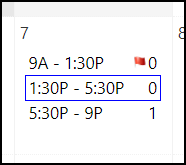
To remove a Volunteer from the shift, after clicking on the shift and viewing your selection in the right side of the screen, just remove the check to the left of their name.
When you click Apply or Save, their name will be removed from the display.
- Click Apply when you are done with all your changes and wish to view the entire schedule to see which shifts have been filled and which are still open.
- View the names of the volunteers assigned to those shifts but clicking on the shift.
- Click Save when you are done with all of your shift assignments and wish to leave the page.
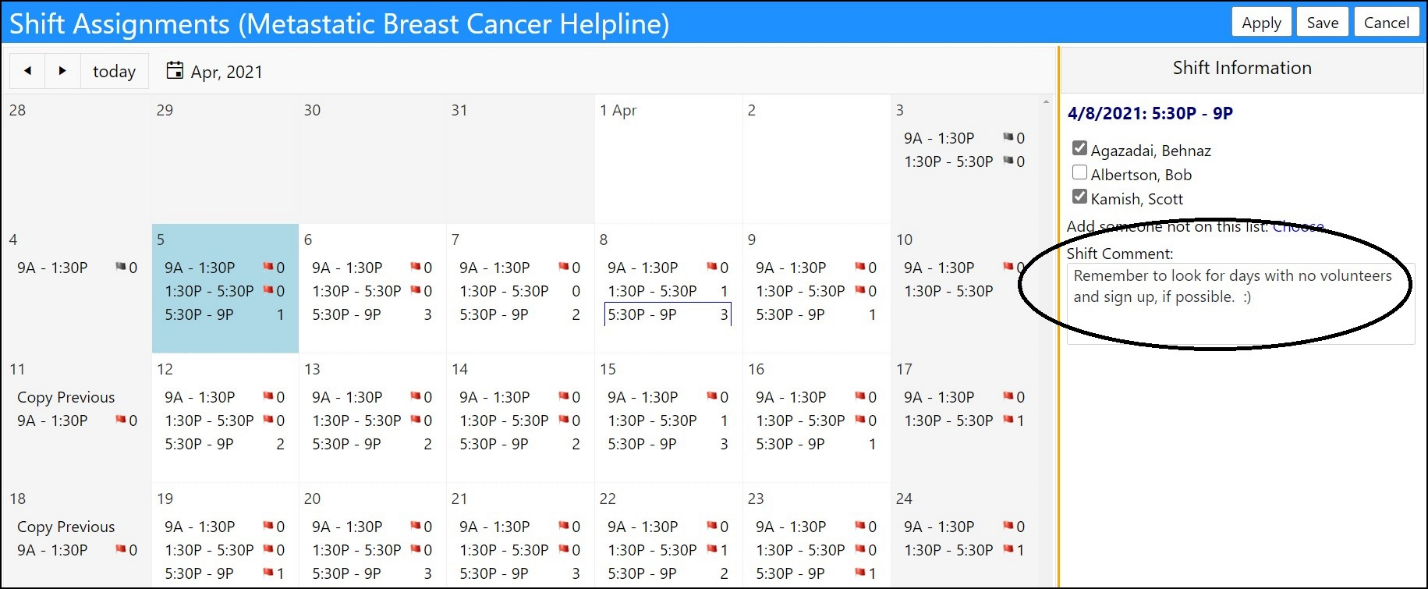
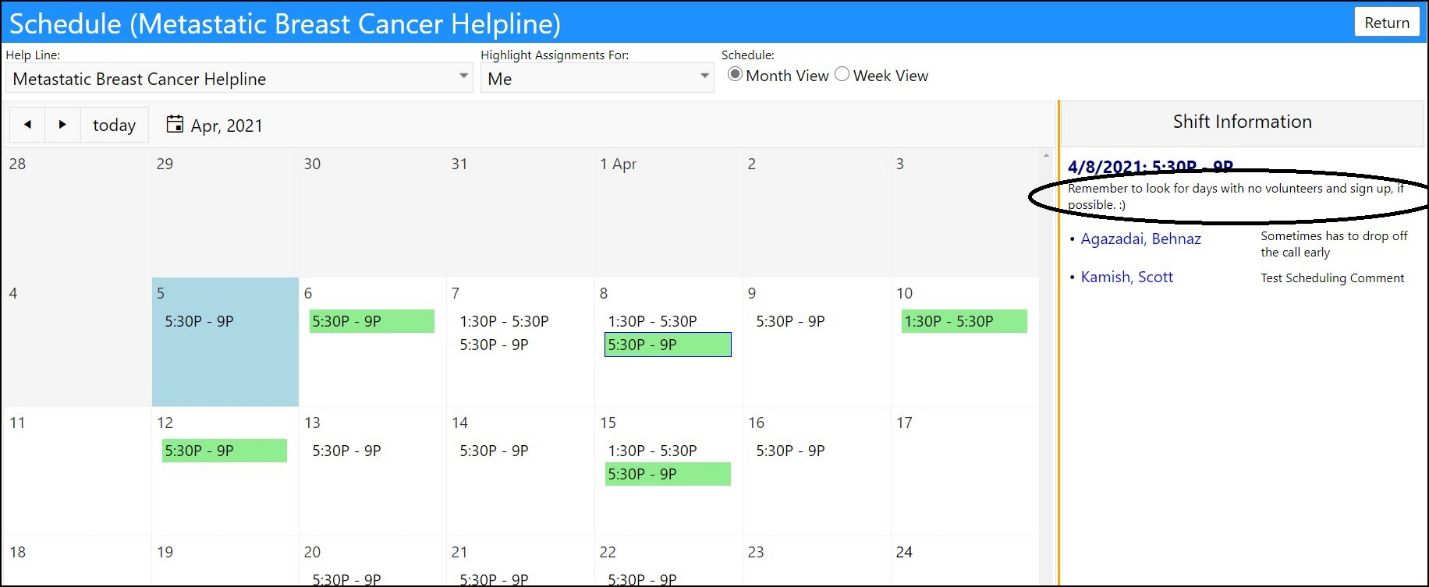
The Shift information, as seen in the previous Shift Assignment screen capture, also contains a box to enter Shift Comments. These are public facing comments, available to all who view the schedule. These can be used for things like informing volunteers to remember to turn in some paperwork by the time their particular shift ends, or to remind them that due to an upcoming holiday, it would be appreciated if they could volunteer, etc.
These comments will display under the shift day / time, when you click on a shift in the Schedule:
Viewing the Volunteer shift assignments
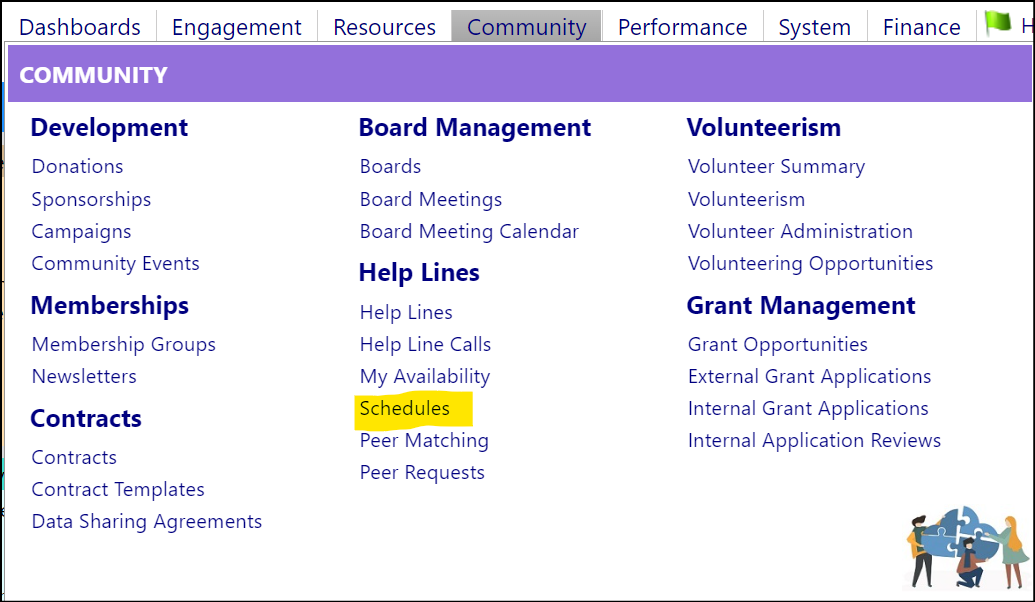
To view a cleaner version of the overall schedule/assignment of all of the volunteers for the helpline shifts, select Schedules in the Help Lines section of the Community menu:
The shift schedule will display in a calendar view:
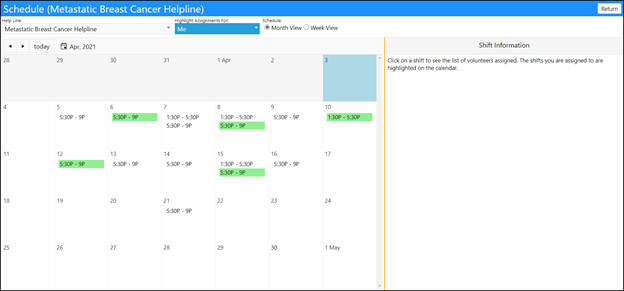
Select Month View or Week View.

Month View:
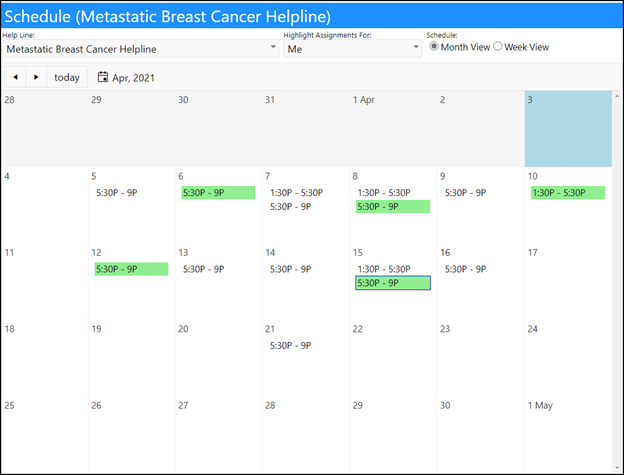
Week View:

Tip: Scroll through the weeks by clicking on the left and right arrows:

The schedule will display all dates for which volunteers have been assigned to a shift, along with the shift.
If not already displayed, choose your Helpline from the drop-down list of helplines.

If there are volunteers assigned to a shift, that shift (or shifts) will display in the calendar:
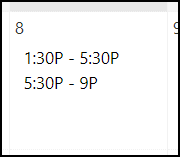
If there are no volunteers assigned, the shift will not be displayed in the calendar:
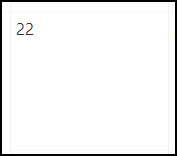
- Choose which Volunteer you wish to view the schedule for, from the Highlight Assignments For drop-down list:

As soon as you do that, the assignments for that person (or yourself) will be highlighted in the schedule calendar:
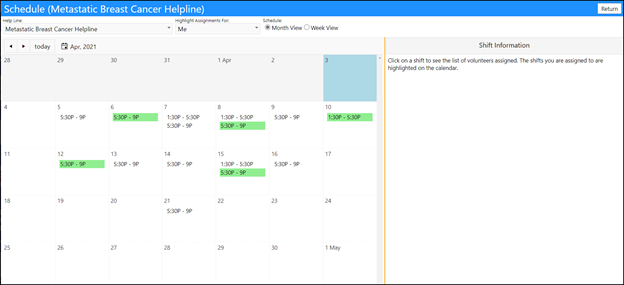
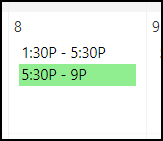
Switch Helplines from the Helpline drop-down list, to view your assignments on other Helplines.
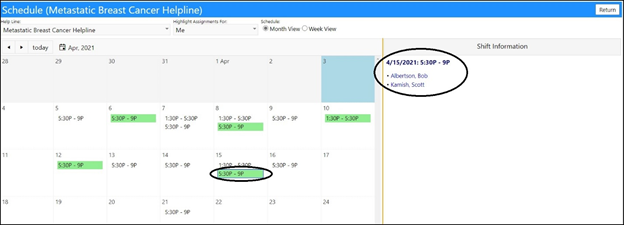
- Click on the shift to see the names of those assigned to that shift:
- Click Return to exit this page.
Confidential