This article will tell you how to add, modify, and delete community event
items and details.
Table of Contents:
-
Modifying/Updating Event Details
-
Add/Delete/Modify Items and Information
-
Event Ticket Types
-
Event Sponsorship Levels
-
Event Sponsors
- Sponsor Mailing Labels
-
Vendors
- Vendor Mailing Labels
-
Volunteers
- Assigning Volunteers to Activities
-
Attendees
- Name Tags/Mailing Lists
-
Media
-
Signage
-
Gifts
-
Supplies & Expenses
-
Event Speakers
-
Event Tables
- Multiple Tables
- Table Signs
-
Notes
-
**Working with Community Events - Modifying and Updating an Existing Community Event Details **
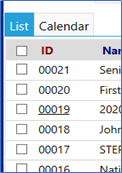
To make changes to an existing event, just click on the ID of the event (from the list of events) to select the event:
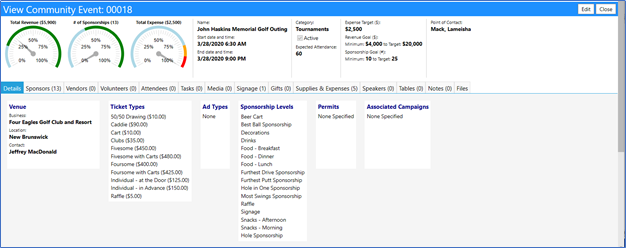
Click on the Edit button to activate the ability to change any of the fields previously entered:

From this screen, you can click between tabs and change fields as desired:
- Clicking on the ‘+’ sign will allow you to add items
- Selecting an item and then clicking on the ‘-’ sign will allow you to delete that item

IMPORTANT: Be sure to press the “Apply” button after your changes and before moving between tabs, or your changes may not be saved.
Be sure to press the “Save” button when your changes when completed so all your changes will be saved!

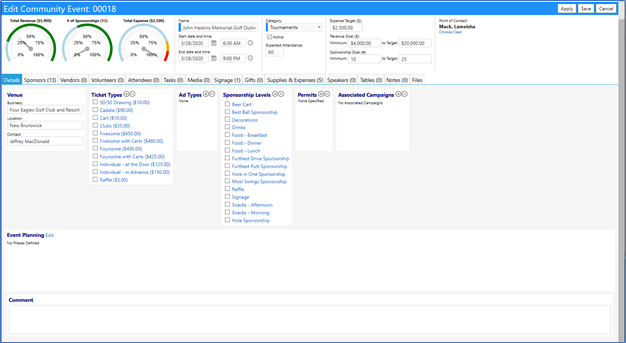
Add, Delete, or Modify items or information:
- Add new items by clicking on the ‘+’ sign
- Delete an existing item by selecting that item and clicking on the ‘-’ sign
- Once you are done with your changes, click on “Save” to apply the changes
Note the items which need to be changed in the Details tab.
Adding, Deleting, or Modifying Event Ticket Types:
Note: before you add sponsorship levels, you will want to set up Ticket Types.
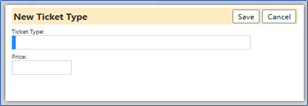
In the Details tab, look for the box labeled “Ticket Types”. Click on the ‘+’ in the box. Enter the type of ticket, along with a price.
Save.
The ticket types will display in the Ticket Types box:

Adding, Deleting, or Modifying Event Sponsorship Levels:
Note: before adding sponsors, you must first establish the Sponsorship levels.
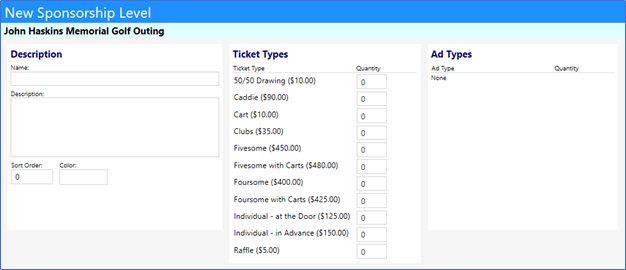
In the Details tab, look for the box labeled “Sponsorship Levels”.
Click on the ‘+’ sign in the box.
Enter the Sponsorship level, a description, and the number of each ticket type for that level (this is optional, especially if there is no limit to the number of tickets being sold).
Now that you have established tickets and sponsorship levels, you can add Sponsors, Vendors, Volunteers, and Attendees.
Adding, Deleting, or Modifying Event Sponsors (Sponsor’s Tab):
Click on the Sponsor’s Tab.
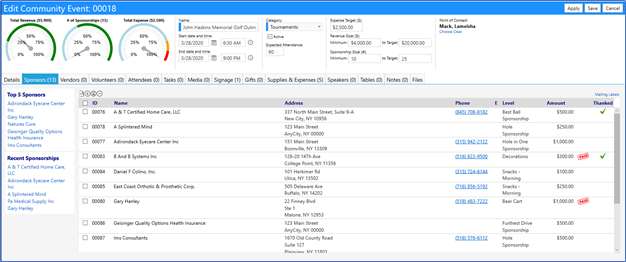
To add a Sponsor, click on the ‘+’ in the Sponsors tab. From here, you can add a new Organizational Sponsor - you can add an Individual Sponsor by clicking on the person symbol:


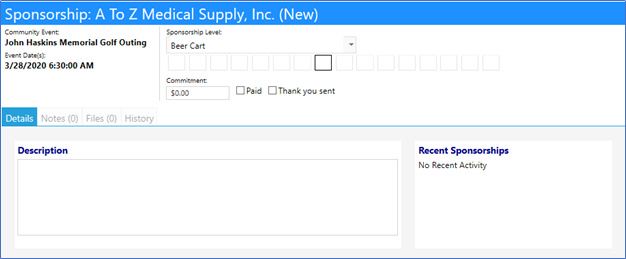
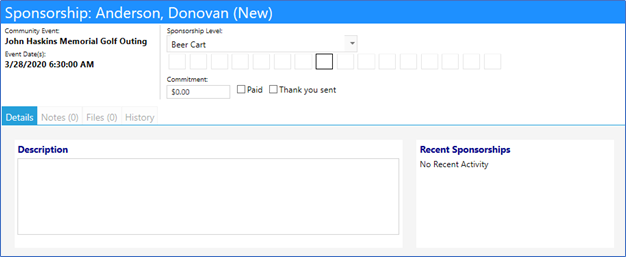
After selecting the type of Sponsor that you wish to add…
- select the organization from the list. (From this screen, you can add one or more organizations by clicking in the checkbox to the left of their name, and then clicking the Save button.)
- select the sponsorship level from the drop-down list
- enter the amount of commitment and…
- identify if the amount is paid or if a thank you was sent
Creating Mailing Labels for Sponsors:
Clicking on ‘Mailing Labels’ on the right-hand side of the screen, will create Mailing Labels for each of your Sponsors

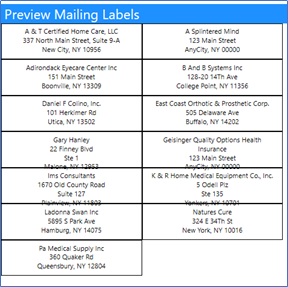
You can change the settings for the Mailing labels, if desired:
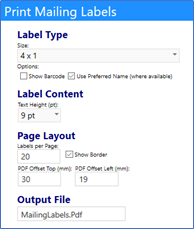
Adding, Deleting, and Modifying Vendors:
The Vendor tab works similarly to the Sponsors tab.
- Click on the Vendors tab…
- Add a Vendor by clicking on the ‘+’ sign. (From this screen, you can add one or more vendors by clicking in the checkbox to the left of their name, and then clicking the Save button.)
- Similar to Sponsors, to delete a vendor, select the vendor and click on the ‘-‘ sign
- After a Vendor is added, their entry can be edited and changes can be made by clicking on the checkerboard to the right of the screen:


Clicking on the Edit checkerboard allows you to make changes to the Vendor, such as identifying the fee the Vendor is paying to participate in the event, whether or not it has been paid, and whether a Thank You note has been sent to the Vendor. In this screen you can also identify if there are any special needs for that Vendor (for their booth), if they will have some signage, and where the signage will be located:
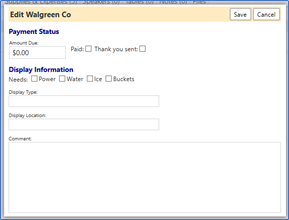
Click on “Save” to apply the changes
Once entered, these items will display in the Vendors list:

Creating Mailing Labels for Vendors:
Clicking on ‘Mailing Labels’ on the right-hand side of the screen, will create Mailing Labels for each of your Vendors
You can change the settings for the Mailing labels, if desired:
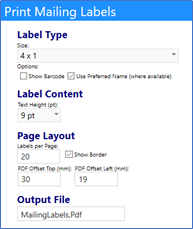
Adding, Deleting, and Modifying Volunteers:
The Volunteer tab works a little differently than the other tabs
Click on the Volunteers tab:

The following steps will allow you to add Volunteers to a Community Event:
In order to add Volunteers, you must first create the needed Volunteer activities. To do this, you first create a category of activities (for example, Administration). You then add in the activities you desire, to that category (for example, in Administration, you want one or more people to register the participants, and someone to collect the payments.)
- To set up the activity category, click on the Edit Activities icon, which is the 2nd icon from the left in the Volunteers tab:
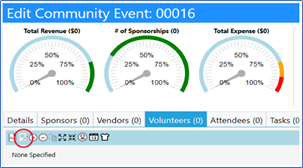
- Click on “New Category”:

- Enter the category of Volunteers (for example ‘Administration’ ):
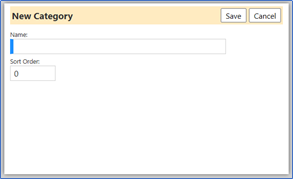
- Click on “Save”
Now that you have a volunteer activity category, you need to add in the volunteer activities which fall under that category. You have 2 ways to add the activities for that category…
-
The first way:
- While still in the Volunteers tab, click on the ‘+’ sign to add a Volunteer Activity for your Volunteer Category (be sure to make the position active – this will display it on your screen)
- Fill in the necessary information (Enter the Name and select the Volunteering Category from the drop-down list)
- Click “Save”
- Click on “Return”
NOTE: If you can't see all categories and activities, click on the Triangle to
expand the list to see what you entered.
-
The second way:
-
While still in the Volunteers tab, click on the ‘+’ sign to add a Volunteer Activity for your Volunteer Category (be sure to make the position active – this will display it on your screen)
- Fill in the necessary information (Enter the Name, Select the Volunteering Category from the drop-down list, enter a description (optional), the assignment in the Activity Details section, enter the location (if needed), a point of contact, and identify how many open positions you want to fill for that activity.
- Click “Save”
- Click on “Return”
NOTE: If you can't see all categories and activities, click on the Triangle to expand the list to see what you entered.
You should now see those Volunteer activities in the Volunteers tab
- If you set these positions using the first method, click on each one you to fill in the missing information. E.g., enter the number of positions you need, along with the hours needed, the point of contact, instructions, location, etc.
- Click on “Save”
Your Volunteer activities are now all entered and are displayed in the Volunteers tab.
Assigning Volunteers to Activities:
Now that you have volunteer activities, you can assign volunteers to do those jobs. To add a Volunteer (i.e. assign them to one of the activities), while in the Volunteers tab, click on the person in the circle:

- Click on “Add New”:

- Choose the name of the person who will be volunteering (volunteers can only be added one at a time)
- Highlight that person and click on Select:

-
Click on ‘Activity Description’
- Choose the volunteer activity by selecting the Volunteer Activities (expand the selection by clicking on the triangle to the left of Community Events):
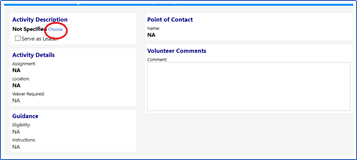
- Find your event a Volunteer Activity (you might have to click on another triangle to show the activities for your particular event). The activities you created should be found in the Community Events Volunteer Activities, under the event you created them for:

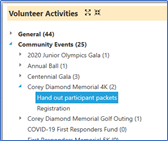
- Click on that activity to highlight it and click on “Select”
- When you click on “Save”, that person has been assigned that volunteer position
- If you click on “Return” (then click on the activity), you will see their assignment
Adding, Deleting, and Modifying Attendees:
Click on the Attendees tab:

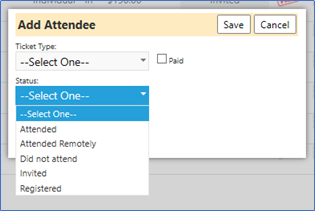
Click on the ‘+’ to add a new Attendee:

Adding a new Attendee allows you to identify the ticket type that they selected, whether or not they paid, and whether or not they attended the event. Click on “Save” to apply the changes:
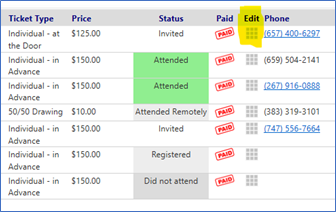
All this information is captured in the Attendee list for the event:

‘Paid’ stamps will be displayed for all who paid, as well as the ticket type and amount and whether or not they attended the event.
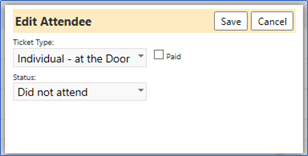
Any change to these fields can be made by clicking on the checkerboard and editing the entry:
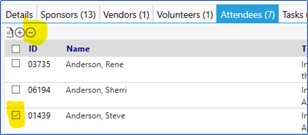
To delete an Attendee, you can either edit their entry to mark them as ‘Did not attend’ or, to remove them completely, check the box to the left of their name and click on the ‘-‘ button:
Click on “Save” to apply the changes
Name Tags or Mailing Labels:
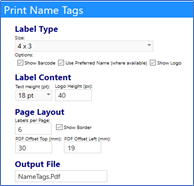
If desired, name tags or mailing labels can be created by selecting the Attendee and clicking on either Name Tags or Mailing Labels:

You can change settings for your name tags if desired:
Adding, Deleting, or Modifying Media:
Click on the Media tab:

Click on the ‘+’ to add a new Media type:

Adding a new Media allows you to identify…
- the Media type (print, radio, social media, or other)
- the date it was added
- the organization, and…
- a description of the Media
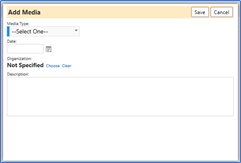
Click on “Save” to apply the changes
All this information is captured in the Media list for the event:

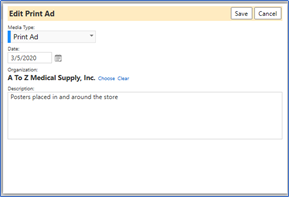
Any change to these fields can be made by clicking on the ID for the Media and editing the entry:

To delete Media, check the box to the left of the Media Type/ID and click on the ‘-‘ button:

Adding, Deleting, or Modifying Signage:
Click on the Signage tab:

Click on the ‘+’ to add new Signage:

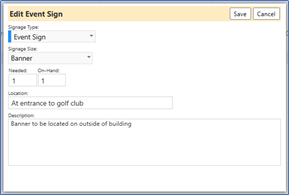
Adding a new signage allows you to identify…
- the signage type (event sign, hole sign, sponsor sign, vendor sign, or other)
- the signage size (banner, large, medium, small, or other)
- the number of signs needed
- the number of signs on-hand
- the location (placement) of the signage, and…
- a description of the signage
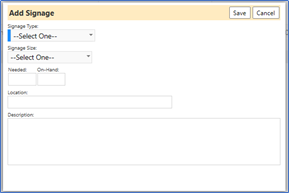
Click on “Save” to apply the changes
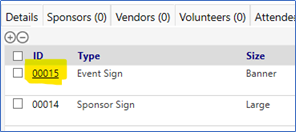
All this information is captured in the Signage list for the event:

Any change to these fields can be made by clicking on the ID for the Signage and editing the entry:
To delete Signage, check the box to the left of their Signage Type/ID and click on the ‘-‘ button:

Adding, Deleting, or Modifying Gifts:
Click on the Gifts tab
Click on the ‘+’ to add new Gifts:

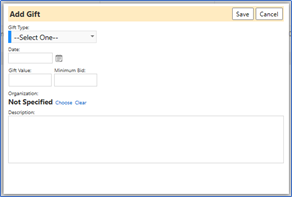
Adding a Gift allows you to identify…
- the gift type (auction item, award, prize)
- the date of the gift
- the value of the gift
- the minimum bid (if used as an auction item)
- the organization, and…
- a description of the gift
Click on “Save” to apply the changes
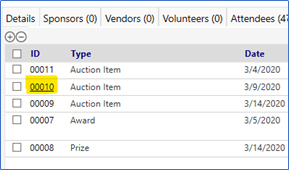
All this information is captured in the Gift list for the event:

Any change to these fields can be made by clicking on the ID for the Gift and editing the entry:
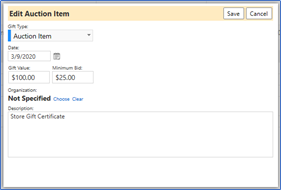
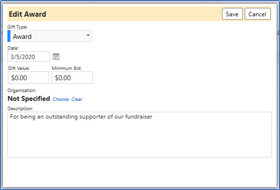
Click on “Save” to apply the changes
To delete Gifts, check the box to the left of their Gift Type/ID and click on the ‘-‘ button:

Adding, Deleting, or Modifying Supplies & Expenses:
Click on the Supplies & Expenses tab:

Click on the ‘+’ to add new Supplies & Expenses for your event:

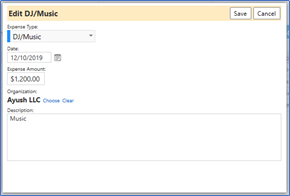
Adding a new Supplies & Expenses allows you to identify…
- the Expense type (Advertising, Decorations, DJ/Music, Food, Drinks Equipment, Invitations, Services, Transportation, Venue, Other, etc.)
- the date of the Expense
- the Expense amounts
- the organization tied to the Expense, and…
- a description of the Expense
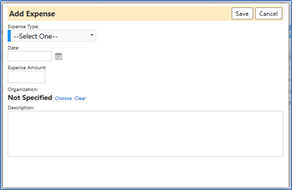
Click on “Save” to apply the changes
All this information is captured in the Supplies & Expenses list for the event:

Any change to these fields can be made by clicking on the ID for the Supply/Expense and editing the entry:
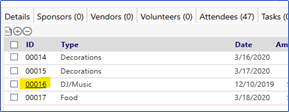
Click on “Save” to apply the changes
To delete Supplies & Expenses, check the box to the left of their ID and click on the ‘-‘ button:

Adding, Deleting, or Modifying event Speakers:
Click on the Speakers tab:

Click on the ‘+’ to add new Speakers for your event:

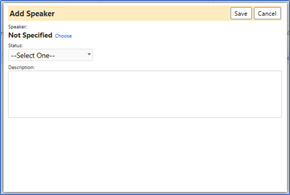
Adding a new Speaker allows you to identify…
- the Speaker’s name
- the status of the Speaker (Accepted, Declined, Invited, or Pending), and…
- a description (this could be what they will be discussing, or a description of the Speaker themselves)
Click on “Save” to apply the changes
All this information is captured in the Speakers list for the event:

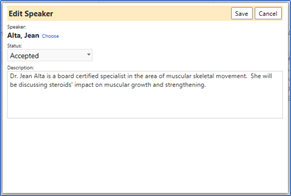
Any change to these fields can be made by clicking on the Edit checkerboard to the right of the description, for the Speaker, and editing the entry:

To delete Speakers, check the box to the left of their Speaker Name/ID and click on the ‘-‘ button:

Adding, Deleting, or Modifying event Tables:
When you wish to add Tables for your event, you have two options:
- add a single table
- add multiple tables at one time
To add a single table, click on the Tables tab:

Click on the ‘+’ to add new Tables for your event:

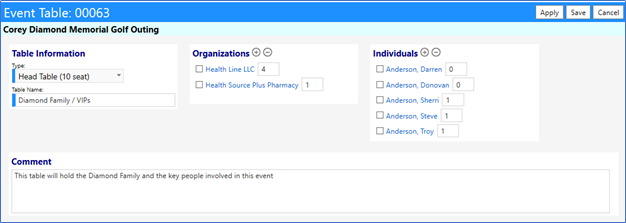
Adding a new Table allows you to identify the following for your event…
- the Table type (various size head tables, various size round tables, various size square/rectangular tables, other)
- the Table name, and…
- any comments you would like to add

In order to identify the Organizations and Individuals who will be represented at that Table, click on “Apply”:

Click on the ‘+’ to add a new Organization to your Table and enter the number of seats which will be filled:

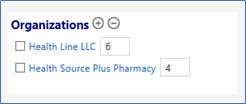
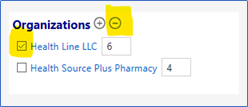
To delete Organizations, check the box to the left of their name and click on the ‘-‘ button:
Click on the ‘+’ to add a new Individuals to your Table:

Indicate the number of seats attributed to that Individual in the box to the right of their name. In other words, if the Individual is coming alone to the event, enter a “1" in that box. If they are bringing one guest with them, enter the number “2” in the box to the right of the Individual’s name. If they will not be attending, either delete them, or enter the number “0”:
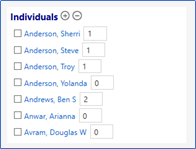
NOTE: The number of people at the table will be the sum of the Organization seats, PLUS the Individual seats PLUS the sum of their guests.
Clicking on “Save” will display your table information and will inform you if there are too many people for your Table:


To delete Organizations or Individuals, check the box to the left of their Name and click on the ‘-‘ button:
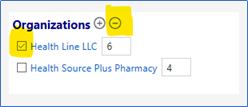
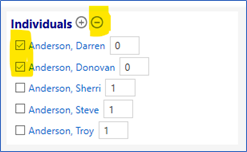
You can also change the number of seats being filled by editing the Table entry. Do so by clicking on the Table ID and making whatever changes are required:

After you click on “Save”, all this information is captured in the Table list for the event:

Adding, Deleting, or Modifying Multiple Tables:
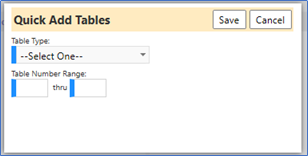
Select the creation of Multiple Tables by clicking on the ‘++’ icon:

Similar to the adding of Individual Tables, when you add Multiple Tables, you select the Table Type (various size head tables, various size round tables, various size square/rectangular tables, other)
You also have to add the Table Number Range:
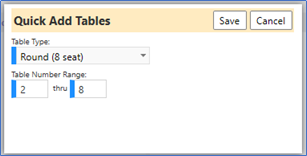
After you click on “Save”, all this information is captured in the Table list for the event:

You can now go into each of your Tables to add Organizations or Individuals who will be seating there and change the Table name if needed, by clicking on the Table ID, to the right of the Table name:


To delete Tables, check the box to the left of their Table Name/ID and click on the ‘-‘ button:

Adding, Deleting, or Modifying Table Signs:
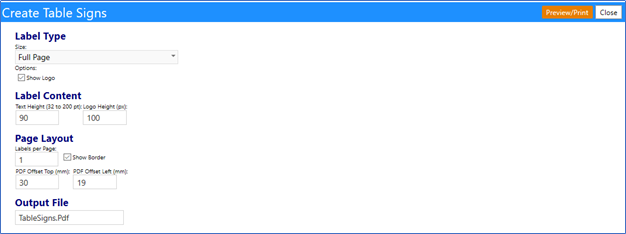
Click on the Table Signs icon (which appears when you select the Tables tab):

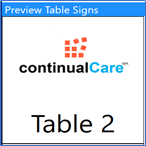
You can change the size and design of the Table Sign – and then preview and/or print your signs:
Adding, Deleting, or Modifying Notes:
Click on the Notes tab:

Click on the ‘+’ to add new Notes for your event:

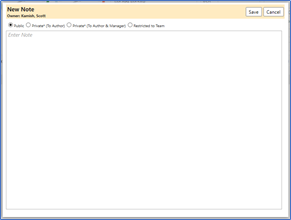
When adding a new Note, you must identify how you would like it to be published…
- the Public (anyone can view this in the event)
- Private* (to Author) (only the author can view this)
- Private* (to Author & Manager) (only the author and their manager can view this)
- Restricted to Team (only the team can view this)
Once the Note is created, it is displayed (depending on how published) in the Note list:

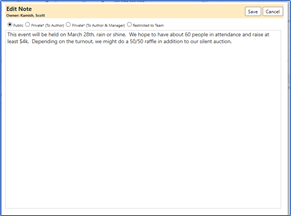
Any change to these fields can be made by clicking on the Edit checkerboard to the right of the Note, and editing the entry:

To delete Notes, check the box to the left of the Notes and click on the ‘-‘ button:

**IMPORTANT: Be sure to press the “Apply” button after your changes and before moving between tabs, or your changes may not be saved. **
Be sure to press the “Save” button when your changes when completed, so all your changes will be saved!