Workorders are just another form of tasks, except that they are entered/created slightly differently.
The User Workorder Request Screen
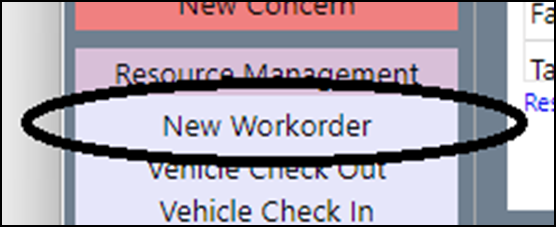
Step 1: Select “New Workorder”
In order see this button, users must be in a security role that has this workflow enabled.
You can also make this link in other ways:
- As a “Favorite” where it will appear on the dashboard favorites list .
- On a menu – using the custom menu feature.
- As the default landing page for a user.
- As a link that you could embed in an email – so that when a person clicks the link, the login screen appears, and right after login, the person is directed to the workorder request screen.
The simplest way to set those up is to just to turn on the user rights for the role they are in, and the button displays in the left side of the imPowr MyDashboard screen, as shown below.
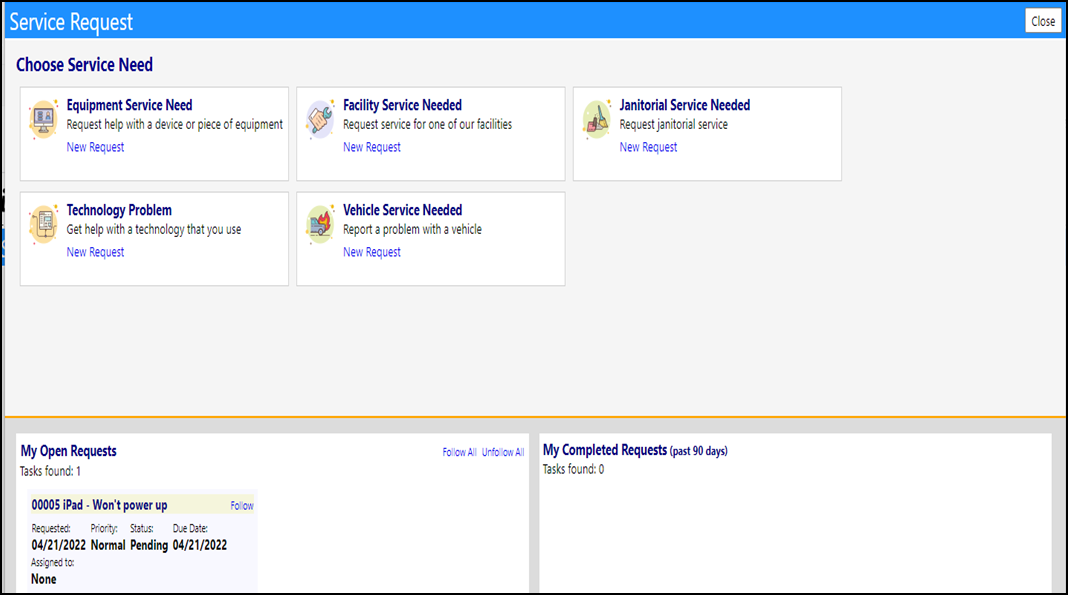
Step 2: The workorder screen appears. Each box is a “Workorder Type”.
Click the icon or the link. When clicked, a popup appears. The details of the popup will depend on how the workorder “type” is configured.
Setup of the Workorder “Types”
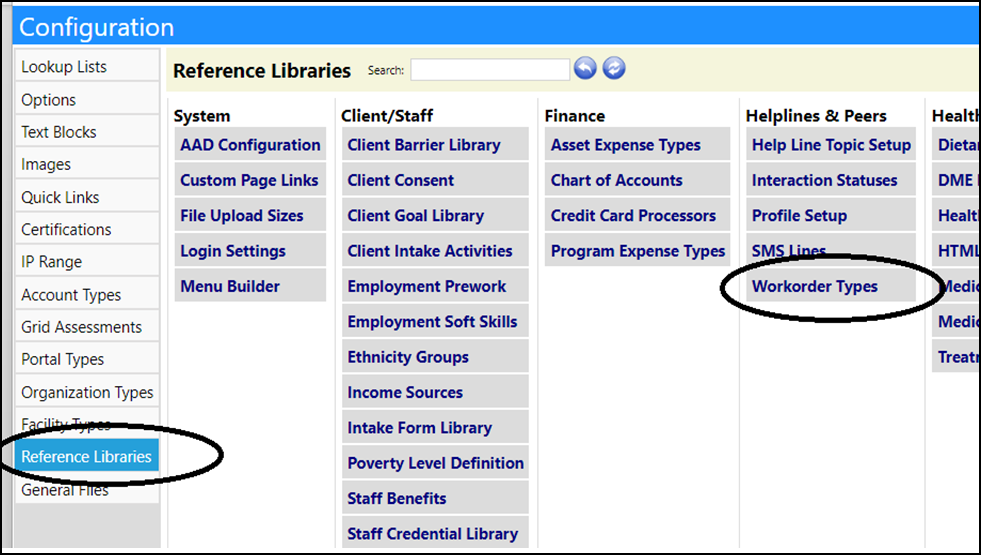
Step 1: Go to the configuration page

Step 2: Select “Reference Libraries”
Step 3: Select “Workorder Types”
Step 4: Click “Add” for a new type or click the ID # to Edit.
The detail screen will appear.
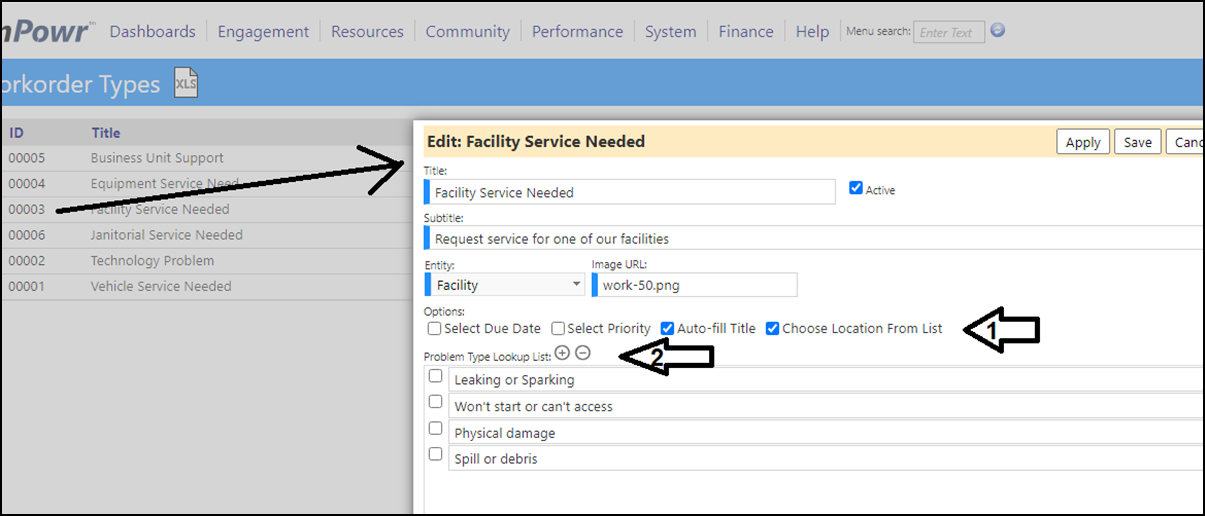
You can hide or show a “type” by toggling the “active checkbox”.
Turn the priority and due date options on or off as needed.
Optionally (and recommended) turn the “auto title” feature to on.
If selection is to be selected from a list, check the corresponding box. If free text entry, uncheck the box.
NOTE: In the future, we will be adding a ‘copy’ option for the problem list so that you can copy it from another workorder type.
The entity dropdown is important. It dictates the behavior of the box.
The choices are:
- Asset
- When Asset is selected, the user is presented with a list of "Vehicle Assets" to choose from.
- The problem list is the default list.
- Business
- When Business is selected, the user is presented with a list of "Businesses" to choose from.
- The problem list is the default list.
- Equipment
- When equipment is selected, the user is presented with a list of “Equipment Types” to choose from.
- The problem list is the default list.
- Facility
- When facility is selected, the user is presented with a list of “Facilities and Locations” to choose from.
- The problem list is the one specified for facilities – or if none are specified, then it is the default list.
- Technology
- When technology is selected, the user is presented with a list of "Technologies" to choose from.
- The problem list is the default list.
The setup of these lists will be discussed in the sections that follow.
Configuring The Facility Problems
Step 1: Go the Configuration
Step 2: Select “Reference Libraries”
Step 3: Select “Facility Problem Types” and the list will appear.
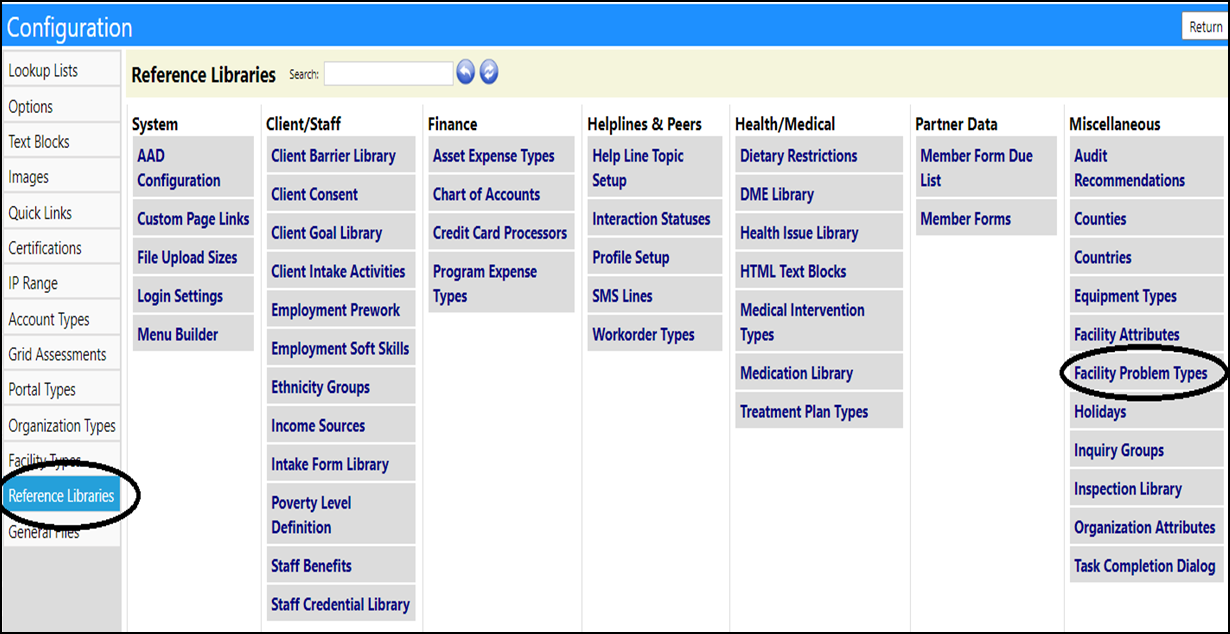
Step 4: Edit the list
Edit the list using the +/- icons
Add and delete the category and click the category name itself or the item name itself to edit it.
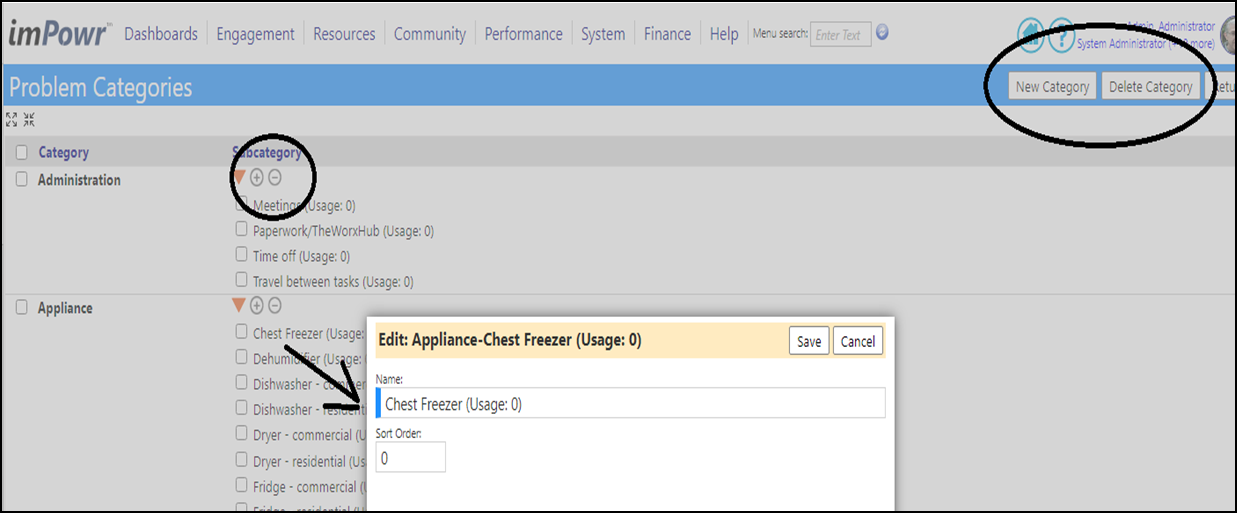
NOTE: The usage indicates how many tasks are referencing the item. Once tasks are using the item, you will no longer be able to delete that item unless you update the tasks to not refer to that.
Configuring the Default Problems
Step 1: Go the Configuration
Step 2: Select “Lookup Lists”
The easiest way to find the default list is to enter “problem” into the search filter and click ‘refresh’ or press [enter].
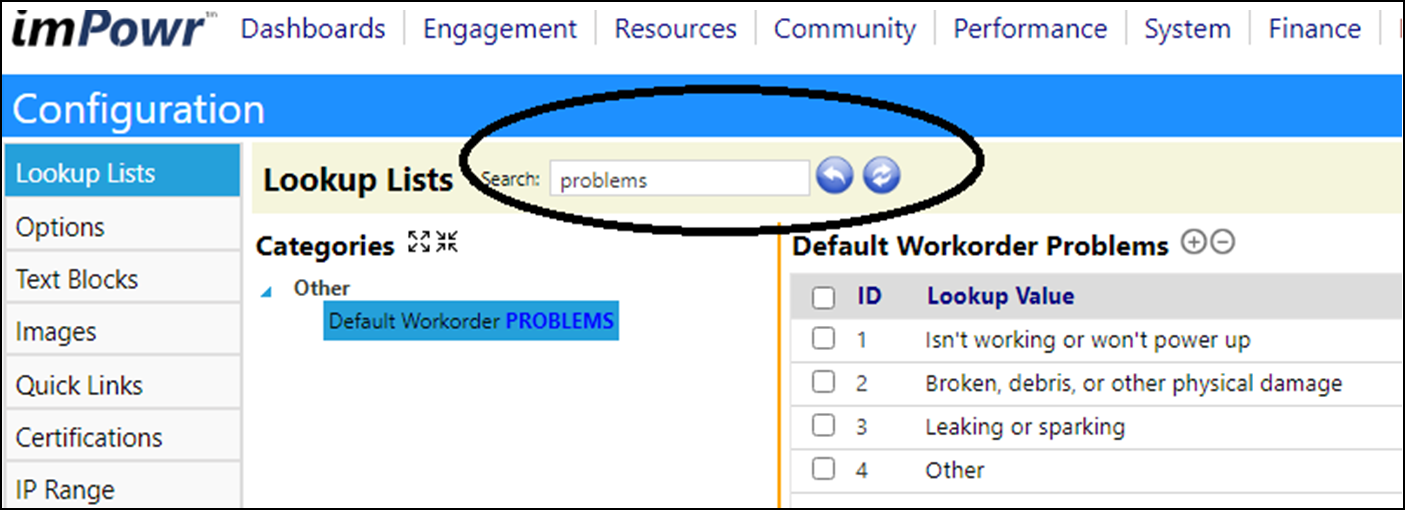
Step 3: Edit the List
Once the list appears, use the +/- icons to add and remove items.
Following a Task (get notification of updates)
Method 1: At Time of Creation
A user can "Follow" a task when it is created by checking the checkbox that they want to be notified.
Following tasks allows users to be notified any time the task, or in this case, the workorder, gets updated.
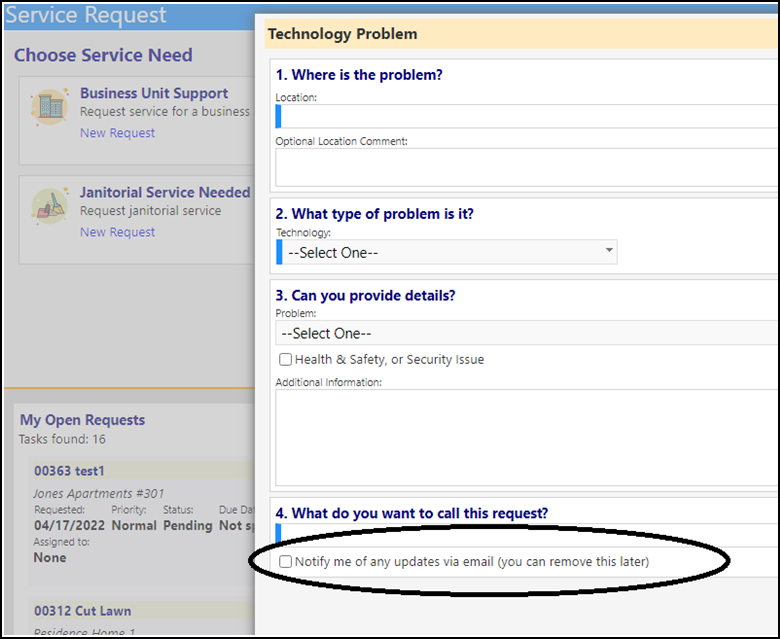
Method 2: After Creation
A user can choose to follow or unfollow any previously submitted workorder by clicking the “follow” or “unfollow” button or the “Follow All” or” Unfollow All” buttons.
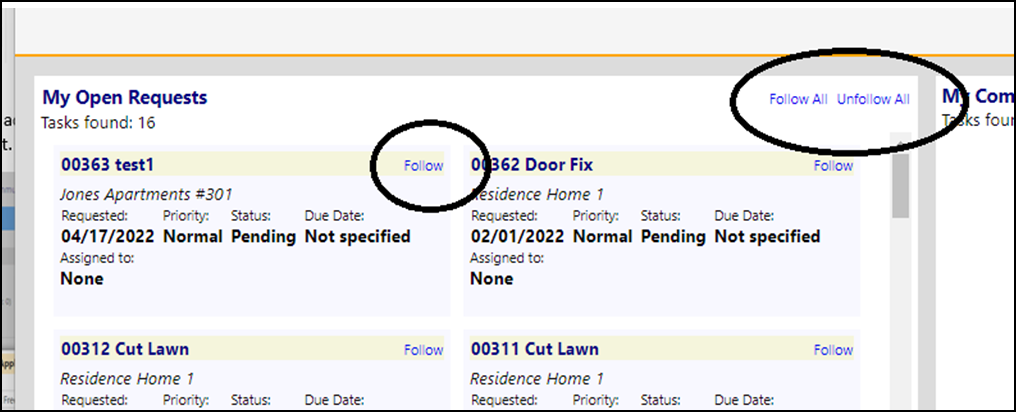
Administrators can view who is following what by looking at the notification list. To remove a notification, just delete it.

There are various options to temporarily disable notifications. Check with your Continual Care Solutions Account Manager for guidance.
Other Odds & Ends
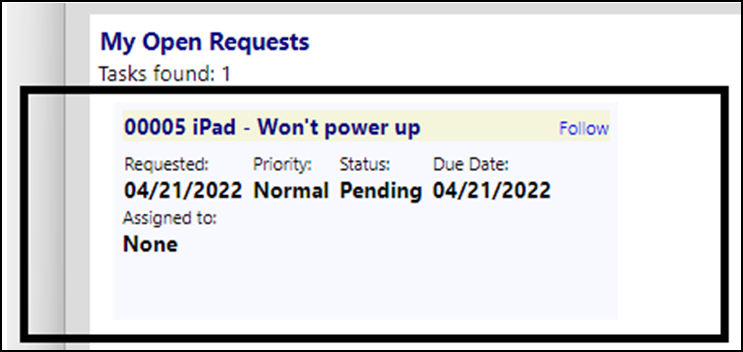
1. Workorder Details
The workorders on the user list, now show more details.
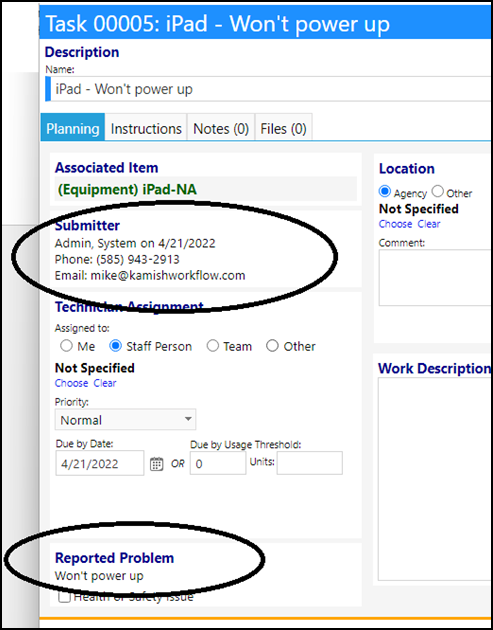
2. Submitter and Problem Info
When you view a task, you can now see more information about who submitted it and the problem they reported.
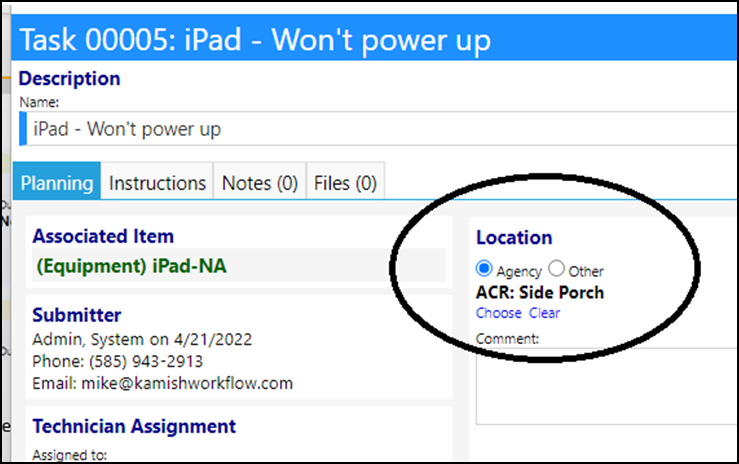
3. Location Selection
If your workorder input form had a Location “chooser” then when you view the task that was generated, the location will be preselected. You can always change it if you need to.
For Facilities, workorder locations are set-up in the Locations tab in the Facility - they are not from the Sites & Locations menu item.
Other Notifications
In addition to “Following" the notifications as discussed earlier, you can also trigger notifications to someone when a workorder is created or updated.
This is done in one of two ways:
Via an “Audit Notification”.
This is a mechanism by which anything that goes into the audit trail (which is a lot of things) can be used as a trigger to send a message. You can put different rules around that such as:
- Send me a message when someone submits a Health and Safety workorder.
- Or, when someone at Location X submits a health and safety workorder that relates to appliances
Logic for audit type notifications can be extensive. It does take some practice to be able to configure.
To configure an audit notification:
-
Go to the “Performance > Notification Policies” on the main menu.
-
Select 'Add Policy' or click an 'ID' to edit one.

-
Select “New” and choose the Audit type of Notification Policy.
-
Click Create.

-
Give your Notification Policy a name and click “Apply” to create the placeholder (if new).
-
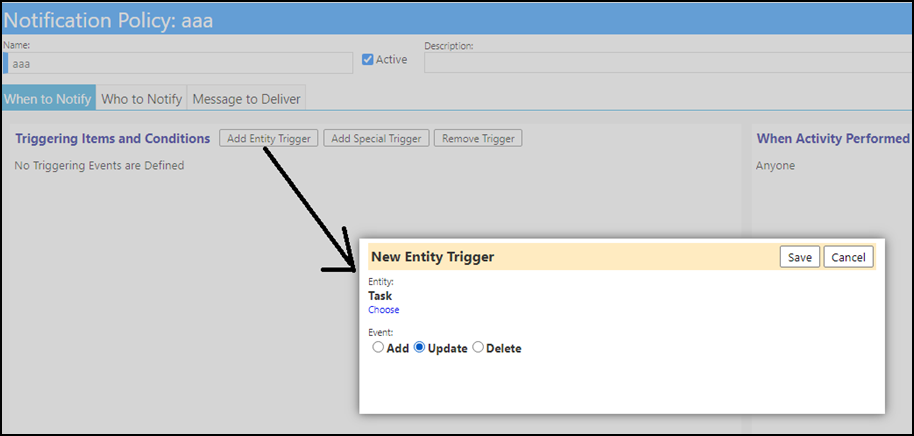
Once created and you can see the first tab, add the entity type “Task”.
-
Select “add” to be notified of a new task, or “update” to be notified of an updated task
-
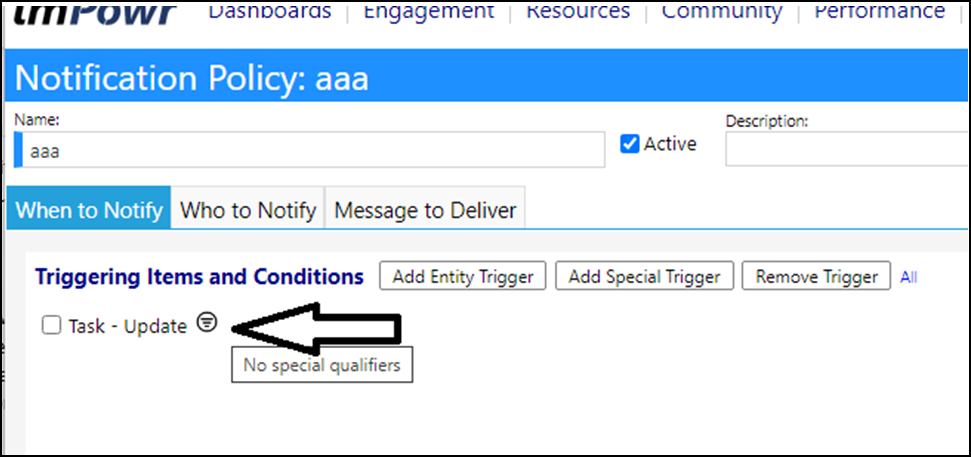
Once the trigger is created, you will see a little icon for “special qualifiers”.
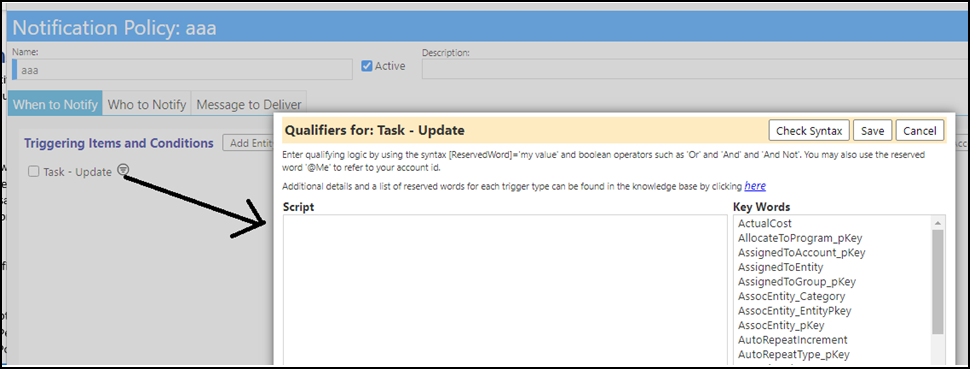
Clicking this is where you enter any special rules such as “When for a Printer” or even more details, “when for a Dell printer”, and so on. Any rule can be created but it does take some database knowledge.
Continual Care Solutions can help you implement it if you can tell us what you need.
Many “key words” are available to help you define your “rules”.
- On The “Who” tab and the “Content” tab you can enter who gets the notification and what it will say.
Auto-notifying Technicians through the imPowr built-in auto-notification.
a. When a facility work order is created, the assigned Technician will auto-matically get a notification when a workorder is created for that facility (provided the Technician has an email address).
b. To configure a technician for a facility:
- Go to “Resources > Physical Resources > Facilities” on the main menu.

- Select the Facility by clicking on the ID number.

- Click EDIT then choose the Technician and save.

NOTE: Regardless of the method used for creating the notification, they only go out if notifications are enabled and activated. Activation can be started and stopped by toggling the circled icon.
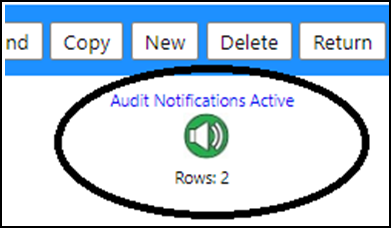
Just click the words above the icon to toggle its status.
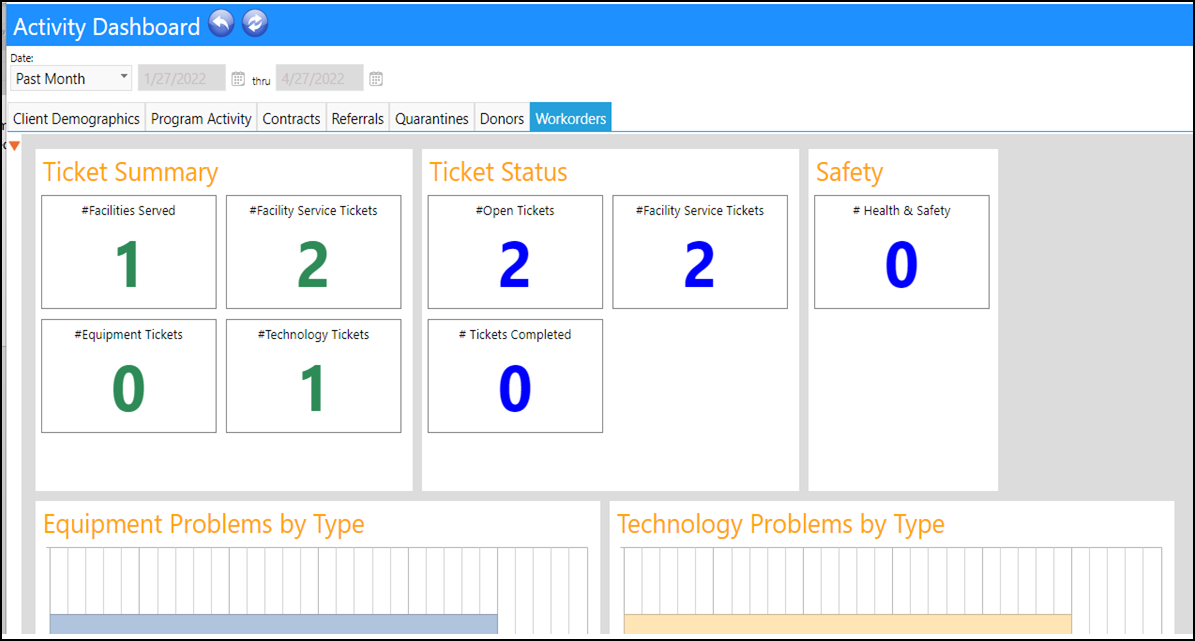
Activity Dashboard
An initial dashboard of your Agencys workorder activity has been created in your Activity Dashboard. You can get to it by going to the main menu: “Dashboards > Summary Pages > Activity Dashboard”. As time goes on, this can evolve and additional reports can be added or reports can be modified.
