This article will tell you how to set up account rights and edit visibility for individuals.
NOTE: In order to set an Account up for Portal Access, not only must the
Portal exist in the system, but the person setting this up must have the
System Administrator role, the Portal must be set up so it’s login button is
viewable, AND for the Portal to be viewable by that Account, the person
setting this up must have the Continual Care Administrator Mode.
For this document, we will assume the Portal has already been created in the
system AND the Account Role has already been established.
Ensure the Account is a Staff Member:
Because we only want specific Staff Members to be able to view the Portal, we
will need to set up their access:
Confirm the Account is a Staff Member:
- Login to your imPowr website.
- Go to the Engagement menu
- Click on Staff in the People section
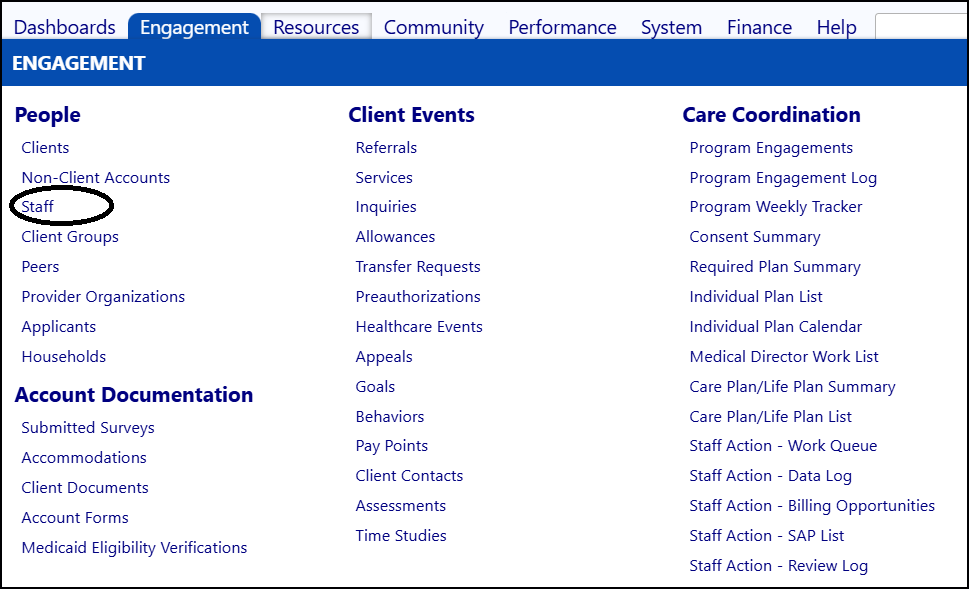
- Select your Account
- Make sure the Account has the Account Type of Staff Member

Set up the appropriate rights for the Account:
Ensure the Account is set up with the proper Account Role to allow them access
to the Portal:
- Click on Account Roles at System > Settings & Security > Account Roles
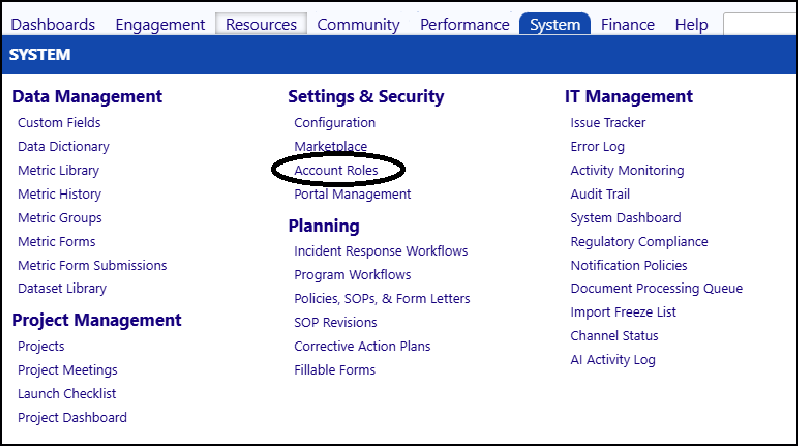
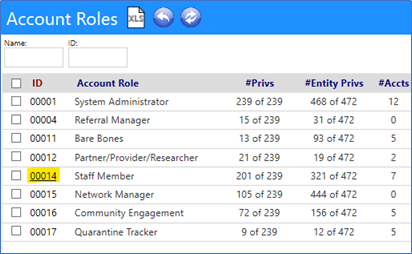
- Select the Staff Member Account Role
Open the Account Role to ensure the Portal is listed in the Portal Rights
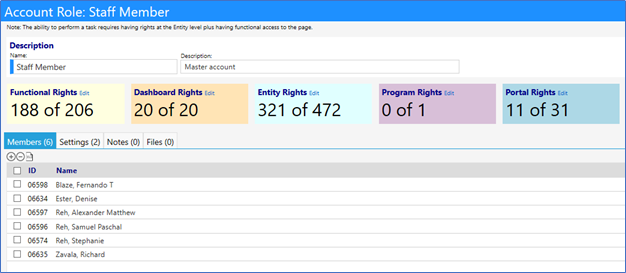
Click on Portal Rights Edit to ensure the portal Login is checked, along with
the pages you want the Account to have access to.
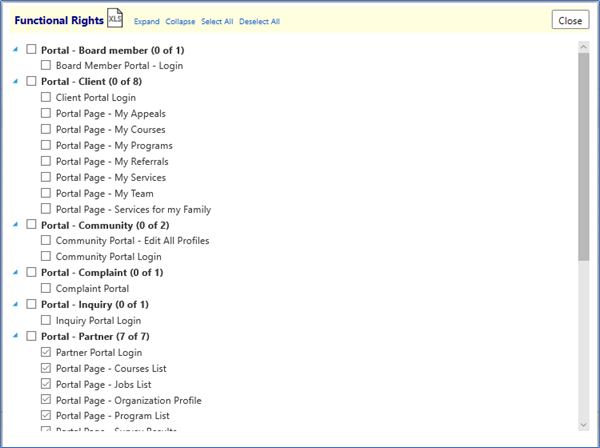
Make whatever changes are necessary and close the window.
View the members who have access to that Role. If the Account is not listed,
you need to add it to the list.
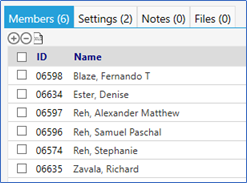
Click on the ‘+’ sign to add a new Staff Member (if you want to delete a Staff
Member, select the member by clicking on the checkbox to the left of their ID,
and click on the ‘-‘ sign)
Select the Staff Member and click on Save.
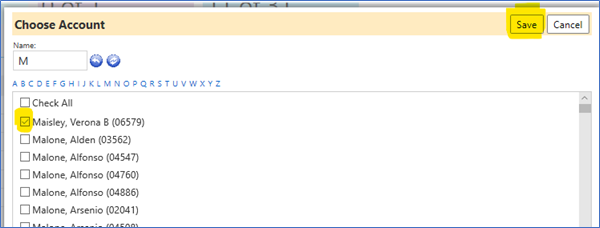
The Account will be granted the Account Role Rights
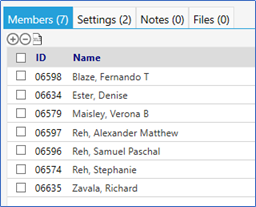
Click on Save to save your changes

The name should now appear in the list for that Account Role

Make the Portal Visible on the Account Individual’s screen:
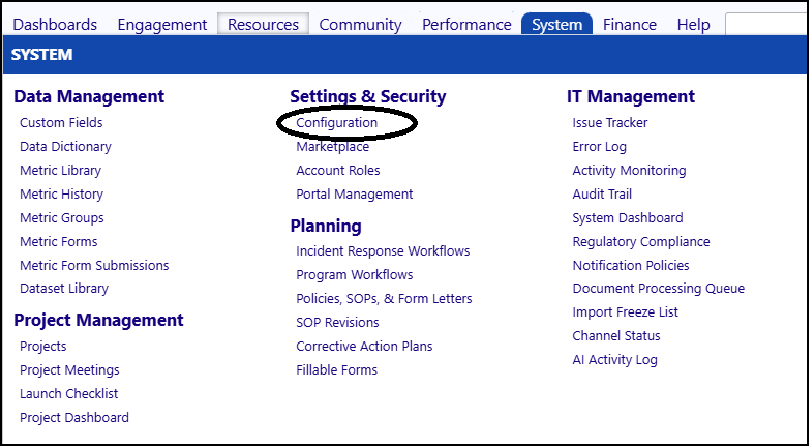
Open the System menu and select Configuration (in the Settings & Security
section)
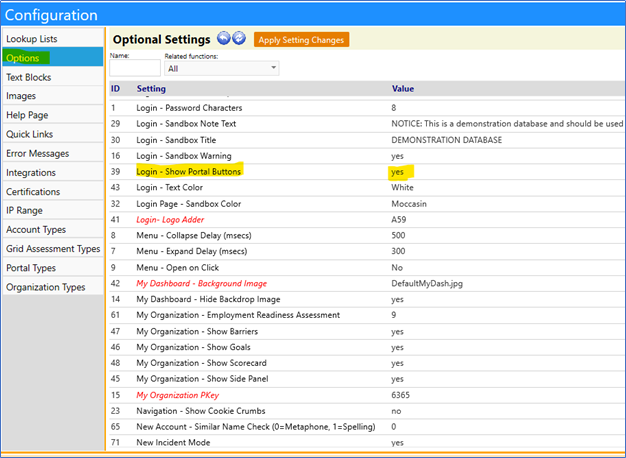
Click on Options to Make sure the ‘Login – Show Portal Buttons’ is set to
‘yes’. If not, change it so it says ‘yes’ (without this, the user will not be
able to see the icon for the Portal)
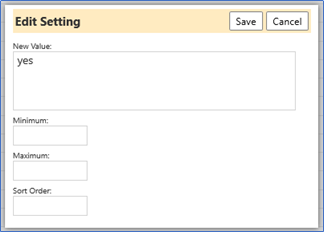
Click on ‘Save’
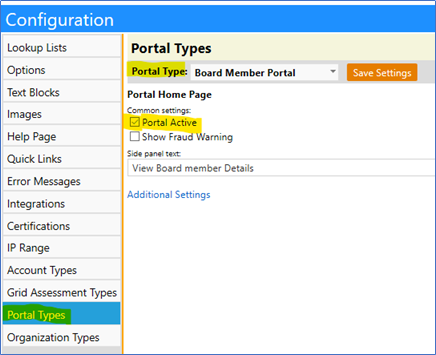
Click on ‘Portal Types’
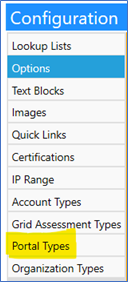
Select the Portal Type you desire from the dropdown list.
Ensure the Portal Home Page is checked to make the ‘Portal Active’
Save your settings and exit this page.
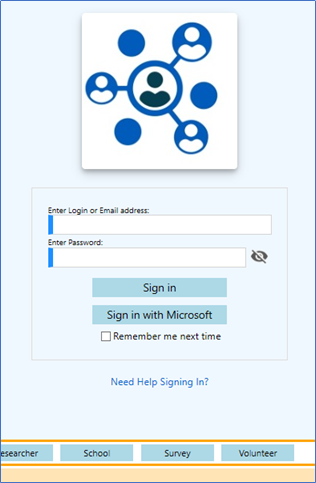
When you sign out, the Portal button is now visible below the login screen:
Confidential