This article will tell you how to create a new course.
NOTE: for the purposes of this document, it is assumed the user has already
been provided with the proper Account Role and appropriate security rights to
access, create, and make changes to courses.
Adding a New Course:
Before any other Learning Management activity can be done, one of more courses
need to be created in the system.
To create a course…
- Login to your imPowr website.
- Go to the Resources
- Click on **Educational & Social Activities **in the Programs & Activities
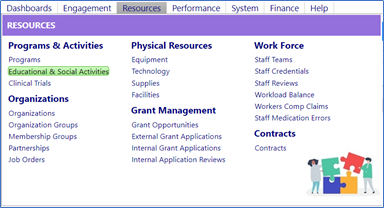
- Click on New Course.

- Add the Title of the Course, the Name (Course ID), and the year the course is being held.

Note: For courses which repeat year after year, enter the year the course was
originally created. You will have the ability to copy the course and change
the date for subsequent years.
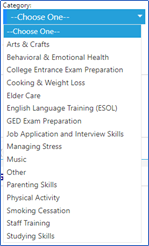
- Select the course Category from the drop-down list and Choose (your) Organization (the organization will default to your organization):

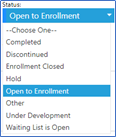
- Select the Status from the drop-down list of statuses:
- Click on Choose and enter the Sponsor (Certifying Organization) for the course and enter any CEUs which may be obtained by successfully completing the course:
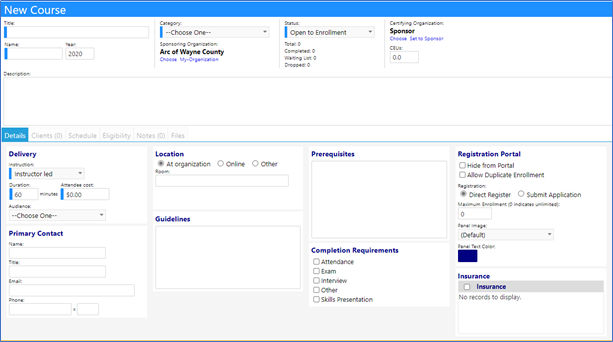
- Enter a course** Description**.
- Click on Apply.
Adding Course Details:
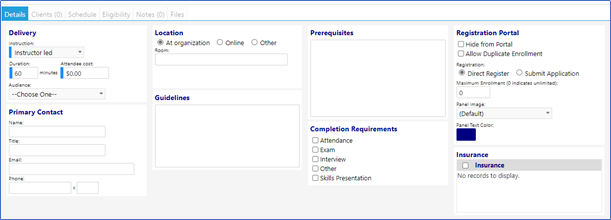
Delivery tab:
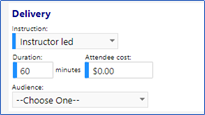
On the Details tab, in the Delivery section…
- Select the method of Instruction from the Instruction drop-down list.
- Enter the Duration of the course.
- Enter the Attendee Cost for the course, if any.
Note: If there is no cost for the course enter $0. Fields with a blue line on
them are required fields and cannot be left blank.
- Select the expected Audience from the drop-down list:
- Click on Apply.
Primary Contact:
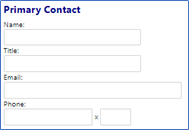
- Enter the Primary Contact Name. Title, Email, and Phone.
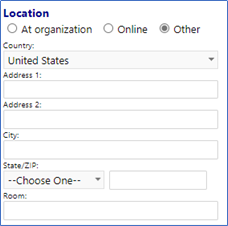
Location:
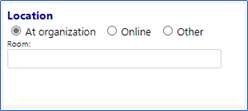
Identify the course Location by selecting one of the location radio
buttons.
Choose from At Organization, Online, or Other.
If At Organization is selected…
- Enter the Room

If Online is selected…
- A window will open prompting you to enter your Connection Details.
- Enter the URL of the website if it is known.

If Other is selected…
- Enter the appropriate location details:
Guidelines:
- Enter the course Guidelines, if applicable.
Prerequisites:

- Enter any Prerequisites you may have identified for this course.
Completion Requirements:
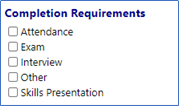
- Check the boxes to select the Completion Requirements from those listed.
- NOTE: this text will appear in the Registration Portal.
The Completion Requirements Lookup List is user configurable if the
appropriate security rights have been granted.
Registration Portal:
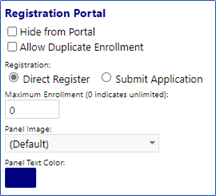
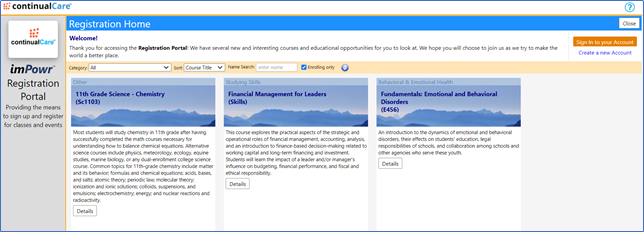
This section controls whether or not this course appears on the Registration
Portal and manages how you want the student to be able to enroll in the
course.
-
Determine if you will want this course to display in the Registration Portal.
- Check the box Hide from Portal if you do not want it displayed.
-
Determine if you want to allow students to re-register for the course if they completed it, dropped it, or previously signed up for it.
- Check the box to Allow Duplicate Enrollment if you do want them to be able to re-register for the course.
-
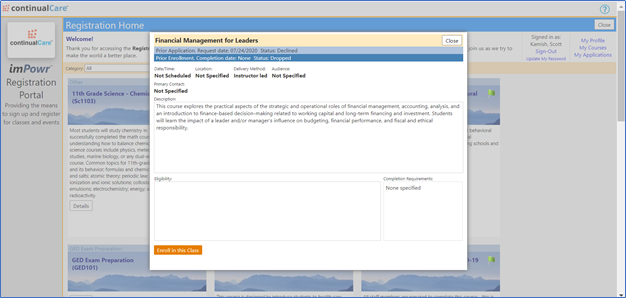
Select the radio button for whether you want the students to Direct Register or Submit Application to request the course. Whichever method you select will guide how the Registration Portal will respond when a student is ready to enroll in the course. Their application would then be reviewed by the appropriate person before approval would be made to enroll the student in the course . The review of applications is done in the Registration Administration section of the Learning Management menu.
-
Enter the Maximum Enrollmentfor the course.
- Enter a value of 0 if there are no limits to the number of enrollees.
-
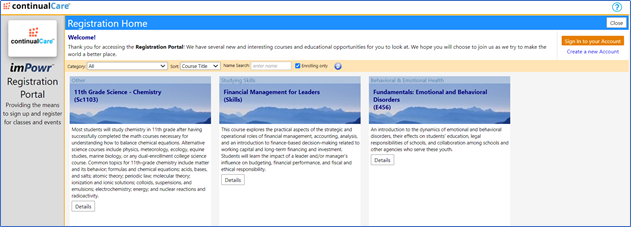
Select the Panel Image of how you would like the course displayed in the Registration Portal from the drop-down list of images.
-
Select the Panel Text Color for the Registration Portal display by clicking on the color and clicking on a new color in the window that opens to select that color for the text.
Insurance:
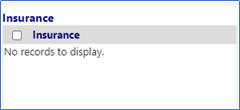
Note the **Insurance **requirement, if applicable (select the checkbox).
-
Click on the ‘+’ button to Choose Insurance Product from the list of products.
- Select one of the products by checking the box to the left of its name.
- Click on Save.
-
Conversely, remove an Insurance Product by checking the box to the left of its name.
- Click on ‘-‘
- Confirm the removal of the product.
- Leave the field blank if there is no insurance requirement.
-
Click on Apply when you are completed with the Details tab.
Clients tab:
When students register for this course, their names, organization, status,
date added, and added by information will automatically appear on this tab.

Once their name appears, you can manually add additional students, delete
students, update the student status, drop a student from the course, transfer
the student to another course, or print out name tags.
Manually adding students to the course:
- Click on Add

- Choose Account(s) from the list of Clients and Staff members.
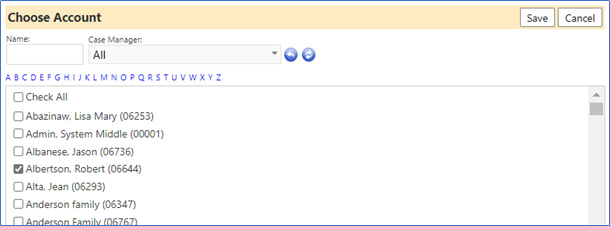
- Click on Save when you are done with your selection(s).
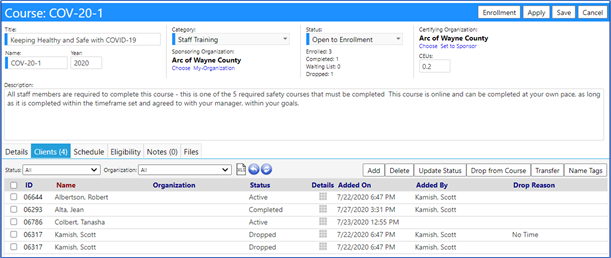
The Clients Tab will display the student’s name, ID, Organization (if
supplied), Status (of their participation in the course), Added on Date and
time, Added by, and Drop Reason (if any) (if and when the course is dropped by
the student).
To remove a Client from the course…
- Click in the checkbox to the left of their name on the Client tab.
- Click Delete.

After confirming removal of the selected client(s) by clicking on OK, they
will be removed from the course.

Update the student’s course status by…
- Select a student (click in the box to the left of their name).
- Click on the Update Status
- Select Status from the drop-down list.
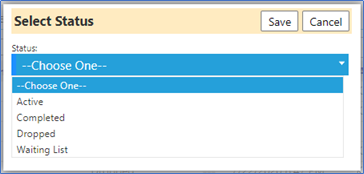
- Click Save.
The status will immediately update on the screen.

To Drop a student from the course…
- Select the student (click in the box to the left of their name).
- Click on the Drop From Course

- Choose a drop reason from the drop down-list of reasons.
- Enter any comments associated with the drop.
- Click on Save

The student will immediately be dropped from the course. The Status will
change to Dropped. And both the Drop Reason and your comment will be displayed
in the row containing the student’s name.

To Transfer a student from the course…
- Select the student (click in the box to the left of their name).
- Click on the Transfer

The Transfer to another Course window opens.
- Choose the course from the drop down-list of courses.
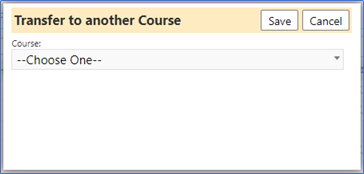
- Click on Save
The student will immediately be transferred from this course to the other
course and will be removed from the list of students.
Create Name tags for the students attending the course by selecting the
student(s)…
- Click in the box(es) to the left of their name(s).
- Click on the Name Tags

- Make any necessary changes to the Name Tag Label Size, layout, etc.
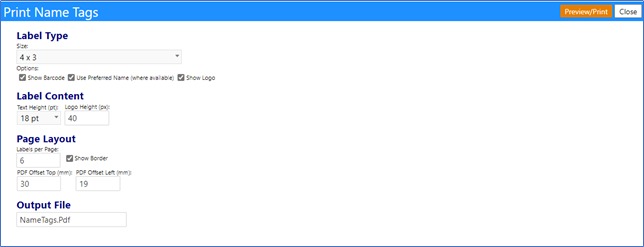
- Click on Preview/Print to view how the name tags will look on the printed page.
- Click on Print to PDF to print the tags.

- Click on Close to return to the Course.
View the Details of the course history for a particular student by
clicking on the Details grid on the row containing their name.

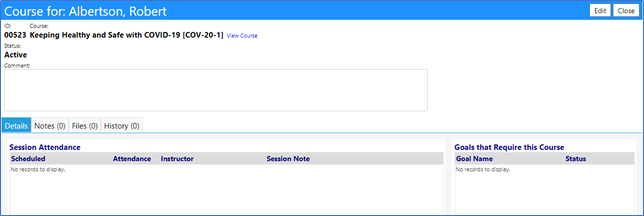
Note: Once the course sessions have been created, the Session Attendance
section can be used by the instructor to track the attendance of each student
in the course, individually.
The instructor needs to make sure the Course is in Edit mode.

- Change the Attendance by clicking on the Att (Attendance) icon.
If the student was originally thought to have attended the course session, the
attendance can be changed to Absent. If they were originally thought to have
been absent, the attendance can be changed to Attended.

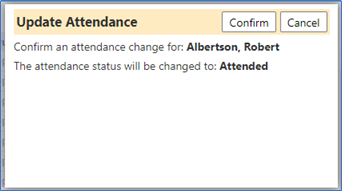
- Click Confirm to immediately update the Attendance and add a Session Note, identifying who made the change.

- Click on the **Note **icon on the right-hand side of the row for the session dated, to add a note to this particular session, or edit the note which was automatically created .


- Click Save when complete.
View the course information by clicking on the “View Course” link.
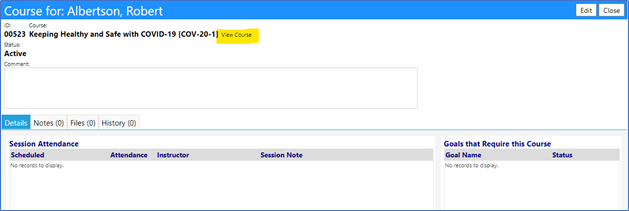
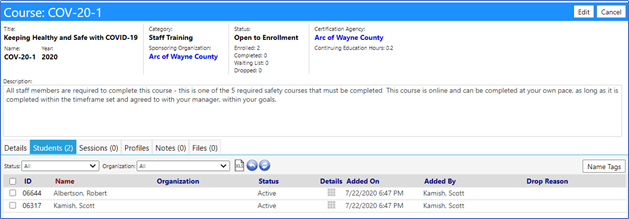
- Click Cancel to return to the previous screen.
- Click Edit to add the Status, Comments, Notes, or Files to the Course Details for this student.

Status:
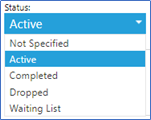
For the Status, you may complete the course for that student by clicking
on the Complete by Attestation link or you may choose a Status from
the drop-down list.
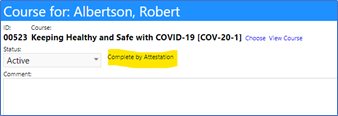
Typically, you would select Complete by Attestation when the student has
demonstrated sufficient knowledge to complete the course, or they have taken a
course which supersedes or is a higher level than this one, possibly from
another institution.
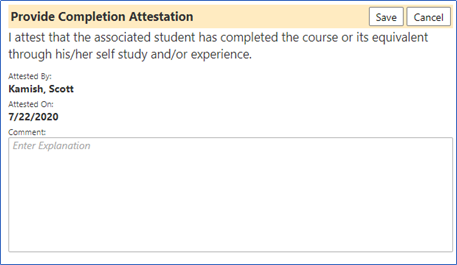

If you select Complete by Attestation the optional comments you entered
will not be displayed but will be visible if you click on Edit in the
Attestation box.
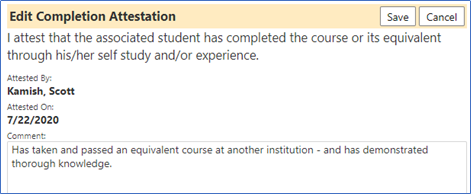
If you select Completed as the status, another box will open asking you to
enter the Completed-On date.

Goals that Require this Course:
On the right-hand side of the page is the Goals that Require this Course
panel.
This section will automatically populate when a course is assigned to a goal.
When that occurs, it will look similar to the following:

When you are finished with your entries, click on Apply.
Notes, Files, and History Tab:
Similar to other pages in imPowr, users can add Notes or attach Files.


To Add a note or File…
- Click on the ‘+’ to add a Note or File.
- Click on Save after it is added or selected.
To remove the Note or File…
- Click in the checkbox to the left of the entry and then click on ‘-‘.
- Be sure to click on Save after the items is removed.
The History tab will track your changes.

- Click on Save when you are completed with your changes.

Sessions Tab
The duration of the course was entered in the details section of this course,
but the sessions tab is where the course schedule is entered.

- Click on Add to add a new session.
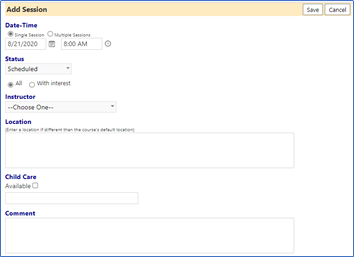
Date-Time:
Select the radio button to indicate whether a Single Session will be held
or Multiple Sessions.
If a Single Session is selected…

- Click on the calendar icon and Select the Date from the date picker.
- Click on the clock icon and select the Time from the time picker.
If Multiple Sessions are selected…

-
Enter the date range and time of the courses.
- Click on the calendar icon and Select the Date from the date picker.
- Click on the clock icon and select the Time from the time picker.
-
Check the boxes to select the Days of week the course will be held each week in your date range.
Status:

- Select the course Status from the drop-down list of statuses.
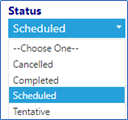
- Select the radio button to choose between All or With interest to indicate whether the courses will be held on the scheduled date or if they will only be held if there is interest.
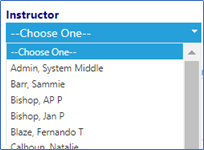
Instructor:

- Select the Instructor from the drop-down list of instructors.
Location:

- Enter a Location if different than the one previously created for the course location. This would reflect a temporary location.
Childcare:

- Check the box to indicate if Child Care is Available during the course sessions.
- Fill in any details or add comments in the box below (for example, “Cost is $10/child/session”).
Comment:

- Add any additional Comments related to the course sessions.
- Click Save when completed with the Add Session

The scheduled sessions will display.
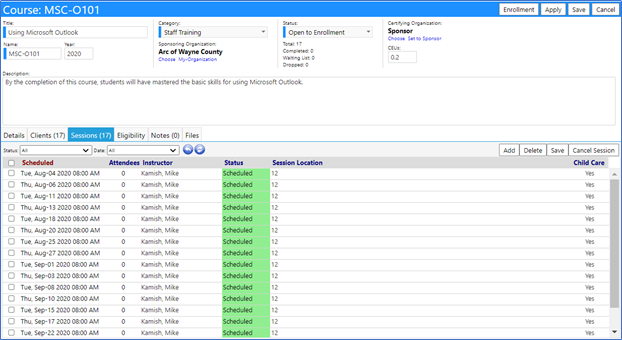
- Click on any Session to view the details:
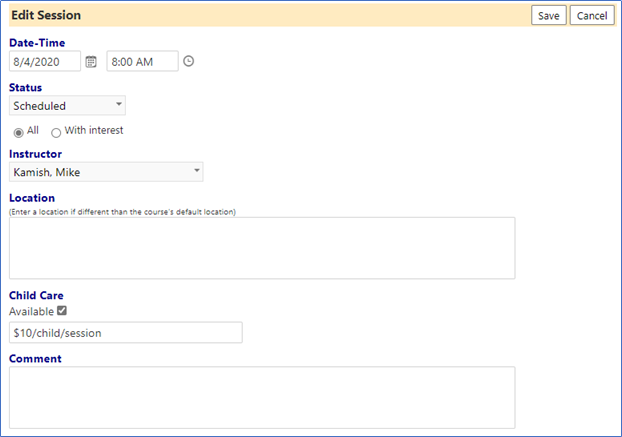
- Cancel out of this screen and click on Apply to save your sessions.
To delete or remove sessions…
- Check the box to the left of the session
- Click Delete

You will be asked to confirm your desire to delete the selected scheduled
sessions.

- Click OK to Delete the session(s).
If for some reason you must Cancel the Session…
- Select the session by clicking the checkbox to the left of the Scheduled time
- Click Cancel Session

You will be asked to confirm your desire to cancel the selected scheduled
sessions.

- Click OK to Cancel the session(s).
The status of that session will change to Cancelled.

- Click Apply to save your changes.
Eligibility Tab:
The Eligibility Tab identifies the requirements needed to enroll in the
course. This text will appear in the Eligibility section of the Registration
Portal.
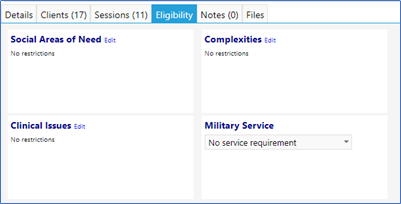
- Click on Edit to select the Eligibility requirements in each section of the screen.
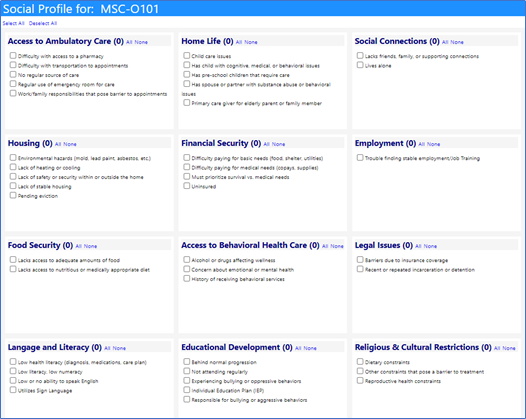
- Click Save when completed with your selections.
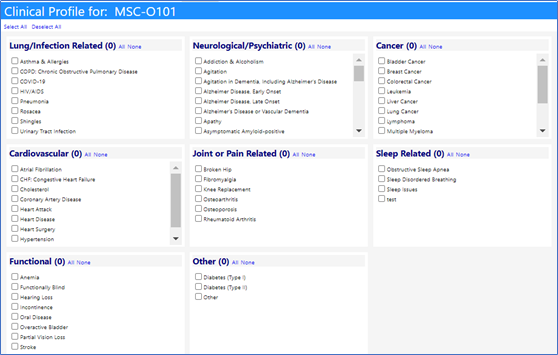
- Click Save when completed with your selections.
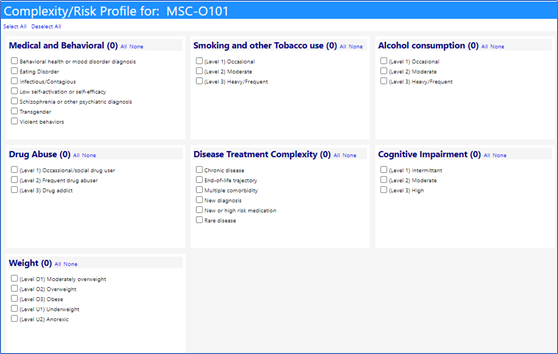
- Click Save when completed with your selections
Select the Military Service eligibility from the drop-down list:

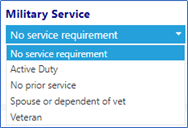
- Click Save when completed with your selections
Notes Tab:
Add a Note:
- Add a Note by clicking on the ‘+’ symbol:

- Select the appropriate Privacy level security.
- Enter the Effective Date for the note by either entering the date directly into the Effective Date field, or by clicking on the calendar to the right of the Effective date and selecting the appropriate date.
- Enter the Note and click on ‘Save’.

Delete a Note:
- Delete a Note by clicking on the checkbox to the left of the Note and then clicking on the ‘-‘ symbol:

Editing Notes:
Once the Note is written, you can edit the Note by…
- Click on the Edit checkerboard to the right of the note:

This will reopen the Note and allow you to edit the text.
- Click on ‘Save’ to save the Note upon completion:

After saving, Notes tab will indicate how many Notes have been saved.

Files Tab:
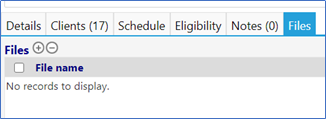
Adding Files:
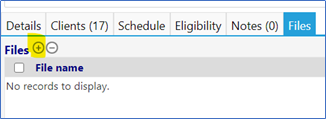
- Add a File by clicking on the ‘+’ symbol.
- In the new window, click on ‘Select’ to open your Window’s Explorer Screen to select a File.
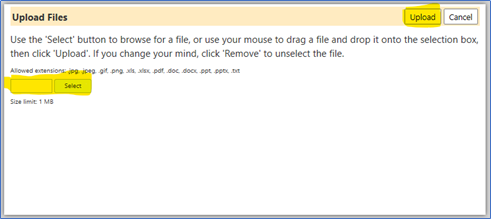
Successful file attachments for uploading will display a green dot next to the
document name.

When ready…
- Click on ‘Upload‘ to add the File and associate it to this course.
The File will now appear in your File list, along with the date
and time it was uploaded:

- Click on the File name to open the File and allow you to view it.
You can also download it from here.


Deleting Files:
- Saved Files can be deleted by clicking on the checkbox to the left of the File Name and then clicking on the ‘-‘ symbol:

After confirming the deletion of the file, the file will be removed.

- Click on Save.
Your Course has now been created in the system and has been added to the course list.