Some Organizations utilize TABS ID numbers (Tracking and Billing System Identification Number). This article will explain how to set those up and how to display them or export them from imPowr.
Entering a TABS ID number
To enter the TABS ID number, access an account by clicking on the account type in the People section of the Engagement menu:
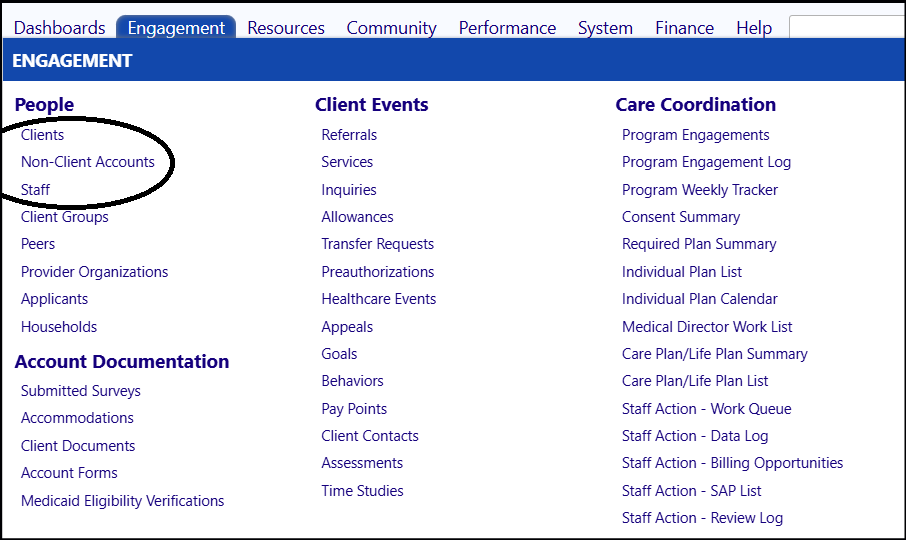
The Account list will display.
- Select an Account by clicking on its ID.

The Account information will display.
• Select The Profile tab.
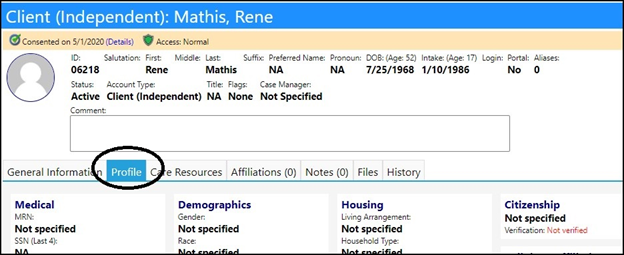
The TABs ID number can either be entered into the existing Custom button in the account profile, or into the Custom Fields panel in the Account profile, if that is present.
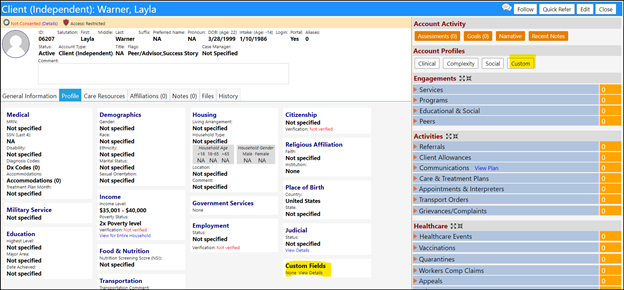
Select either the Custom button in the Account Profiles on the right side of the Account screen or locate the Custom Fields panel in the Profile tab of the Account details, towards the center of the screen.
• Just click in the field to add the TABS ID.
• When the Customer Fields screen opens, locate the TABS ID.
• Click on the ‘+’ to the right of the TABS ID.
NOTE: If the category under which the TABS ID is located is not correct, please contact your System Administrator to move the TABS ID to the proper category.
A Window will pop-up allowing you to enter in some TABS ID information.
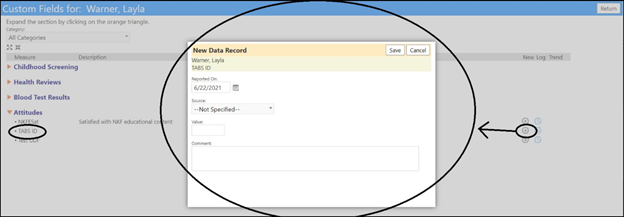
• Select or enter the ‘Reported On’ date.
• Select the Source from the drop-down list of sources.
• Enter the Value (typically, for the TABS ID, this is a number).
• Optionally enter any comments.
• Click Save when done with your entries.

• Click Return to return to the Account Screen.
• If you were in Edit mode, click Save to save your TABS ID number entry. Otherwise, click close to exit the Account.
Viewing the TABS ID number
The TABS ID will display in the Account list when you select it as an Attribute and refresh your account list:


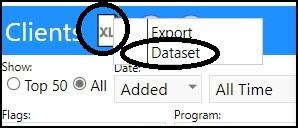
- Once you have created an Account List that meets your needs in terms of what is displayed based on your selected filtering, be sure to click the Export button and select ‘Dataset’ to export a Dataset (be sure to give it a name, a category, and Save it), so that you can run a similar report at any time to display the same kind of details.

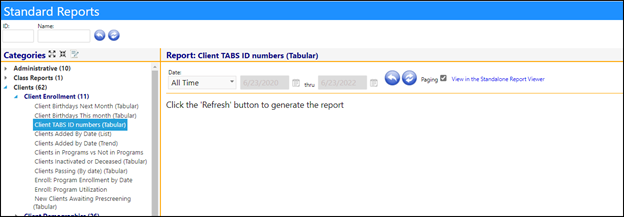
After saving, your dataset can be found in the Dataset Library (System, > Data Management > Dataset Library) and can be run as a report (Performance > Data > Standard Reports).


Note: that if you have other items you wish to add to the custom field selection, they can be created via Custom Fields. Please contact your System Administrator for assistance with the setup.