Step 1: Create the inspection form
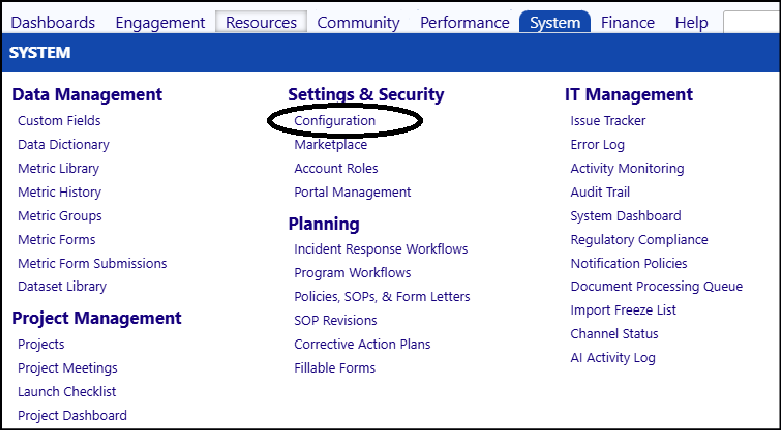
Access Configuration (users must have the appropriate security rights to be able to access Configuration settings). Navigate to System > Settings & Security > Configuration
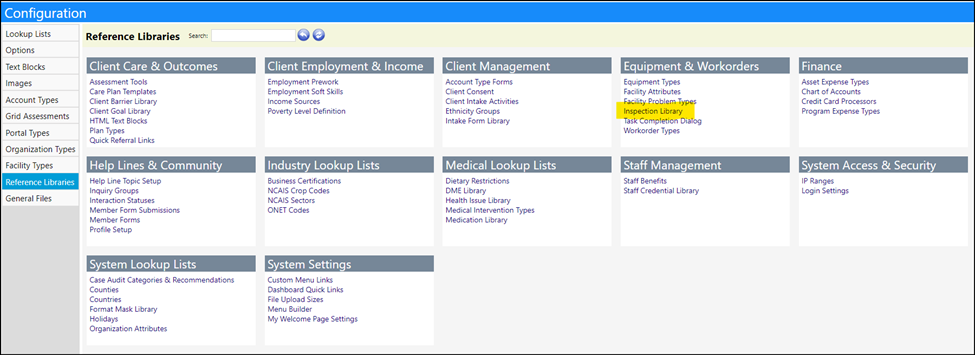
Go to the Reference Libraries and locate the Inspection Libraries.
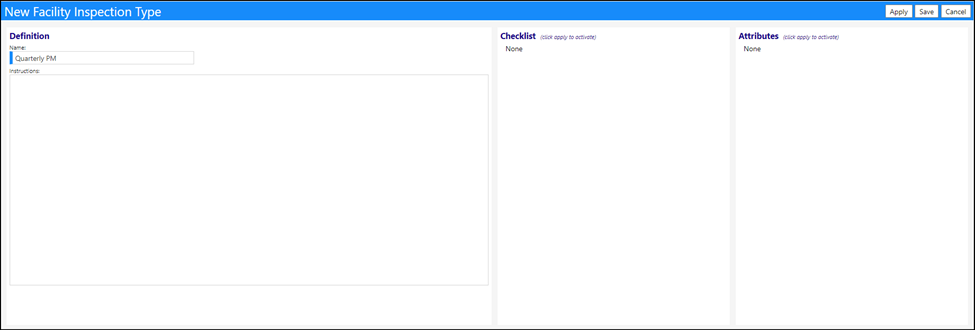
Click New Inspection Type to create the inspection checklist and data collection form (some examples may already exist).

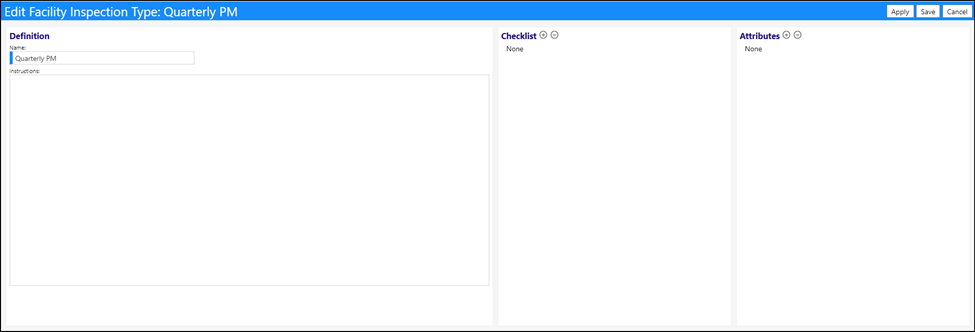
Enter an Inspection Type name. Use a name that will make it easy to find the type of inspection you would like to do.
Click ‘Apply’ to activate the form.
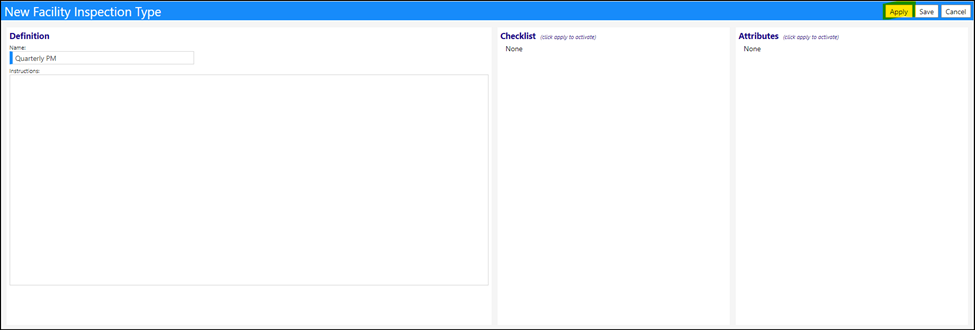
The Checklist and Attributes sections become active so you can enter, modify, or delete entries.
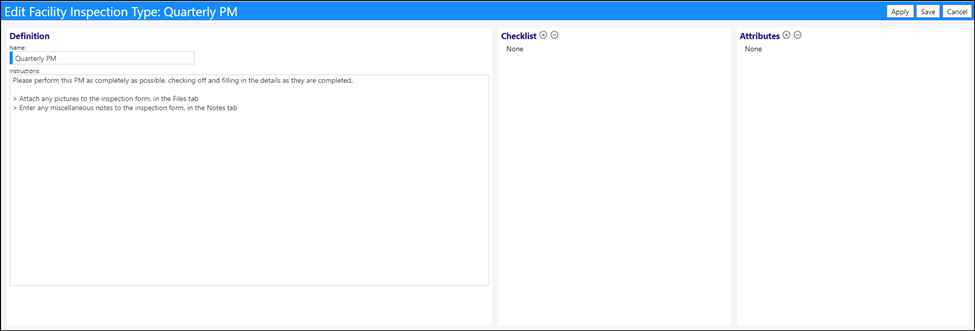
Enter some Inspection Instructions. These will be made available to everyone who selects this type of Inspection.
In the Checklist section, click the ‘+’ to add an entry to the checklist. Once finalized users will see a list of items they can check off as they are completed.
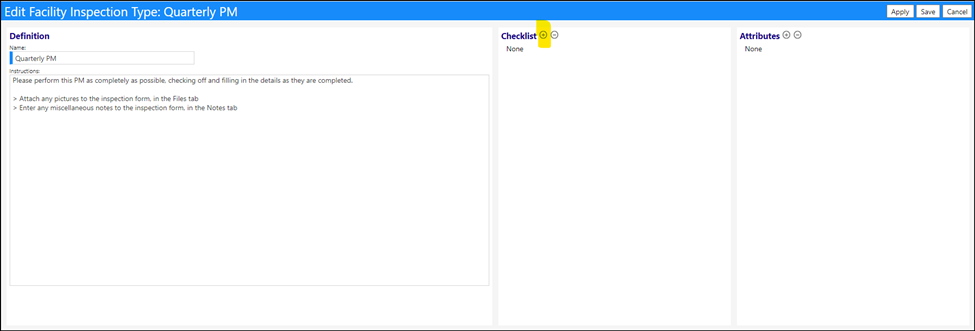
After clicking on the ‘+’, a field will display.

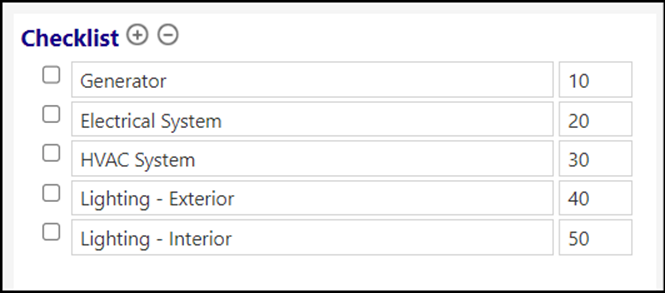
Enter the checklist item you wish to display.

Enter a Sort Order. This field is used to sort the display of checklist item entries, both during the setup process as well as in the completed form. The numbers sort based on the entered sequence. The smaller numbers sort to the top of the list, while the larger numbers move to the bottom. The sorting is done in order… so it is recommended that you enter numbers, such as by 10s, so there is ‘room’ to add entries in between those already entered (so you do not have to renumber them) or so you can move fields around. For example, if your checklist entries are sorted by 1, and you need to add something between 2 entries already made, you would have to renumber all entries so you can place that new entry between those already in place. Whereas if your entries were sorted by 10s, you would have the ability to enter a new entry without having to renumber those already in place… just give the new item a sort order that falls between those that already exist.
NOTE: if you have multiple entries with the same sort order, the system will sort those items alphabetically.

Click the ‘+’ sign to add additional checklist items.

When you do that, another checklist field will display. Enter a new checklist item.

After entering the new checklist item, be sure to add a sort number that is greater than the one previously entered, if you want it displayed below your prior entry.

Click ‘Apply’.

The checklist items will reposition themselves, based on the sort order you have entered.

Repeat the process of adding additional checklist items until all of your desired items have been added. NOTE: If you wish to click on the ‘+’ sign multiple times to create the fields for you to add items to, you can do that. Just remember to add your sort order so when you eventually click ‘Apply’ the sort order will be applied and the entries will display in your desired order.
If any checklist items need to be removed, select that item and click on the ‘-‘.
If you wish to edit any of the entered items, just click on that item and make whatever changes are necessary.

When you are all done with the checklist, you can add in the Attributes. The Attributes are fields which are used for collection of some kind of input data. Some people use these to collect things like a temperature setting, while others might use these fields to capture a Yes or No response.
NOTE: You do not need to enter the Checklist items first and the Attributes second. You can enter them in any order you wish including entering a checklist item followed by the attributes for that item. Both the Checklist and Attributes are limited in the number of characters which may be entered. If there are too many characters, the line you entered will not save.
Click the ‘+’ sign in the Attributes section to add in the data collection fields.

Just like as what occurred in the checklist section, a field will display.

Make an entry and set a sort order.

Repeat the process to add additional entries.

Recommendation: If you would like to receive a Yes or No response for something, you might want to enter something similar to the following.
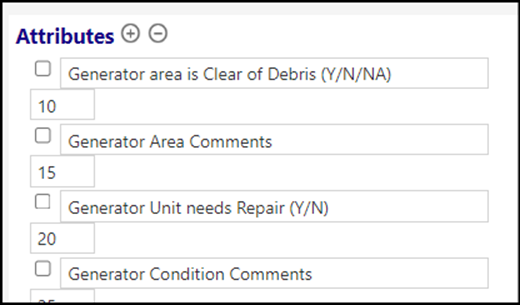
When you are all finished with your entries, be sure to click ‘Apply’ to save what you have entered. As mentioned, both the Checklist and Attributes are limited in the number of characters which may be entered. If there are too many characters, the line you entered will not save, so it is recommended that you click ‘Apply’ regularly to make sure you don’t go too far before you realize something may not have saved.
Your Inspection form should look something like this when all finished with your entries.
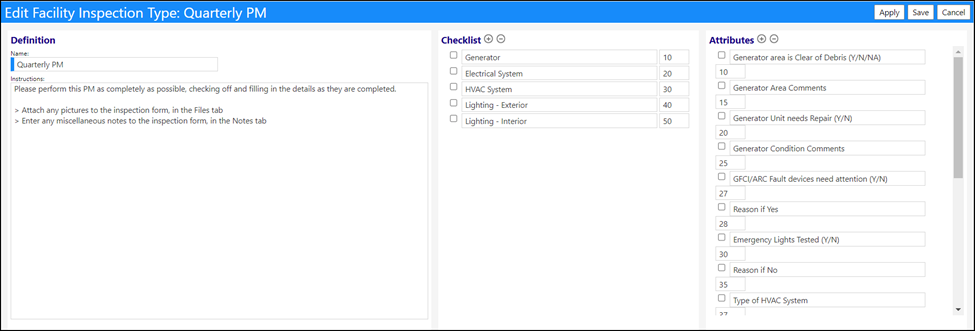
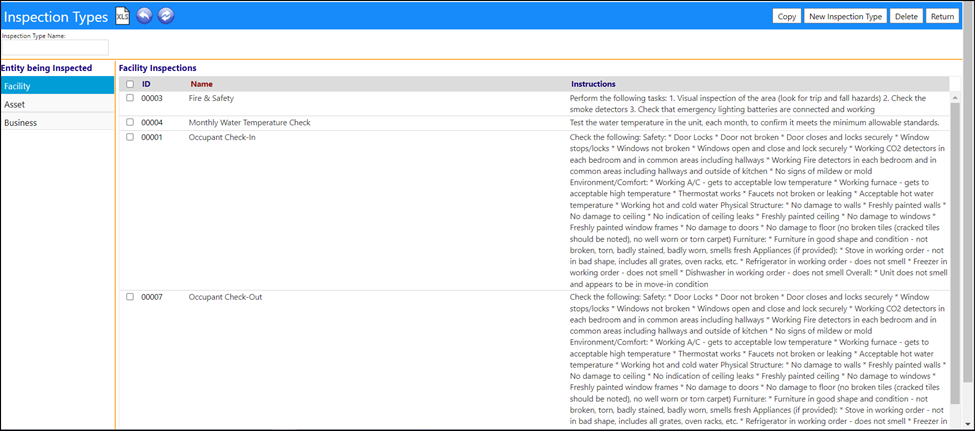
Click ‘Save’ to save your Inspection form. Your inspection form will now display along with your other inspection form types and will be ready for use.
Step 2: Schedule an inspection
Users must have the appropriate security rights to be able to access Facility Inspections.
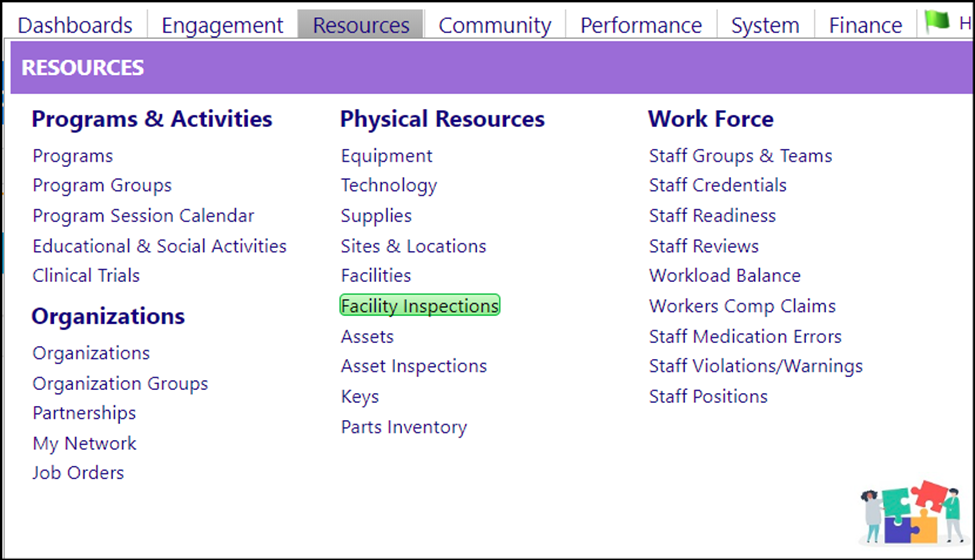
Facility Inspections can either be set up from the Facility Inspections page. (Resources > Physical Resources > Facility Inspections) or by clicking on the Inspections tab in the Edit Mode of a Facility (Resources > Physical Resources > Facilities) or by clicking on ‘View Inspections’ in the Facility Dashboard (Dashboards > Summary Pages > Facility Dashboard). Whichever path you choose to take to get to Facility Inspections, ultimately you will be brought to the Facility Inspections page.

Click ‘New Inspection’ to schedule a single inspection

A New Facility Inspection form will display.
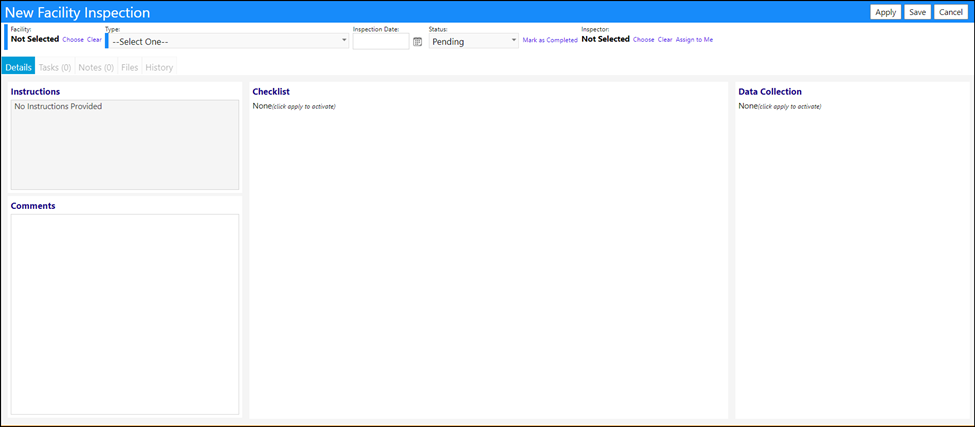
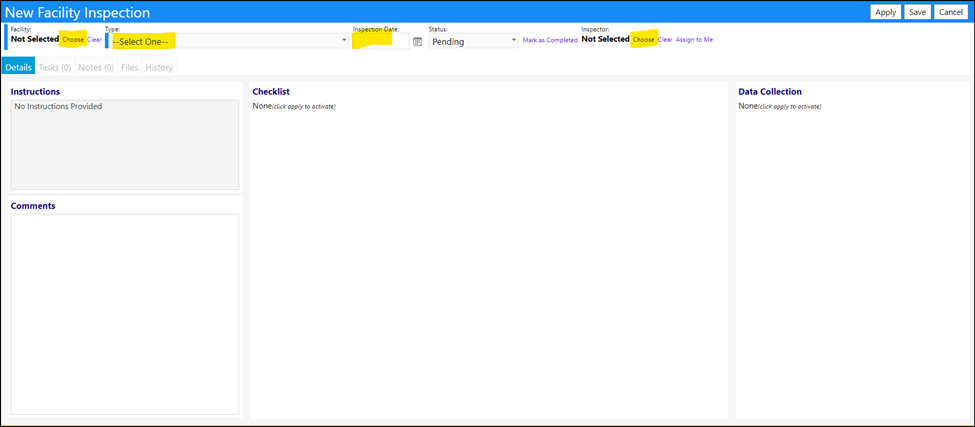
Select the Facility from the drop-down list.
Select the Type of Inspection from the drop-down list.
Enter an Inspection Date.
Change the Status to ‘Scheduled’.
Choose an Inspector from the drop-down list or assign the inspection to yourself by clicking on ‘Assign to Me’.
NOTE: Some agencies assign Technicians to Facilities. If a Technician has been assigned to a facility, all tasks created in imPowr for that facility, including inspections, can automatically be assigned by the system, to that individual. This can only occur if the appropriate system configuration settings are in place. Please contact your System Administrator for assistance in setting this up.
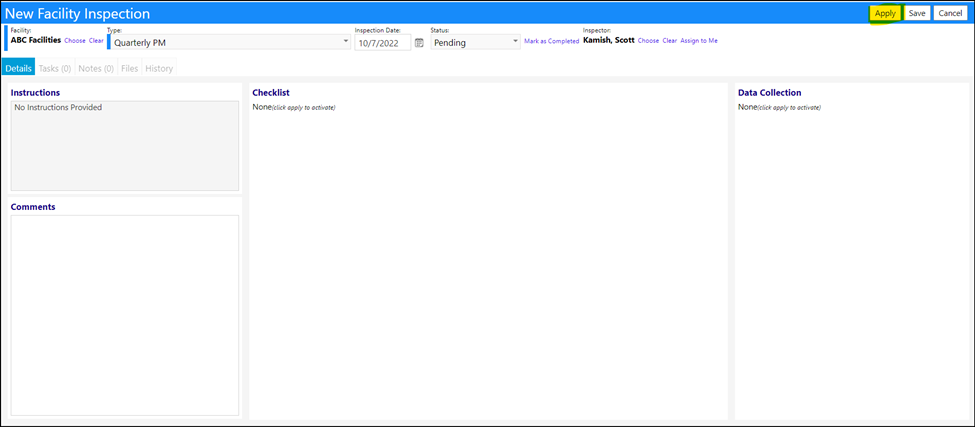
Click ‘Apply’ to save your selections and activate the rest of the inspection form.
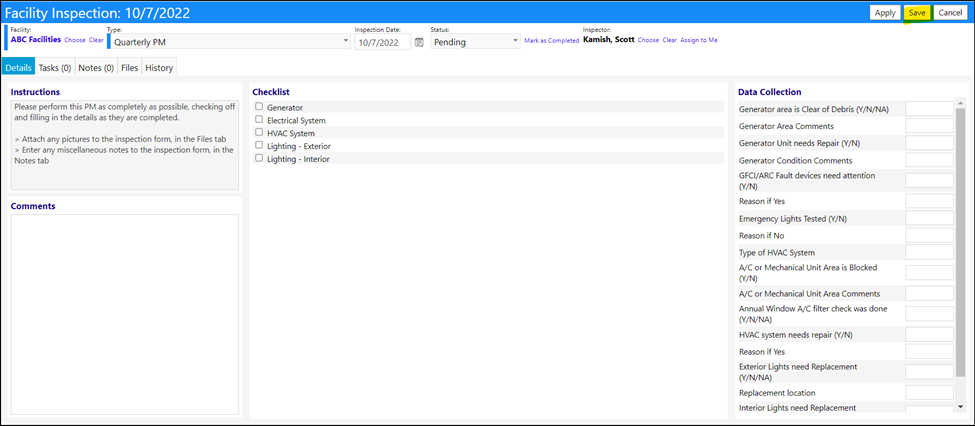
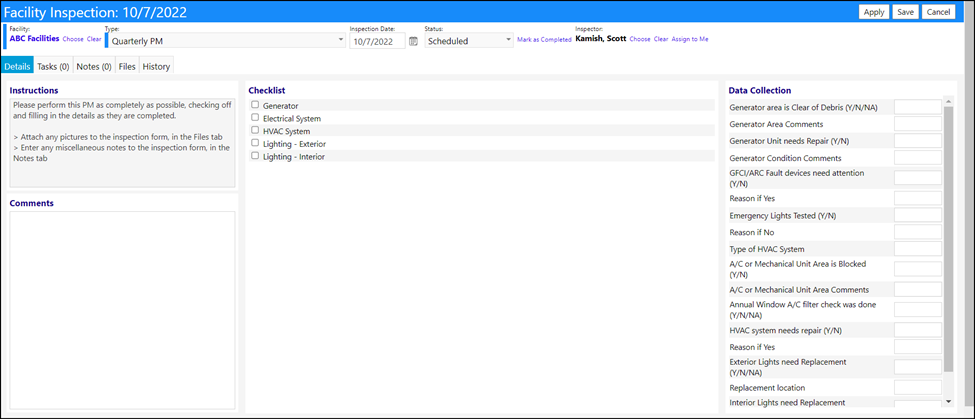
The Inspection Form (Instructions, Checklist, and Attributes) for the Inspection Type you selected, will now display.
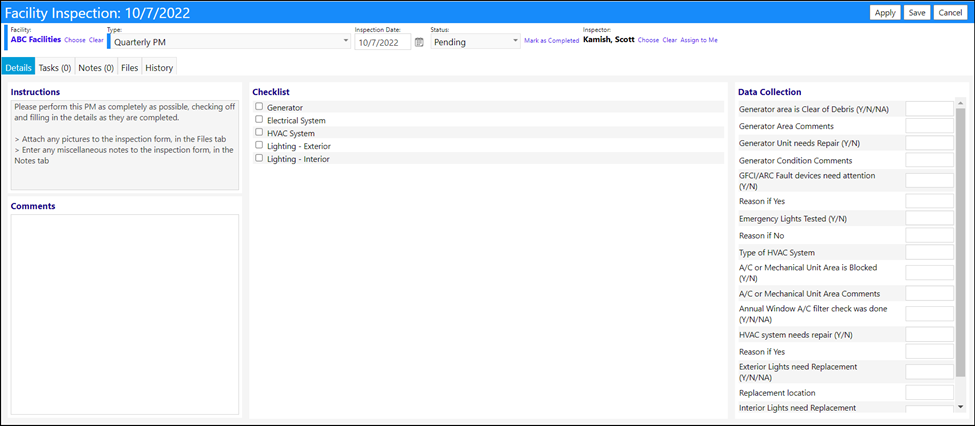
Click ‘Save’.
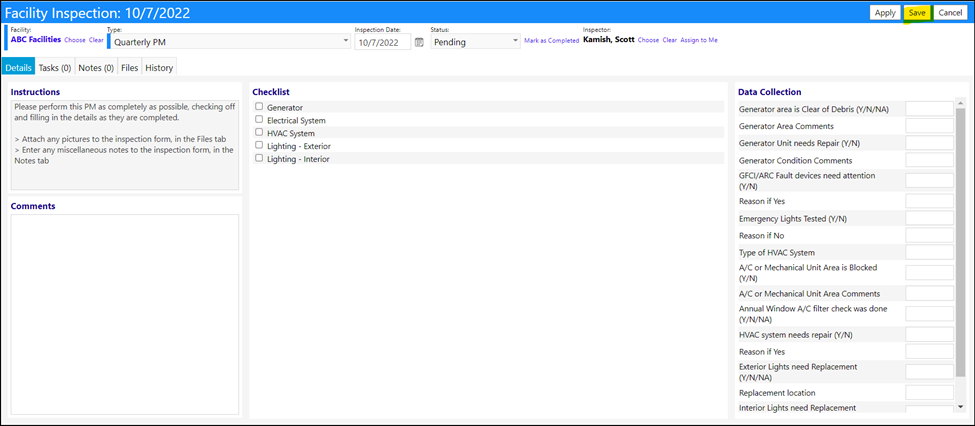
The inspection has now been created and scheduled in the system and has been assigned to the Inspector.
NOTE: The assignment to an Inspector on the Facility Inspection Form is Optional. The assignment can also be done in the Facility Inspections page once the technician/inspector has been identified and assigned to this inspection, or it can be done automatically by the system (contact your System Administrator to set this up).
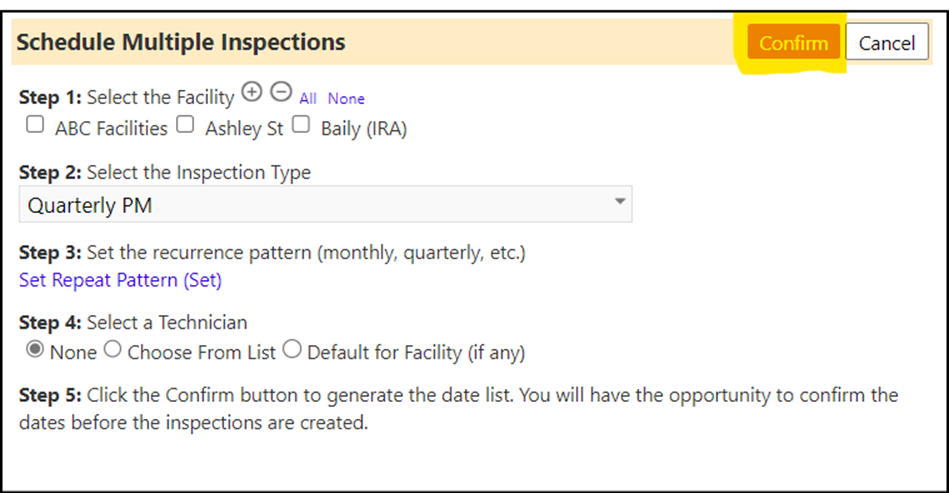
The Scheduling of Multiple Inspections works similarly. But, instead of clicking ‘New Inspection’, click ‘Schedule Multiple Inspections’.

A window will open which will allow you to schedule Facility Inspections for one or more facilities, with a recurrence pattern of monthly, quarterly, etc. You can also choose to assign all facility inspections to a single Technician, the ones assigned to the Facility, or none.
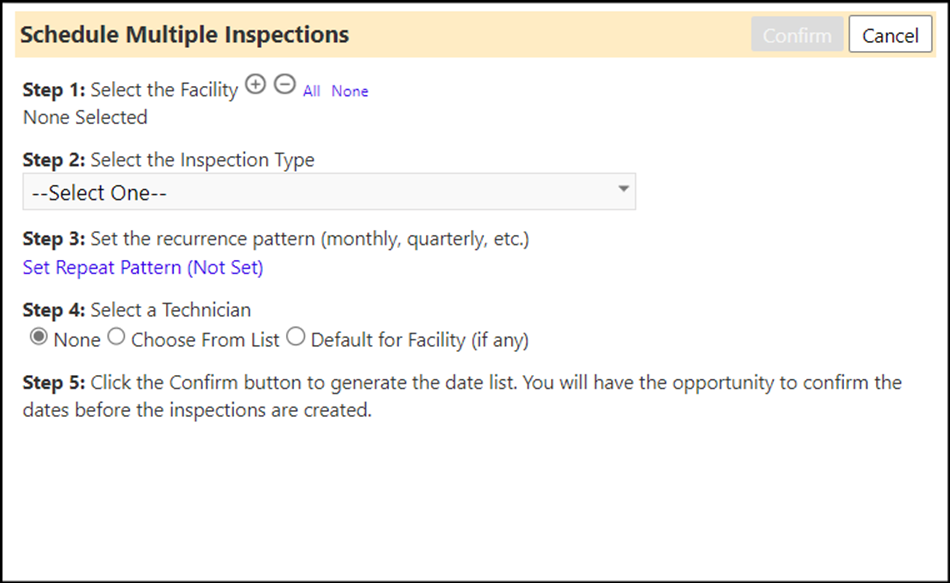
Choose the Facility or Facilities by clicking on the ‘+’ and adding them from the drop-down list.
Select the Inspection Type from the drop-down list.
Set the Recurrence Pattern by clicking on ‘Set Repeat Pattern’.
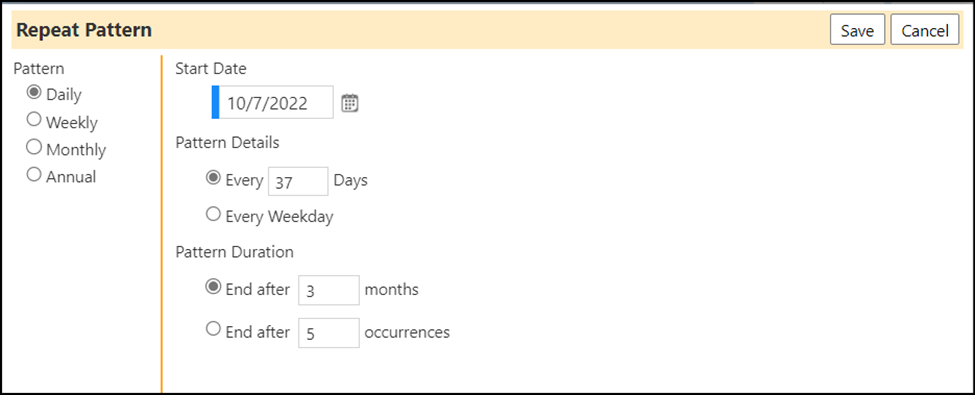
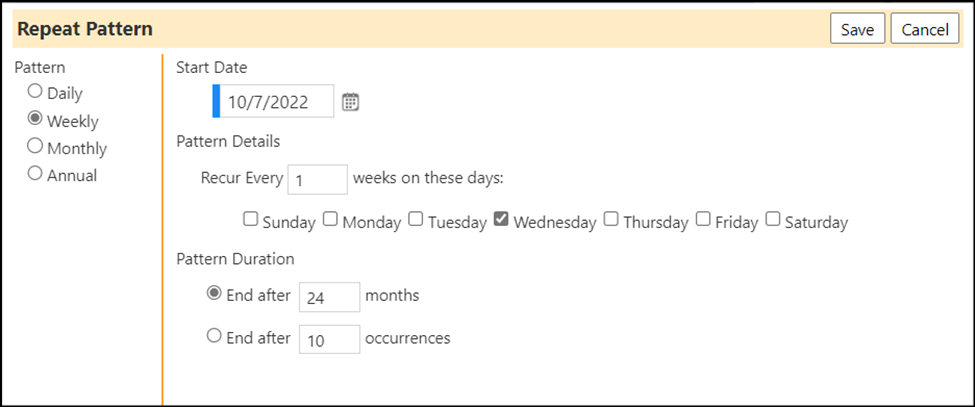
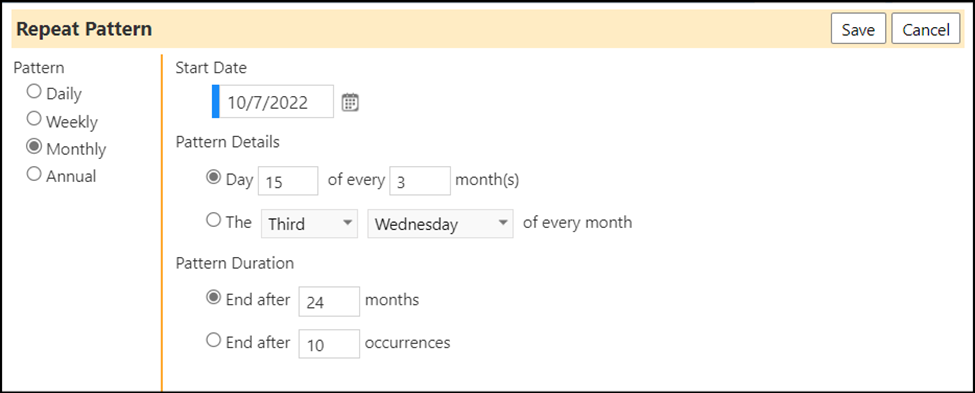
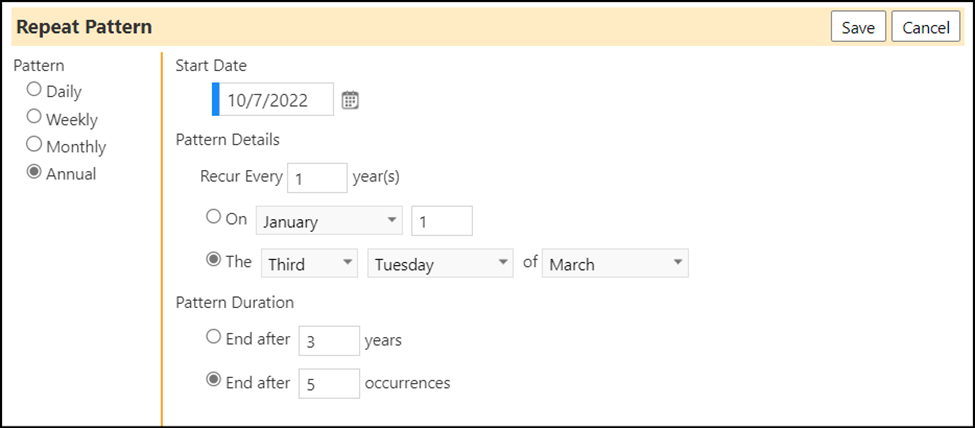
A window will open, allow you to set the pattern. Enter the date you want the first inspection to occur. Choose from daily, weekly, monthly, or annual inspections. Choose a pattern detail (for example, every 15 days or every 7 weeks on a Monday, etc.). Also choose how long you want the pattern to repeat for (example, 10 times or end after 24 months, etc.).
Daily:
Weekly:
Monthly:
Annually:
Click ‘Save’ when your Repeat Pattern entries are completed. The system will indicate your pattern is now ‘Set’.
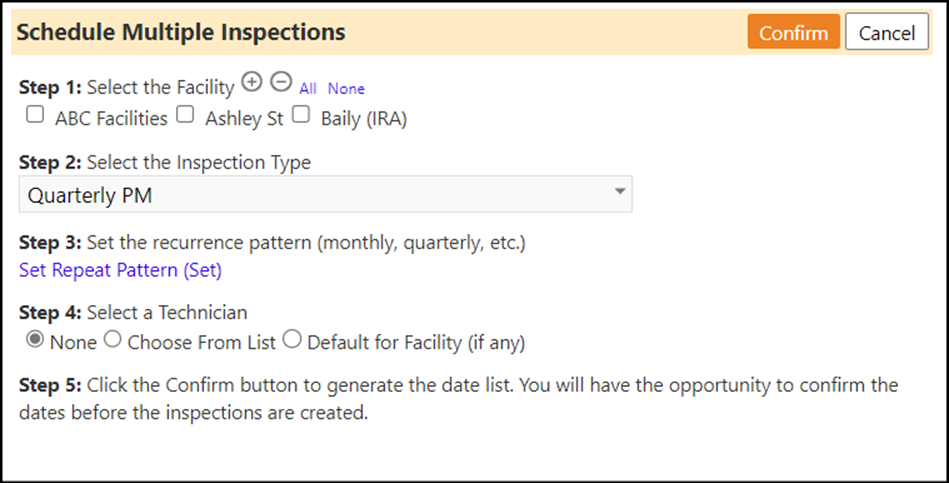
When you are all done with your entries, click ‘Confirm’.
A window displaying your scheduled inspections will display, allowing you to confirm or reject them.
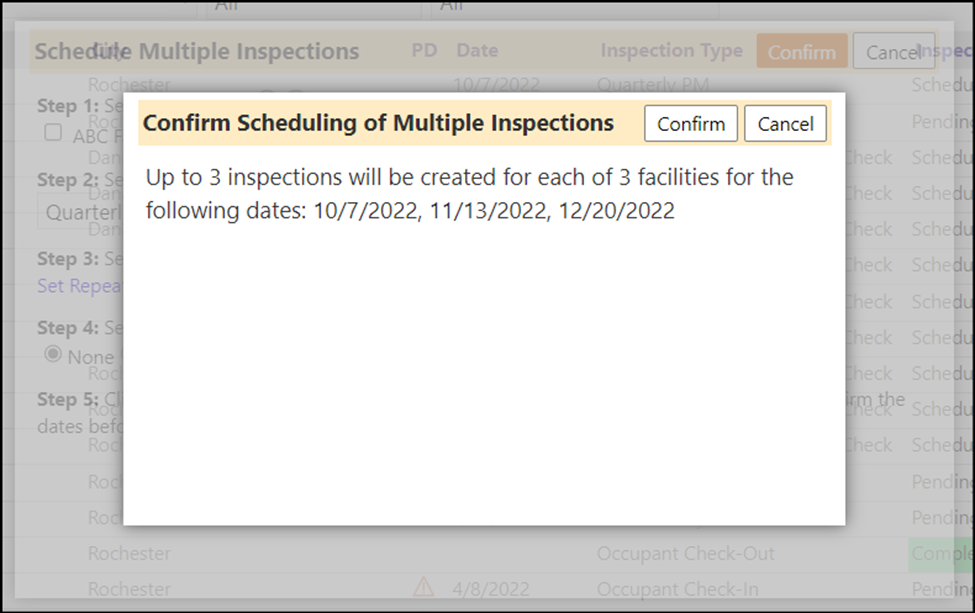
Click ‘Confirm’ if everything is fine. Click ‘Cancel’ if you need to make changes (clicking ‘Cancel’ will bring you back to the ‘Schedule Multiple Inspections’ window, where you can make the necessary changes to the inspections.
As soon as you click ‘Confirm’, the Facility Inspections will display in your Facility Inspection list.

You can now assign these to a Technician to complete the inspection.
NOTE: If desired, you can set up a Notification Policy that will email the Technician once an Inspection is assigned to them, informing them of the inspection. You can also set up a notification policy to inform you once the inspection is completed, when it is updated, or if it gets deleted. Please contact your System Administrator to set this up.
Once assigned, the Technician would access the Facility Inspection page and look for their assigned inspection.
Step 3: Completing the Facility Inspection
Once the Technician has been made aware of an upcoming inspection, they can filter the list of Facility Inspections by adjusting filters on the page and refreshing the view. They can filter by any combination of facility, Inspection type, facility type, inspection status, assigned to, or date.

Upon locating their inspection, the Technician can click on its ID to open the Facility Inspection form.

The form will open and will display the instructions, checklist, and data collection fields.
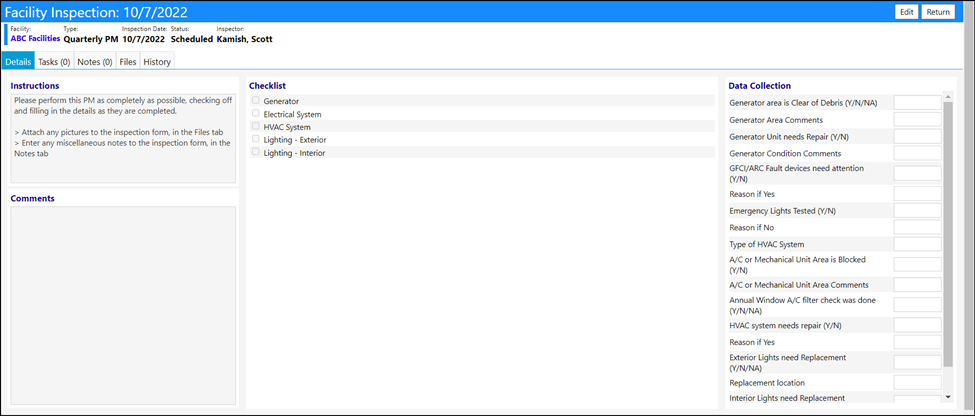
The Technician MUST click on Edit in order to be able to use the form.
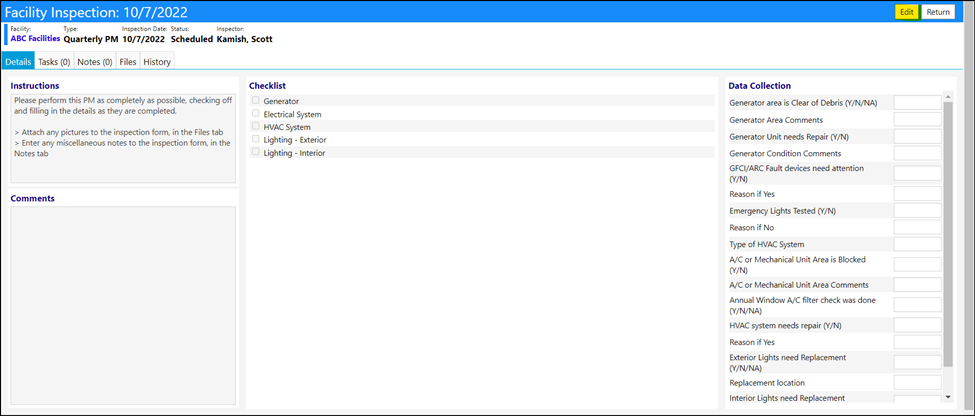
This will activate all of the fields so the Technician can check off items, enter data, and even use the other tabs on the form.
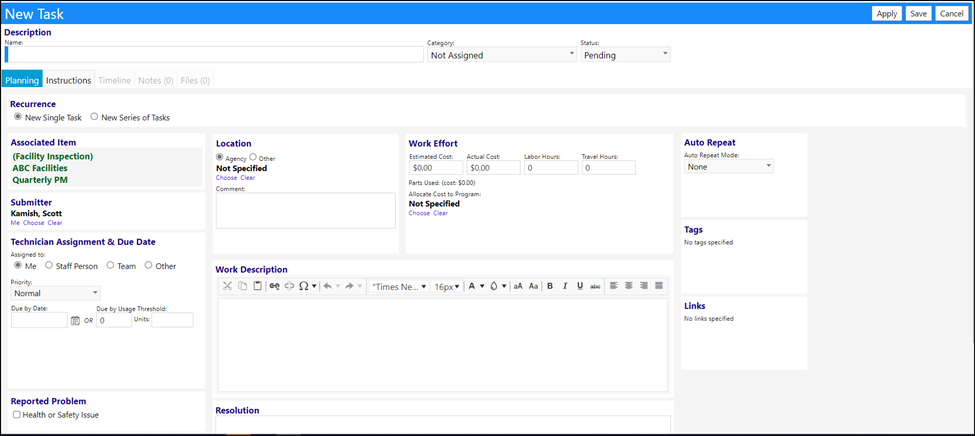
If the Technician clicks on the Tasks tab, they can create a task for themselves or others by clicking on the ‘+’ and adding a new task. These tasks will display in the Task List as well as in the Tasks tab in the Facility Inspection form and will be associated to Facility Inspection.

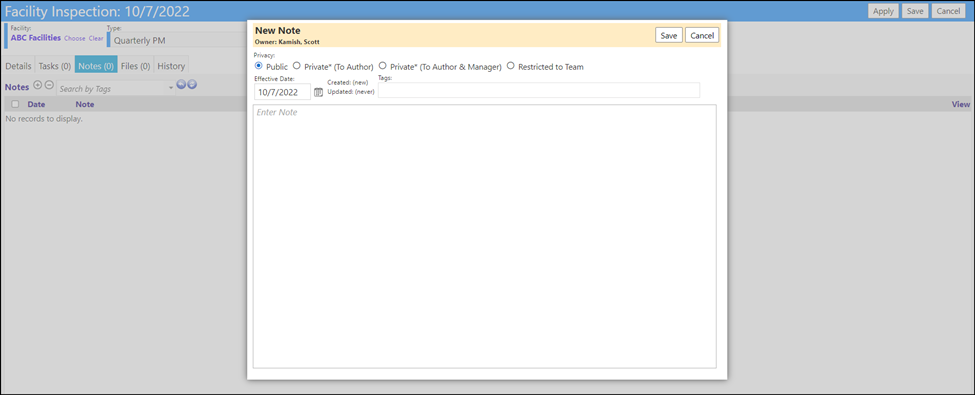
If the Technician clicks on the Notes tab, they can enter a public or private note by clicking on the ‘+’ These notes are all date stamped and cannot be changed by anyone except the author (the only exception is the System Administrator). Once the notes are posted, as long as they were made public, they will be accessible by anyone who has been granted the appropriate privileges to view the Facility Inspections.

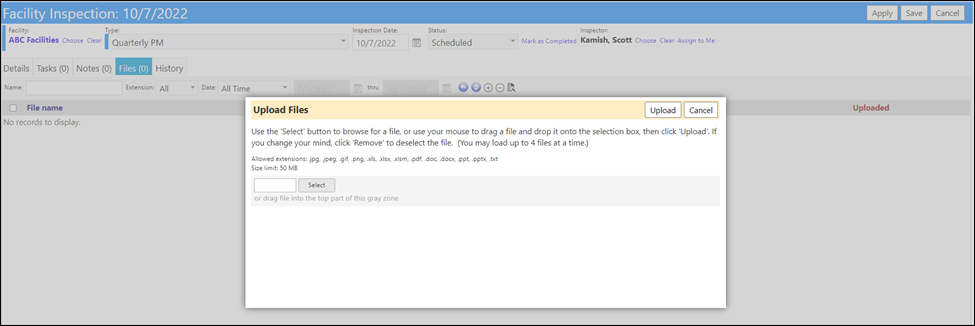
If the Technician clicks on the Files tab, they can upload documents, pictures, or manuals by clicking on the ‘+’ sign and drag and dropping their file from the PC to imPowr.

After the file is uploaded, it will display in the Files tab and will be accessible by anyone who has been granted the appropriate privileges to view the Facility Inspections.
When the Technician is all done with all of the changes, additions, or comments, they should click on the ‘Mark as Completed’ .
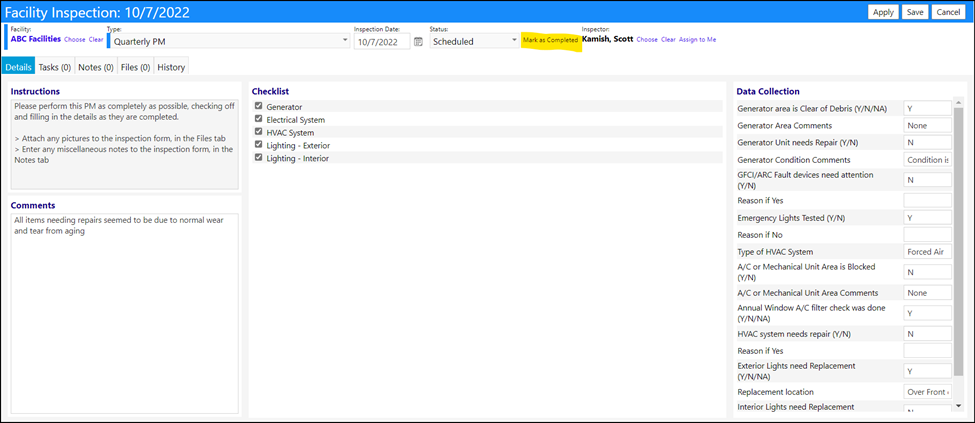
Clicking on ‘Mark as Completed’ will change the status of the Facility Inspection to ‘Completed’.

Click on ‘Save’ to save your updated status and entries.

The Facility Inspection is now Complete and will now display in the Facility Inspection as Completed (unless your filters are set to only show those Scheduled or are filtered in some other way).
