This article will tell you how to add, manage, and enter account ledgers. It will also tell you how to make deposits and payments.
NOTE: In order to access Ledgers, the person setting this up must have the appropriate security rights to view, add, delete, and edit Account Ledgers.
NOTE: For this guide, we will assume the appropriate Account Role has already been established.
Entering and Managing Account Ledgers:
- Login to your imPowr website.
- Go to the Finance
- Click on Client & General Ledgers in the Financial Tools section.
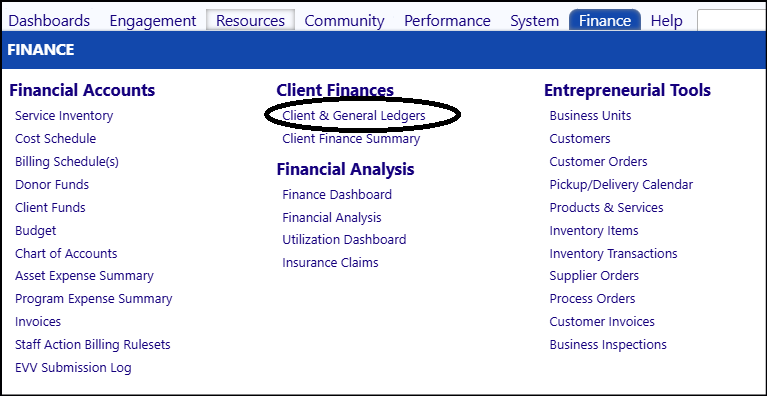
- The Client & General Ledgers screen will appear.

Adding Account Ledgers:
- Click on New Account Ledger.

-
Select a Client for which the new Account Ledger is being created for.
-
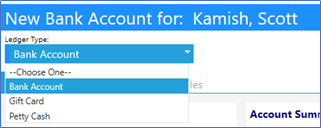
Select the Ledger Type from the drop-down list:
- Bank Account
- Gift Card
- Petty Cash
-
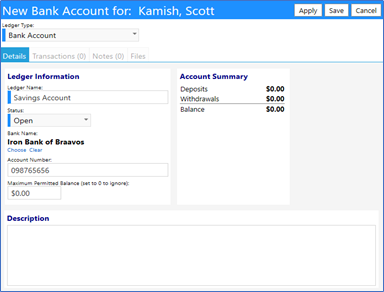
Enter the Ledger Name.
-
Enter the Status:
- Closed
- Open
- Suspended
-
Enter the Bank Name by clicking on Choose and selecting a name from the Organization list.
-
Enter the Account Number.
-
Enter the Maximum Permitted Balance (set this value to 0, if you wish to ignore it. Otherwise, set it to a value so that the Balance background changes color (to Yellow) to alert you if there is too much money in the Account).
-
Click on Apply.
Transactions Tab:

The Transactions tab allows you to…
- Make Deposit
- Make Payment
- Move Cash
- Make Adjustment
- Reconcile with Statement
- Print Summary
It also displays the Count of Transactions**,** a Summary of the amount of **Credits/Deposits **and Debits/Withdrawls, as well as displays the Balance on the Account.
Making Deposits:
Set up the initial and subsequent deposits by clicking on Make Deposit.

- Fill in the Transaction Date.
- Fill in the Amount of deposit.
- Optionally, enter a Memo or select from a list of predefined (and user configurable) activities (such as Family Deposit, Medicaid Stipend, Rent Payment, Transfer from Petty Cash).
- Click on Post.

The credit now appears in the Transaction tab:

Making Payments:
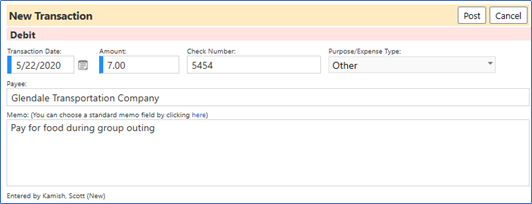
Make a Payment (issue a check) or make a Debit/Withdrawal by clicking on Make Payment.
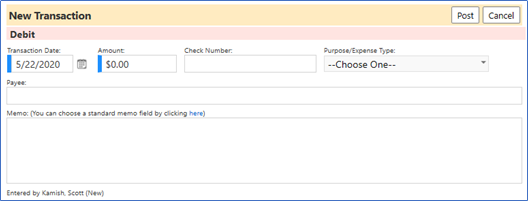
- Fill in the Transaction Date.
- Fill in the Amount of payment.
- Fill in a Check Number.
- Select the Purpose (of the payment)/Expense Type from the drop down list.
- Enter a Payee
- Optionally, enter a Memo or select from a list of predefined (and user configurable) activities (such as Family Deposit, Medicaid Stipend, Rent Payment, Transfer from Petty Cash).
- Click on Post.
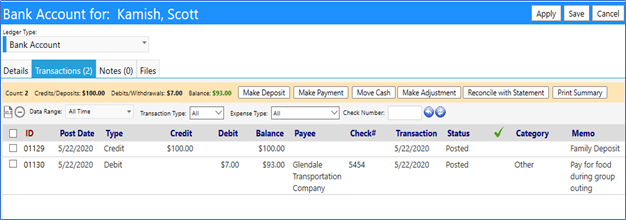
The payment now appears in the Transaction tab:
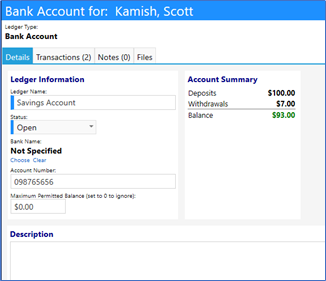
NOTE: Each time you perform a transaction, your Balance and your Account Summary gets updated:
Moving Cash between Ledgers:
Move Cash from your Account Ledger to another one of your Account Ledgers by clicking on Move Cash.
- Fill in the Transaction Date.
- Fill in the Amount of cash to be transferred.
- Select a Destination Ledger from the list of your active
- Optionally, enter a Memo or select from a list of predefined (and user configurable) activities (such as Family Deposit, Medicaid Stipend, Rent Payment, Transfer from Petty Cash).
- Click on Post.
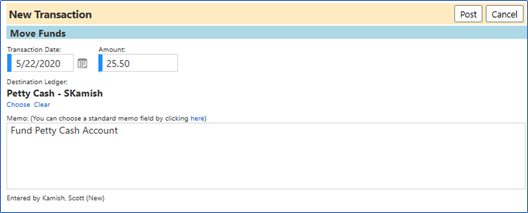
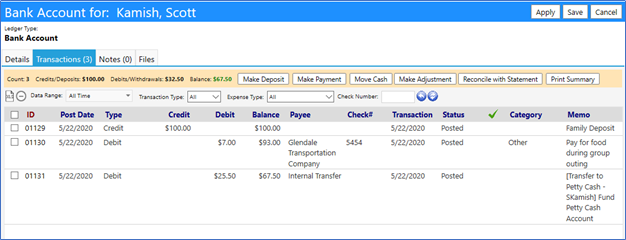
The transfer appears in the transaction as a Debit, with the payee being an Internal Transfer, and the Memo indicates which of your Ledgers the money has been transferred to:
NOTE: General Ledgers can transfer money to any other ledger account within the same organization. Account Ledgers can only transfer money between ledgers for the same user account. So, if someone wanted to transfer money from one account (Petty Cash) to another (a resident’s account), they will need to issue a check…because, if they choose to set the Petty Cash account to a General Ledger, it will no longer be tied to a program (since it is not tied to an account)… and they will not be able to restrict who can view that General Ledger Account.
Making Adjustments:
Adjust your Account Ledger and correct any errors made to the Account during the entry process by clicking on Make Adjustment.
- Fill in the Transaction Date.
- Fill in the Amount of your Account Ledger which needs to be adjusted.
- Optionally, enter a Memo or select from a list of predefined (and user configurable) activities (such as Family Deposit, Medicaid Stipend, Rent Payment, Transfer from Petty Cash).
- Click on Post.

Note: The Adjustment can be a credit or debit. For credits, just enter the dollar amount. For debits, enter the dollar amount with a ‘ – ‘ in front of it.
For example:
The adjustment appears in the transaction as either a Credit or Debit, and the Memo, if entered, indicates your reason why:


Reconciling the Ledger:
Reconcile your Account Ledger with your bank statement amount by clicking on Reconcile with Statement.
- Select the Date Range for which you are performing the reconciliation (default = All Time).
- Identify the items which are found on your bank statement (can be a credit, debit, or adjustment).
- When both your bank statement and your Account Ledger match, mark the entry Status as “Reconciled” and mark the entries which have been reconciled by checking the Reconciled Box to the right of the entry.
- Click on Close.

The reconciliation appears in the transaction with a green checkmark.
Note: that some entries may appear as a checkbox with a line through them – these represent adjustments which correct for errors made during the entry process and are not transactions found on the bank statement. Adjustments are credits only.

Printing the Account Statement:
Click on Print Summary to get a printout of the Account statement.
When you do this, a new window opens showing the Account details along with the transactions which occurred.

Click on Print to PDF to Open or Save the summary so you can either print the document or save it to your computer:

Deleting Incorrect Transactions:
Delete incorrect entries by selecting the entry via the checkbox to the left of the Transaction ID, and clicking on the “-“ button:
