Non-Staff Action Bed Checks work the following way:
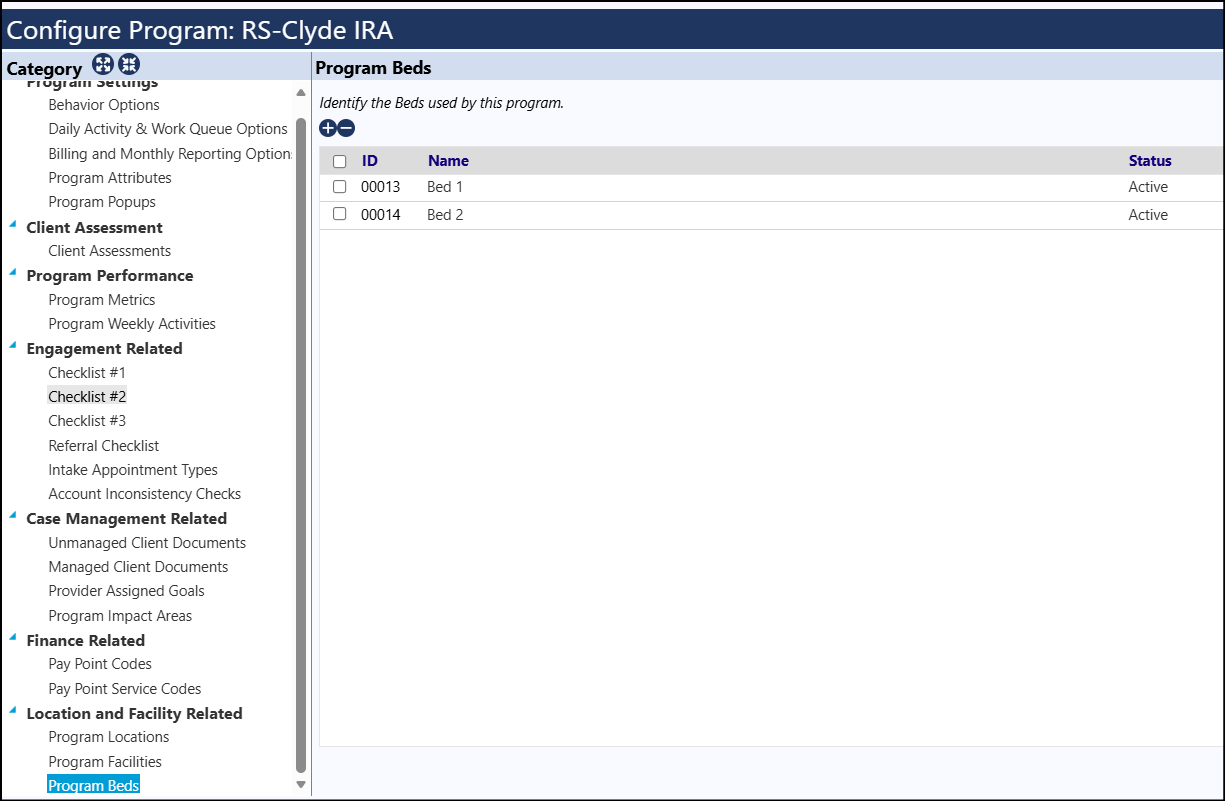
Beds used by the program are setup with...
Resources > Programs & Activities > Programs
Select your Program
Click on Settings
Select Program Beds
Enter name of bed and be sure to set it active
Click Save
Bed checks are setup with...
Navigate to Resources > Programs & Activities > Programs
Select your Program
Click on Settings
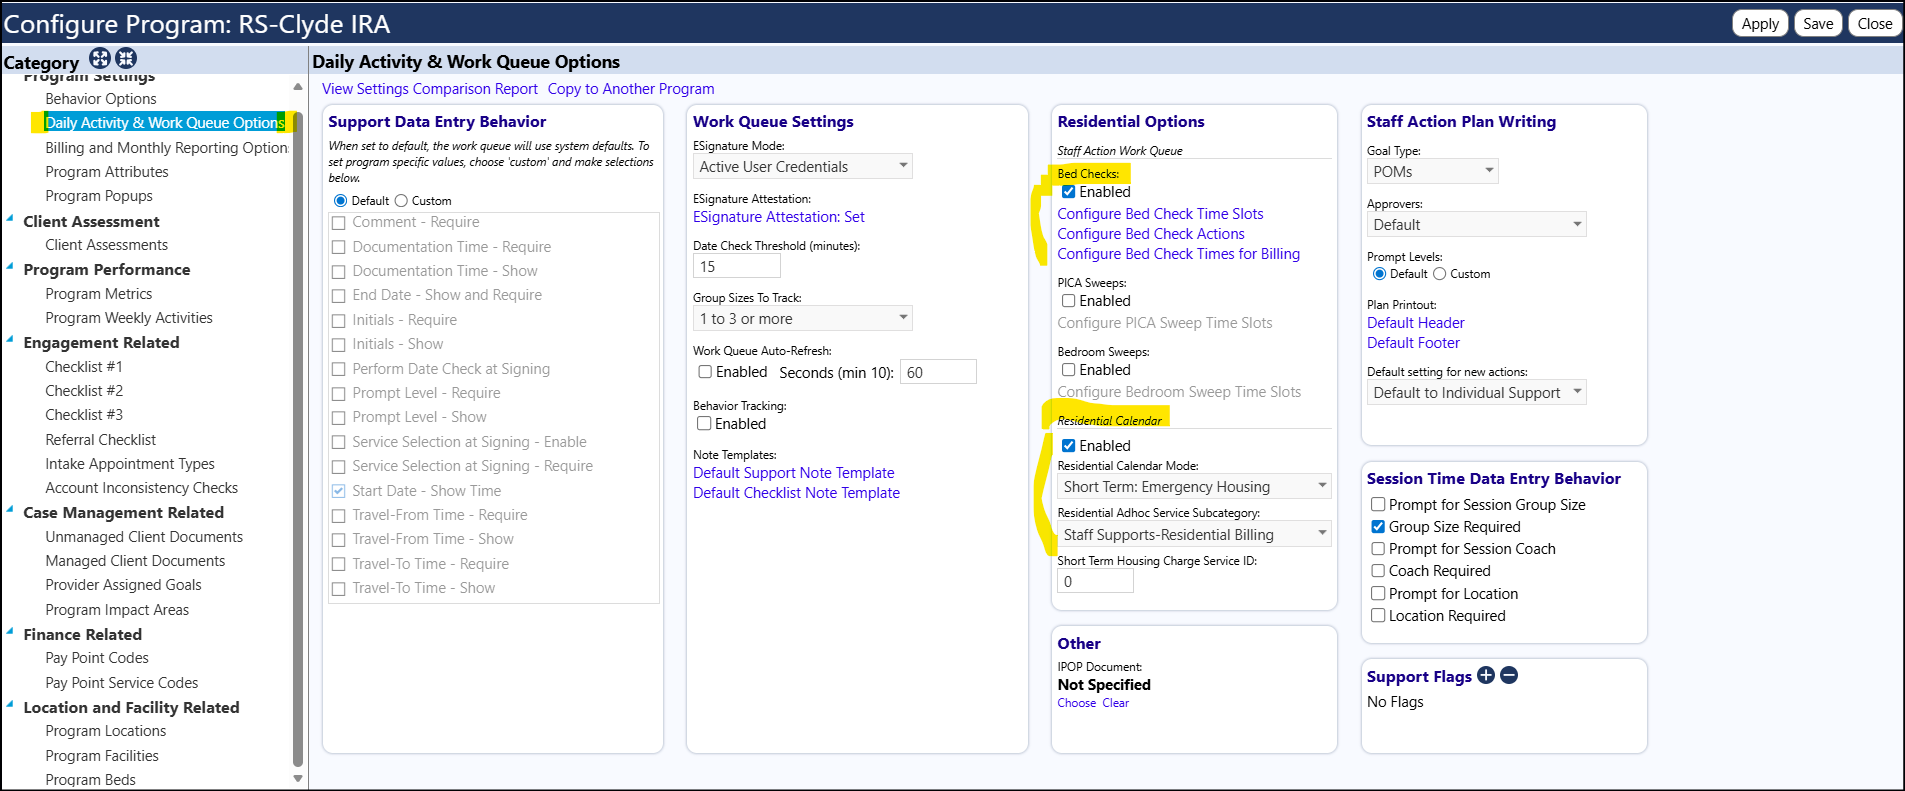
Select Daily Activity & Work Queue Options
Locate the Residential Options panel
In the Residential Calendar section...
Check the Enabled box
Select the Residential Calendar Mode of Short Term: Emergency Housing
Select the Residential Adhoc Service Subcategory: Residential Services - Over night
In the Staff Action Work Queue section...
Check the Enabled box
Click Configure Bed Check Time Slots
Add Time Slots or copy from another program
Click Return
Click Configure Bed Check Actions
Add Actions or copy from another program
Click Close
Click Configure Bed Check Times for Billing
Enter start time
Enter duration
Click Save
Click Save
Bed Check Stay Types are hard coded and are not user configurable
Individual notes/comments for a client's Bed Checks (like 'Check CPAP machine to make sure it is filled with water') are added with...
Navigate to Resources > Programs & Activities > Programs
Select your Program
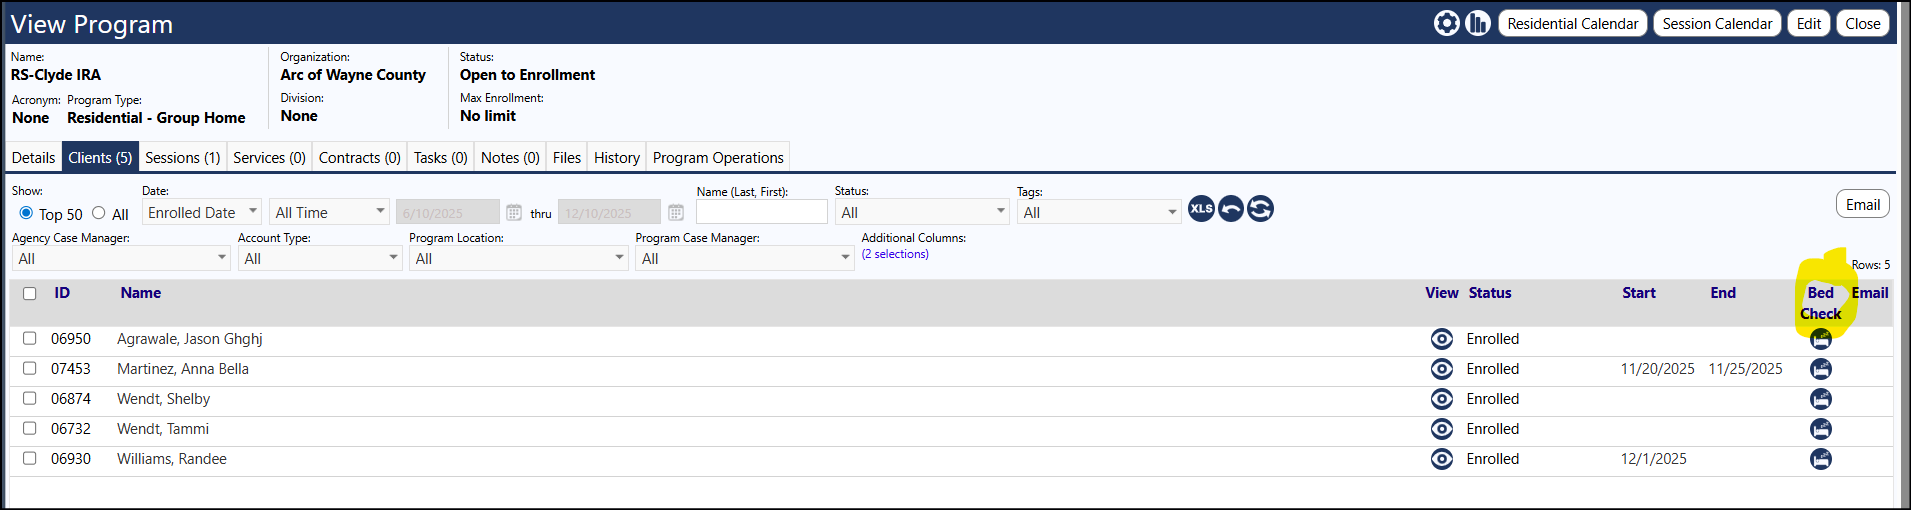
Select the Clients tab
Locate your client
Click on the Bed Check icon (towards the right of the screen, on the same row as the client)
Check the time slots that apply to that client
Enter any specific notes for that client, in the individual time slots
Make sure the Check Status is Enabled
Click Save
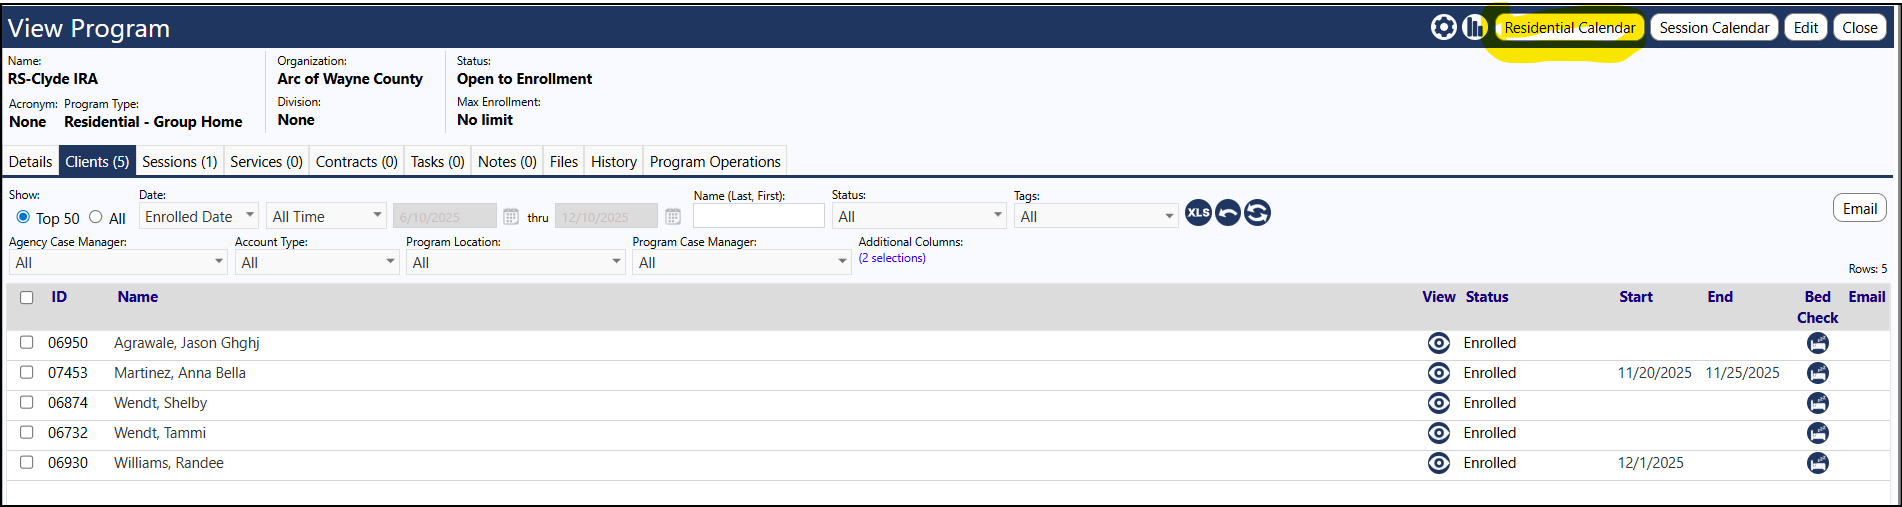
Perform the bed Check by...
Navigate to Resources > Programs & Activities > Programs
Select your Program
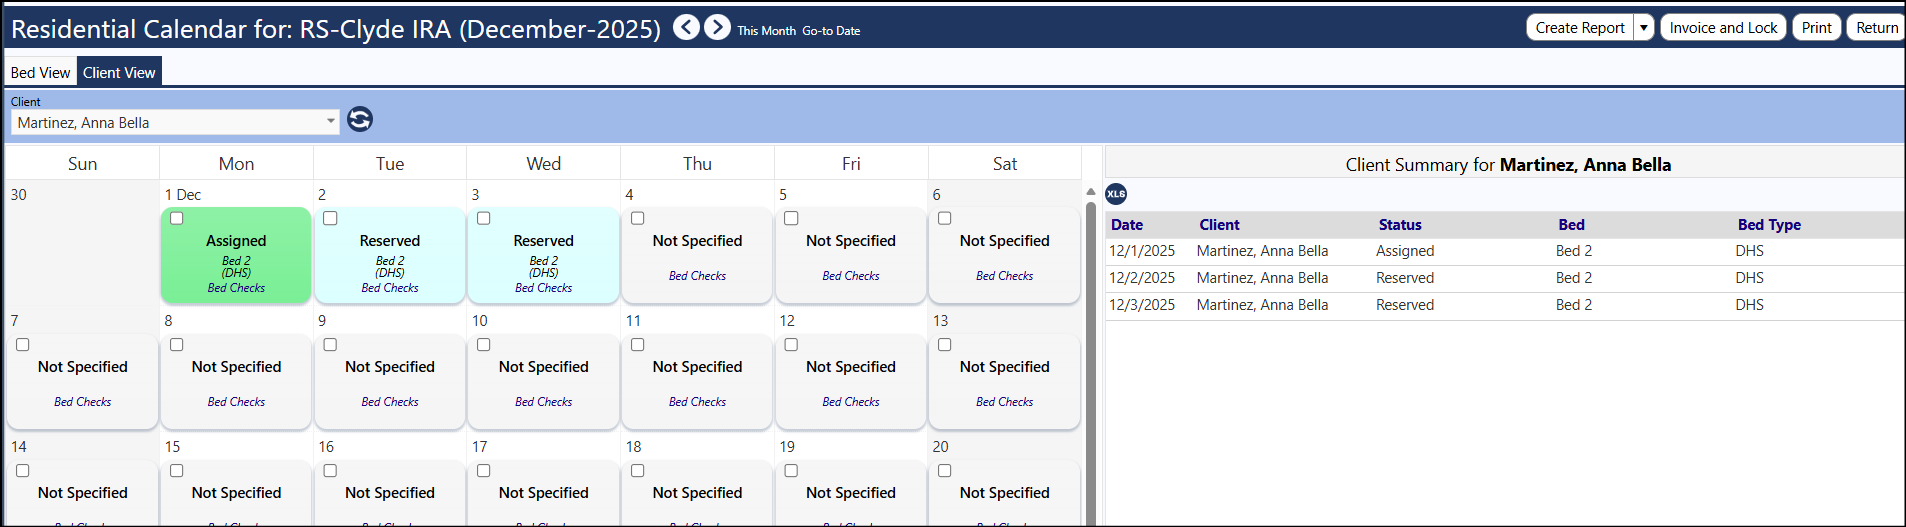
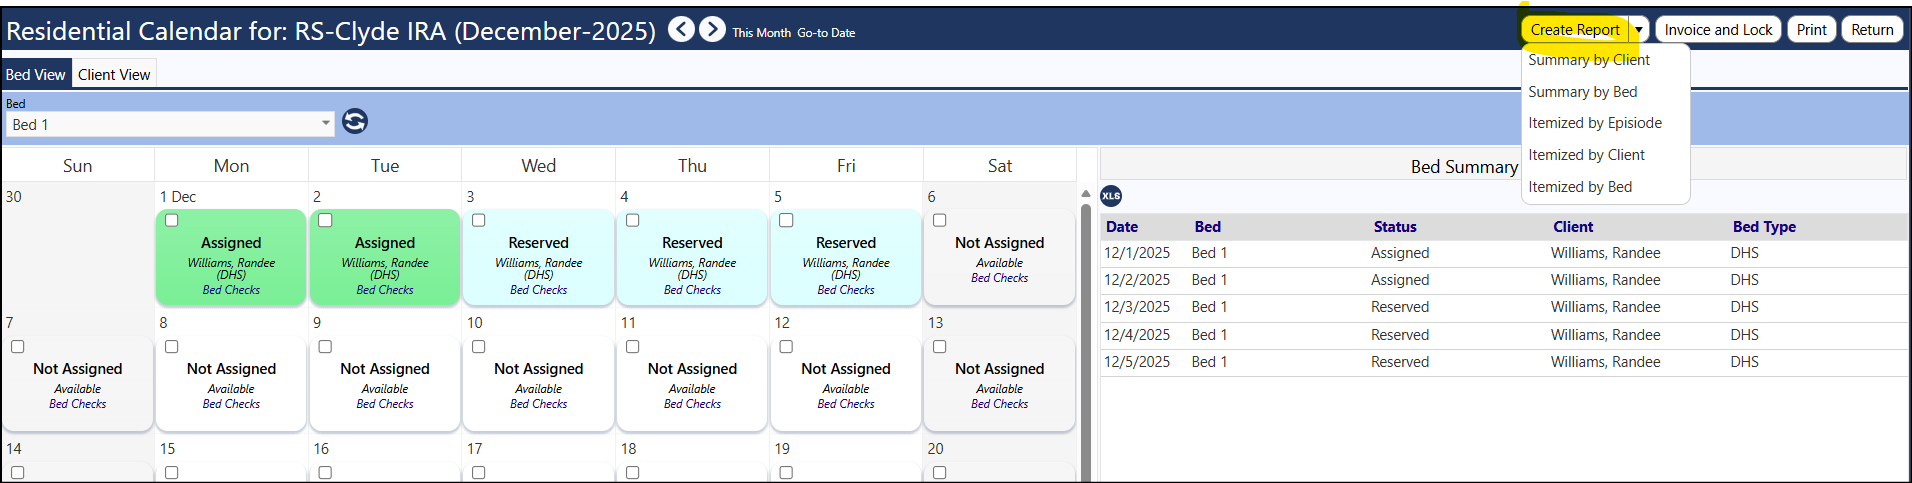
Click Residential Calendar
Select either the client or the Bed View
Select the Bed or the Client
Click on the 'Not Assigned' (if in Bed View) or 'Not Specified' (if in Client View)
Select the Bed (if in Client View), enter the Projected End Date, click on 1 - 5 nights to reserve the bed for that number of nights, select the Stay Type, the click Proceed OR Select the Client (if in Client View), enter the Projected End Date, click on 1 - 5 nights to reserve the bed for that number of nights, select the Stay Type, the click Proceed
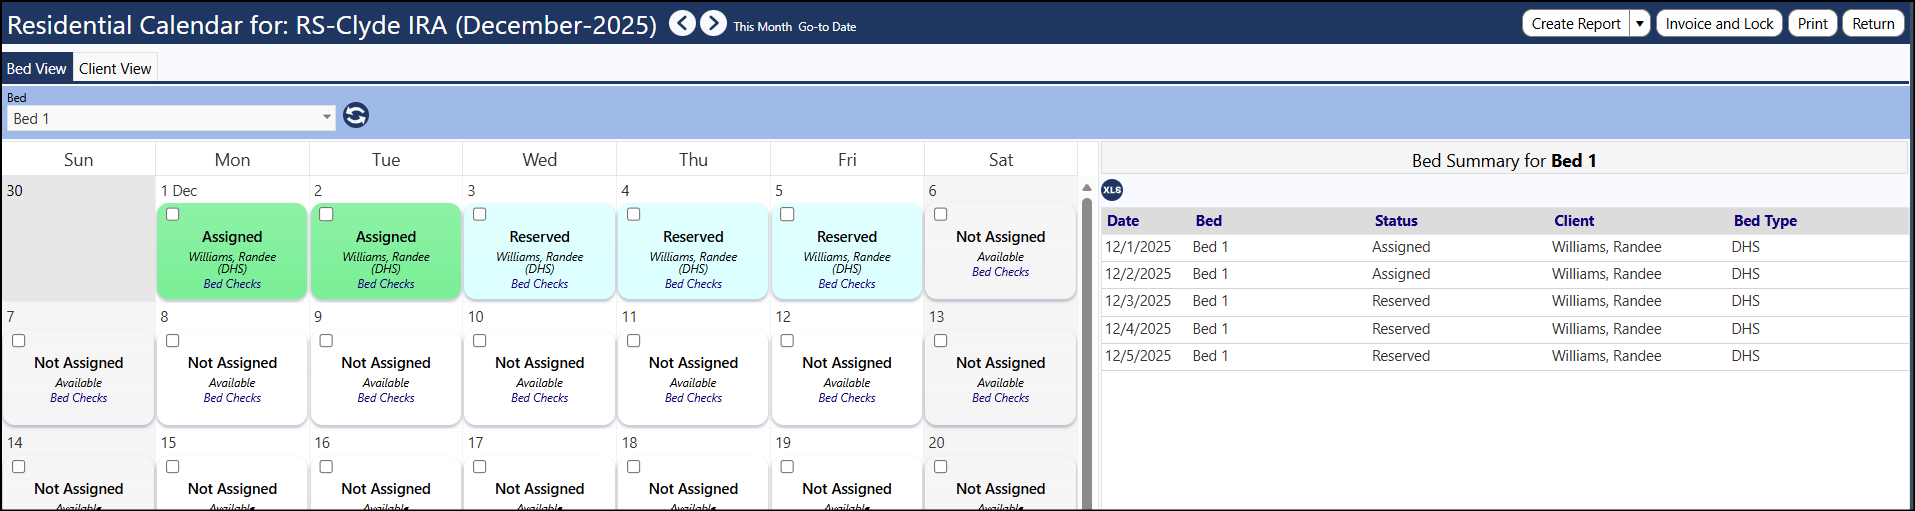
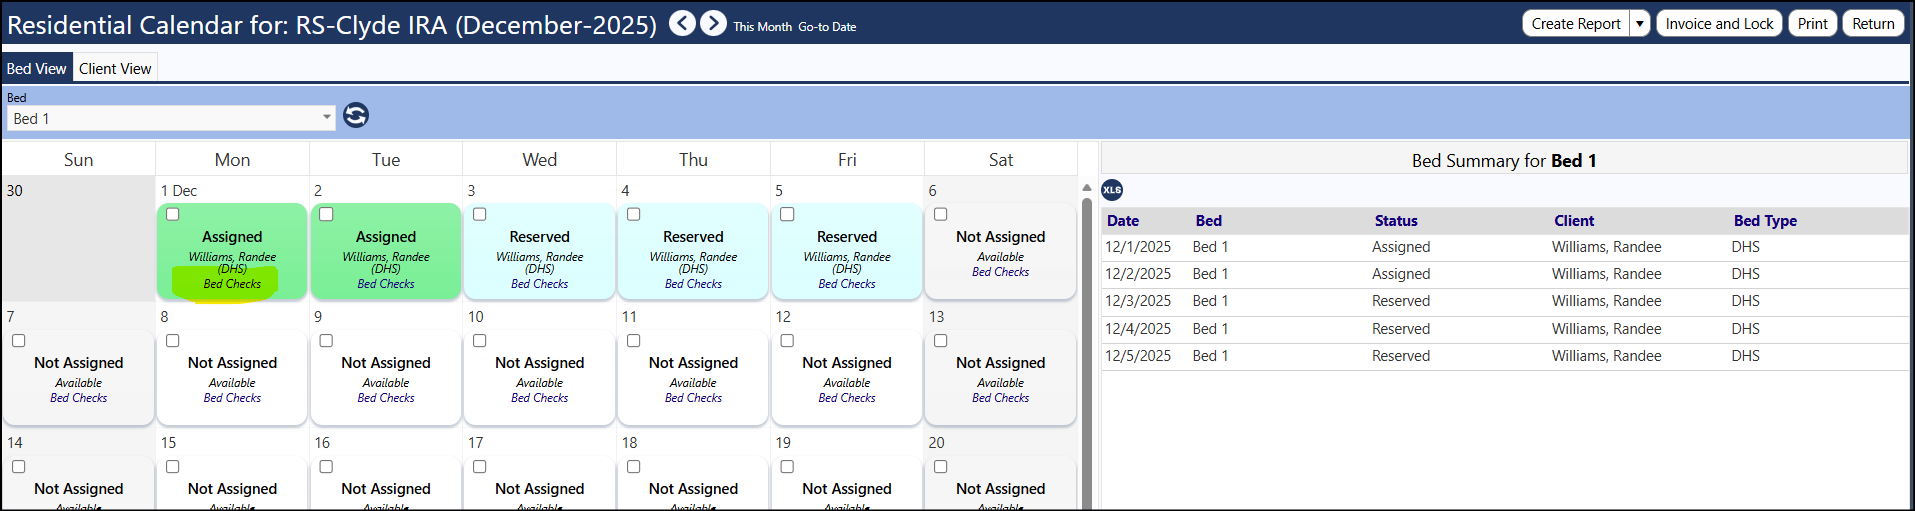
Click Bed Checks on any day to see a summary of all entries for that day
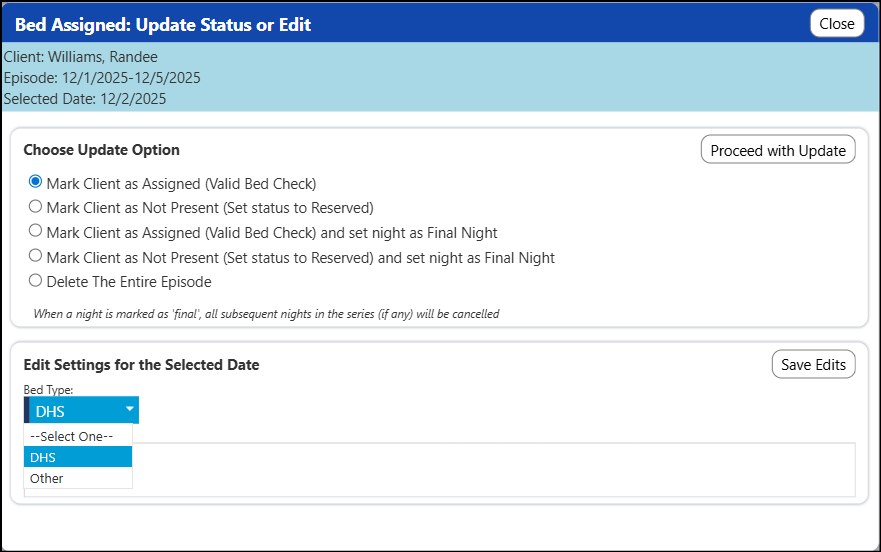
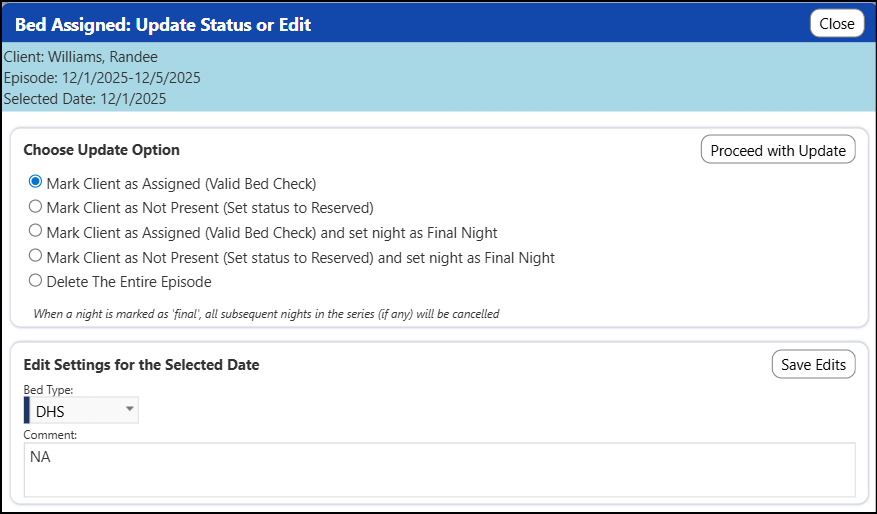
Update the Bed Check Status or Edit the Bed Check
Navigate to Resources > Programs & Activities > Programs
Select your Program
Click Residential Calendar
Select either the client or the Bed View
Select the Bed or the Client
Click on the 'Assigned' or 'Reserved'
Choose the Update Option
Edit the Settings for the selected Bed Type and enter any desired comments
Click either Proceed with Update or Save Edits, depending on whether you are updating the status or editing the settings for the selected date
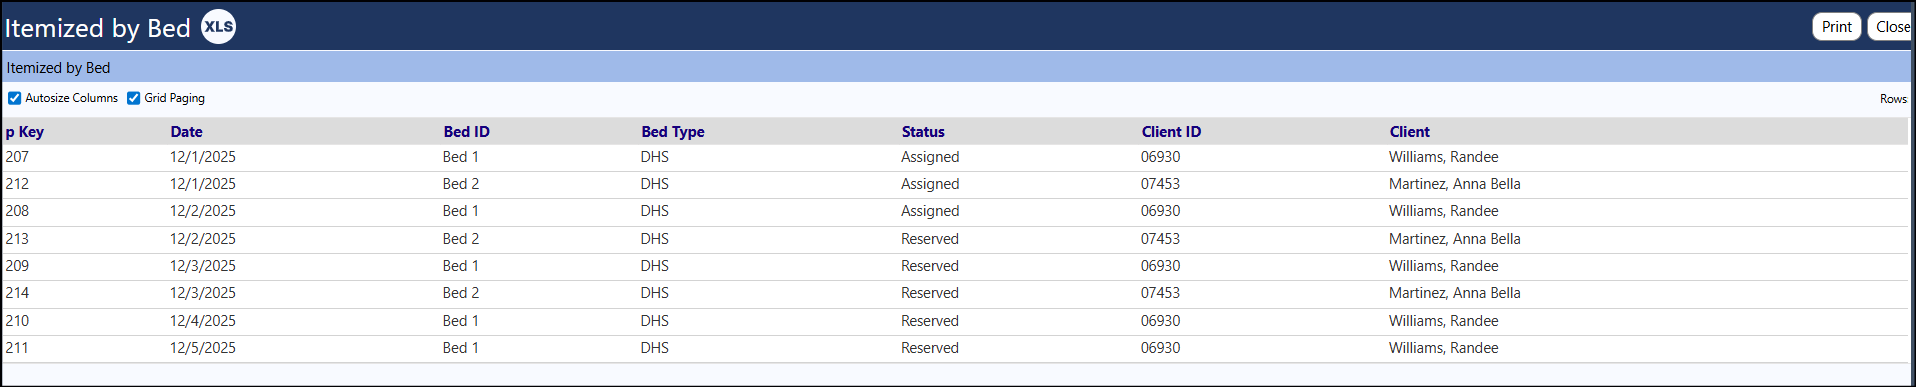
Click on the drop down for Create Reports to generate a report