Menu Wizard
The Menu Wizard makes working with Account Roles easy. It ‘tells’ you which Functional Rights and Entity Rights you need to access the various pages, menu items, and functionality within IMPOWR.
The Menu Wizard can be found in the upper right of corner of the Account Role:
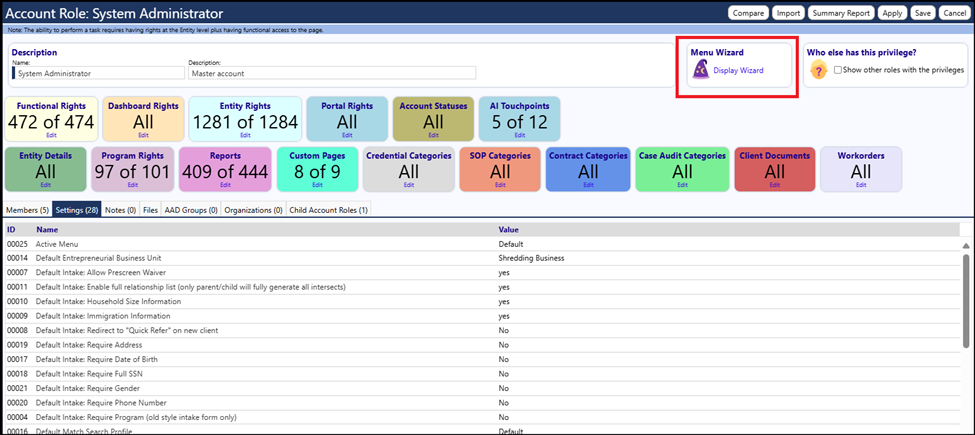
Using the Menu Wizard
Open an Account Role
Locate and Click on the Menu Wizard
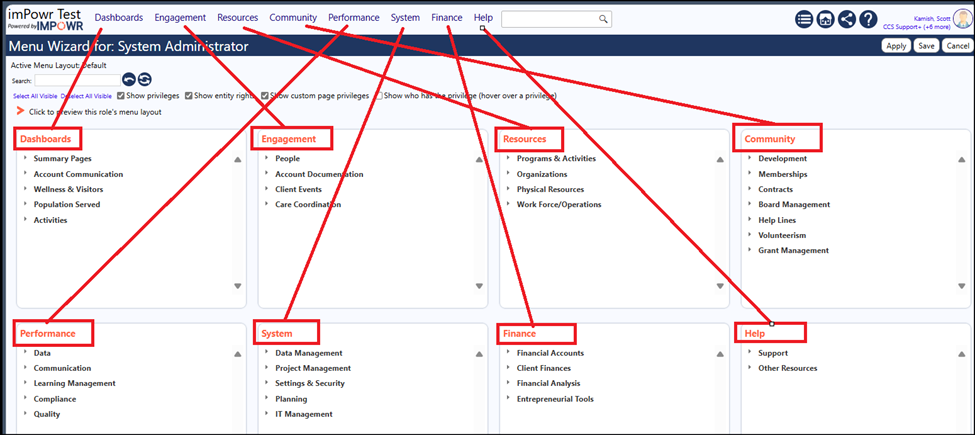
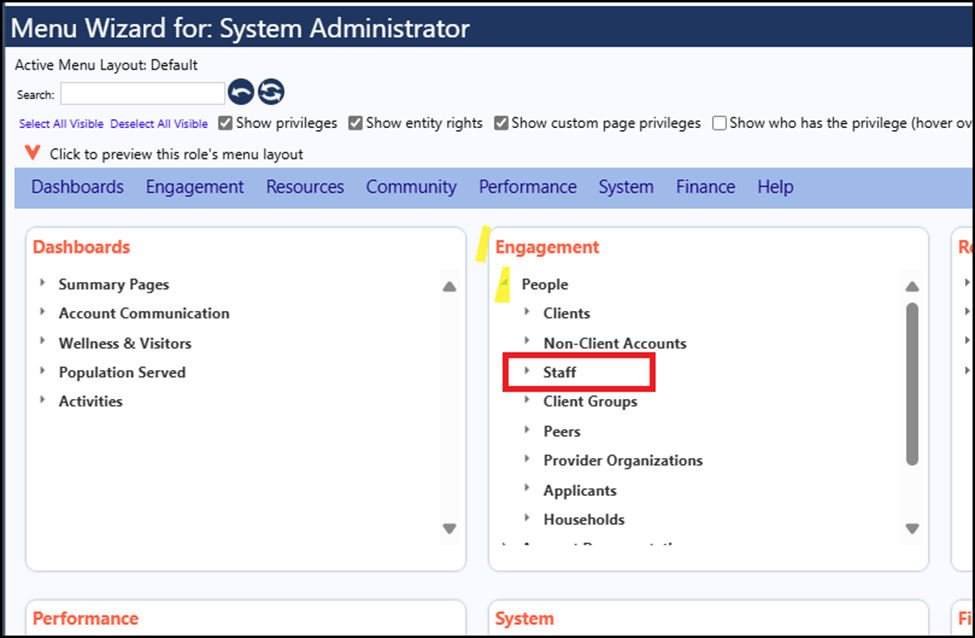
The Wizard will open:

Make sure the following checkboxes are selected:

When looking at the screen, you will notice multiple panels, each labeled in Red with a name that matches the menu on the top of each page in IMPOWR:
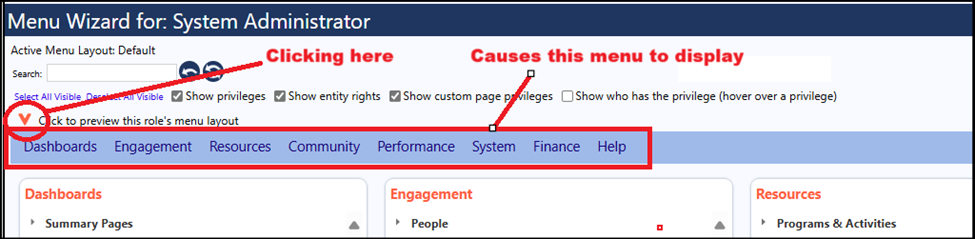
Click on the Orange arrow to preview the Account Role’s particular menu:
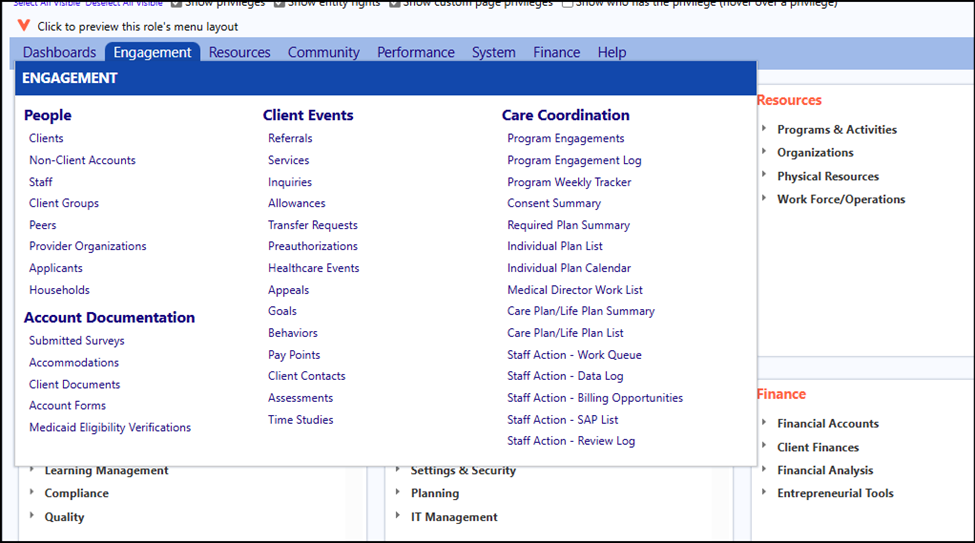
When you hover your mouse over any one of the menu items in the above screen capture, you will see the pages associated with that menu item.
The Menu Wizard will guide you through the Account Role setup. You don’t have to go through each privilege. The Menu Wizard will tell you which ones you need to access your desired page.
Process
Let’s say you want to be able to view and edit client accounts….
If you were working in the Account Roles, you would need to guess at which Account Role privileges you needed based on the names of those privileges. There is a good chance you might miss some, but if you use the Menu Wizard, that is no longer a concern.
Open the Menu Wizard.
By clicking on Engagement in the menu preview, we can see Staff falls under the People section.
In the Menu Wizard…
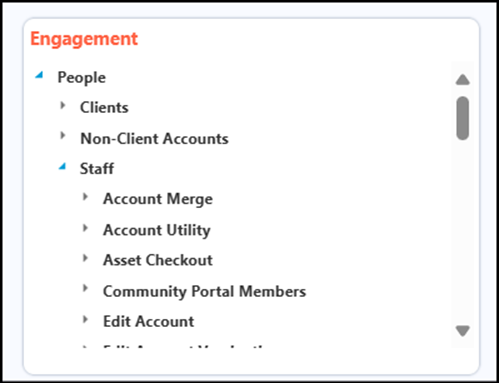
• Locate the Engagement panel
• Locate the People sub-section
• Click on the arrow to the right of ‘People’ to expand the wizard
• Locate ‘Staff’
• Click on the arrow to the left of the staff to expand all privileges and settings associated with the Staff.
• Scroll down the list and locate items with checkboxes

These are the Functional Rights and Entity Rights privileges that you need to have assigned in order to work with the Staff:
- The first list of items is the Functional Rights.
- Check all of the boxes that you need, if they are not already checked
- The ones of importance are:
- The Account Role needs Menu Access to the Staff List Page
- If the Account Role is not an administrator, they do not need the Administrator Functions – uncheck that box
- The Account Role needs Menu Access to the Staff List Page
- Check the General – Data Export button if you want the Account Role to be able to export the Staff List, otherwise, keep it unchecked
- If you want the Account Role to be able to merge Staff Accounts, check that box so the Account Merge page will be accessible. Example lets say you only want your Account Role to be able to view and add staff accounts but not manage them by editing or deleting them. In that case, you would make sure the Page – Account Merge box would be unchecked:

- Similarly, if you did not want someone with that Account Role to be able to export the list of Staff, you would uncheck the General – Data Export box:

- The Page – Group Assign button needs to be checked only if the Account Role manages Staff accounts and have a need to assign a credential, course, or learning goal to a group of selected staff members, in bulk
- The Page – Staff List is required if you want the Account Role to be able to view the staff list
- Staff Management – Add Staff, Staff Management – Delete, and Staff Management – Edit Staff need to be checked if the Account Role is responsible for adding, editing, or deleting staff members
- The View All Clients all Programs button needs to be checked if you do not want to restrict the Staff Members from viewing clients only in the programs identified in the Account Role
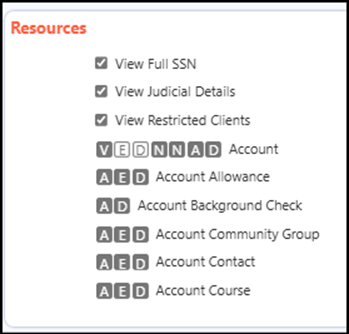
- The next section of items is the Entity Rights
- If you look below the above checkboxes, you will see the letters V, A, E, D and the word Account. These represent the Entity Rights which grant the user the ability to View, Add, Edit, and Delete Accounts. You can click on one or more of these Entity Rights to turn that right on or off. For some pages, if you click on Add (A), the Edit (E) might also automatically be clicked by the system. That happens when Edit rights are automatically assigned and users can edit entries that they have added. That is not the case for Staff Members. For example, let's say you want the Account Role to be able to Add and View a new Staff Member but not be able to Edit or Delete them. You would make the following selections:
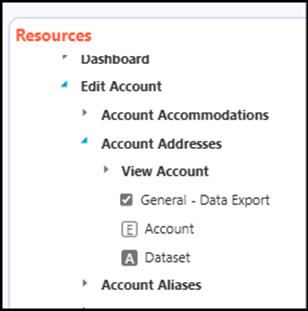
- Below that box is the letter A and the word Dataset
- This is for the Entity Right that allows the user with the Account Role the ability to Add a Dataset to IMPOWR (in other words, if they click on Export, they can select Export to a Dataset. Datasets are used for reporting purposes.)
By opening the Wizard, the system has guided you as to which Functional Rights and Entity Rights are applicable to working with Staff. The nice thing about using the wizard is if you selected the Entity Rights and those Entity Rights are also used for other pages, when looking at the other pages, you will see that the Entity Rights have already been selected for you, because you already indicated that Account Role can have them. This saves you time.
For example, if you had selected the View and Add features for the staff, you were also selecting the View and Add Entity Rights for non-Client Accounts. You were also selecting the View and Add Entity Rights for any editing Accounts in Programs, and many other menu items, as well.
The Menu Wizard makes the setting up of Account Roles easy. All you need to do is identify what menu item the item you want some kind of access to and go to that menu item in the wizard. Expanding the wizard lists will tell you what you need.
Example: to Edit an Account Address in a Program, I can see I need the Edit Account Entity Right. If I want to export account addresses, I will need the General – Data Export Entity Right. And if I want to create a dataset for a report, I will need the Add Dataset Entity Right.
The wizard makes it easy!