This article will explain the process for scoring exams.
The Overall Exam Process works as follows:
Once the exam is set up and linked to the course, the student...
- Logs into the student portal.
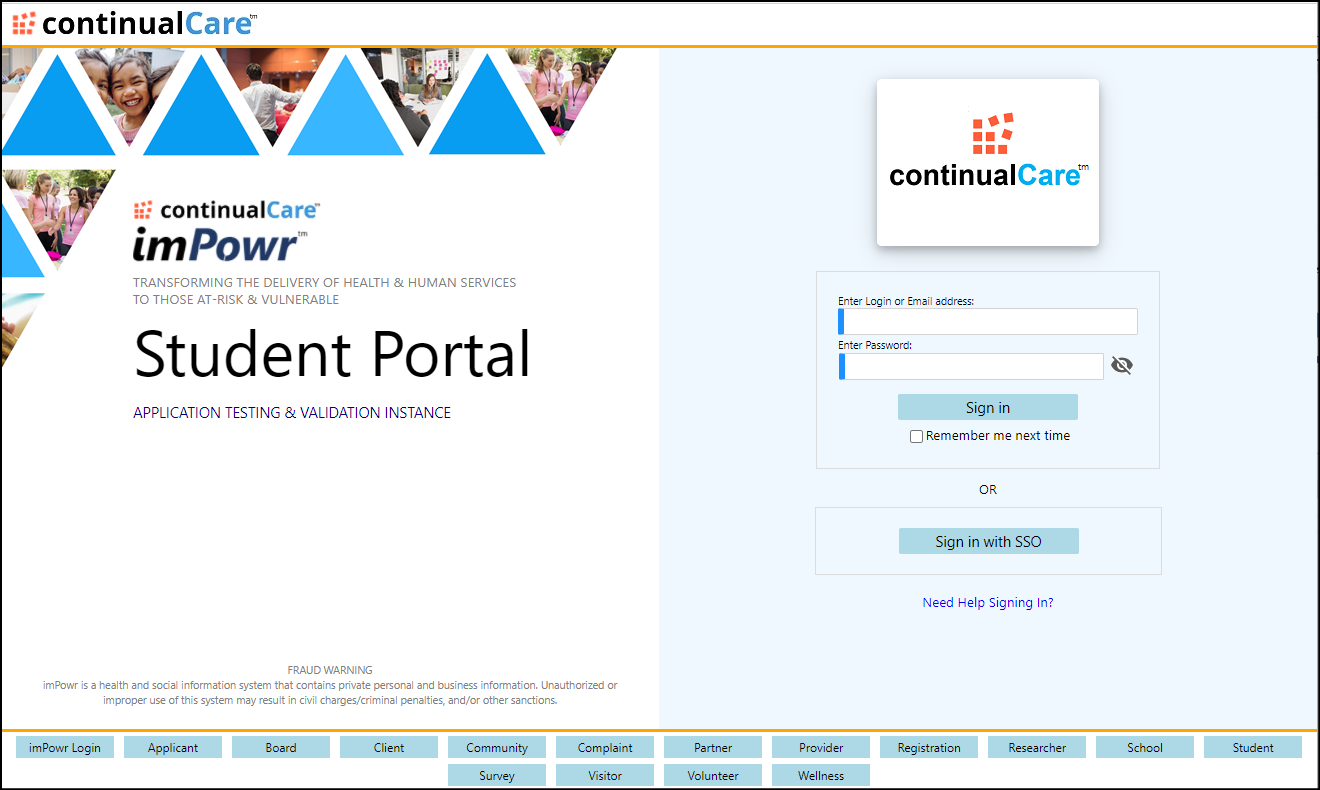
- A screen appears with a list of all of their courses.
- They click on one by clicking the course ID (e.g. “A200”).
- The exams for that course appear on the right of the screen. If there are multiple exams, they see all of them. If there are no exams it informs them no exams exist for that course.

No exams found example:

Multiple exam example:

- The student Selects one of the exams to take from the drop-down list of exams (e.g. “ExamNumber1”) and clicks ‘Take Exam’ to take the exam.
- The student completes their exam and clicks Submit.

- After taking the exam, the student gets an acknowledgement of their submittal.
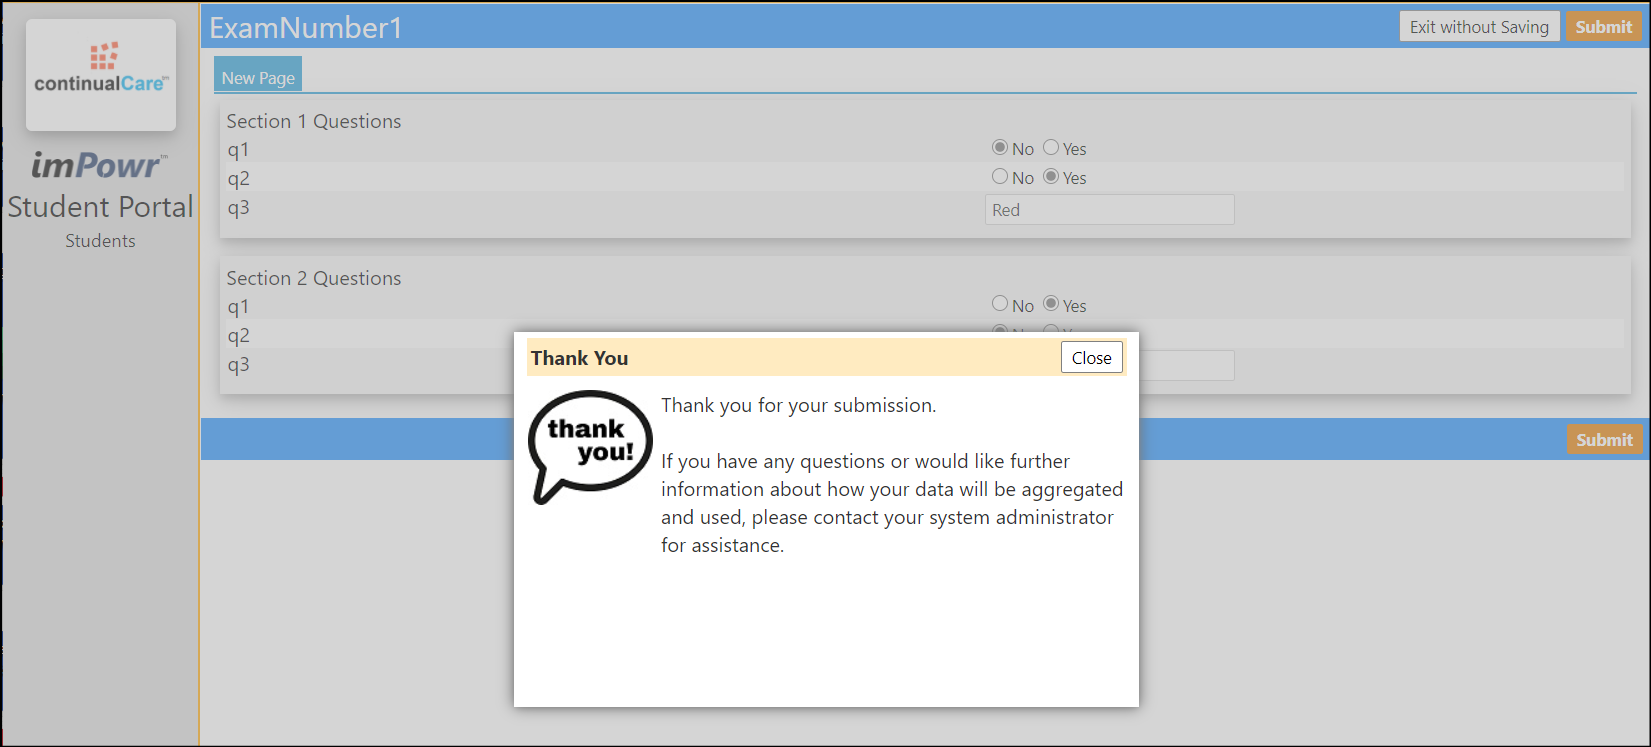
After submitting, the date the exam was Submitted On is displayed. The student
can come back later after the exam is manually scored and see the score they
were given.

Procedure
In order to do the above, the process is as follows:
- Create an exam.
- Configure options like ‘allow retake?” etc.
- Link the exam to the course.
- Make sure the students have the “student portal login” privilege selected as part of their security role.
- Make sure students know how to access the student portal (give them the link plus any training or instruction sheet).
Scoring
The following procedure assumes exams have already been created for the course
and the student is enrolled in a course / course section that has an exam.
Access Courses from Educational & Social Activities in the Programs &
Activities section of the Resources menu.
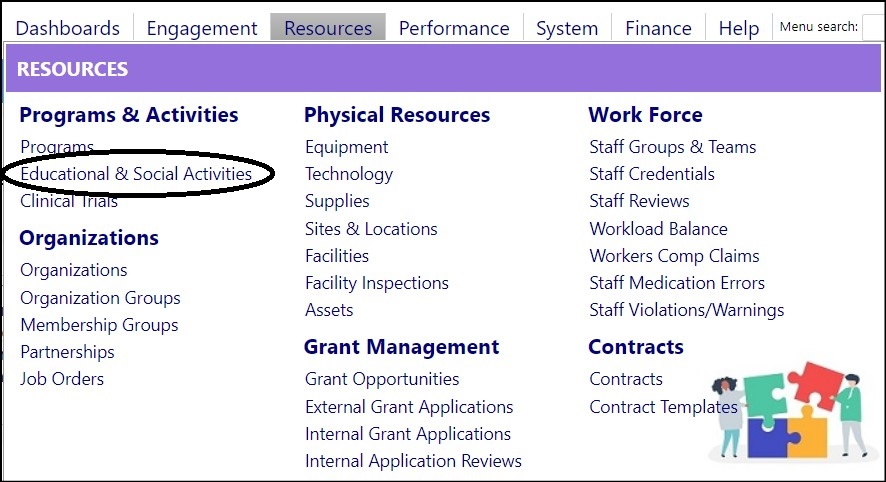
- Select the course from the list of courses by clicking on its Name (example: A200).
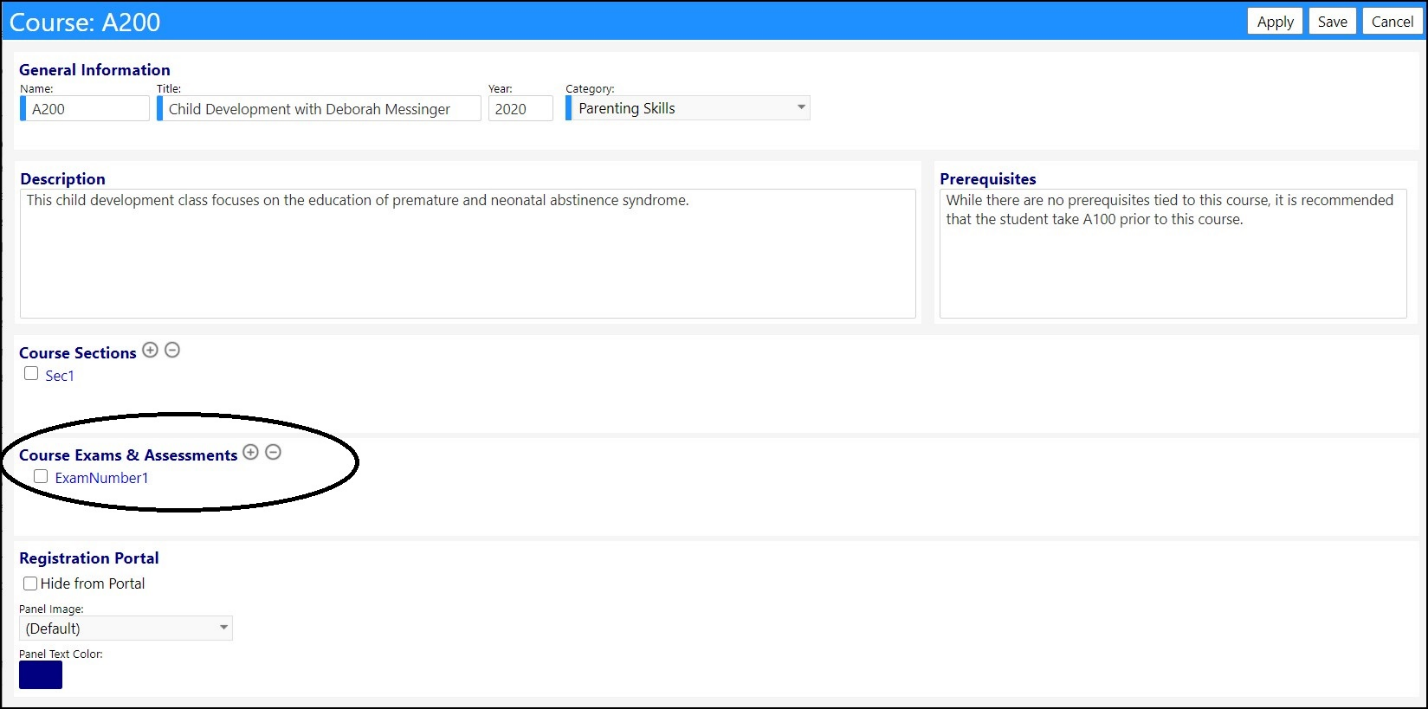
Looking at the course page, the exams created for that course are displayed in
the Course Exams & Assessments section.
Example: Course A200: one exam ("ExamNumber1") has been created for this
course.
To score an individual exam...
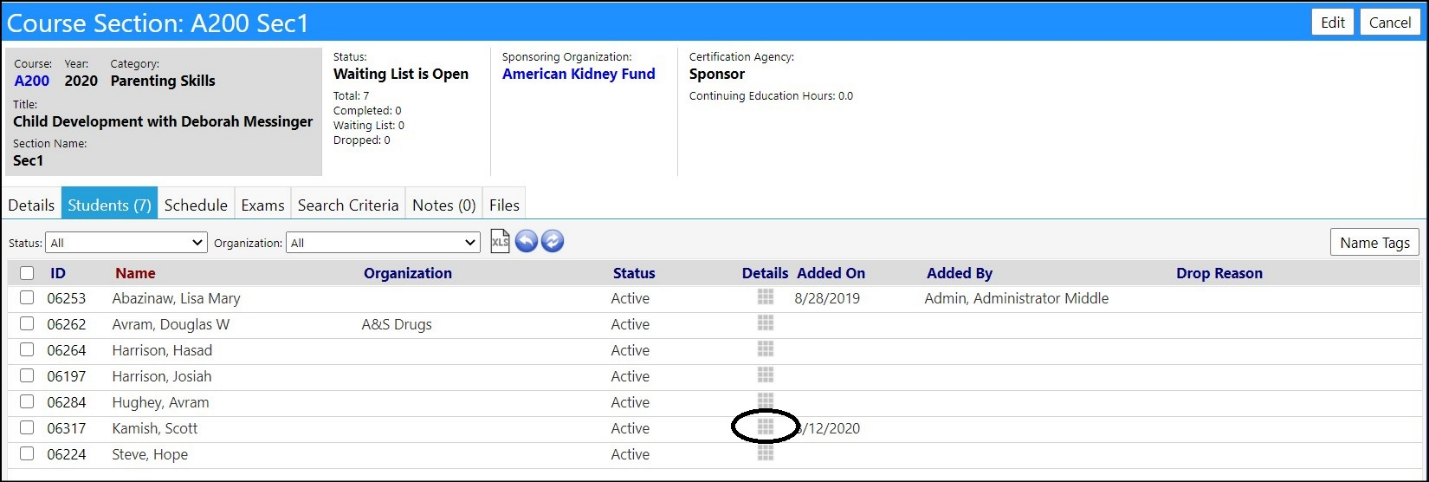
- Click on the Course Section (e.g., Sec1), and go to the Students tab.
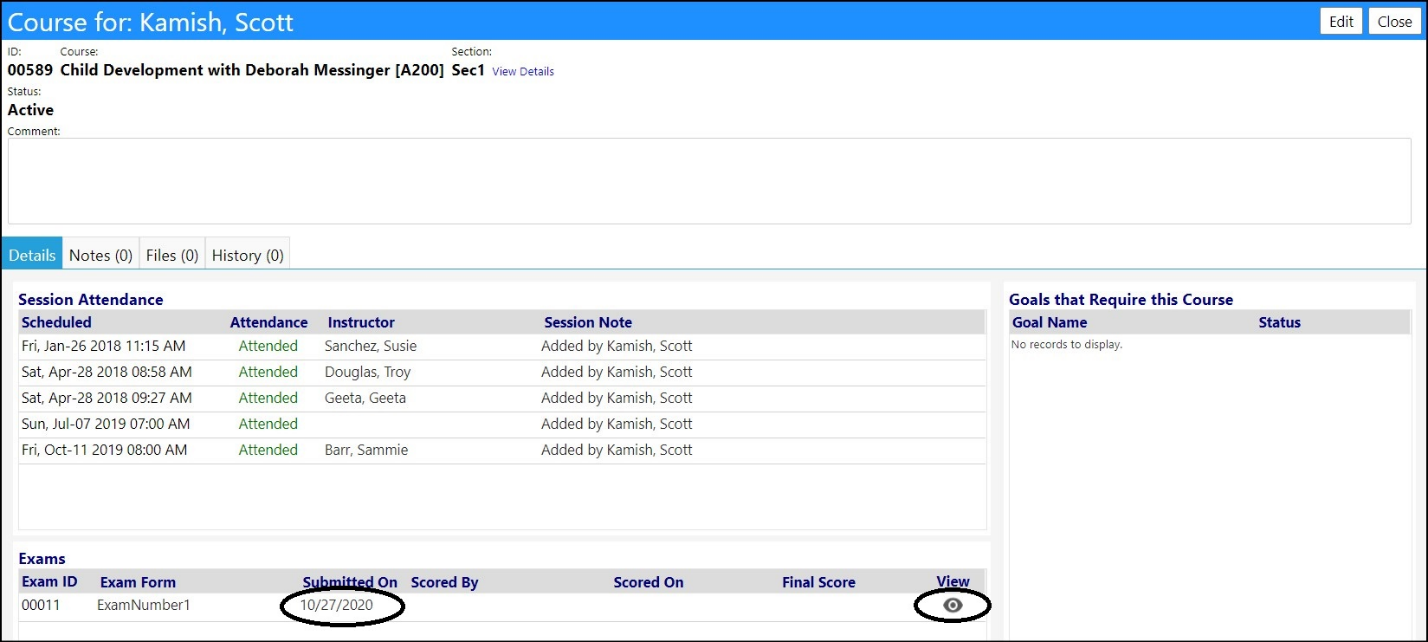
- Click the DETAILS icon (the little gray grid) for the student and view the details of their exam submittal.
- Notice the “eyeball” to view the submission. This brings up a read only view of the submission.
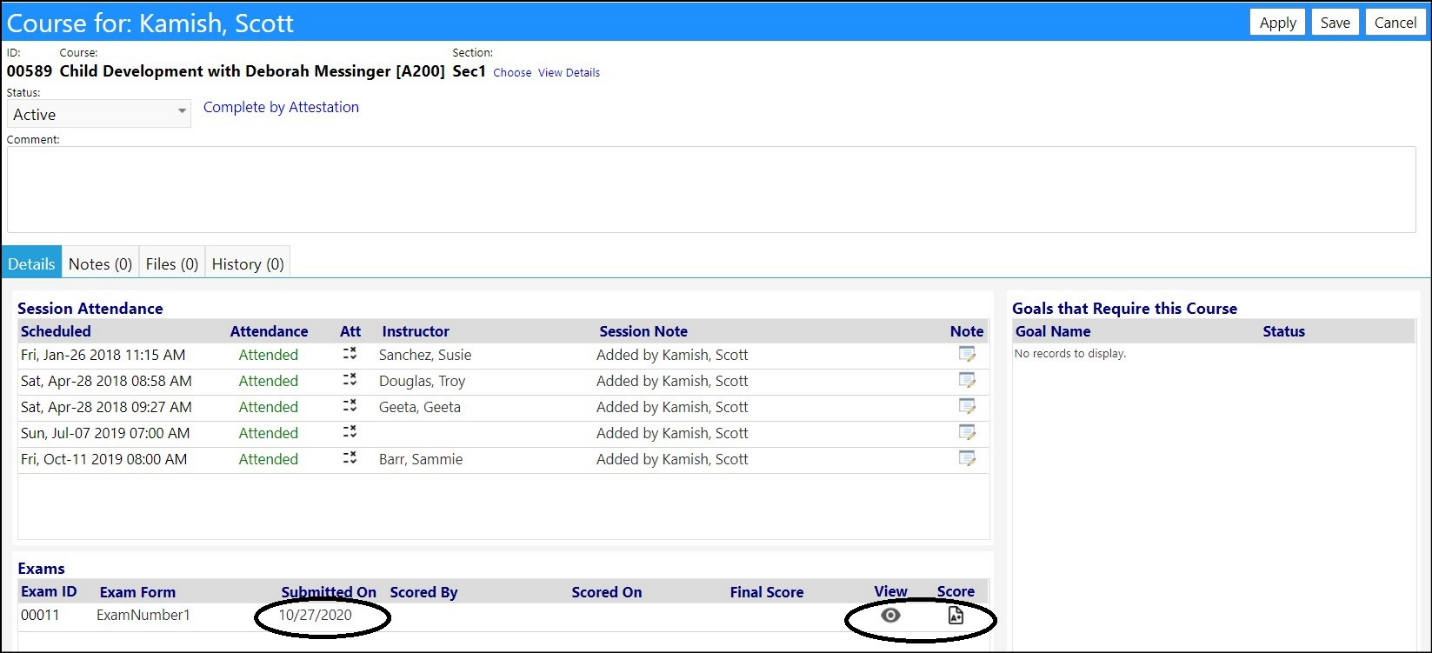
- Click Edit. The icons for the course change. You can now not only view the exam submission by clicking on the "eyeball" but you can also score the exam by clicking on the "score sheet" icon.
NOTE: if the exam is already scored, a green thumbs up will display.

- Click the "score sheet" icon for ExamNumber1.
Exams are semi-automatically scored. That is, if the questions on the exam
result in a numerical score or the selection of a checkbox or radio button,
the exam can automatically assign a value to that selection. But, if the
question results in a text response, that will have to be manually scored.
If the exam is auto-scored, the score appears pre-calculated.
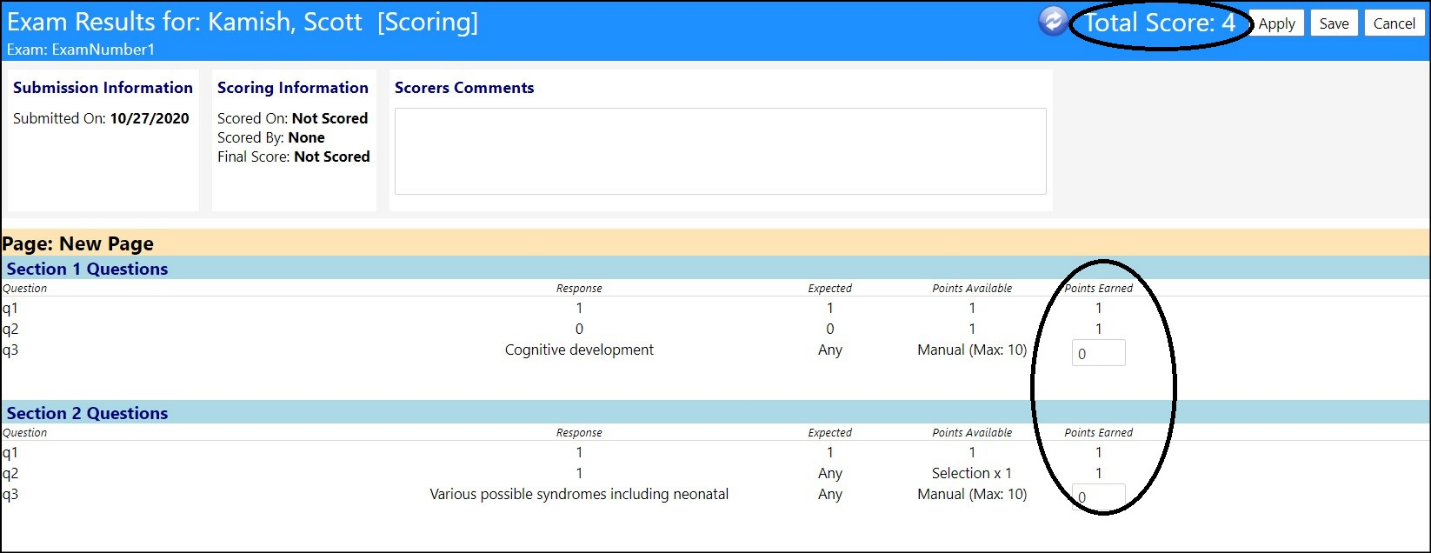
NOTE: Exams are set up to have the instructor look at each exam to score it –
so that the instructor can enter notes and comments.
- If the exam has no questions where manual scoring is required – the scoring is completed at this step and the instructor can just enter a comment if they want and then click Save.
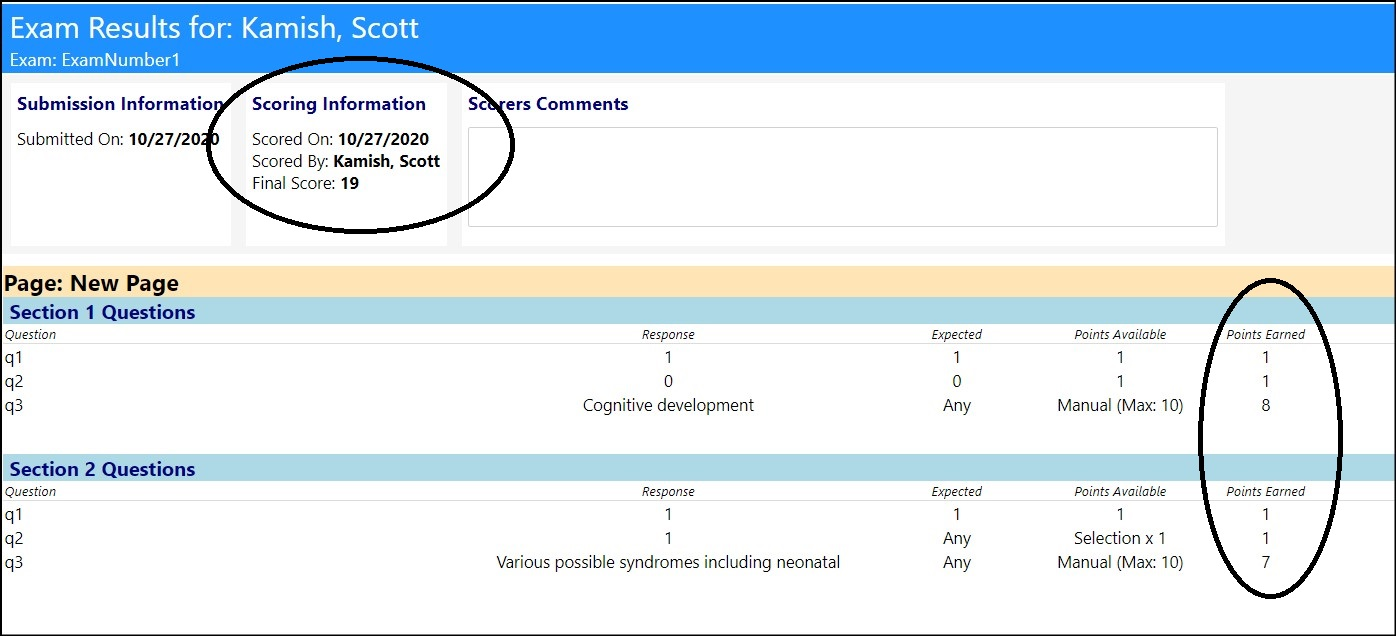
- If there are any manual scoring steps (like essay questions or entered text like in the above example), instructors need to see the responses and score those too. The instructor needs to fill in the Points Earned for the boxes where manual scoring is required.

- Enter any desired comments in the Scorers Comments section.
- Click Save when completed with the scoring to register the score.
After clicking ‘Save’ the flow goes back to the client page. The score icon
now now displays as a ‘thumbs up’ and the ‘Scored by’ and "Final Score" are
filled in.

If you want to return to the page to see the score, click the “View” eyeball
icon. In this case, who scored the exam and each question and points earned
can be viewed.
Exam Summary - Viewing Exam Submittals and Scoring Multiple Submitted Exams
To view an exam overview for the course (i.e., a single list that has all of
the exams for all of the students)...
- After clicking on the course section (e.g., Sec1), go to the Exams tab.
In this tab, the submitted exams for each of the students in the course are
displayed.
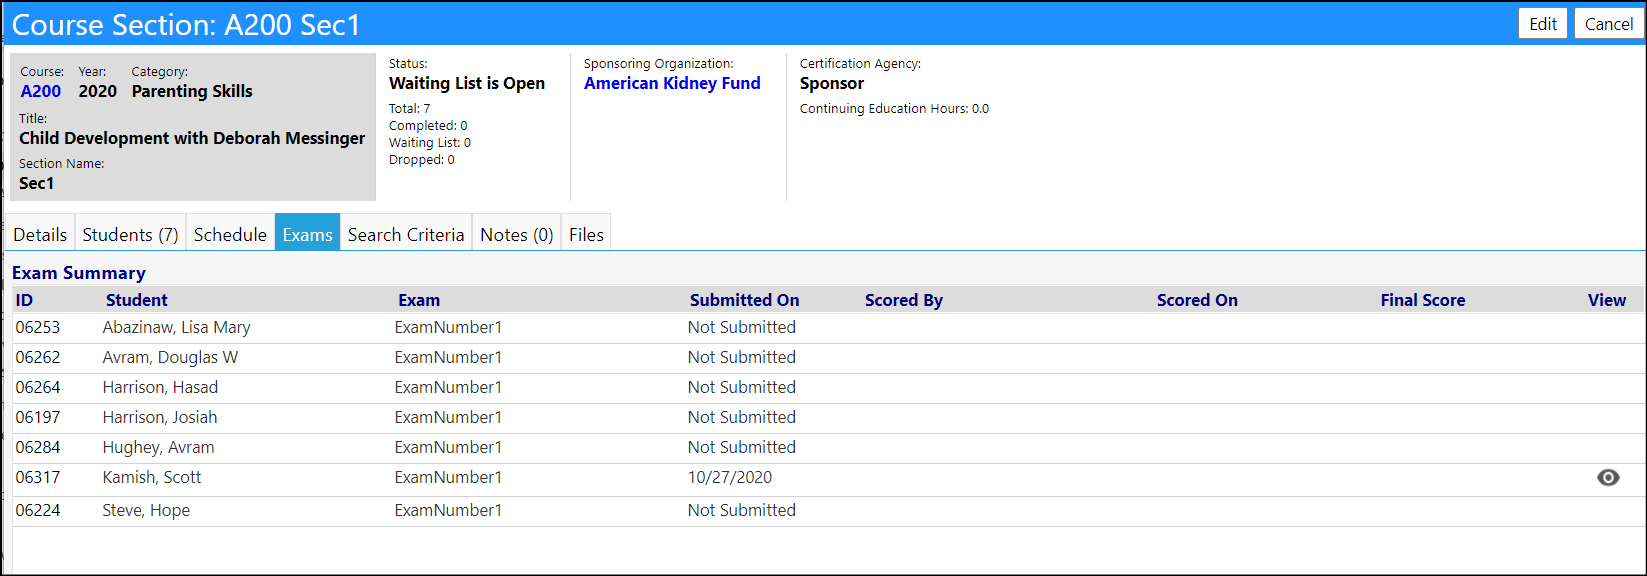
- From this screen, you can view the submitted exams by clicking on the** View** "eyeball" icon.
- You can quickly view who submitted exams, whether or not they were scored, on which date they were submitted, who scored them and when that scoring was done, as well as the score of the exam by clicking on the Edit button (the green thumbs up indicates the exam was scored).
- You can also quickly score individual student exams by clicking on the Edit button and then the "scoring sheet" icon. Doing it this way avoids having to go into each student's details.
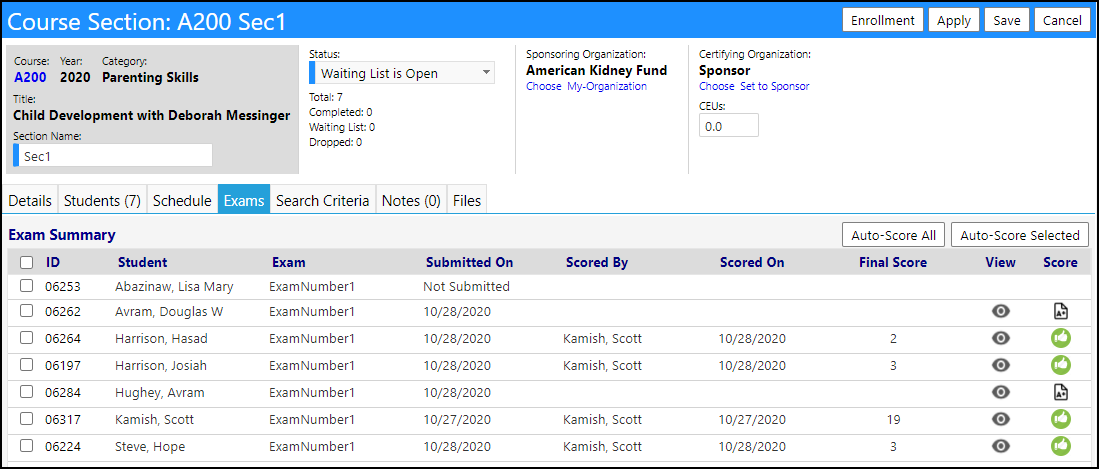
- Be sure to Save your changes.
NOTE: If the exams result in numerical values only, that is, they do not have
any essay or text questions, you can Auto-Score Selected or All exams at once.
To Auto-Score Selected exams, select those exams and click on Auto-Score
Selected. To Auto-Score All exams, click on Auto-Score All (the system
will determine which exams it will score - those submitted by not yet scored).
The system will then check to make sure the exams are fully auto-scorable. If
they are, it will proceed with the scoring and will refresh the screen to
display the scores. If they are not auto-scorable, the system will alert you
with a message indicating the exams are not auto-scorable.
Student Portal
- Exiting out of imPowr and going back to the Student portal, the exam can now be viewed as scored and with a score of 19.

DISCLAIMER: The characters, names, and events contained in our training
documents and in our demonstrations are fictional. Any resemblance or
similarity to any actual events, entities, or persons, whether living or dead,
is purely coincidental and are purposely made for better visualization of the
functionality of our software.