How do I create a custom menu?
Custom menus can be used for a variety of purposes. The most common purpose is to provide users with visibility to only those menus that they need to access. Although security privileges still must be set to access the needed pages, the custom menu also allows for custom naming of modules containing those pages, so that they are more meaningful to the end user.
Custom Menu provide users with an alternate view of their Account Role menu. Typically, a Custom Menu is easier to read and follow, and may more directly reflect the actual actitities the individual is doing, so the menu is much easier to use.
Creating an Account Role
Prior to creating a Custom Menu, an Account Role that identifies the appropriate security privileges must be created. Please work with your Continual Care Solutions reprepsentative to create your Account Role.
Creating a Custom Menu
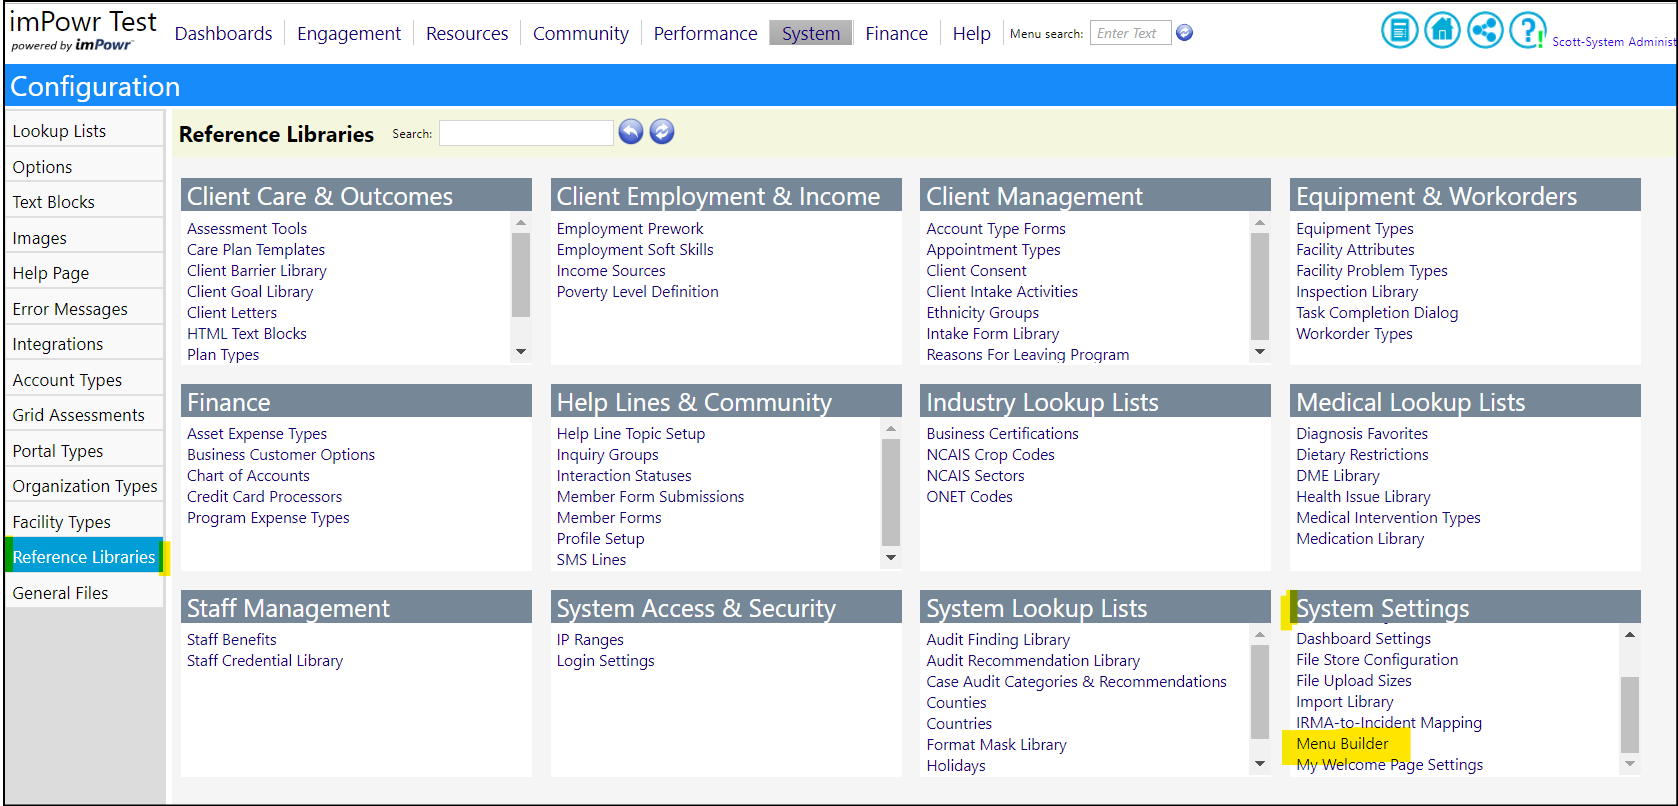
To set up Custom Menus, access Menu Builder in the System Settings in the Configuration Reference Libraries.
Help / Instructions
Access the Custom Menu Setup Page (see below for instructions)
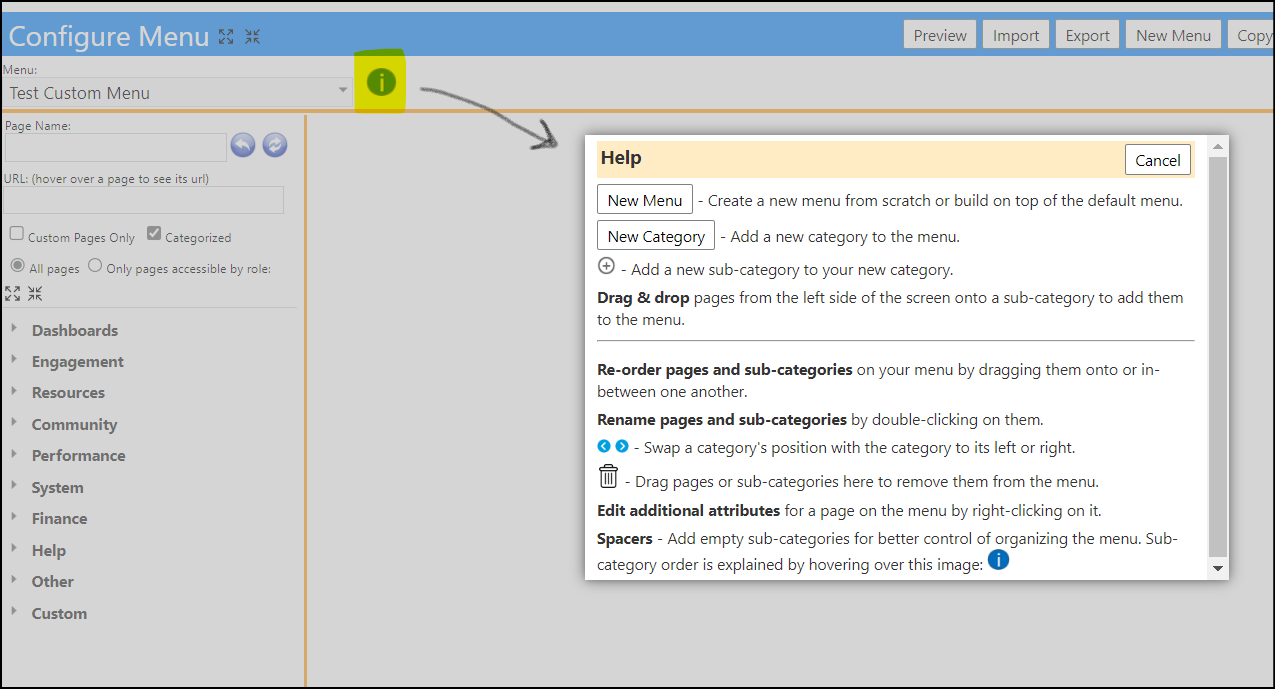
There is an “i” icon on the configure menu page where hovering over it will show more tips and instructions.
Create the Custom Menu
• Click the “Create new menu” link to start creating a new menu:
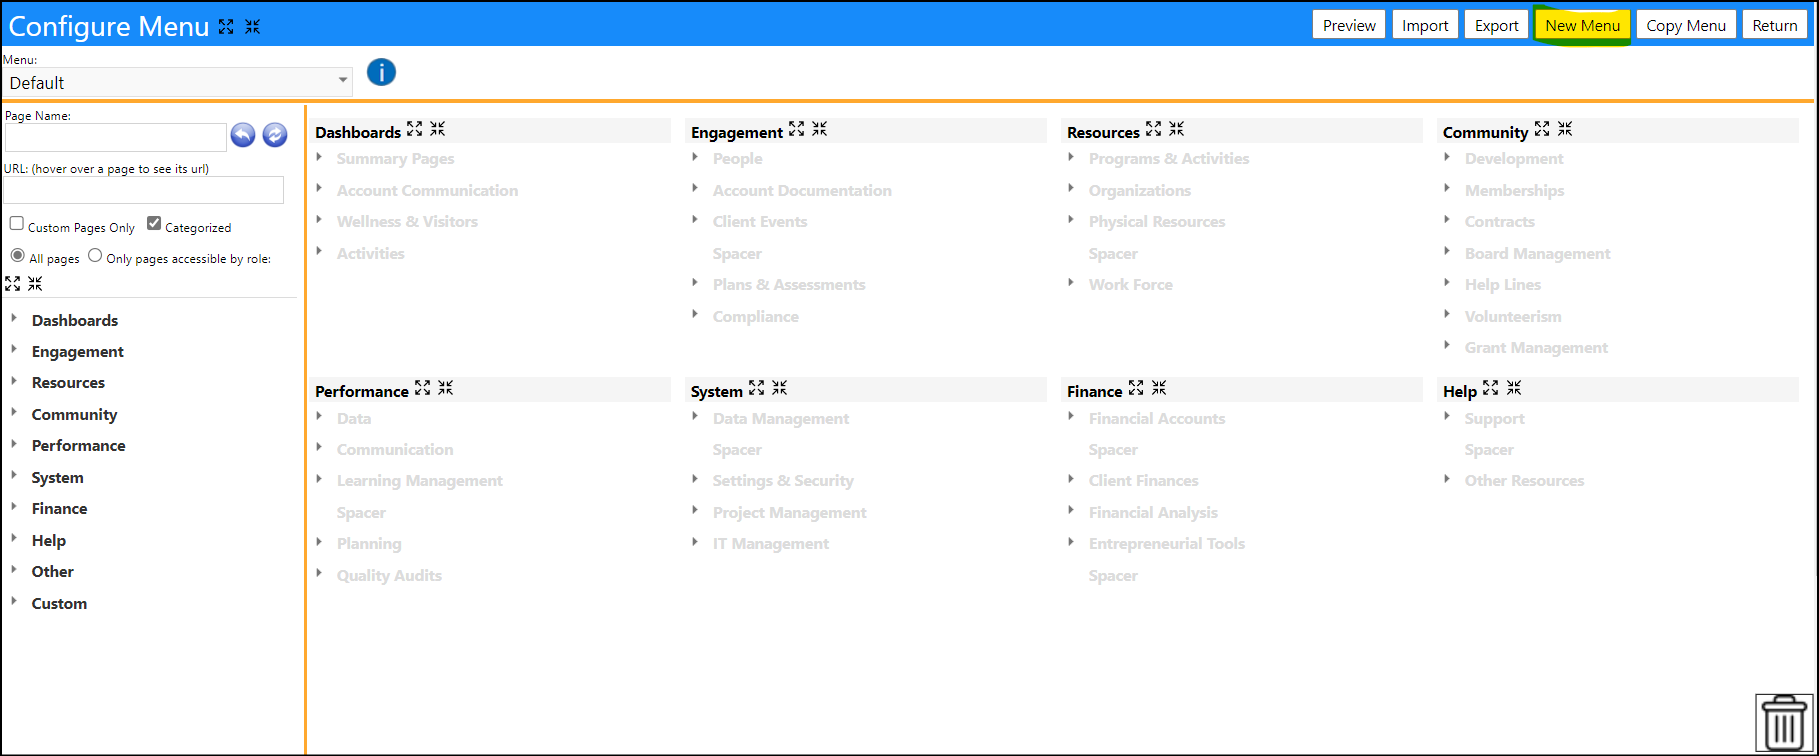
A new window will display.
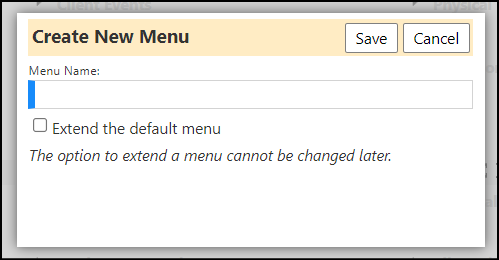
When you create a New Custom Menu, you can either add items to the default menu (i.e., extend the default menu) or you can create your own menu.
• To add items to the Default Menu, enter a name for your new Custom Menu.
• Check the box to extend the default menu. By checking the box, the new menu items you select will be added on top of the default menu.
• Click Save.
• To create a completely New Custom Menu, enter a new Menu Name and click Save.
Adding Menu Categories
Once your Custom Menu has been named, you need to add menu items to it.
To add those items to the menu you will need to first add a category and then add the sections contained within that category. The Category will become the grouping of menu items, much like those you are used to seeing across the top of the screen:

• Click New Category.
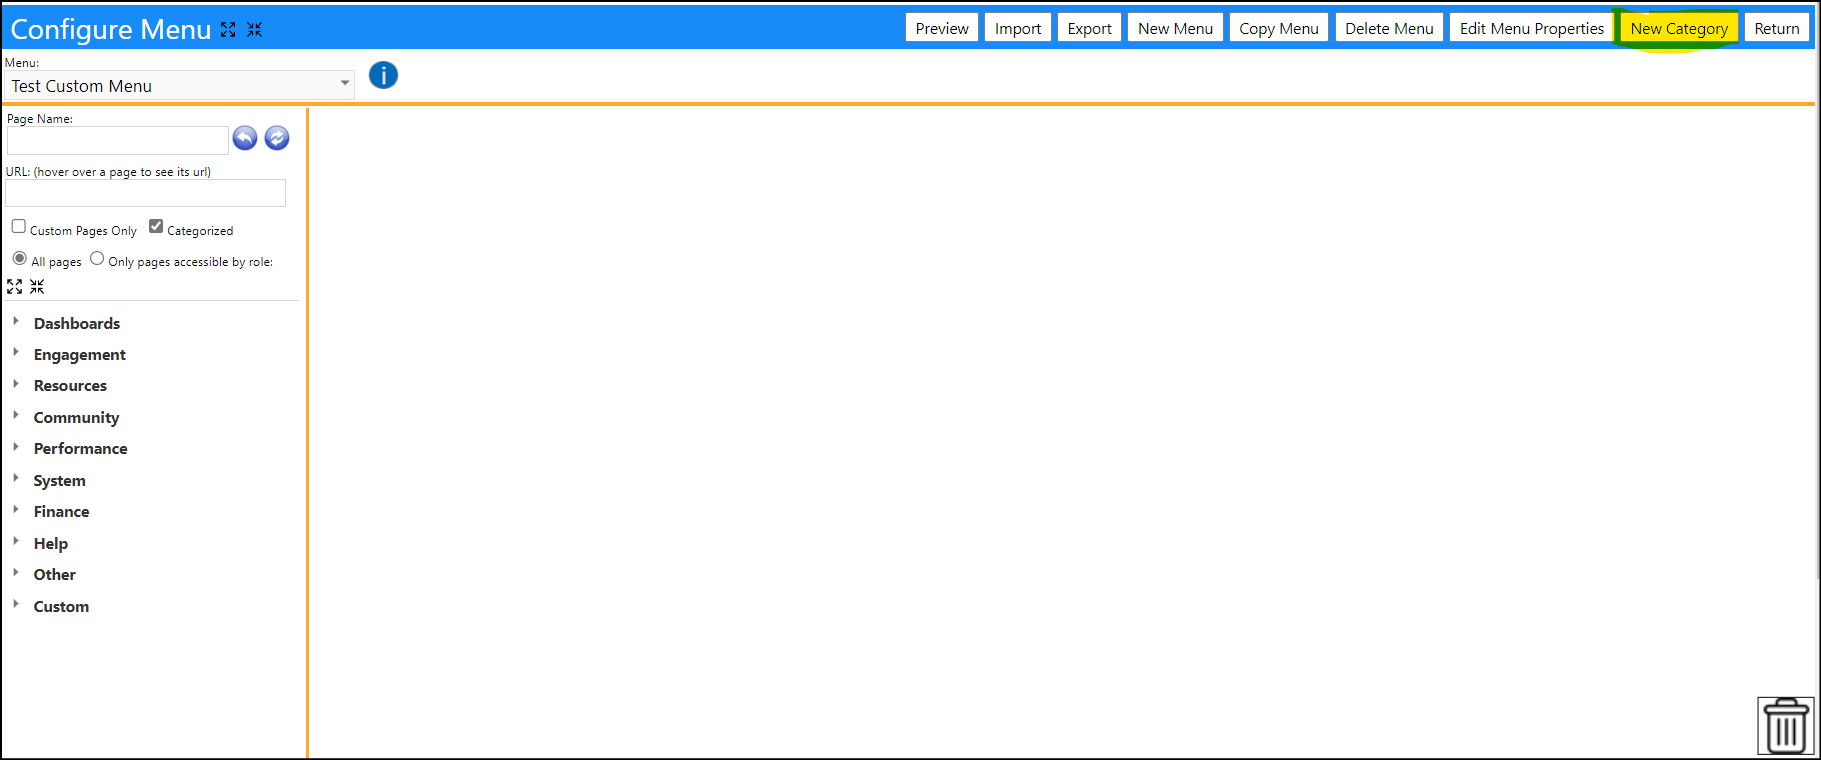
A new window will display.
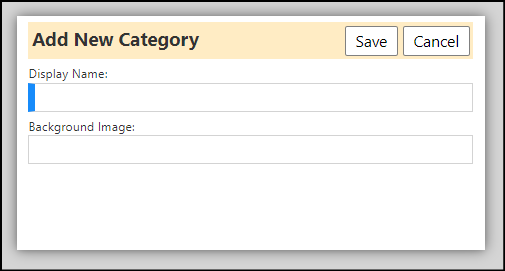
• Enter a Display name for your Category (you will be able to rename this now or later by clicking on “Category”, entering a new name, and saving).
• Click Save.
Repeat this for each Category you wish to add (you can add these now or do it later in the process).
Adding Menu Subcategories (sections) to Categories (groupings)
Once the Category is Saved, you can add the various Sections to that Category, much like those you are used to seeing after you click those across the top of the screen:
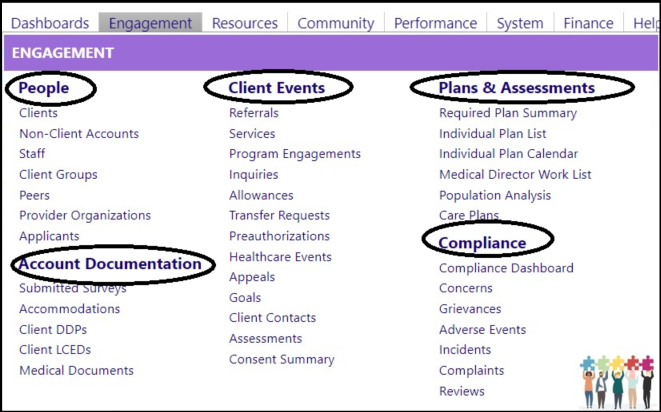
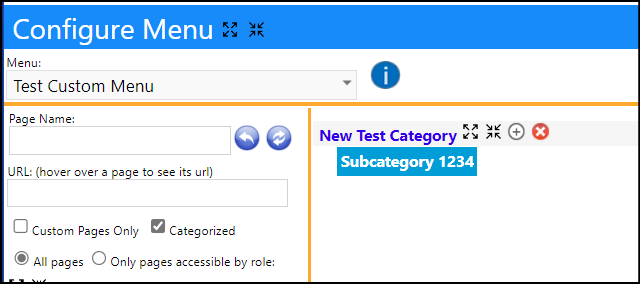
• When you are in the Category, Click the ‘+’ button to add a subcategory. The subcategories will become the individual menu item sections. (Clicking the ‘X’ will delete the entire category.)
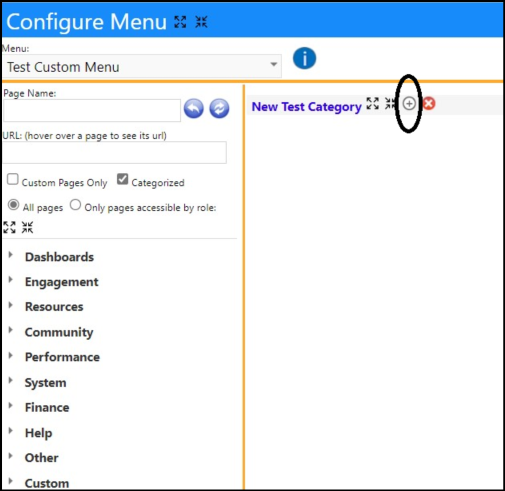
After clicking on the '+', a 'New Subcategory' will display.
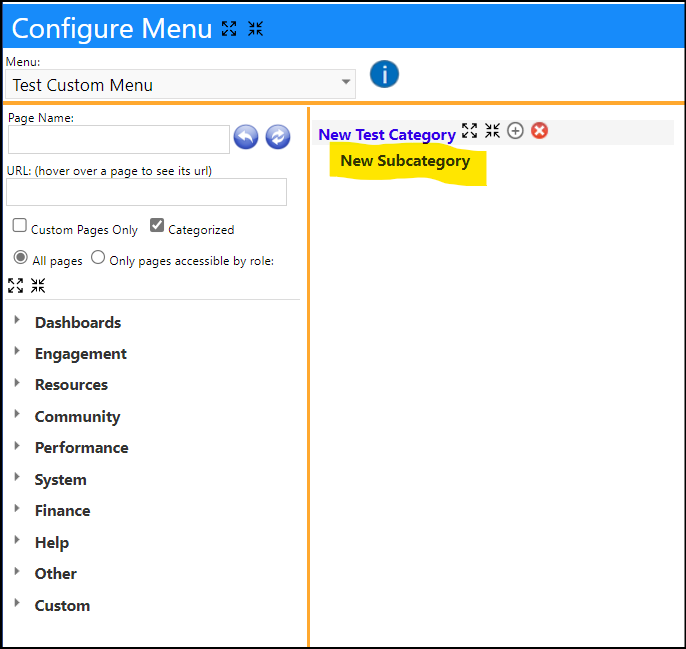
• Double click on 'New Subcategory' to highlight it. Once highlighted you can change the name to whatever you want displayed in the Custom Menu.
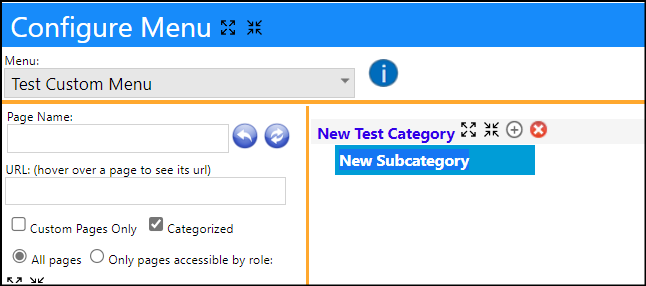
• Click the enter key on your keyboard to save your change. Please be aware that you can change rename the Subcategory at any time by double clicking on it to highlight it, retyping the name, and clicking the enter key on your keyboard to save your update.
Adding Menu Items (pages) to Subcategories (sections)
When creating a Custom Menu, Pages are stored in the menu subcategories (menu sections). The pages refer to the individual screens in imPowr. Please note that a screen may or may not be called what you think it is called. If you cannot find the appropriate page on the list, you may have to open up a session of imPowr and after accessing the page you are interested in, look to see what the URL name is for that page. The last entry in that URL name is the name of the page.
Example:
In the following example, we can see the Process Orders page is actually called “OrderPortalHome”:
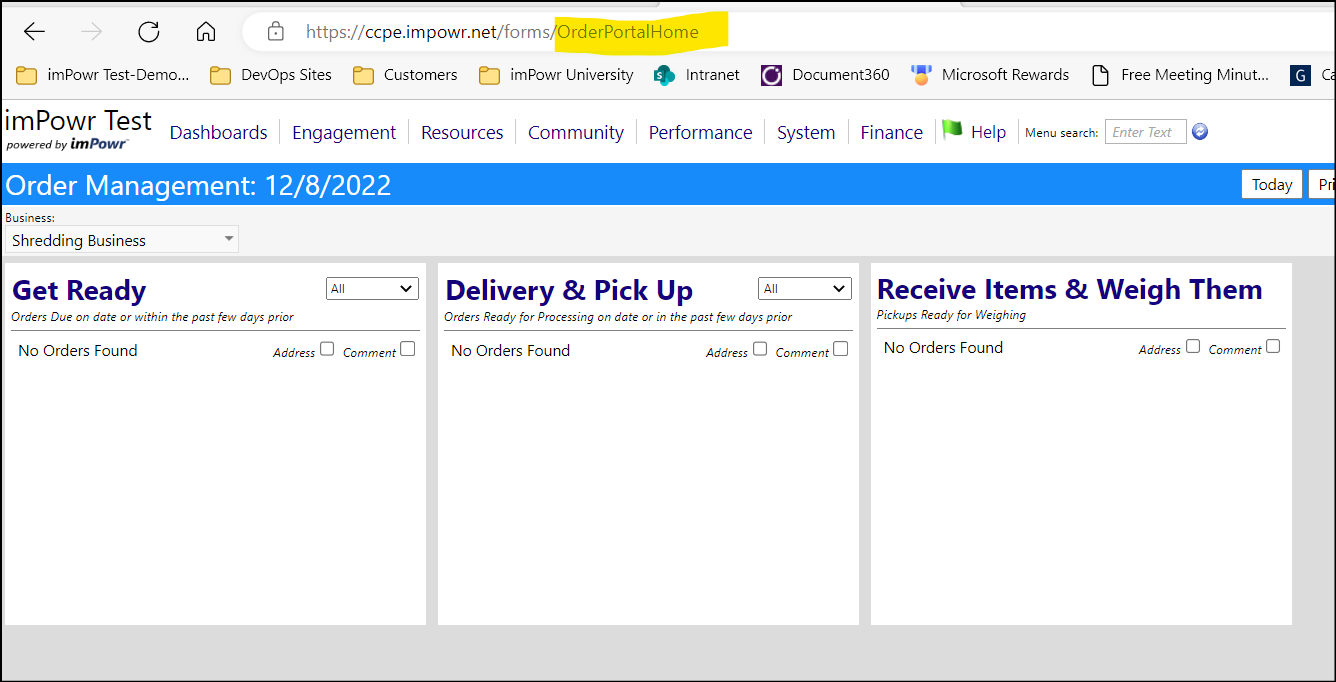
On occasion you may not locate the name, or the name brings you to another URL. In those special cases, either contact Continual Care for assistance in setting up that item for your Custom Menu, or view the section related to adding URLs to your menu, below.
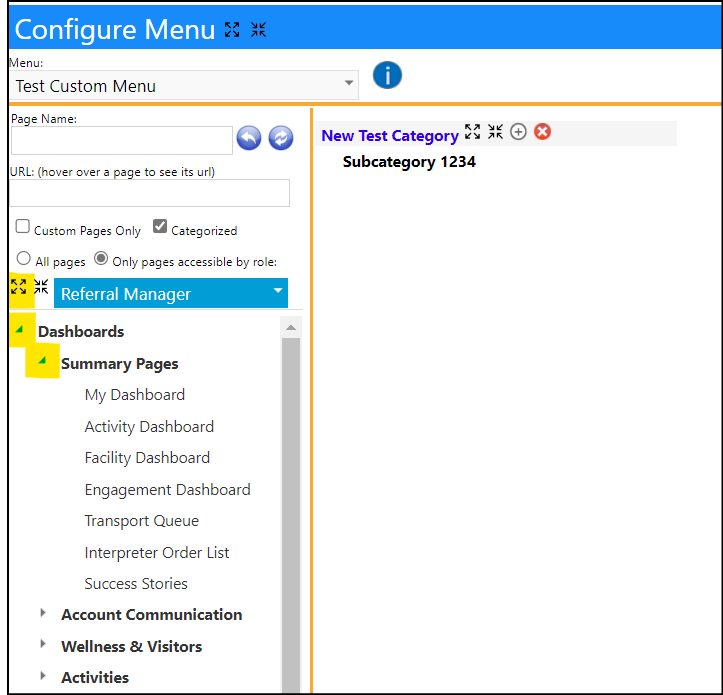
• Expand the Categories and Subcategories on the left side of the page by either clicking on the arrow or clicking on the expand symbol (4 arrows pointing outwards).
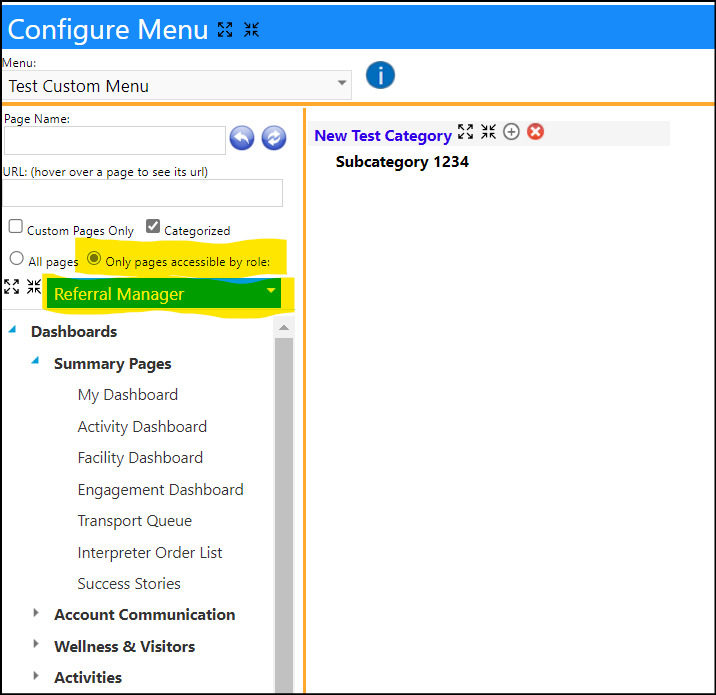
Recommendation: Either before or after expanding the categories, select the radio button for 'Only pages accessible by role:' and then select an account role from the drop down list on the left side of the page. Click the refresh icon (the blue ball with the double arrows) to refresh the screen. Doing this will limit the Categories, Subcategories, and pages to only those that this Account Role can access. That will make it easier when creating the Custom Menu because you will restrict the list of pages to choose from to only the pages the Account Role can access.
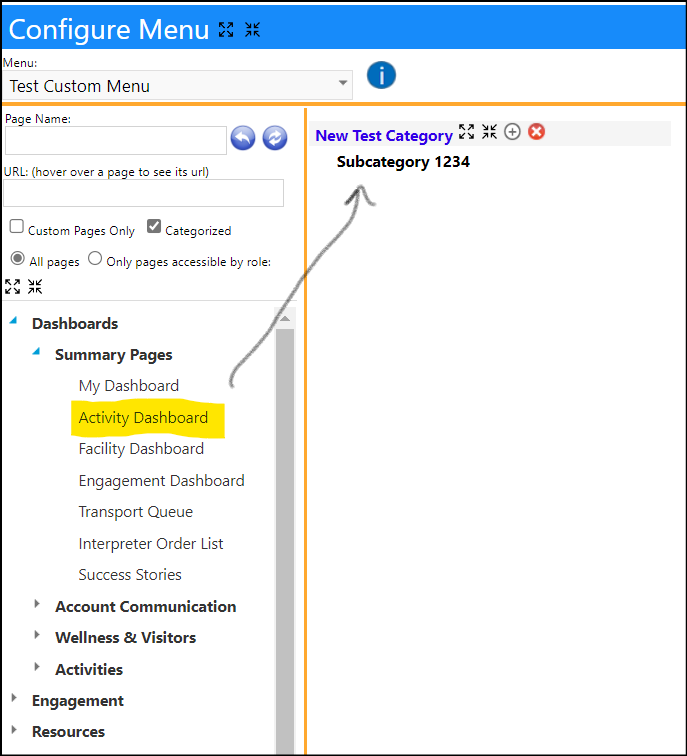
• Click on a Page from the list on the left side of the page and drag that page directly onto the name of one of your subcategories to add it to the menu:

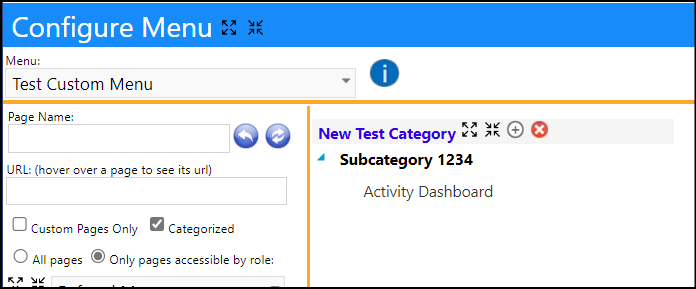
Expand the Subcategory to see the Page you just added:
• Edit the name of a page or subcategory by double-clicking on it, just like you did for the Category. Everything gets automatically saved as you go so you don’t need to worry about losing progress.
As mentioned in the Note, some pages on the menu currently have different names in the list on the left side of the page. For instance, you can see “Peer Matching” on the menu, but on the configuration page, it appears as “Help Line Peers”. It may help to use the URL of a page if you’re looking for one that is mismatched – hovering over a page on the left side of the configuration page will show its URL in a tooltip.
• Repeat this process for each Category and Subcategory.
NOTE: Even though there might be Categories, Subcategories, or Pages listed on the left side of the screen, you do not have to use them all. That is the purpose of the Custom Menu. It is to create a menu that is easy to use and best meets the actions for the job role activities that the customer performs. Feel free to not use all of the listed Categories, Subcategories, or Pages. And, at any time, if you find you need to make changes, by either adding or removing Categories, Subcategories, or Pages in the Custom Menu, you can return to this page and make those changes, so they are immediately applied and available.
Deleting / Removing Pages or Subcategories
• Click on the page you had added to the subcategory and drag it to the trash can icon (in the lower right hand corner of your screen) to remove (delete) the page from Subcategory .
Changing the order of the Categories and Subcategories
• You can change the order of the Categories by clicking on the Right of Left Arrows adjacent to the Category name:

• You can move the pages or the Subcategories by clicking on their name and dragging it to a new position.
As you make changes, your Custom Menu automatically saves. Once you are done, you are ready to assign the Custom Menu to the Account Role.
Changing the order of the Pages
As previously noted, you are able to change the sort order in which the pages in the subcategories are displayed, by dragging the pages to a new position.
When dragging a page around, you’re able to drag them between one another. But, when you do that, you’ll get a dotted line when your cursor is between two nodes, and the direction of this line will show you which node you are going to place below or above. When you drop one page link directly on top of another, it will try to place your link below the one you dropped it on. But when placing between two nodes, you’ll have better control of where your link goes. Dragging them around is how you re-order them.
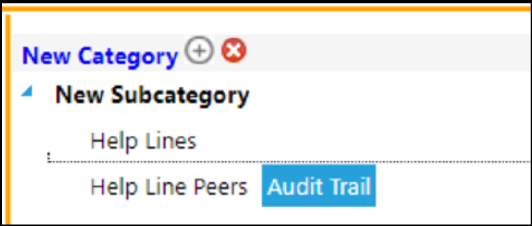
You can also delete individual pages by dragging them onto the trash can icon on the left side of the page. Keep in mind if you drag a subcategory there, deleting it will delete all of its child links too.
When you are all done, instead of the default menu, you have created a custom menu – only displaying the pages your users need access to.
Setting the Custom Menu as the Default Menu
Once the menu is built, you’ll need to set it as the active menu for each account role that will use it.
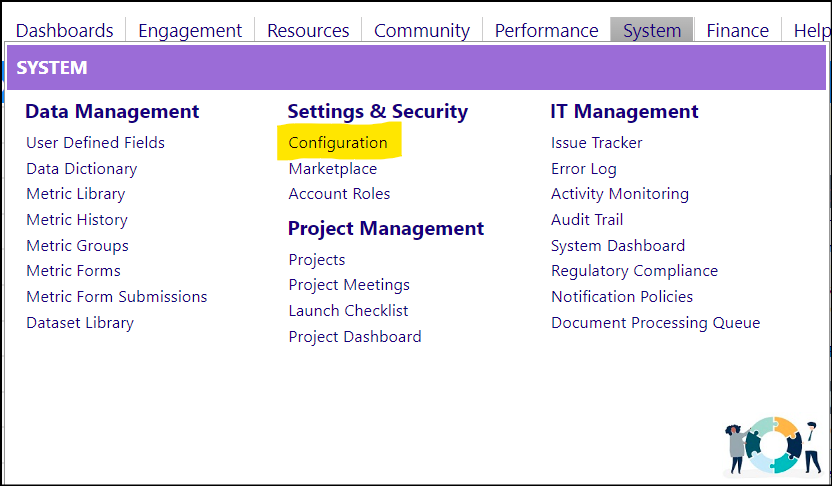
- Access the account role settings page, via the Settings & Security section of the System menu.
Users must have the appropriate security rights to be able to make changes to Account Roles.
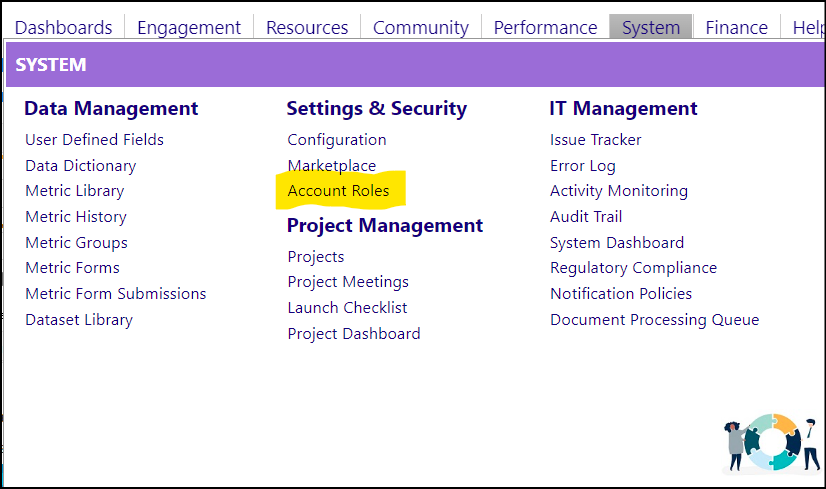
• Click Account Roles.
• Select the Account Role you wish to add the Custom Menu to.
• In the Settings tab, click the Active Menu Default value in the window that opens.
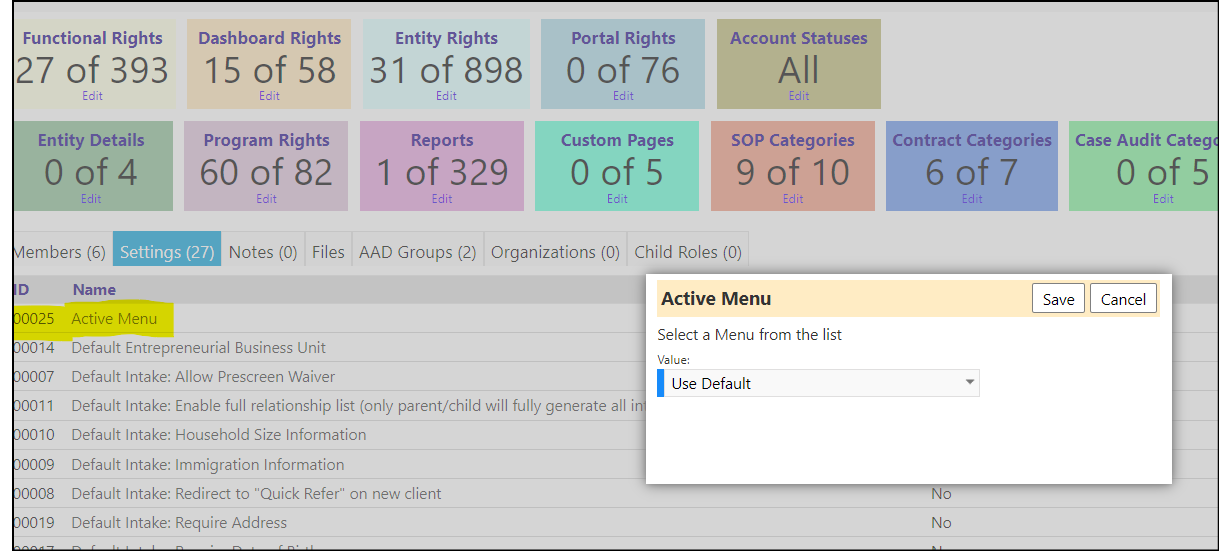
• Enter the name of your Custom Menu from the drop down list of available menus.
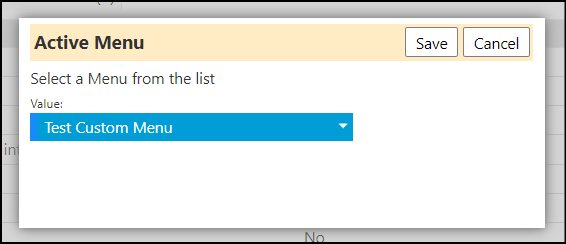
• Click Save to save that Active Menu selection.
• Click Save to save the Account Role.
The next time someone logs in with that Account Role, the Custom Menu you created will apply.
Example:
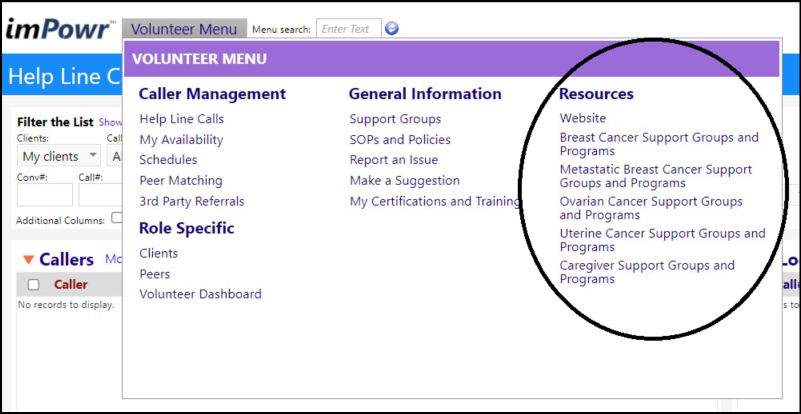
The following example is a Custom Menu created for a Cancer Support Group Helpline Volunteer Account Role:

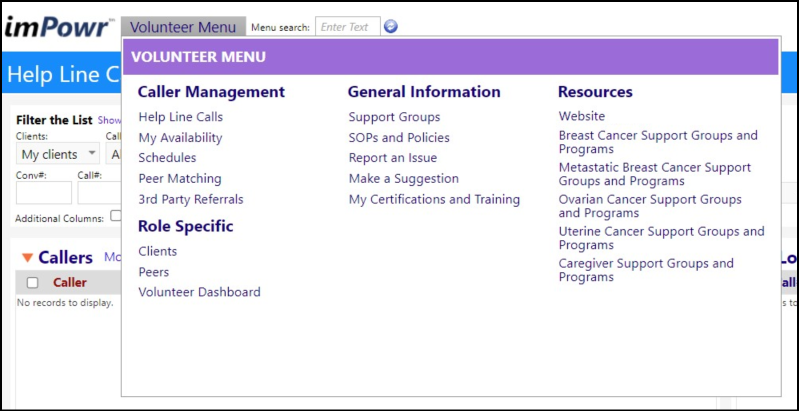
Adding Pages or Links to Pages Not Currently on the Default Menu, to your Custom Menu
If you need to add links to the menu that aren’t already on the default menu, there are a few additional steps that need to be taken:
Access Configuration from the Settings & Security section of the System menu.
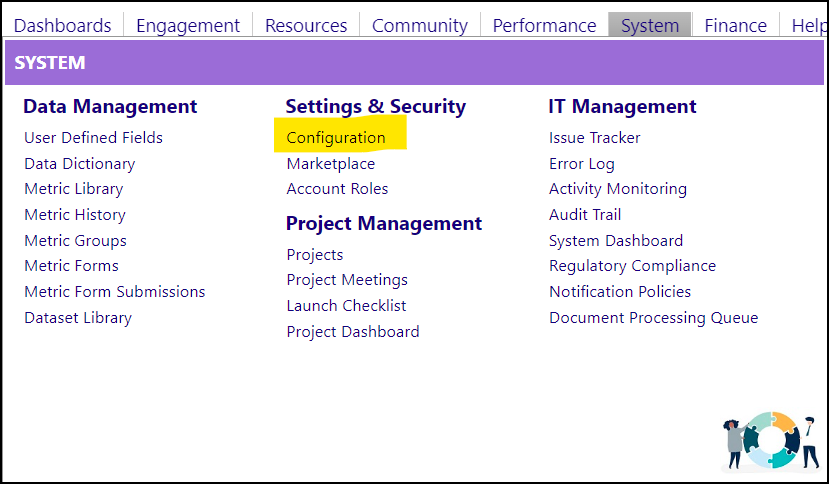
• Select the Reference Libraries and navigate to the System Settings.
• Click Custom Menu Links
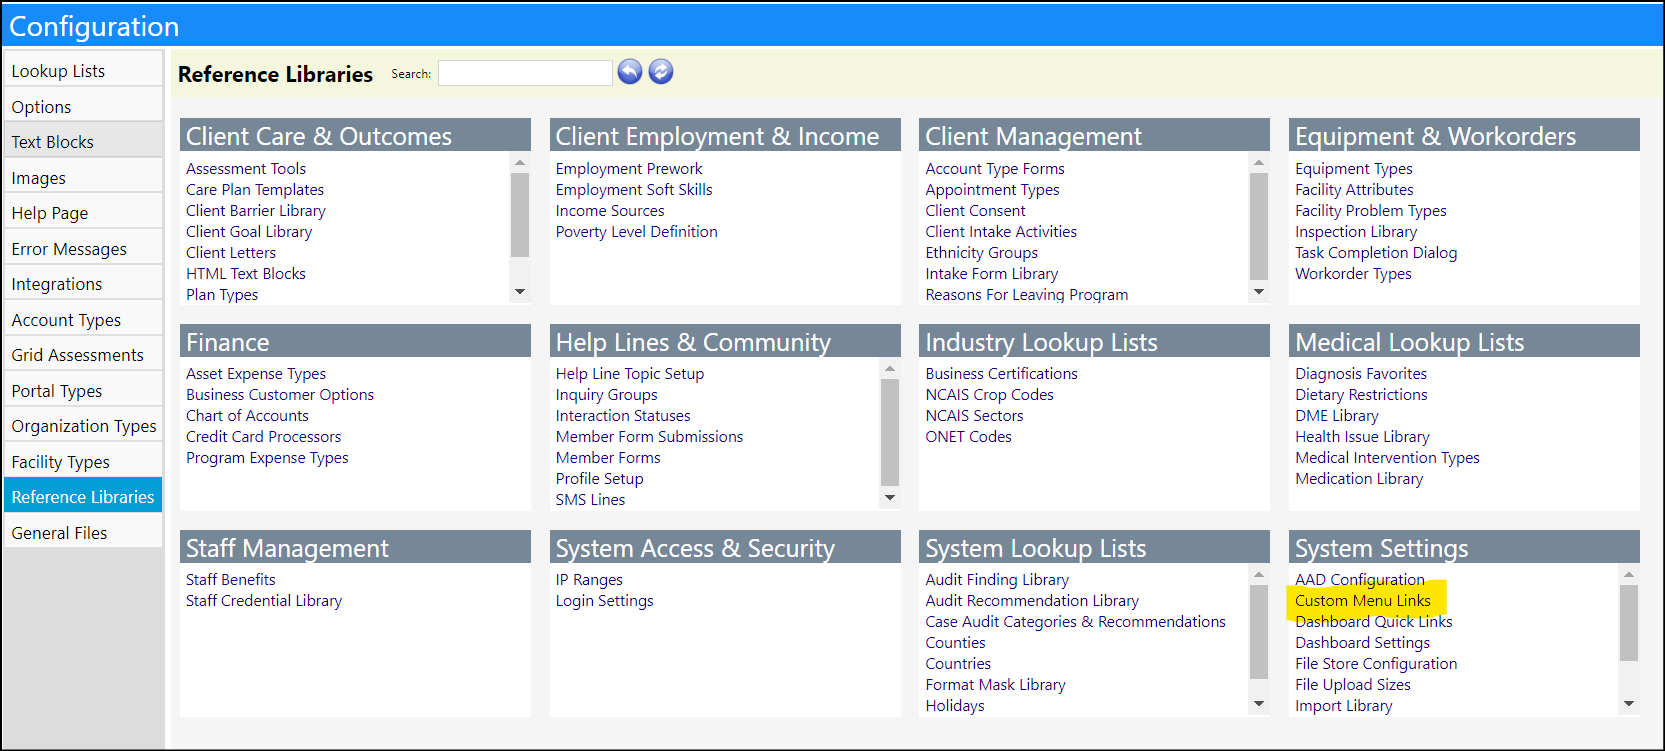
• Click the Add button.
• Enter a name and the URL of the page you want the Page Link to go to:

• Click Save
From here, you can go back to the menu configuration page and add the Link to a subcategory like you did with other pages (see above for instructions).
• Access the Menu Builder in the Configuration Reference Libraries System Settings.
• Select your Custom Menu from the drop down list in the upper left hand corner of the page.
Custom links you add will appear on the list on the left side of the page.
• Check the “Custom Pages Only” checkbox to filter to only links you have added.
• Refresh the screen by clicking on the blue ball with double arrows.
• Drag and drop the Link onto your desired Subcategory.
If desired to rename your link by double clicking on its name to highlight it and be sure to click on your Enter button on your keyboard after making your changes, to save them.
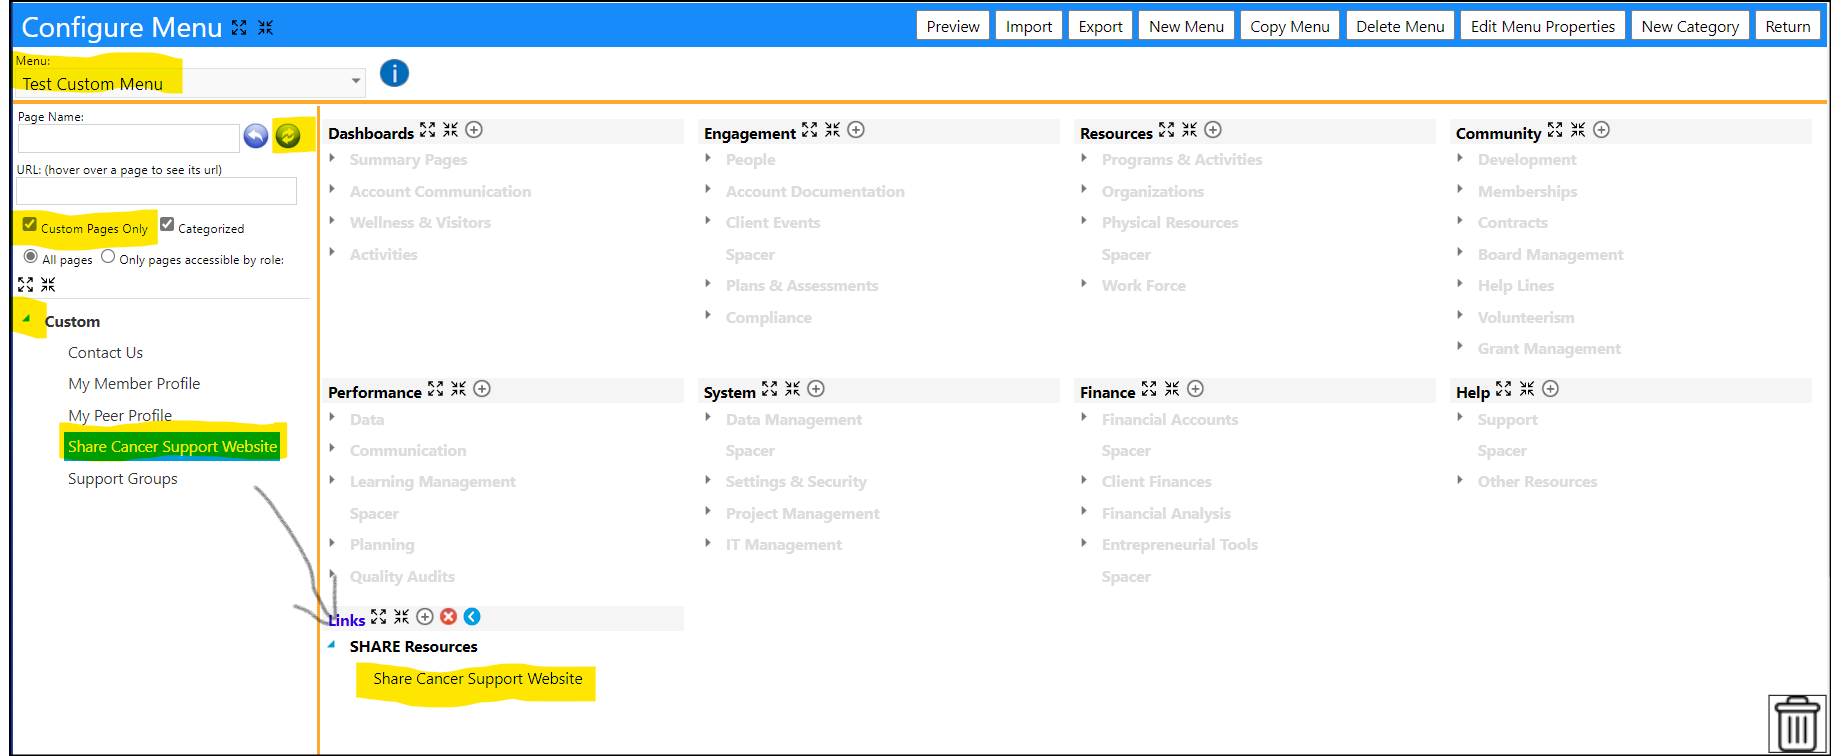
NOTE: These steps will add the page link to the custom menu but will not provide access to the pages in the menu.
Providing Access to the Page Links in the menu
In order to both view the links in the menu and have access to them, access must be granted in the Account Role via the appropriate functional privileges and entity rights.
For any custom Links that you created, go back to the Account Role settings page by clicking on Account Role in the Settings & Security section of the System menu.
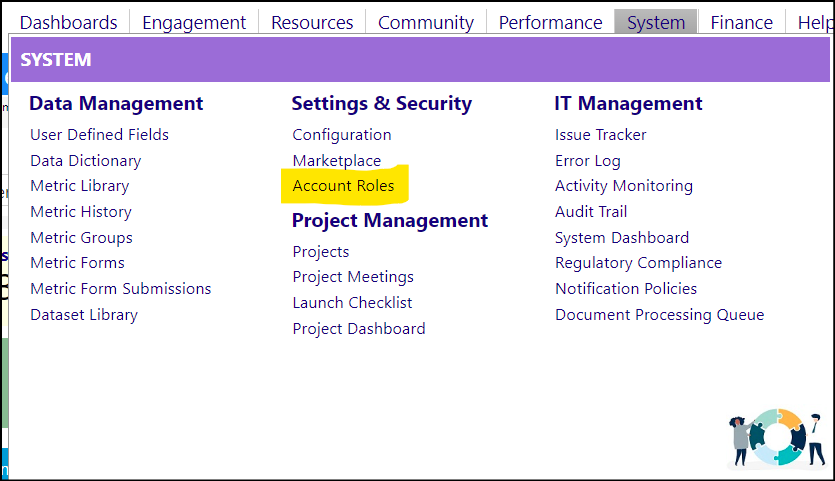
• Select the appropriate Account Role from the list by clicking on its ID.
• Navigate to the Custom Pages block.
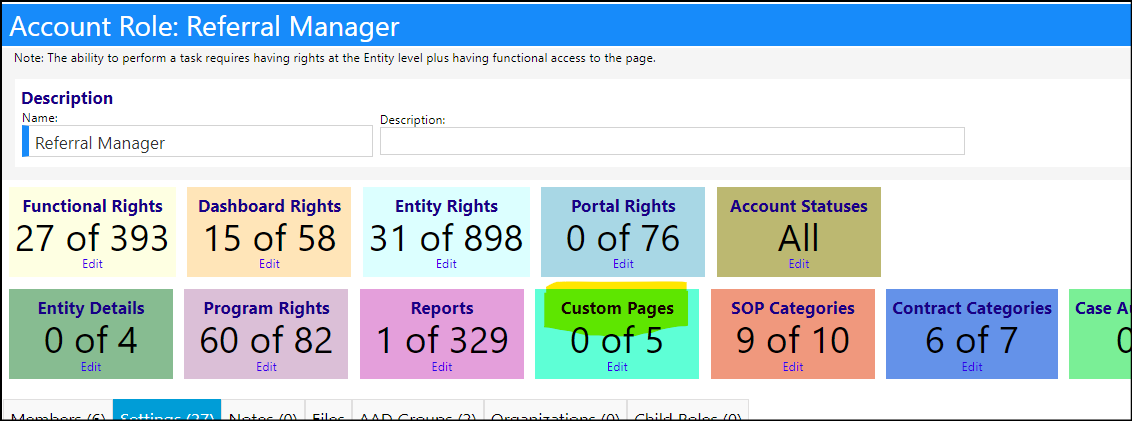
• Grant privileges to these custom links (pages)
* Click Edit to access the settings
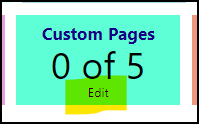
* Select the Custom Page Link
* Click Save

• Verify the “Active Menu” is still set to the Custom Menu like previously mentioned.
• Save the Account Role

Repeat the above steps for any account roles that require that access.
The custom page links will become immediately available to anyone who has that Account Role.
Example:
The following example is of custom page links created for a Cancer Support Group Helpline Volunteer Custom Menu:
