This article will describe how to use Case Audits for internal audits.
Many organizations perform internal audits to preparation for other audits, or
just to spot check documents to make sure staff are following defined
processes. imPowr provides a way for an organization to define a series of
things to check for (via a survey) and then use that to spot check and review
the document or process as an “internal audit” to determine if there are any
deficiencies in the process or if the required process steps are being
following and performed or documented properly.
NOTE: This article assumes you have the appropriate account role security
privileges to access Case Audits as well as Forms (surveys). It also assumes
the form used to check to make sure the process is being followed has already
been created in the form library section of imPowr – under the Audit tab.
Before you can set up Case Audits, you must Create an Audit form in the
Forms Library of imPowr (found in the Performance menu, under the
Communication section). This will allow you to identify the items you wish to
look for while auditing the samples you have selected. You will use the
results captured in the form to ultimately be able to summarize your findings
and make recommendations for changes or corrections.

Case audits can be found in the Quality Audits section of the Performance
menu.
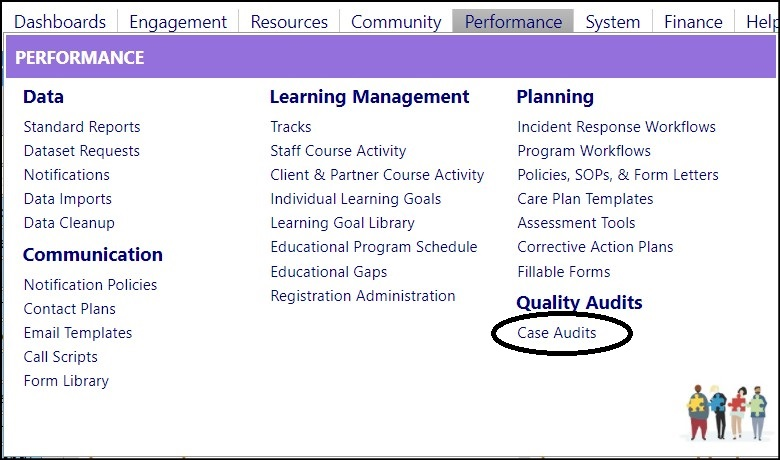
- Click on the Case Audits to access the Case Audit list.
- The Case Audit List allows you to view, edit, or copy an existing case audit, or create a new case audit.

There are a number of things that need to be set up before you are able to use Case Audits for your internal audit.
After either creating a new Case Audit or editing an existing Case Audit
Name, ensure your Organization is chose, enter the Audit Date and its
Status, as well as select which Audit Data Form (survey) you are using
to capture your findings.

Select an Audit Team
The Audit Team consists of the people you want to be linked to the audit and
may be made up of one or more people.
- Click the ‘+’ icon to bring up the staff list.
- Choose the staff members you wish to add and click Save.
- To remove staff members from your audit team, check the box to the left of their name and click the ‘-‘ icon.

Add your list of Document Samples.
Samples typically consist of randomly selected documents that you want to
audit. They can be things like documents, charts, checklists, etc. Your agency
may have specific items which are requested by your auditors – you can pull
and audit similar documents in advance of that other audit, just to see how
you are doing in following your processes.
You can add as many samples as you want – whatever you feel is appropriate for
that audit.

- Click the ‘+’ icon to add samples one at a time.
- Enter a name for your New Sample.
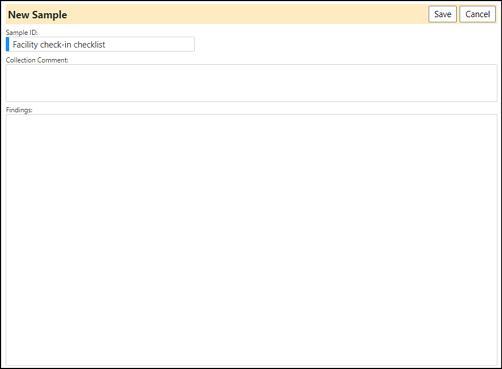
- Click Save.
The sample displays in the list.

- Click the ‘++’ icon to add multiple samples at the same time.
- Enter the quantity of samples being added.
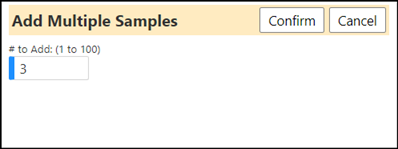
- Confirm your entry
The samples display in the list

- Click on each Sample ID to enter a unique name for each sample.

- Click Save when completed.
The new names display.

- Click ‘submit’ on each sample line, by clicking on the submit icon.

The Audit form questionnaire (survey) displays just as it does on the preview
in the form builder section.
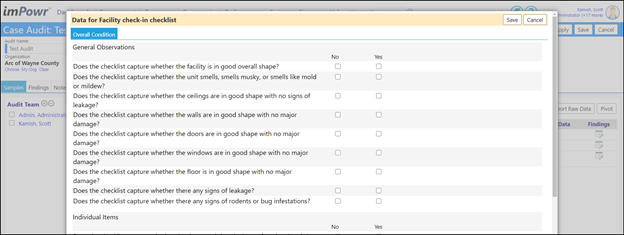
- Perform your review (audit) and answer the questions in your audit form.
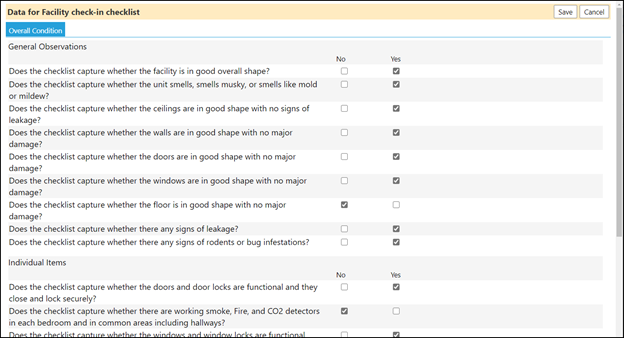
- Click Save when completed with your review and entries.
If you need to make a change to your document, just click on the submit icon
again, and make the necessary changes before saving and re-submitting the
document once more.
- The display will update to show the review of that document has been completed.

- A ‘view’ icon will also display. This icon will allow others to view, but not change the responses captured during your audit (they will be visible but grayed out).

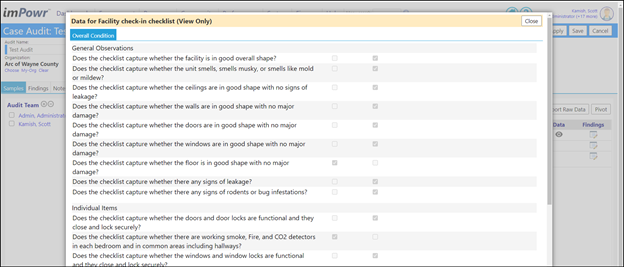
- Repeat this above process for the remainder of your samples.
After your samples have been submitted and reviewed, some agencies may have
another person review the results and report their findings and
recommendations so any deficiencies found may be corrected prior to any other
audits. (In other agencies, it may be the same person who reviewed the
samples.)
- To enter findings and recommendations, click the findings icon on each sample line.

- Enter your comments and findings and click save.
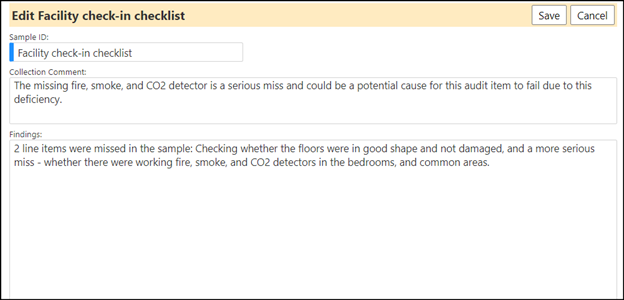
- Repeat for the remainder of the samples.
Upon completion with the samples, the internal ‘auditor’ of those samples will
want to provide their overall Findings and Recommendations for this audit.
- Select the Findings tab
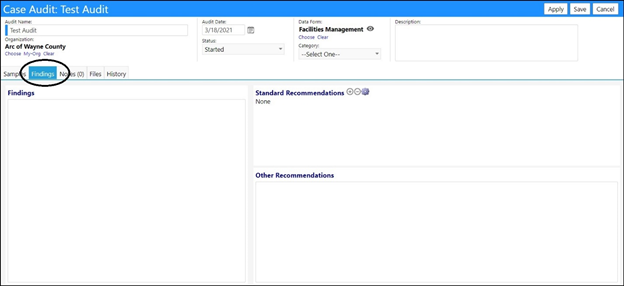
- Enter your overall findings and recommendations for this audit item.
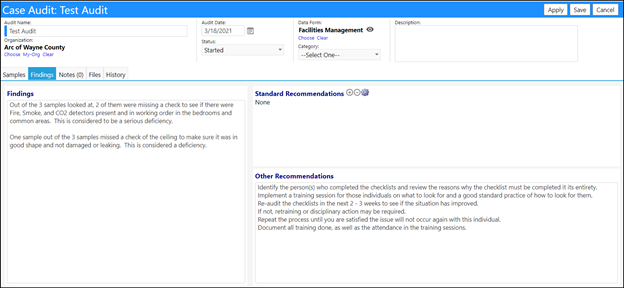
- Click Apply or Save when done.
- Attach any notes or files and click Save when done.
Export your results.
- To export your review data, select the desired sample(s).
- Click Export Raw Data.

- An Excel spreadsheet will be created.
The following is a example of a report for a single sample.

The following is an example of a report for multiple selected samples.
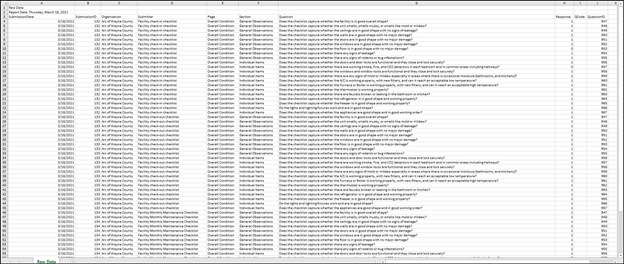
NOTE: on the above spreadsheet example of a single sample, you can easily see
the 2 responses that were marked ‘No’. The Response value is set in the Audit
form.
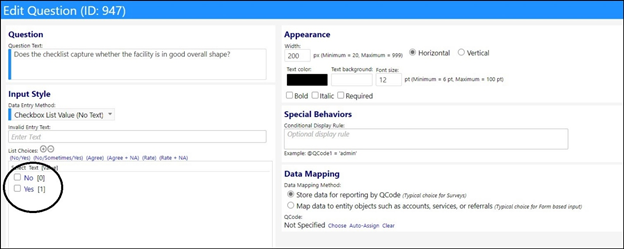
You actually have the ability change the values (as well as the responses you
would like to capture) when you create the audit form.
- To be able to compare the samples you reviewed, select one or more samples and click Pivot.

A new screen displays with the data pivoted.
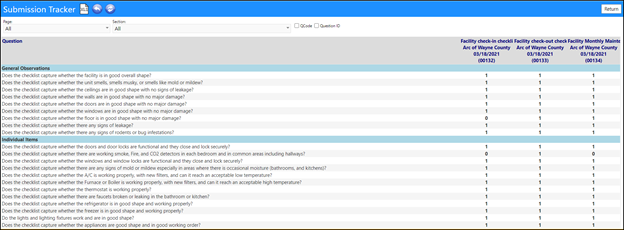
- Close the page when completed.