This article discusses the basics of configuration changes which can be made by the System Administrator.
System Administrators have the ability to make changes within many of the screens. There are various things which can be changed including drop-down lists, default values, displayed text, etc. It is strongly recommended that no changes be made in the system, especially to the Options, until after you have consulted with your Continual Care Solutions Project Manager.
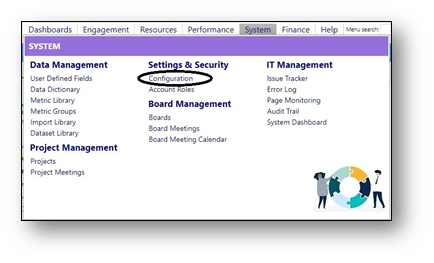
Access the Configuration screen from the Settings & Security section of the System Module:
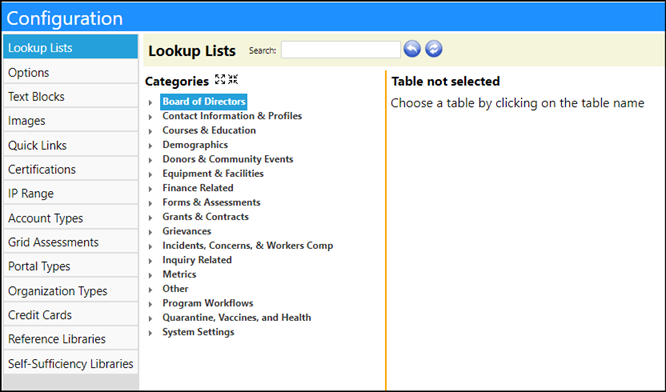
The following summarizes each of the sections of Configuration:
CONFIGURATION
DETAILS
Lookup Lists
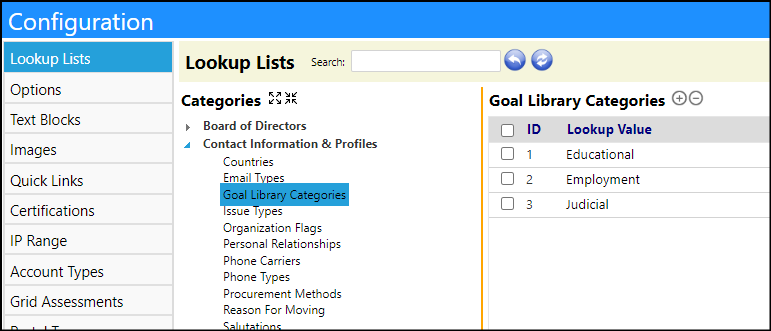
These are the drop-down lists that appear on many of the pages. Not all lists are user configurable. Additions to the list are made by clicking on the ‘+’ to add new entries. Changes are made to the list by clicking on the ID number of the entry or the entry itself and overwriting the Value… and then Saving. Deletions are made by selecting the item by clicking in the checkbox to the left of the item’s ID number and clicking on the ‘-‘ button. For most organizations, this is the area that is changed most often. As users get more involved, they will identify needed changes – the way lookup lists were designed gives you a lot of flexibility in this area.
Options
These are the default values which impact all users in the imPowr instance. In some cases, the changes consist of a yes or no to indicate the acceptance or declining of a feature. In other cases, the change may consist of a number, a name, or an internal number. This is also where you can set up password rules and requirements. Before making any changes to this section, we recommend you consult with your Continual Care Solutions Project Manager.
Text Blocks
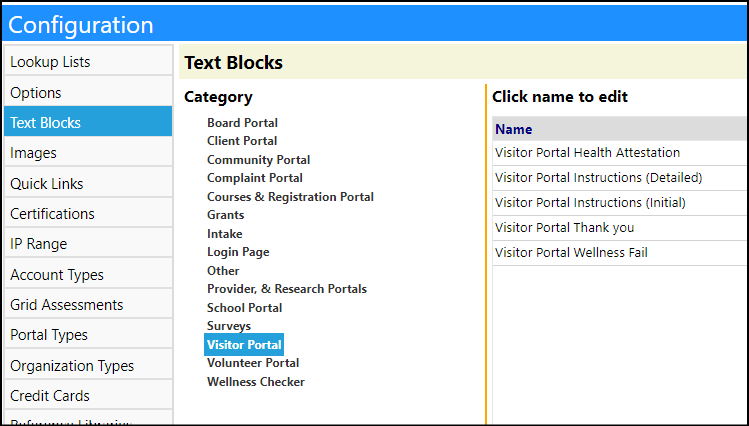
This section consists of text displayed on the screen either as page or portal titles and subtitles, error responses, instructions, or document headers, footers, or bodies. Typically, this section is sufficient for most organizations. You may want to consider customizing some displayed text to include names and extensions or emails for support. You Continual Care Solutions Project Manager can show you how to change support messages.
Images
This section consists of logos, certificates, and backdrops. Pictures can be uploaded directly into this page and set as the default.
Quick Links
This page allows you to add or delete various web links which are used on other pages.
Certifications
This page lists out names and descriptions of various business verifications which may not otherwise be commonly known. Example: “VOSB” - Veteran Owned Small Business.
IP Range
This page provides the ability to block specific IP Addresses from accessing the imPowr instance. It also allows you to identify specific IP addresses as allowed. The default is All IP Addresses are Accepted except any identified as blocked. In most situations, unless there are issues, this section is not altered in any way.
Account Types
The Account Types page allows System Administrators to select which panes, side panels, goals, and assessments are going to be displayed, depending on the Account Type selected. This page is also used to configure the Intake Screen Questions based on Account Type – and set up the rules which refer people to programs or services, depending on how they answer the pre-screen questions.
Grid Assessments
The Grid Assessments section allows you to create Grid Assessments. In contrast to the Assessment Tools menu item page, this page is used for the 6 default Grid Assessment types. Eventually, this will be phased out. Depending on which default Grid Assessment type is selected, you can change the assessment, or completely overwrite it.
Portal Types
This section is used to activate or deactivate the portal buttons displayed on the bottom of the login screen. It also allows you to rename the portal and its sub-panels, as well as show the fraud warning. Additionally, this page allows you to set an inactive display message and set up default data. For example, on the Wellness and Visitor Check portals, in this section, you establish the questions and the risk assessment. In the Provider Portal, in this section, you identify which items you want displayed. And, in other portals like the Registration, Board, or Client portal, etc., you identify what panels, information, and buttons you want displayed.
Organization Types
For Organizations, this section is used to identify what panels and sub panels you want displayed on the screen. This also allows you to display Profile Assessments. Depending on which organization type you select (remember, these are default values), you can determine which of the panels you want displayed.
Credit Cards
This section is used to configure credit cards. The imPowr system provides a framework for processing credit card transactions when making donations or paying for classes and events. The actual execution of those transactions requires that you engage with a credit card processing company and link imPowr to that company.
Reference Libraries
This page consists of multiple reference libraries ranging from a listing of countries, staff credentials, health issues, or Durable Medical Equipment (DME) to inspection steps, forms for assessing clients (lists of medical conditions, social determinants, economic factors and other similar items are used for multiple purposes including assessment of a client and for configuring eligibility requirements for programs, courses, clinical trials and other sometimes restricted activities), and a form to track client consent as to how that data is collected, processed, and shared.
Self-Sufficiency Libraries
This page consists of lists such as Employment Soft Skills, Employment Prework, Client (health and success related) Barriers, Client (success related) Goals, and Ethnicity Groups where you can add, edit or delete entries.
In many cases, you just click select an entry and add, delete, or edit the information:
In some cases, you have to provide a yes or no response. Typically, these related to things which will be displayed.

In others, you may have to enter some information, like text:
While others may require you to select entries which will be displayed as panels, tabs, or action items:
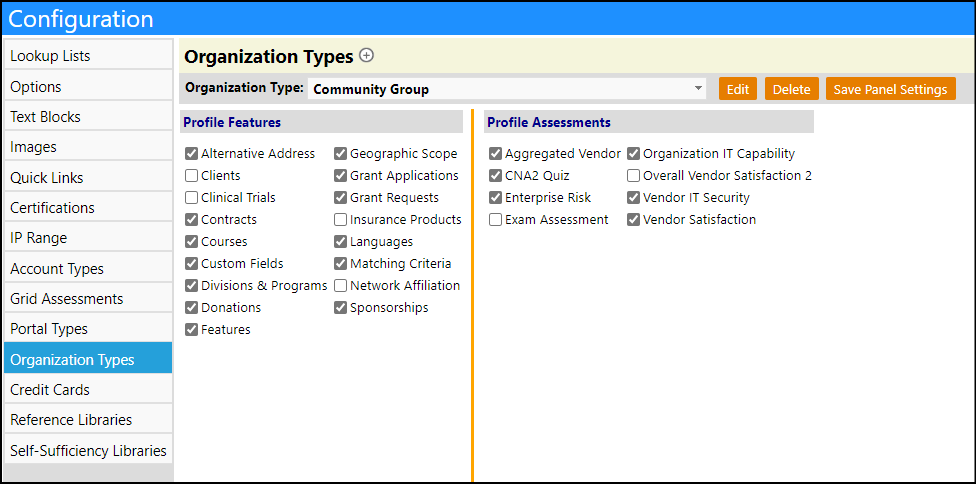
Or some may even be for having you add items to a Library:
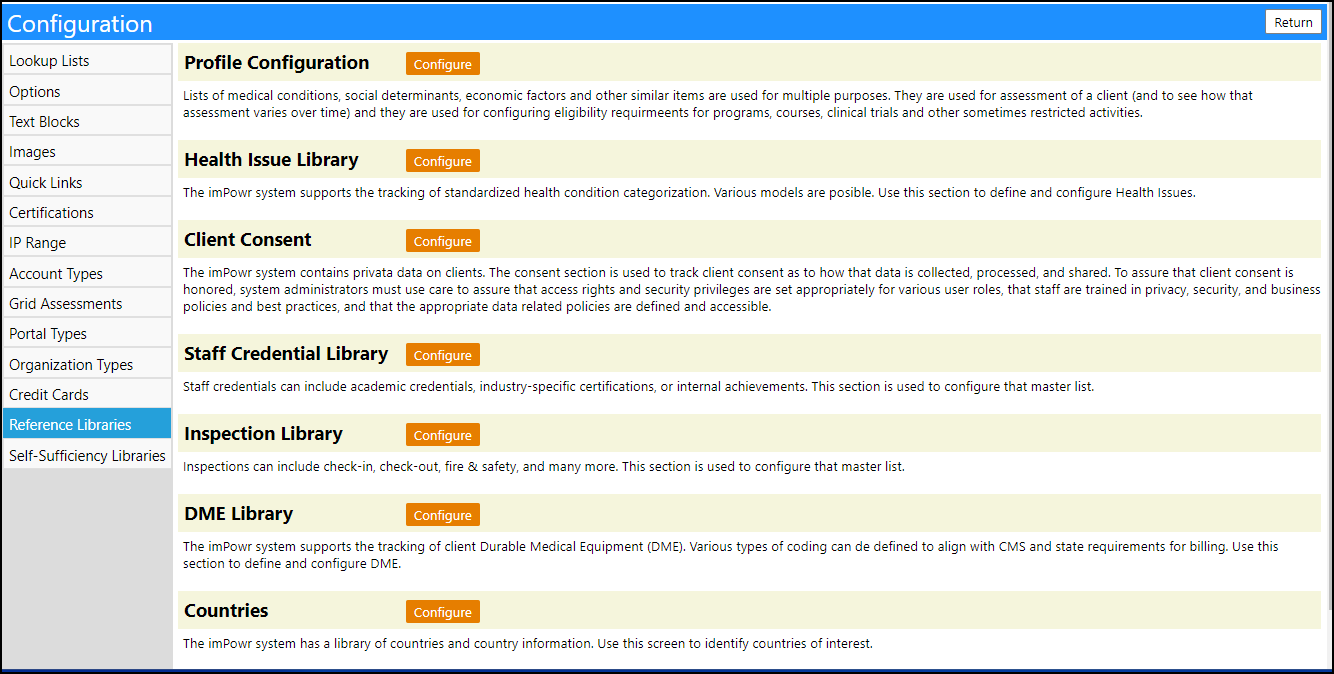
For all the above, remember to save your changes before exiting. In some cases, the changes may not be effective until you log out and log back into imPowr. Because configuration impacts all users, if there is any doubt of the impact or if you have any questions, please consult with your Continual Care Solutions Project Manager before making any changes.