Enhancement to Account List - Import ID Column
- The ImportID can now be optionally displayed in the Account List. Users just need to select this column in the Show Additional Columns panel.


Account Profile Enhancement - Multiple Changes
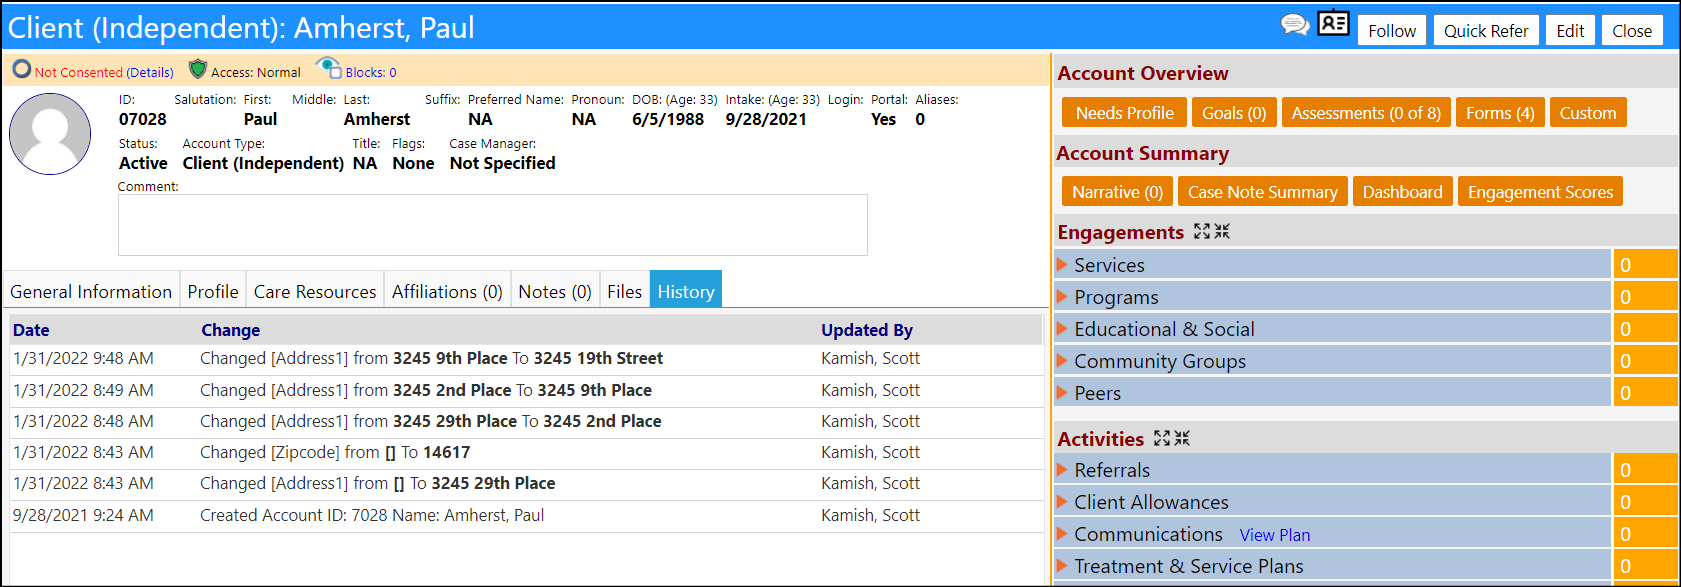
- Changes to the Account address are now captured in the history, as well as in the Audit Trail. This will help when tracking down account changes.

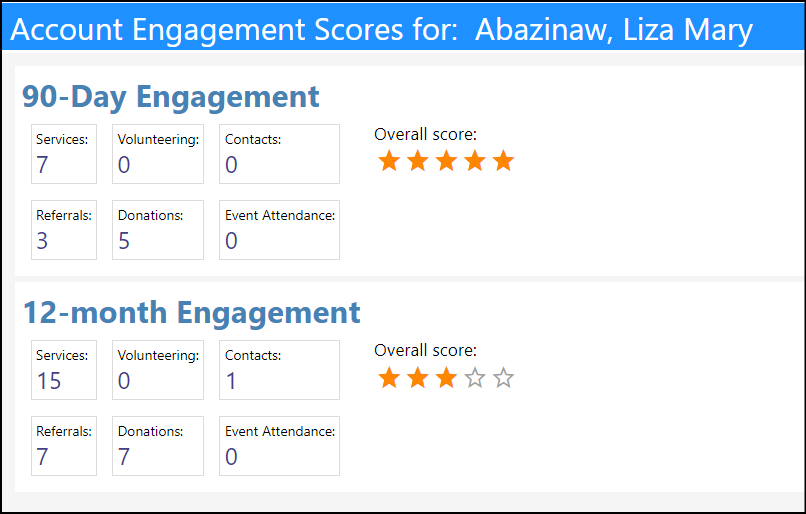
- A new Engagement Score has been added to the account-profile. When clicked on, the individual's participation is taken into consideration over the past 90 days and the past 12 months, and an overall score of 1 through 5 starts is calculated.
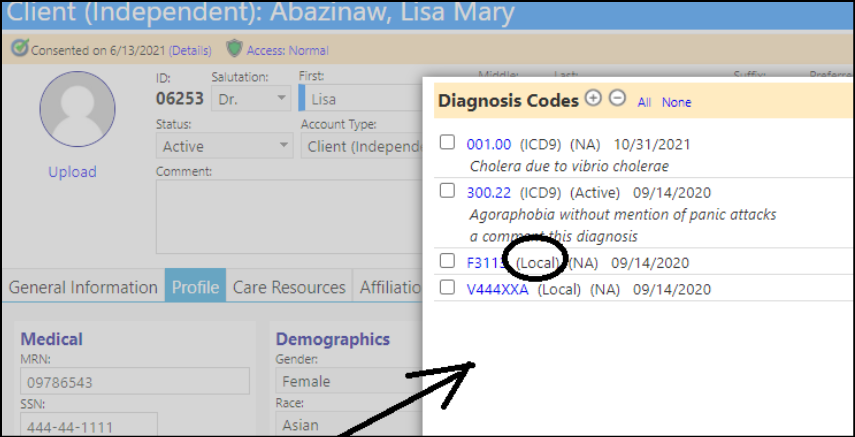
- The normal process for adding diagnosis codes is to choose from a list of ICD9 codes or ICD10 codes, but for backwards compatibility and because some customers don't use the proper codes, manual entry of a local code is now allowed. Local codes are identified by the word "Local" when displayed.
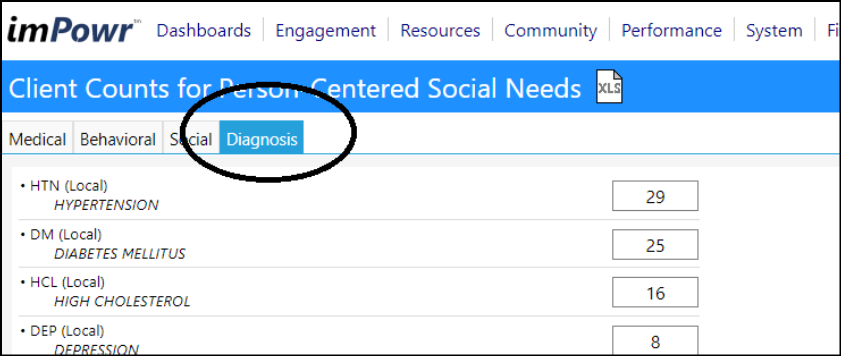
- A new Population Analysis menu item has been added to replace the Needs Analysis menu item. This new item now includes a Tab for Diagnosis, which shows the a count of the various diagnosis of existing clients.

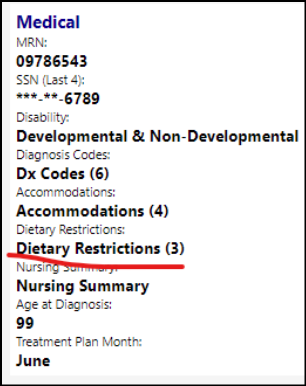
- Dietary Restrictions have now been added to the Medical panel in the Account Profile.
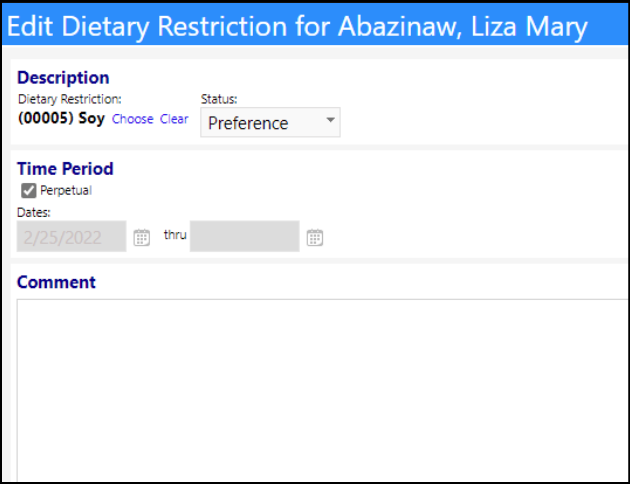
- The list page now has filters and a few other additional columns.

- There's also an add/edit page.
- A new summary report button on the list page brings up three options:

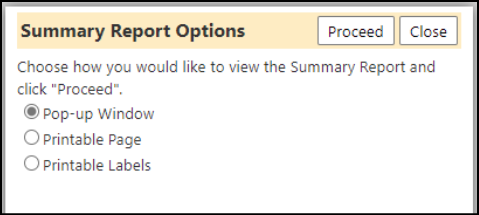
Option 1: A pop-up window displays all the information in a bulleted list:
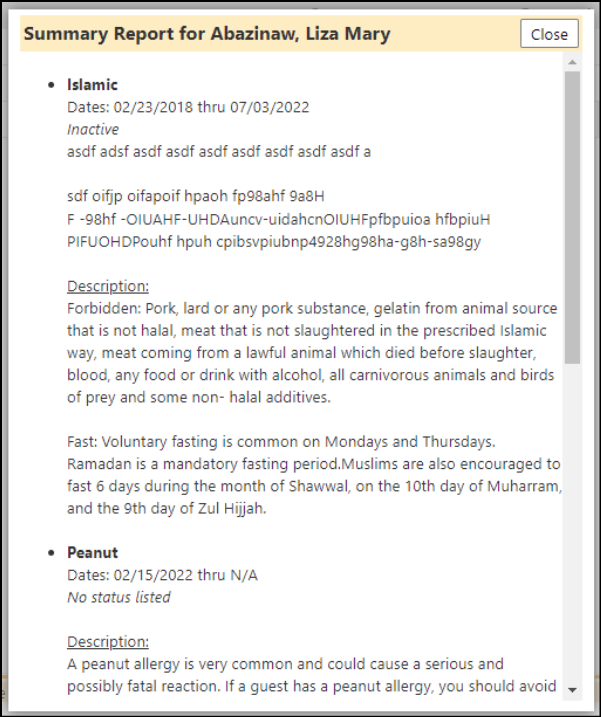
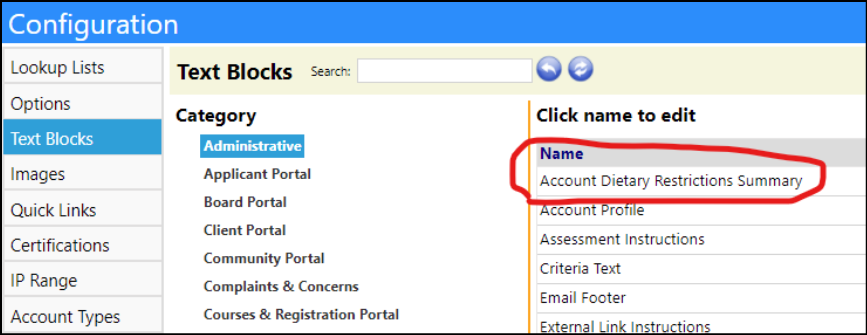
Option 2: Displays the same list as Option 1, but on a printable page. This is controlled by a text block, which can be configured in the configuration screen. That text block will need to be added to each instance that will want to use this.
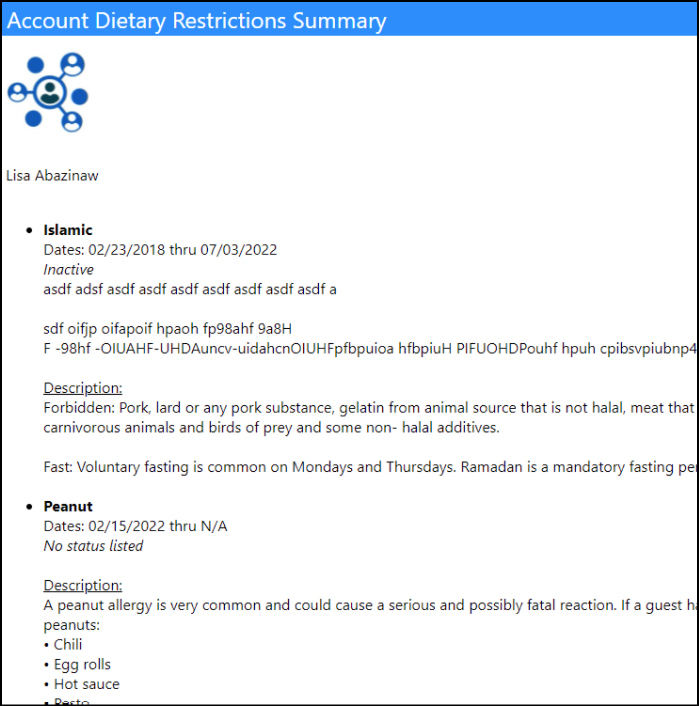
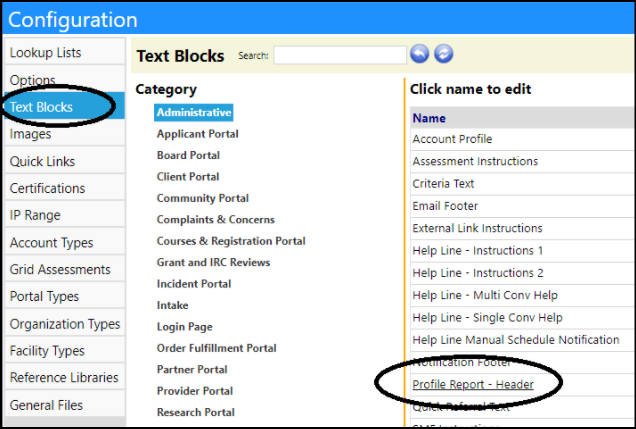
The text block can be configured here:
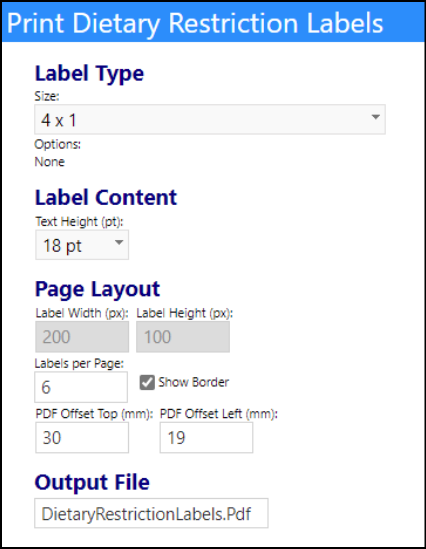
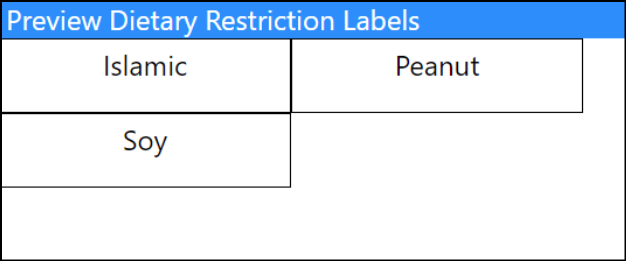
Option 3: Print the name of each dietary restriction on a label (this is similar to the name tags screen used by the mailing lists):
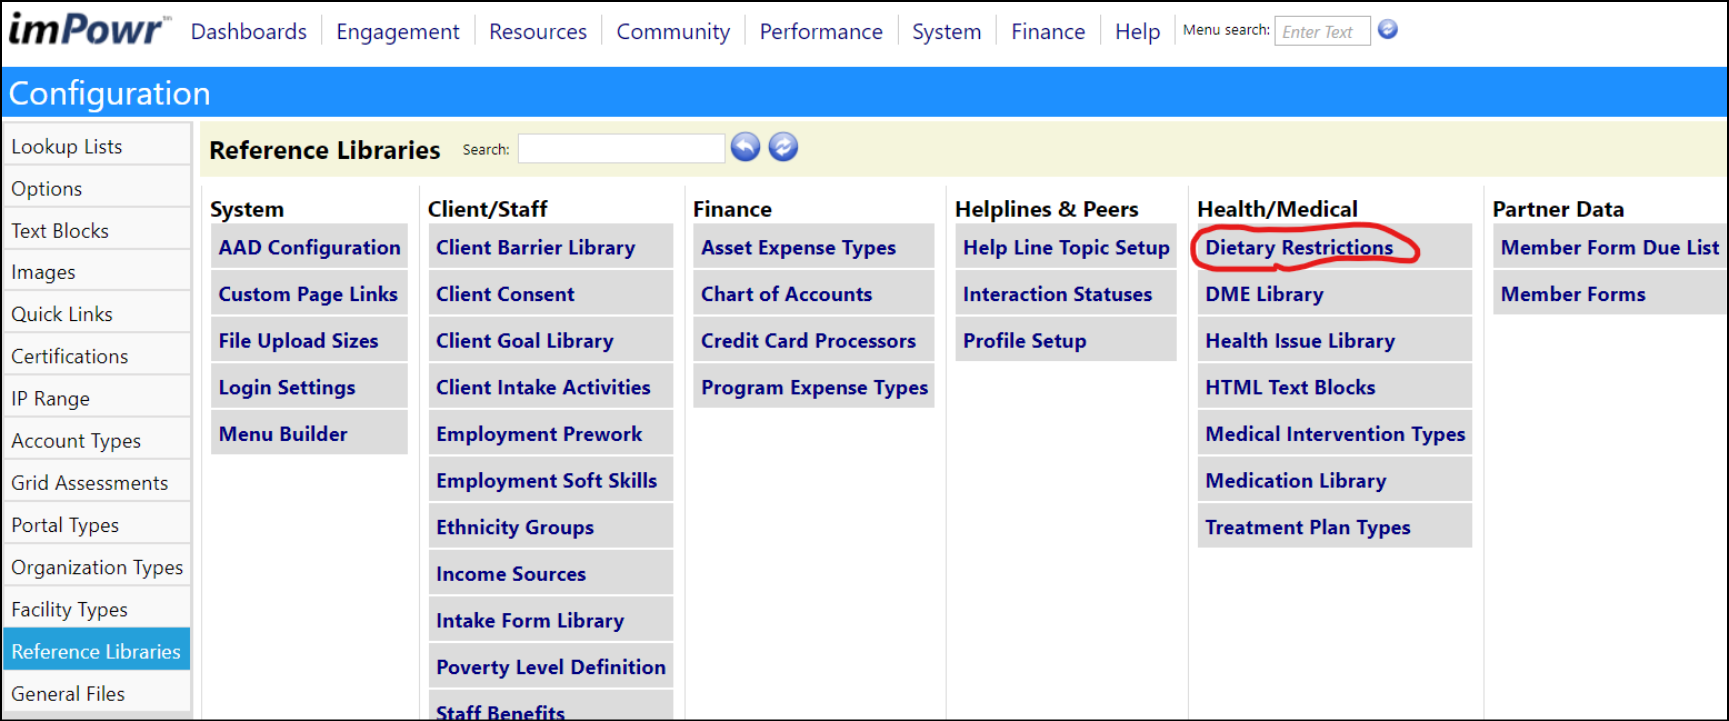
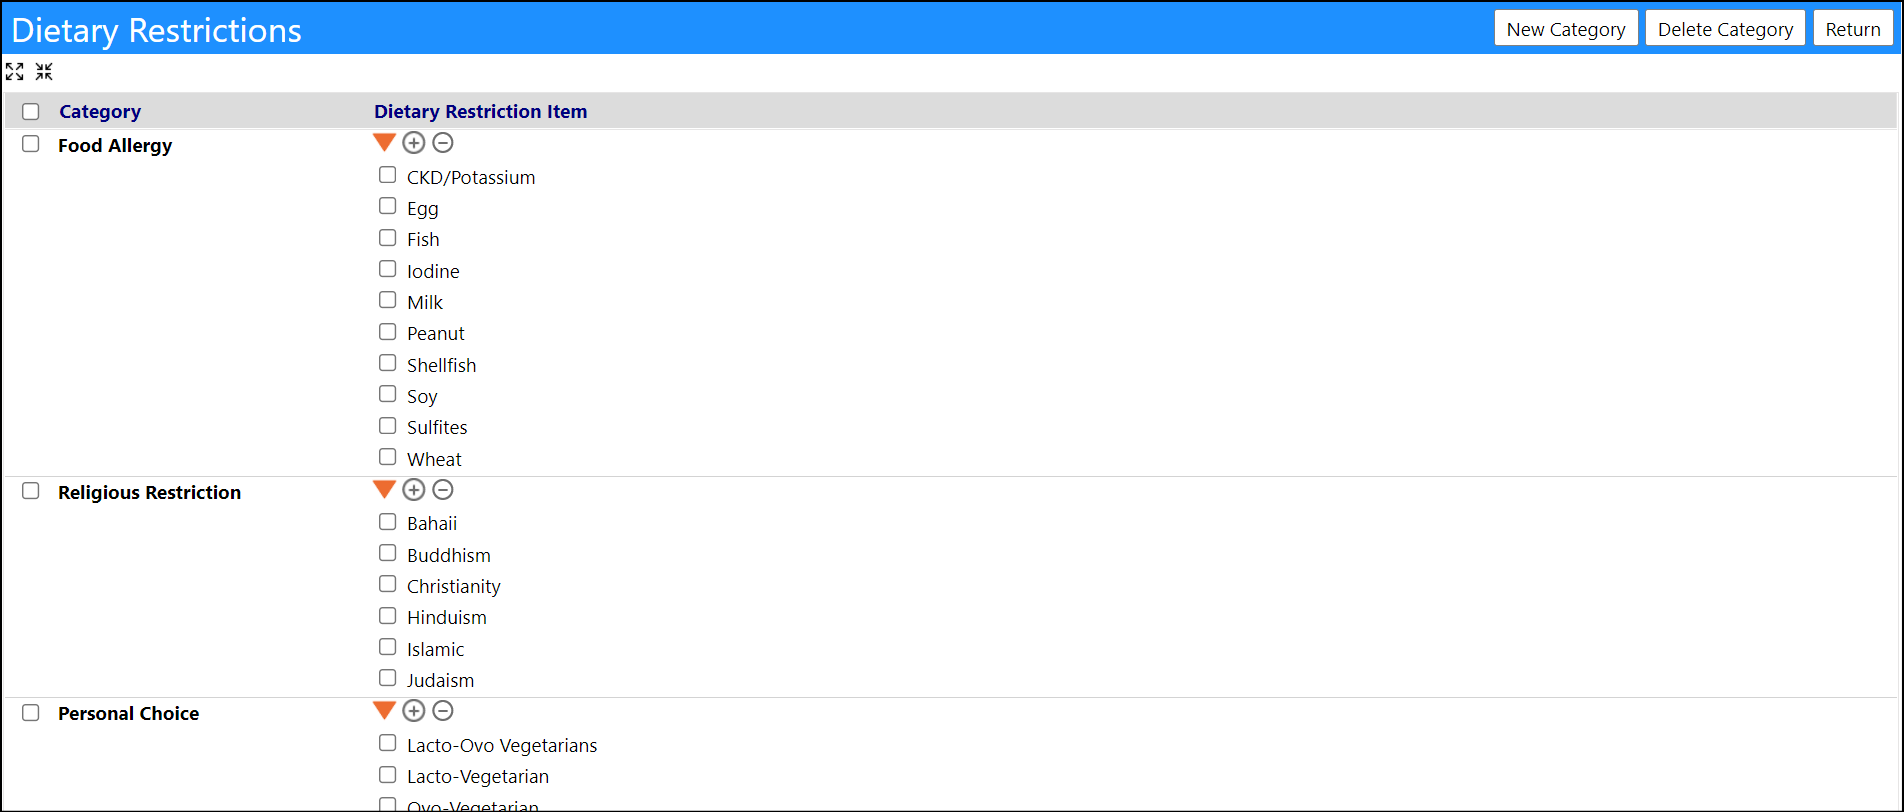
- The Categories in the Dietary Restrictions list can be found in Configuration:
New Account Profile Feature - Needs Analysis of Person-Centered Needs
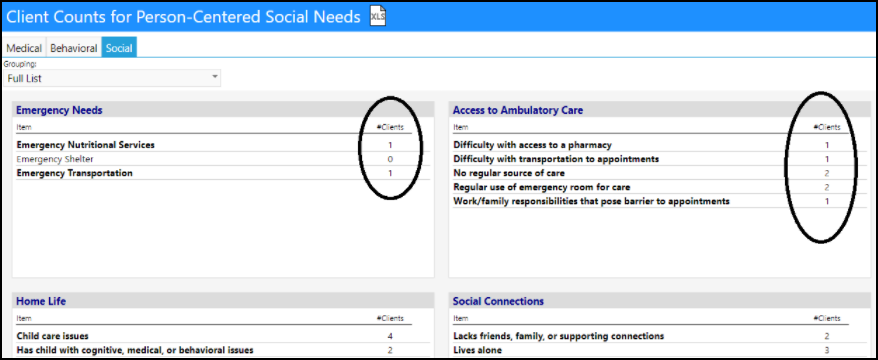
- Users with the appropriate security rights can now access and view a Client Counts of Person-Centered Needs page. This page shows the client counts for each Medical, Behavioral, and Social need that has been selected for any account. Those not displayed in bold on the page have no clients with that need.

New Account Profile Feature - Account Forms
- A new type of pre-mapped account-related form can be created in the Form Library called Account Forms. These forms can be associated with an Account Type and be used to capture data, collect authorizations or approvals, survey accounts, etc.
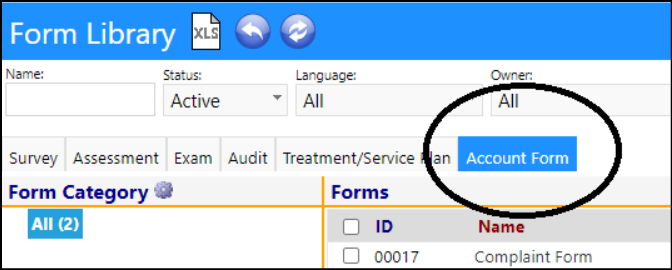
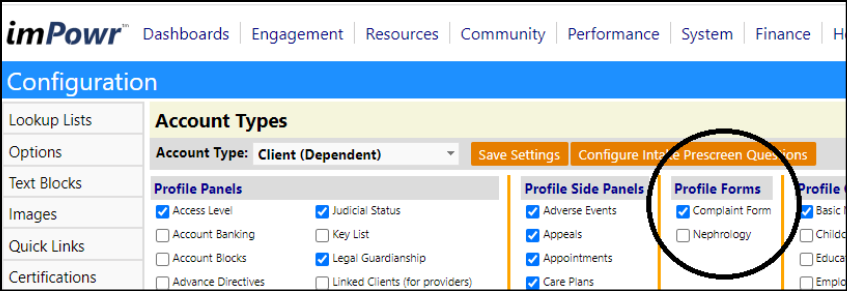
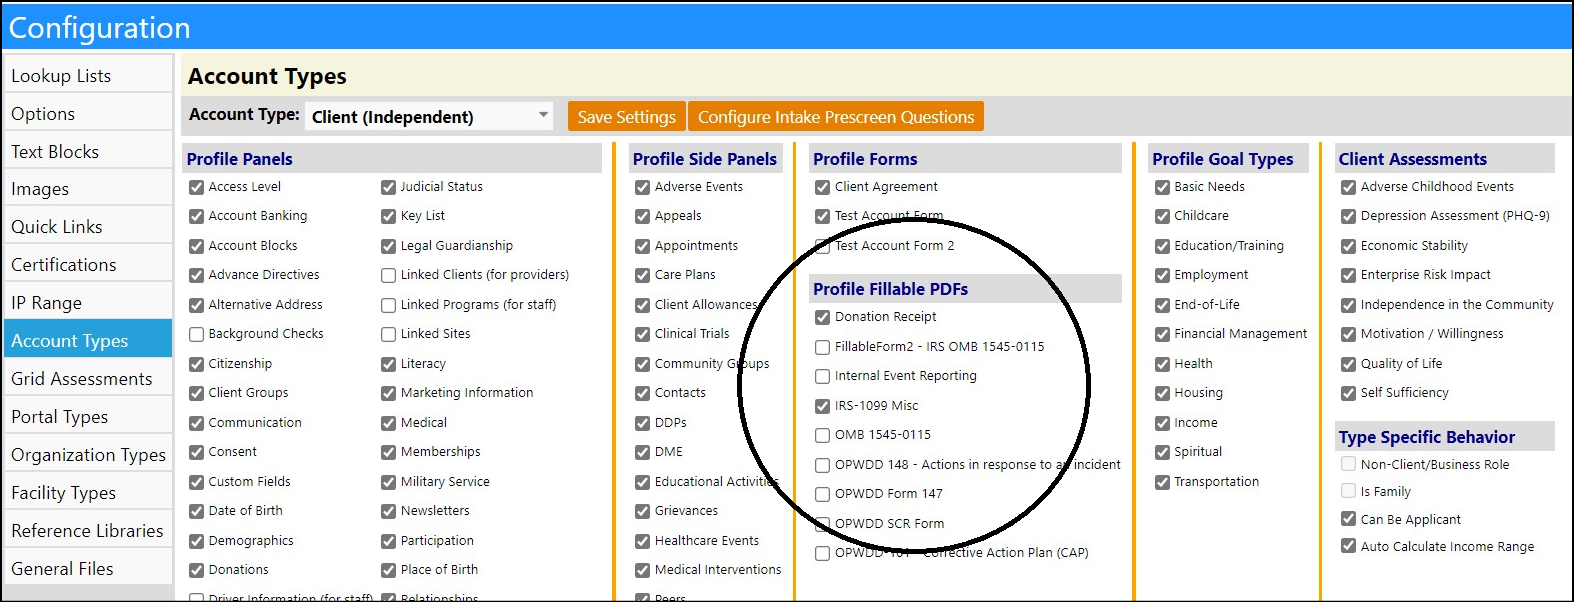
- Once created, they have to be associated with the Account Type - that is done via configuration:
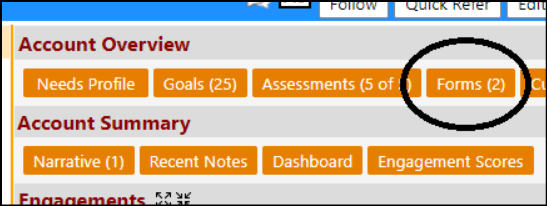
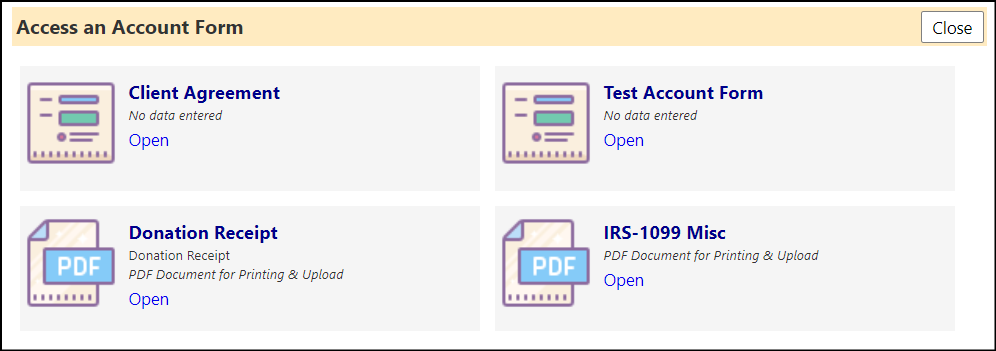
- The Account Forms will display on the account profile as a new button in the Account Overview section:
- Clicking that button will allow you to view the form:

- Clicking on 'Open' opens the form and allows for entry:

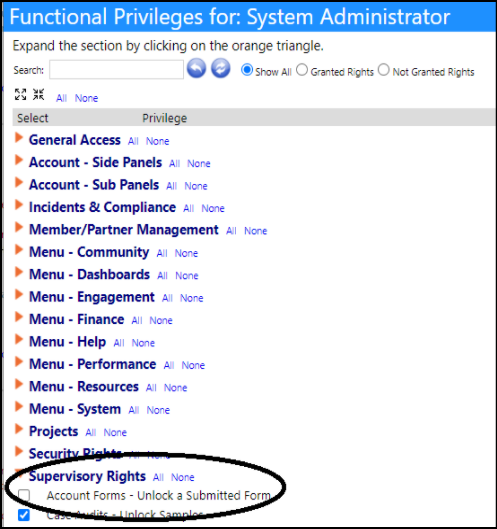
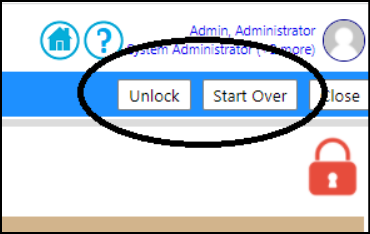
- Once submitted, if you have the appropriate security privilege, you can reset the form:
- Users can also attach fillable forms in the same manner:
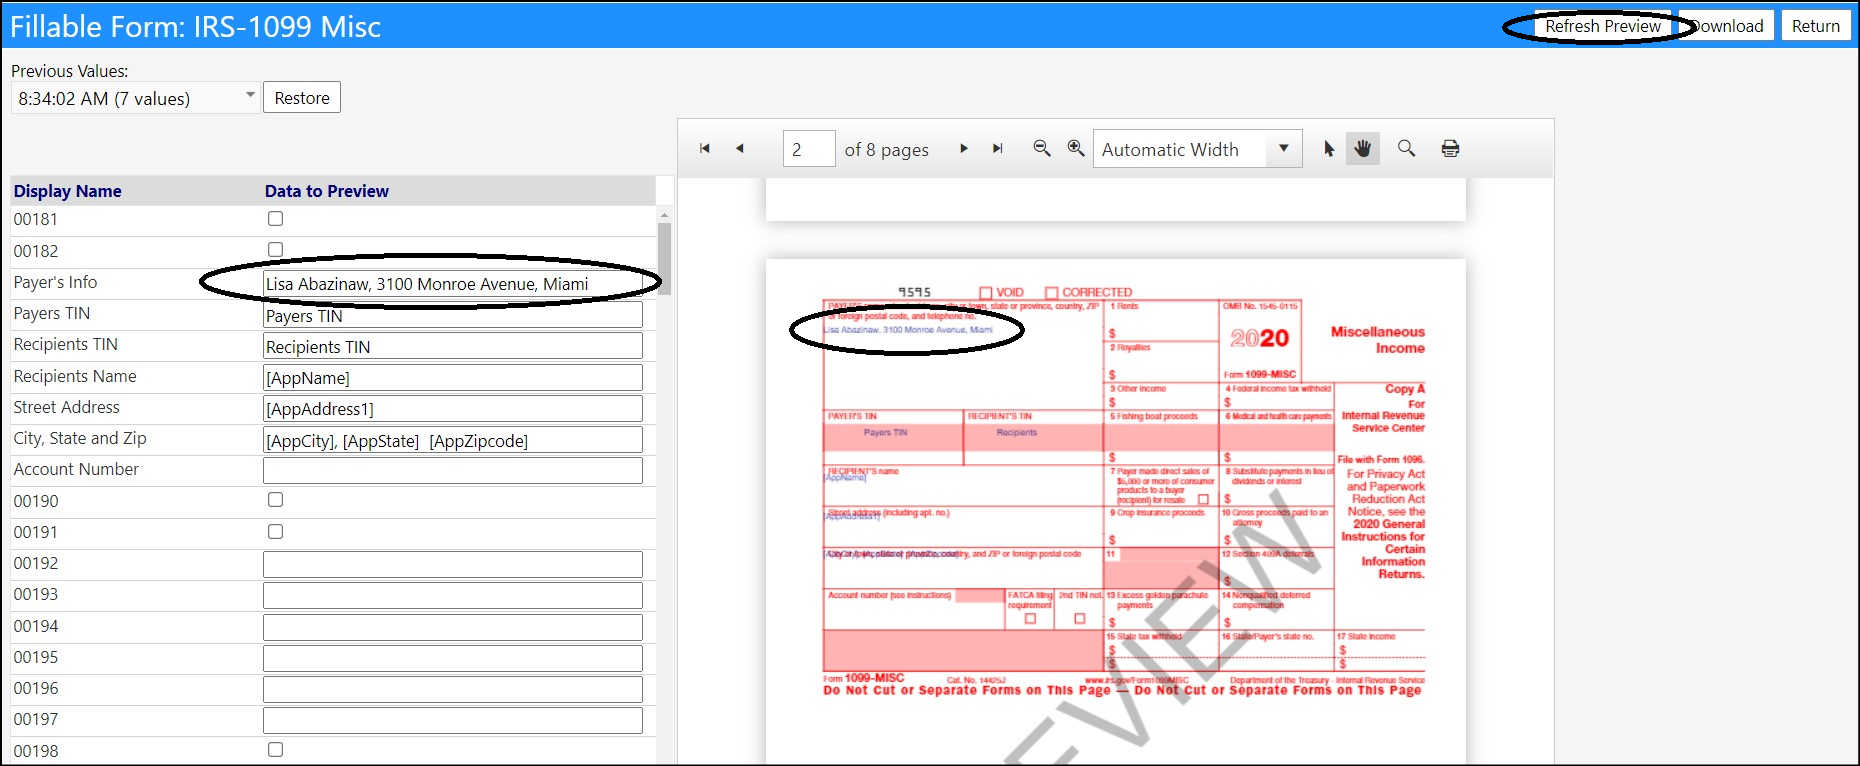
- Filling in the Data to Preview, and clicking on 'Refresh Preview' will allow users to see what the form will look like when saved or printed.
Enhancement to Datasets - Custom Filters Added
- A way to write additional queries on a dataset that will populate dropdown lists in the report viewer page has been added. These dropdown lists can then be used to filter the report.
- A new tab on the edit dataset page lets you create custom dropdown lists to filter a report, on the reports page.
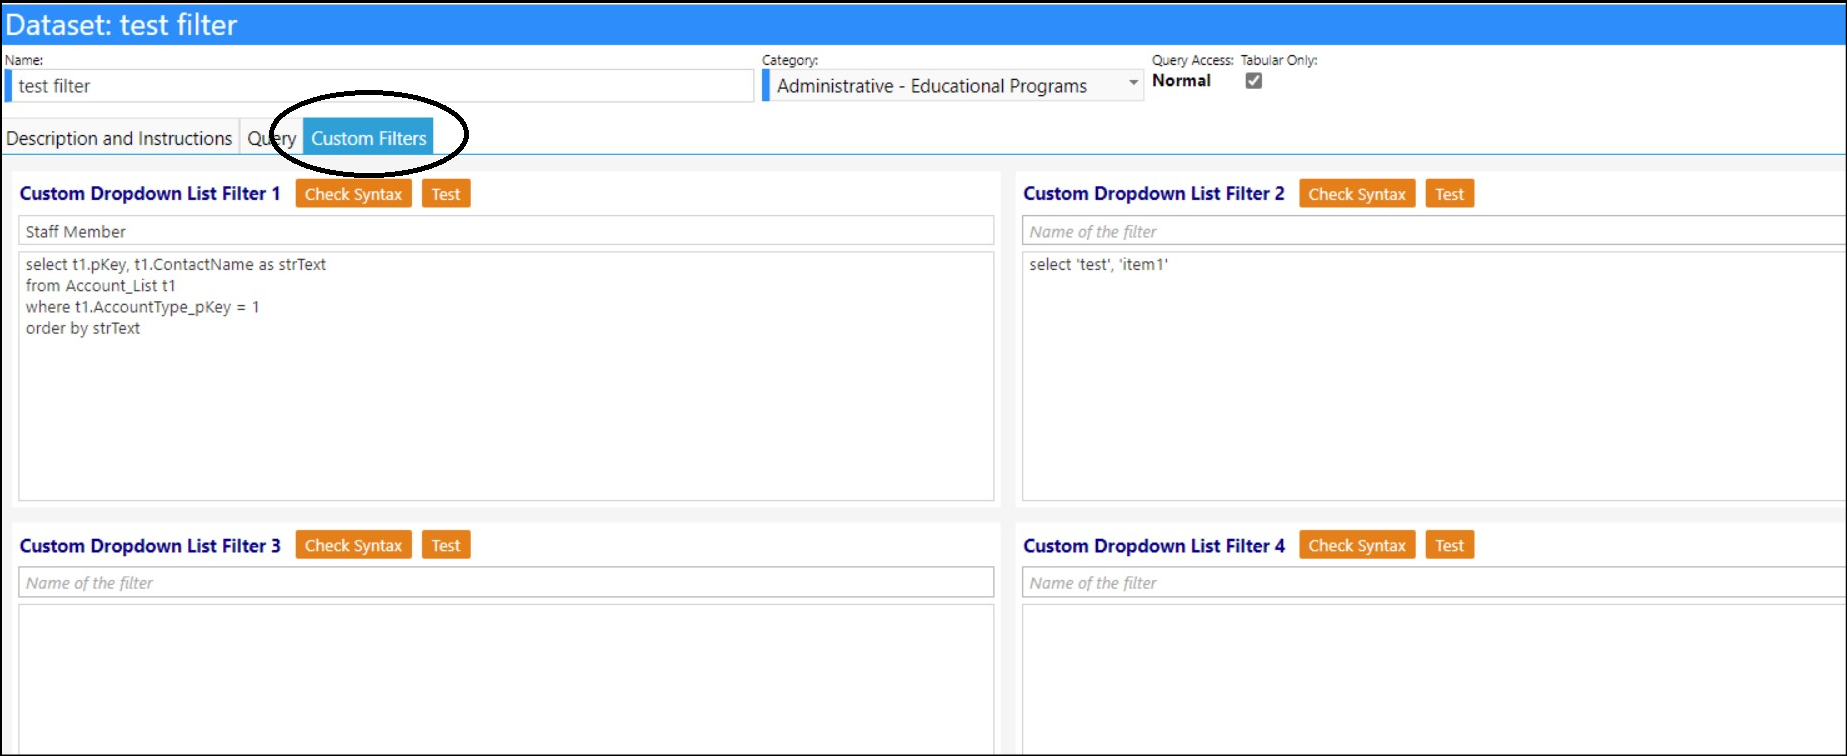
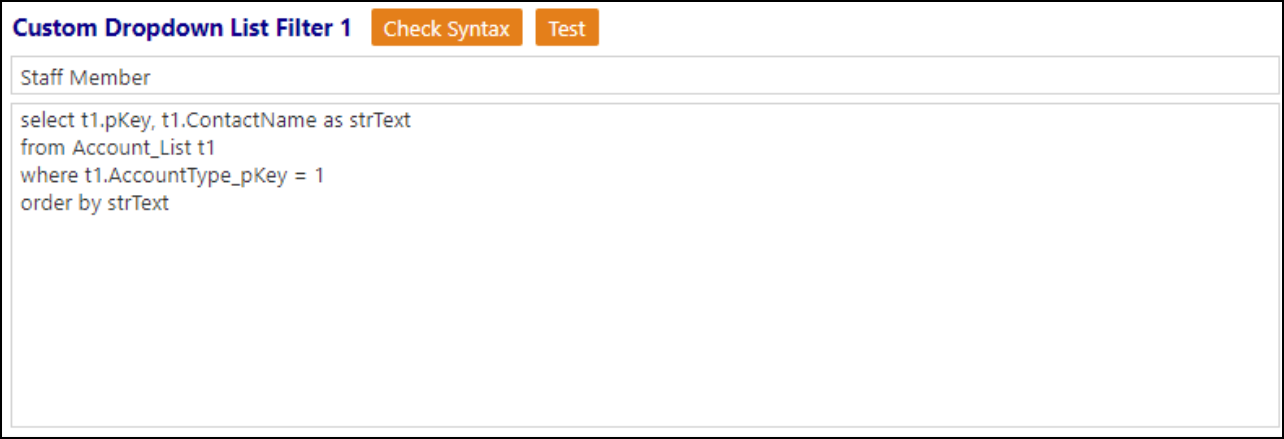
- The dropdown lists should ideally be formatted with the key of something (in this case, account pkey) in the first column, and text corresponding to that key in the second column. In this example, the text (contact name) in the second column is what will appear in each item of the dropdown list.
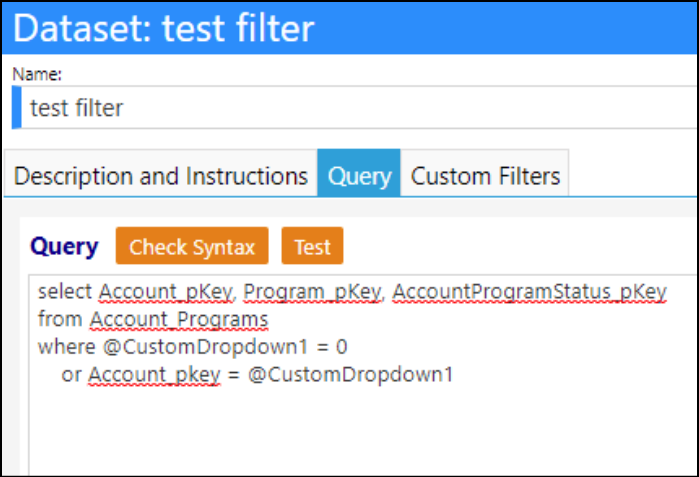
- To use the filter in the main query, use reserved words @CustomDropdown_, where the underscore is the number of the filter you want. In this example query (which just pulls each account program row), The @CustomDropdown1 keyword, which corresponds to the filter in the image above (which the filter is just a list of all staff members), was used. It is worth noting that these filters will automatically have an "All" option that it defaults to, and the value that comes from selecting "All" is 0.
On the reports page, this report contains a custom staff member dropdown filter, and when a staff member is selected from the list and the report is refreshed, the report is filtered.
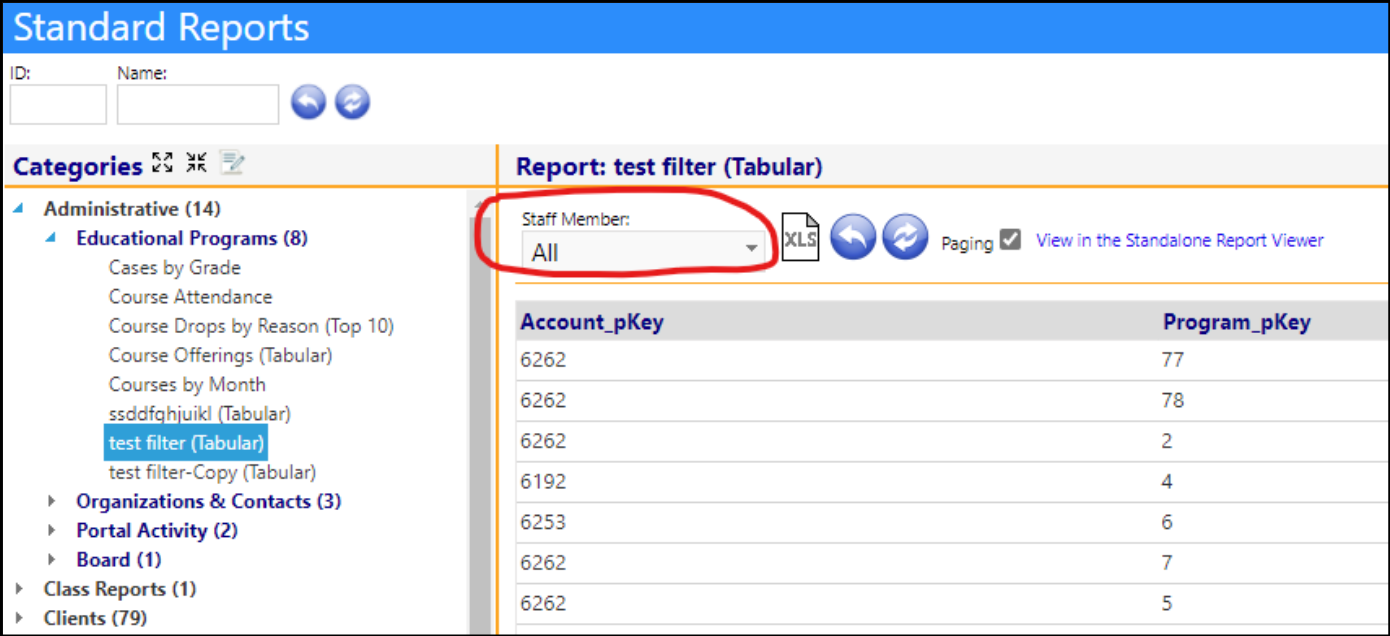
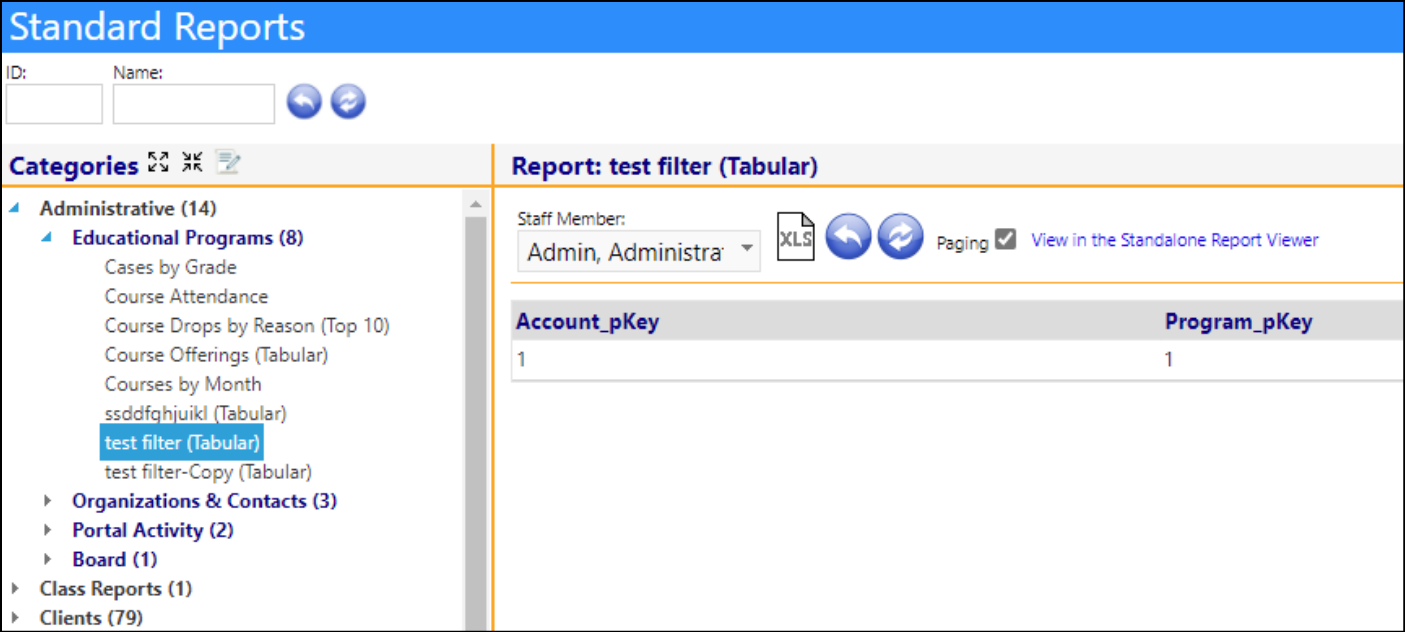
-
Note: Even though in the first image above had a query written in the box for custom dropdown list 2, the second dropdown list filter won't display on the report unless their reserved word is used in the query. Because '@CustomDropdown2' was never used, that dropdown doesn't display on the page.
-
Another kind of filter can be added using new reserved words @CustomTextbox1, @CustomTextbox2, @CustomTextbox3, and @CustomTextbox4. WIth this kind of filter, you can cause a search box to appear on the report viewer page. When editing a dataset, you can put that reserved word anywhere to customize how the searching works
-
In the following dataset, the first custom textbox is used and set it up so the input in that textbox will be treated like a contact name of an account. If the textbox input is empty, it will return all rows, otherwise it will filter account list on contact name:
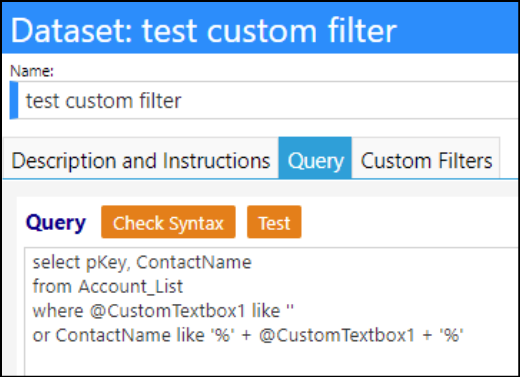
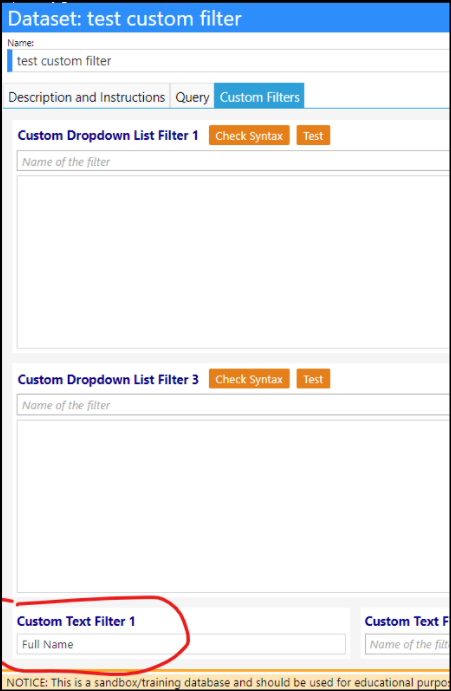
- The textbox can optionally be provided with a name on the custom filters tab:
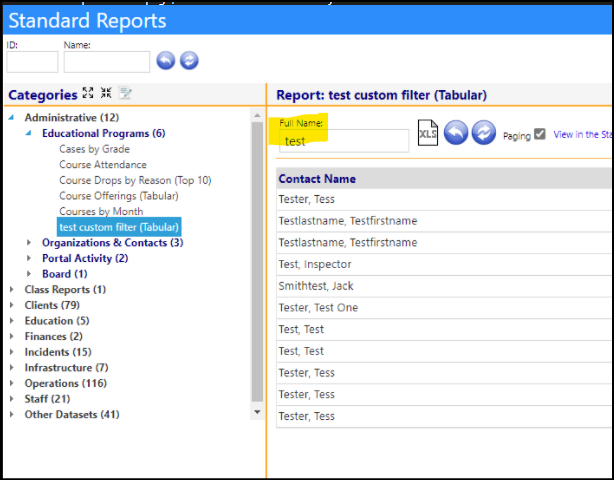
The filter will display on the report viewer page, and can be used like any of our other textbox filters:
Form Enhancement - New Signature Block Functionality
-
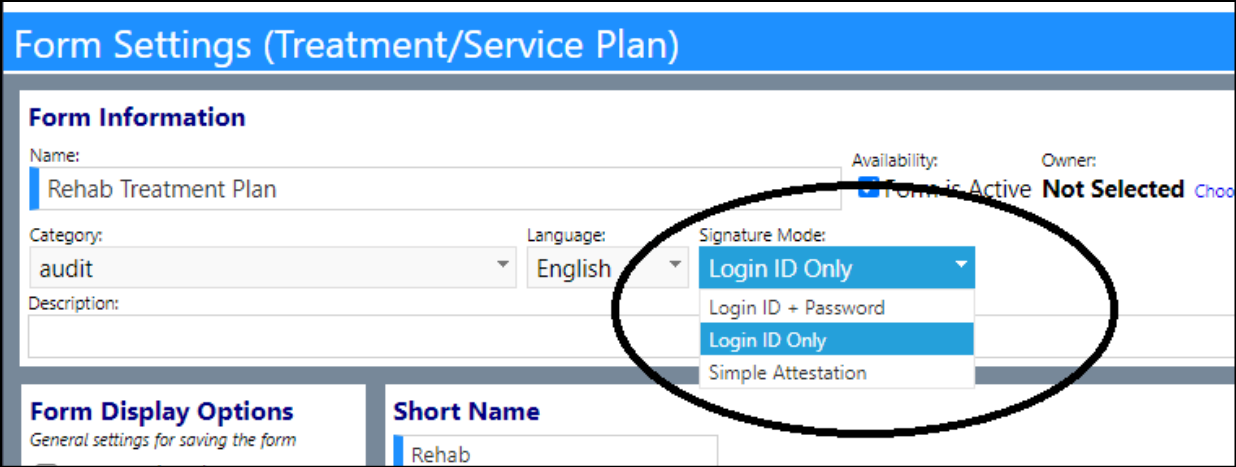
Some new functionality was added to the Signature Block in forms. The functionality choices are:
-
Simple attestation: you just click “confirm" and you are done.
-
Login: you have to enter the log in (or email) of the person currently logged in.
-
Login+Password: you need to enter login + password (the way it was working before).
The default is “Login Only”.
- It is configured on the form settings:
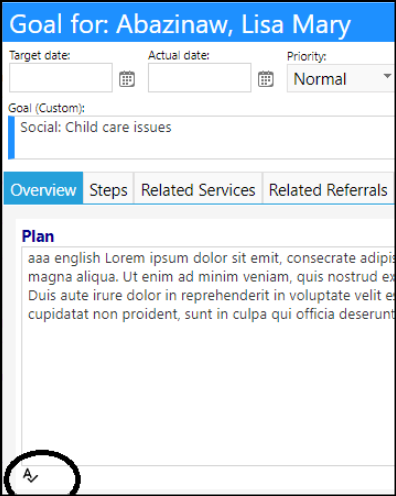
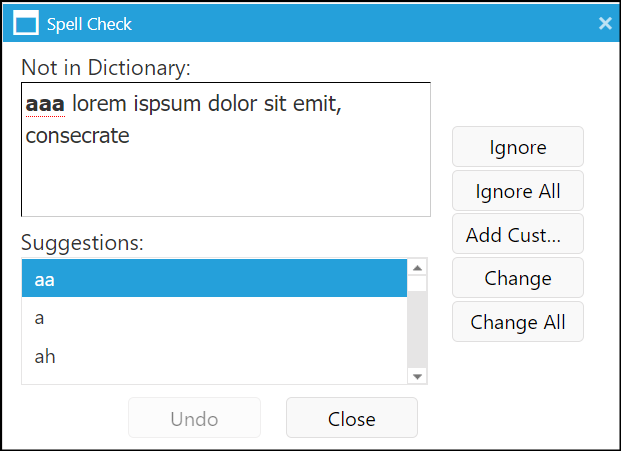
Enhancement to Goals - Spell Checker Added
- When creating Goals, users can now spell check their entries.
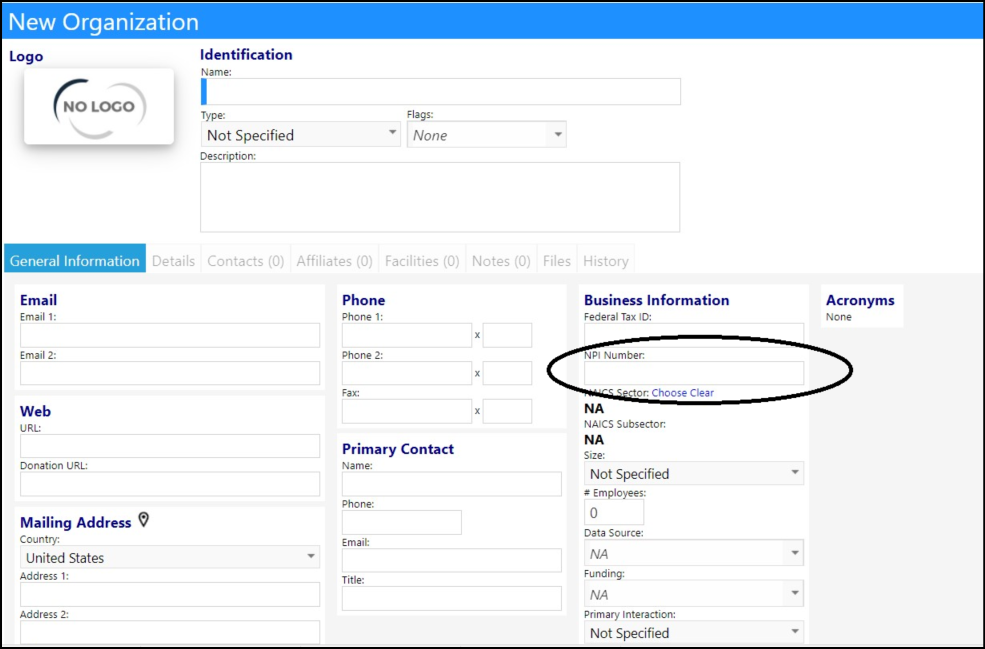
Organization Enhancement - NPI Number Added
- Agencies can now add in Organization NPI (National Provider Identification) numbers for their Organizations. This will help better identify organizations.
Enhancement to Needs Profile - Multiple Changes
- When identifying Needs in a Client's Account Profile, users can now select from a list of pre-defined favorites.
- The favorites are defined in the Configuration Reference Libraries, under Profile Set-up.
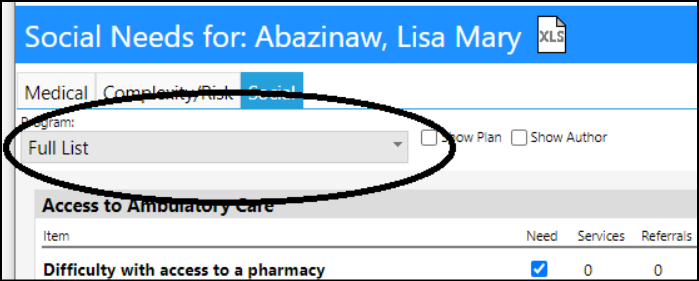
- Reports have also been added to the Needs Profile.
- After clicking on the Needs Profile Button, a Reports Button will display. Click on that to get to the reports.

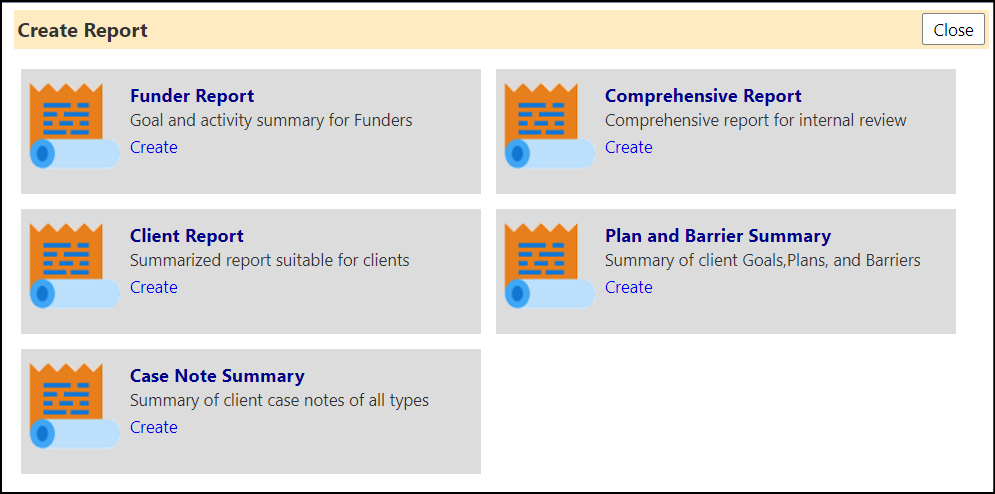
- The Report content is hardcoded, but the header is user configurable. The default header is a simple display of logo and repot name and date.
- The textblock introduces a new reseved word [ReportTitlr].

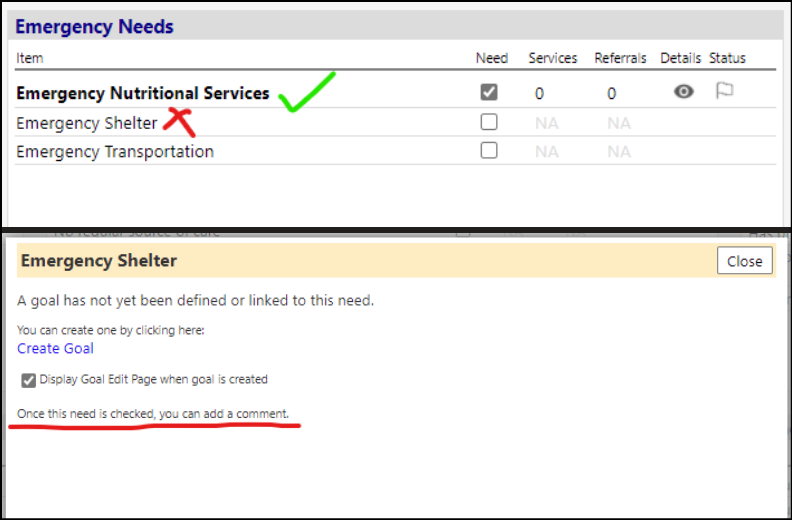
- When clicking on a need in the needs profile, the popup window now has a comment field (the "save comment" link will save the comment and close the window) - previously comments were able to be added, but they could not be viewed in this screen.
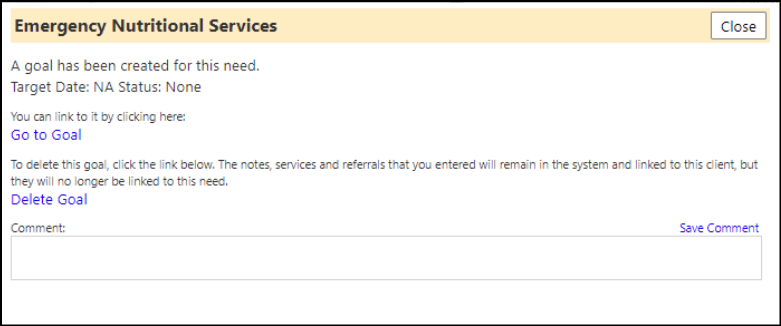
- A need has to be checked and bolded in order to leave a comment on it. If you click on a non-checked need, it'll tell you to check it to add a comment.
