This article will explain how you can do internal grant application reviews.
In order to be able to do internal grant application reviews, you must be
assigned to an account role which provides you with the appropriate functional
and entity rights.
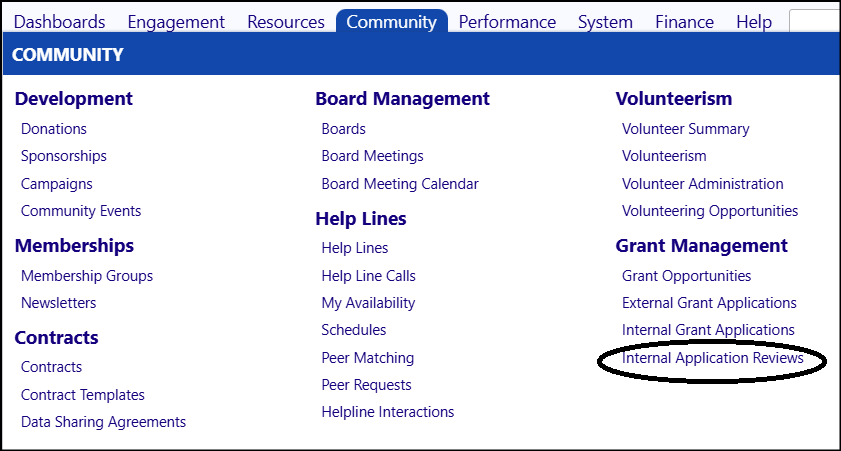
- Access Internal Application Reviews from the Grant Management section of the Community menu.
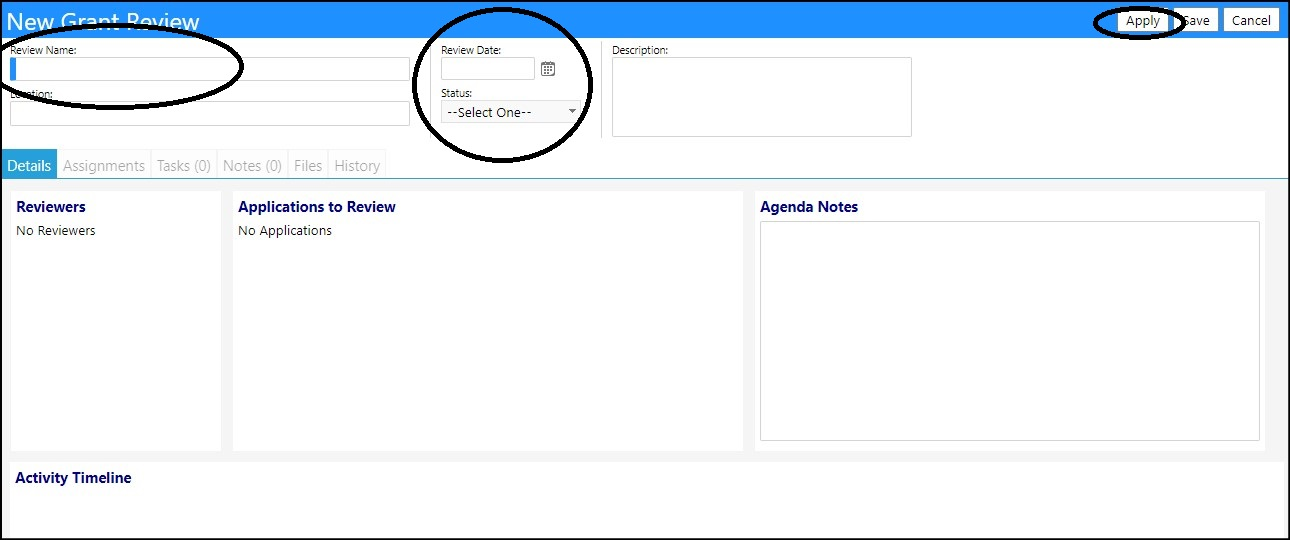
- Click New Review.

- Enter the Review Name.
- Enter the Review Date, if known.
- Select a Status from the drop-down list of statuses.
- Click Apply to save your changes and proceed to the Details tab.
-
In the Details tab...
-
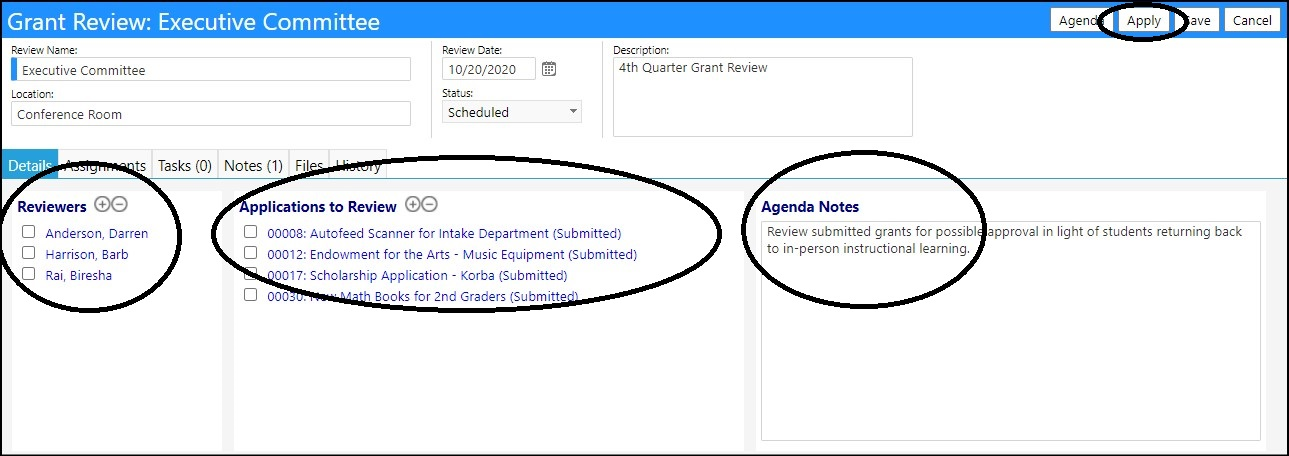
Add Reviewers by clicking on the '+' in the Reviewers section.
- Select one or reviewers from the list of Accounts by checking the box to the left of their name.
- Click Save to transfer the name to the list of Reviewers
-
Add Applications to Review by clicking on the '+' in the Applications to Review section.
- Select one or more grants from the list of Inbound Grant Applications by checking the box to the left of their name.
- Click Save to transfer the Inbound Grant Application to the list of Applications to Review.
-
Enter any meeting Agenda Notes desired.
-
-
Click Apply to save your entries.
Select the Assignments tab.
- Click on the Edit checkerboard to the left of any application (this process will be repeated for each application).

- In the Reviewer Assignments screen, select whether to Assign the Reviewer to that application, Not Assign them, or identify a possible Conflict of Interest, from the drop-down list of possible assignments.
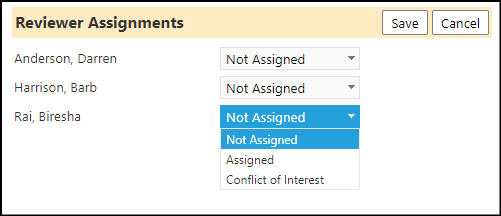
- Click Save to submit your selections and have them display in the Assignments screen.

- Click Apply to save your entries.
NOTE: You may change your assignments at any time by clicking on the Edit
checkerboard and reselecting your assignments.
- Select the Tasks tab.
- Add a Task by clicking on the '+'.
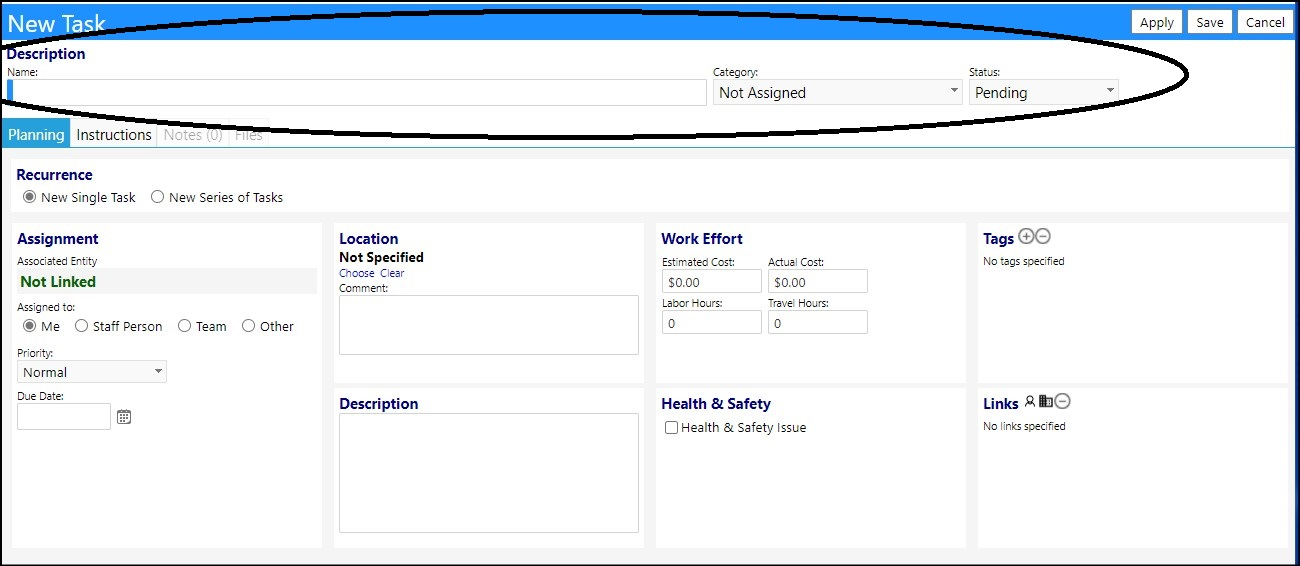
- Provide a Name for the Task.
- Select a Category from the drop-down list of categories (optional)
- Set the Status of the Task from the drop-down list of statuses (optional).
-
Choose the Recurrence of this Task.
-
Select New Single Task if this is a one-time activity.
-
Assign the Task to someone by choosing the appropriate radio button.
- If someone other than you are selected for the Task, choose the appropriate Account or Staff Team from the drop-down list.
-
Set the Task Priority.
-
Set the Task Due Date.
-
-
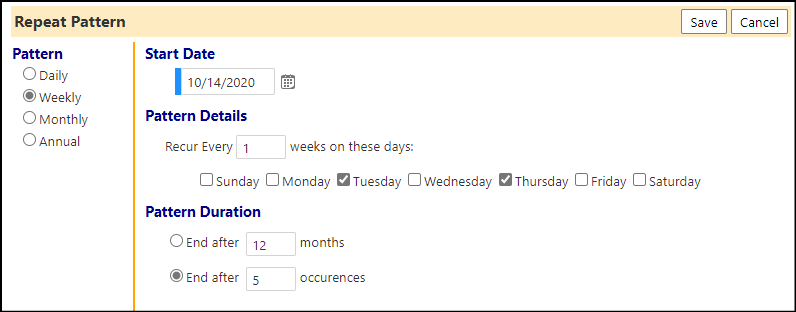
Select New Series of Tasks if this Task needs to occur multiple times.
- Click Set Repeat Pattern.
- Enter the Start Date.
- Select the Pattern.
- Set the Pattern Details.
- Enter the Task end date in the Pattern Duration.
- Click Save to save your entries.
-
Example:
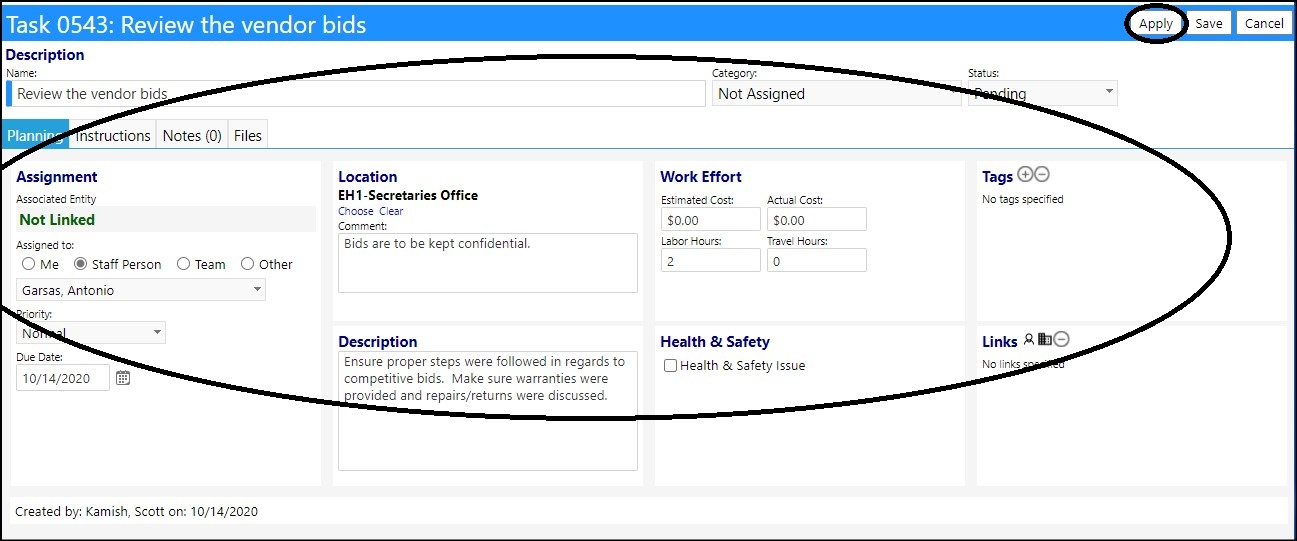
- Assign the Task to someone by choosing the appropriate radio button.
- If someone other than you are selected for the Task, choose the appropriate Account or Staff Team from the drop-down list.
- Set the Task Priority.
- Set the Task Due Date.
- Enter the Location of Task.
- Enter the Description.
- If there is a Cost or Hours involved with the Task, enter those.
- If the Task is related to a Health & Safety issue, check the box.
- Click Apply to save your entries.
- If you wish to Tag this Task, you may now add a Tag by clicking on the '+'.
You may remove tags by checking the box to the left of their name and clicking
on the '-'.
- Add any Links.
- Click Apply to save your entries.
- Select the Task Instructions tab.
- Optionally enter any Instructions related to this Task.
- Click Save when completed.
- Attach any Notes by selecting the Notes tabs, and clicking on the '+'.
- Click Apply to save your entry.
- Repeat the process for the Files and the Files tab.
- Click Select to choose the files from your PC.
When adding Files, be aware of the allowable file extensions and and file size
limitations.
- Click Upload to attach the files to this application review.
- Click Save to save the entries made for your Task.
- Repeat this process if you have additional Tasks.
- Attach any Notes to the Grant Review Meeting by selecting the Notes tabs, and clicking on the '+'.

You can change your note by clicking on the Edit checker box to the right of
your Note. Click Save when completed with your changes.
- Click Apply to save your entry.
- Repeat the process for the Files and the Files tab.
- Click Select to choose the files from your PC.
When adding Files, be aware of the allowable file extensions and and file size
limitations.
- Click Upload to attach the files to this application review.
- Click Save to save the entries made for your Grant Review Meeting.
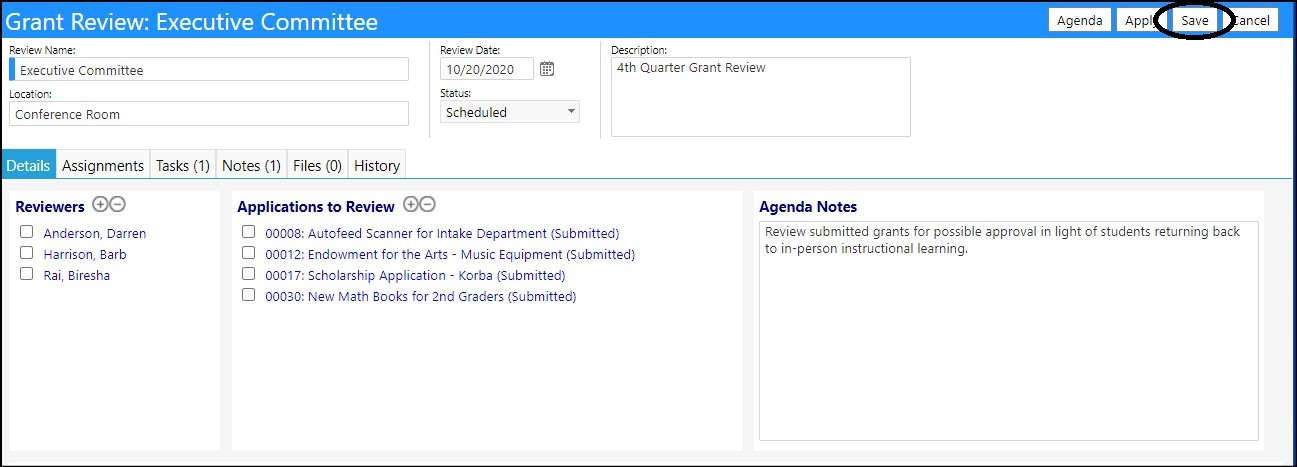
Your Internal Grant Application Review will now display in the Grant Reviews
list.

As the Grant Review moves forward, complete the tasks and change the status of
the review as appropriate.