Course Registration Process Notes
Public Facing Workflows
Details displayed below.
Typical Public Scenario
-
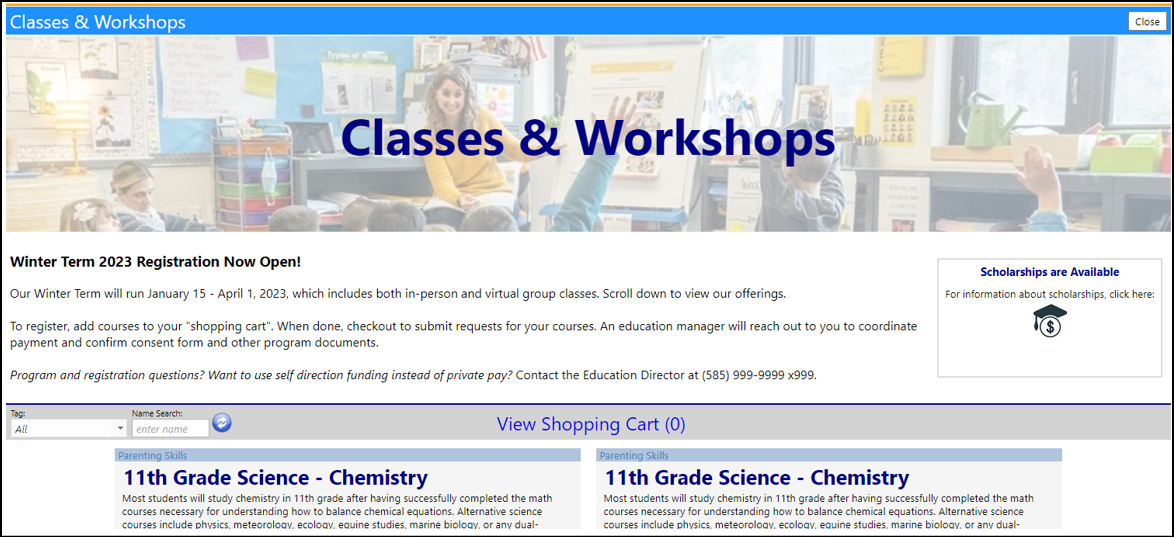
Launch Registration Portal (Classes & Workshops) in non-logged in mode.
-
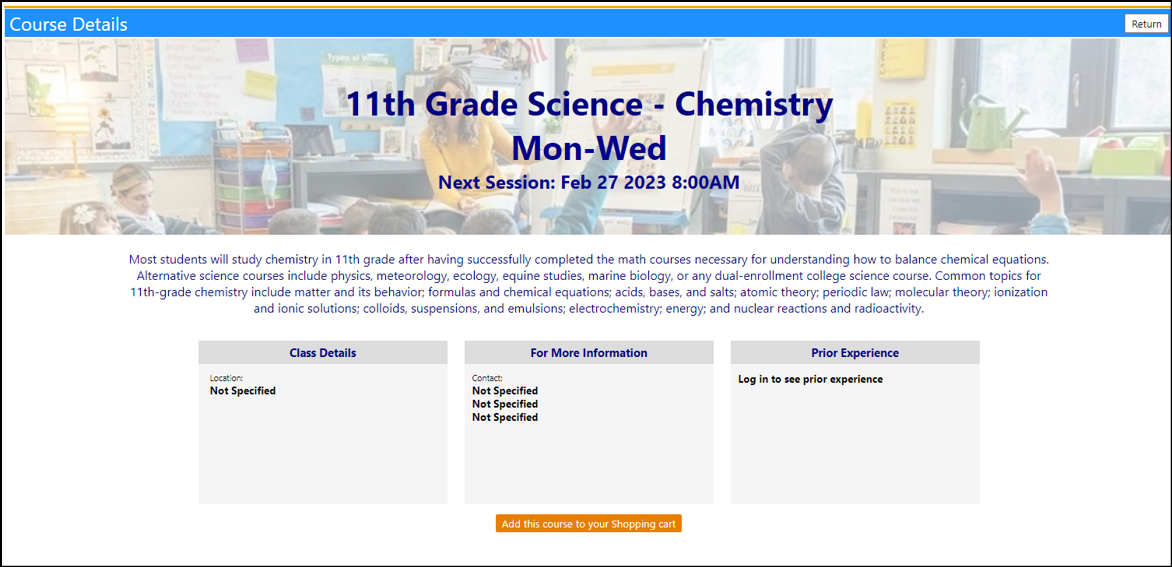
Browse course list and click on section names for details.
-
Add course to your Shopping Cart.
-
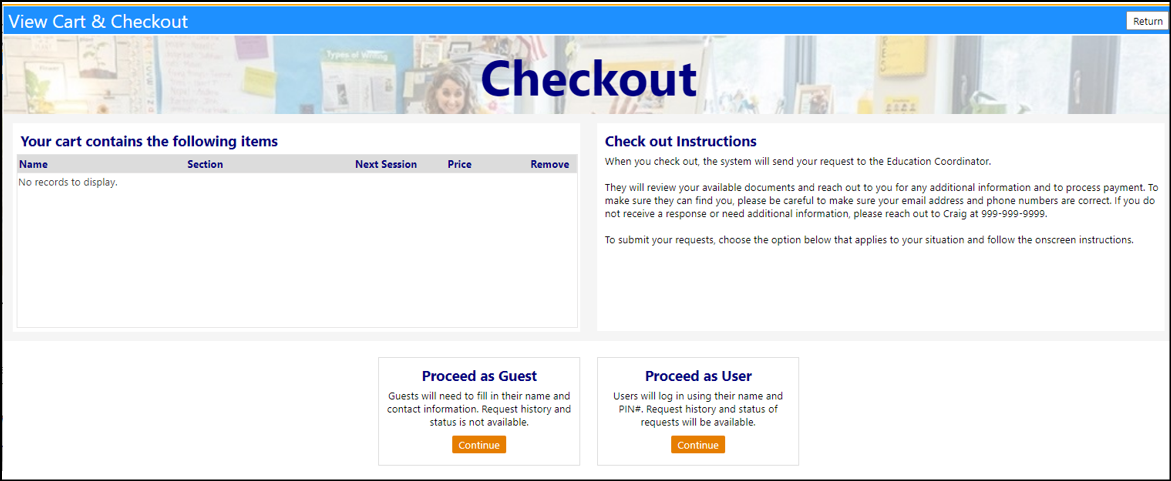
When done, view the cart and checkout.
- Checkout as guest -> fill out form, creates an applicant in imPowr, logs request in the Registration Administration page.
- Checkout by logging in using your PIN -> logs request, associated with your imPowr account.
More Advanced Public Scenario
-
Launch portal in non-logged in mode.
-
Go to view cart (empty) and log in using your PIN.
-
Browse course list and click on section names for details.
- Now that you are logged in, you have access to your history of past experience with the course, etc.
- When done, view the cart and checkout.
- Since you are already logged in, checkout is a single click.
Private User scenario
-
Launch portal in logged in mode.
-
Browse course list and click on section names for details.
- Since you are logged in, you have access to your history of past experience with the course, etc.
- When done, view the cart and checkout.
- Since you are already logged in, checkout is a single click.
Course Section selection
- Click the course section for details.
- Duplicates are ignored when adding to cart.
- A class full indicator shows – but it only applies to approved requests. We currently cannot hold a spot in the class, so it is possible a class was available when requested – but once other requests are approved the slot is no longer available. .
Checkout
At checkout, a user can...
- login and proceed as an existing imPowr account
- submit requests as a guest.
- When proceeding as guest the user gets a data entry form and an applicant record is created. Course Requests are logged against that applicant, in the Registration Administration page.
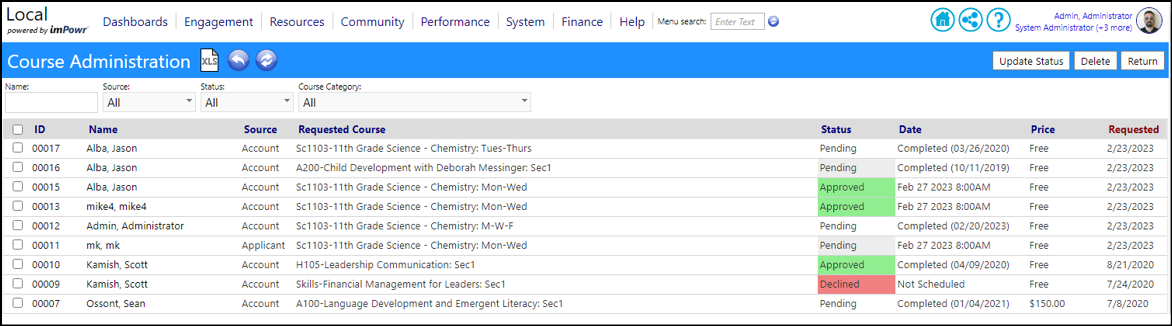
Request Management
- Course Requests go to Registration Administration
- From there you can go into individual requests or update the requests in bulk.
- Applicants will auto convert into accounts when their requests are approved, or you can convert them manually ahead of time on the applicant list screen.
- Request status.
- When a request is approved, the person is enrolled into the class.
- When a request is rejected, we mark it as rejected but there is no built in notification to the requestor. Currently, that must be done manually.
- Users can export the list of requests, using the export icon on the blue bar.
Registration Portal Configuation:
Course list
- Text blocks are configurable.
- Shopping Cart-based design.
- Login helpful but not required.
- Two calendar modes.
- Scholarship information is optional.
- Displayed courses must be active and open to enrollment.
- Pricing is by course, but can be overridden for a specific section.
- A trick: go to the empty cart and log in to get the benefit of being a logged in user.
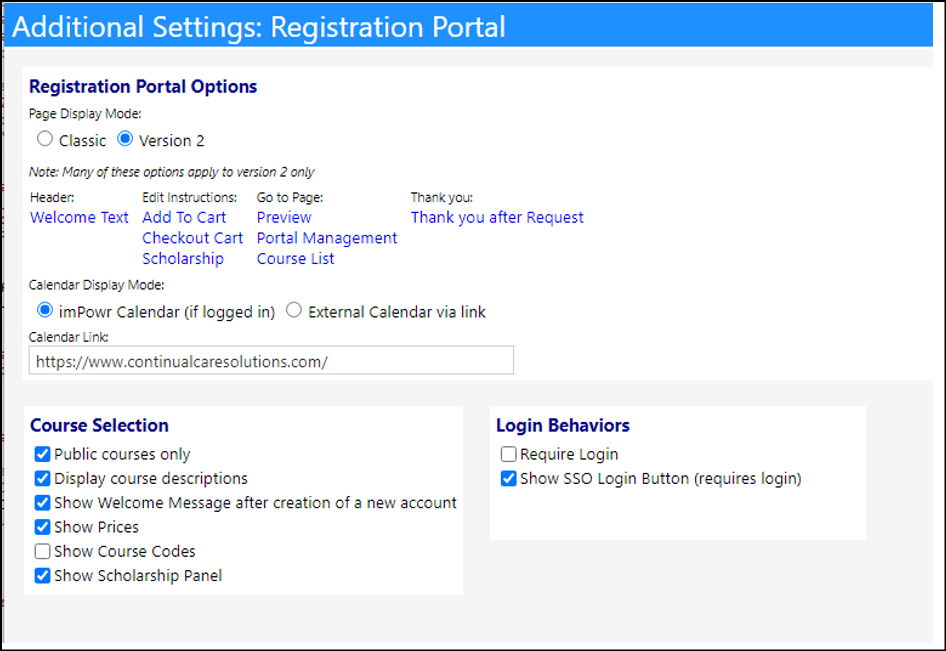
Portal Setup
- The Classic Mode is how most existing customers use the Registration Portal at this time. Most settings are ignored in classic mode. (This method will be phased out over time.)
- Version 2 is the new method.
- A typical setup for Version 2 is shown below. Once a customer uploads a calendar, the external calendar will be available via a link.
Testing
If you want to log in as a Test Client:
- Create a Fake Client account.
- Enter the following:
- Firstname
- Lastname
- ZIP code
- PIN – use the MRN field in the Medical Panel to store the PIN.
- On the shopping cart screen click Login and enter the required information.