A USER GUIDE TO ACCOUNT ROLES
Contents
Account Roles 2
What are Account Roles? 2
Where are Account Roles found in IMPOWR? 3
Viewing the Account Roles setup in IMPOWR 4
What are some of the rights available with Account Roles? 4
How can I tell what Account Role I have? 5
How can I change from one Account Role to another? 6
What Account Role will I be assigned to when I log into IMPOWR? 6
Viewing Account Roles 6
What does my Account Role include? 6
Account Role Setup 9
Functional Rights 9
Viewing the Privilege List 10
Dashboard Rights 12
Entity Rights 13
Portal Rights 14
Account Statuses 15
AI Touchpoints 16
Entity Details 16
Program Rights 17
Reports 18
Custom Pages 18
Credential Categories 19
SOP Categories 19
Contract Categories 20
Case Audit Categories 21
Client Documents 21
Work Orders 22
Members 23
Settings 24
AAD Groups 24
Organizations 25
Child Roles 25
Menu Wizard 25
Using the Menu Wizard 26
Process 28
Account Roles
One of the very first things all customers have to do after getting an IMPOWR instance, other than setting up their staff accounts, is to assign each staff member who will be using IMPOWR, an Account Role.
What are Account Roles?
All users of IMPOWR must be granted an Account Role to login and work within the IMPOWR instance. Account Roles consist of various kinds of access and security rights. At minimum, all IMPOWR users must be granted both Functional Rights and Entity Rights. In general, Functional Rights allow users to access pages and menu items in IMPOWR, as well as the various portals. Entity Rights provide users with the ability to do things on those pages, such as viewing, adding, editing, and deleting entries. In most cases, just because a user may have been granted access to a page via a Functional Right, it does not mean they can view it or do anything on it unless they have an appropriate Entity Right.
When IMPOWR is initially setup, Continual Care Solutions will setup a System Administrator Account Role. And, once a user is identified as the organization’s System Administrator, Continual Care Solutions will work with that individual to train them on Account Roles. The System Administrator is granted full access to the IMPOWR instance (i.e., access to all menu items, pages, portals, configuration, and functionality within IMPOWR) so they can create Account Roles, assign them to other organizational staff members, as well as work with and configure IMPOWR. Continual Care Solutions will work with the System Administrator to determine which other user(s), if any, should additionally be designated as a System Administrator, and will also review Account Roles with that user(s).
Typically, Account Roles will be created for various user roles within the customer’s organization. It is not uncommon for there to be multiple Account Roles, with each reflecting the kind of access
that role requires in order to perform their job. Ideally, a user should only be assigned to single Account Role but knowing that some people wear ‘multiple hats’ and just don’t perform one kind of activity, the IMPOWR system has been designed to be flexible and allows users to be assigned to multiple Account Roles. User can switch between their Account Roles at any time.
Account Roles may seem a bit daunting at first, but once you understand how they work, you will find them easy to setup. This is especially true when you use the Account Role Menu Wizard, which we will focus on later in this user guide.
Before we discuss the Wizard, some basic information about Account Roles….
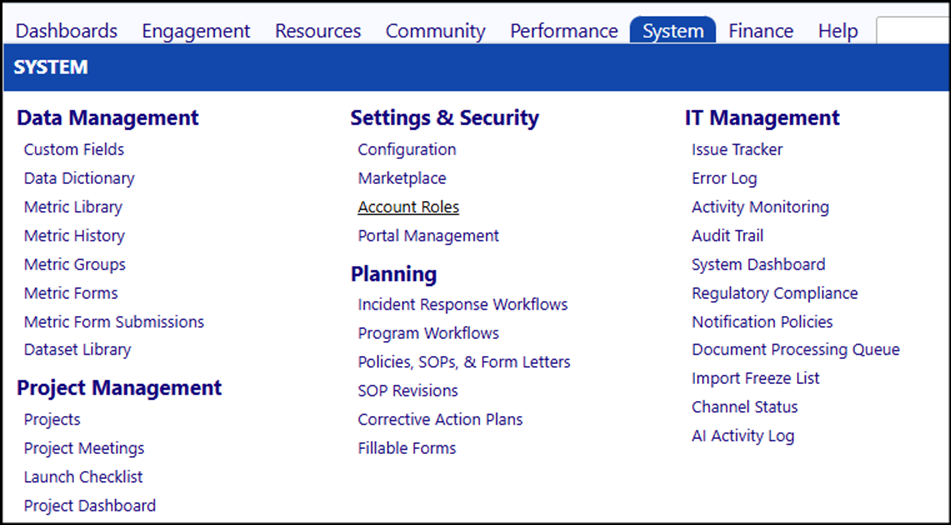
Where are Account Roles found in IMPOWR?
Users who have been granted specific access rights can access Account Roles from the System Menu (System / Settings & Security / Account Roles). Only those users who have been setup with the appropriate functional rights to access the Account Role page and the appropriate associated entity rights to make changes to that page (View, Add, and Edit) can setup or change Account Roles.
Example of the standard System Menu showing all menu items including Account Roles (without any customization):
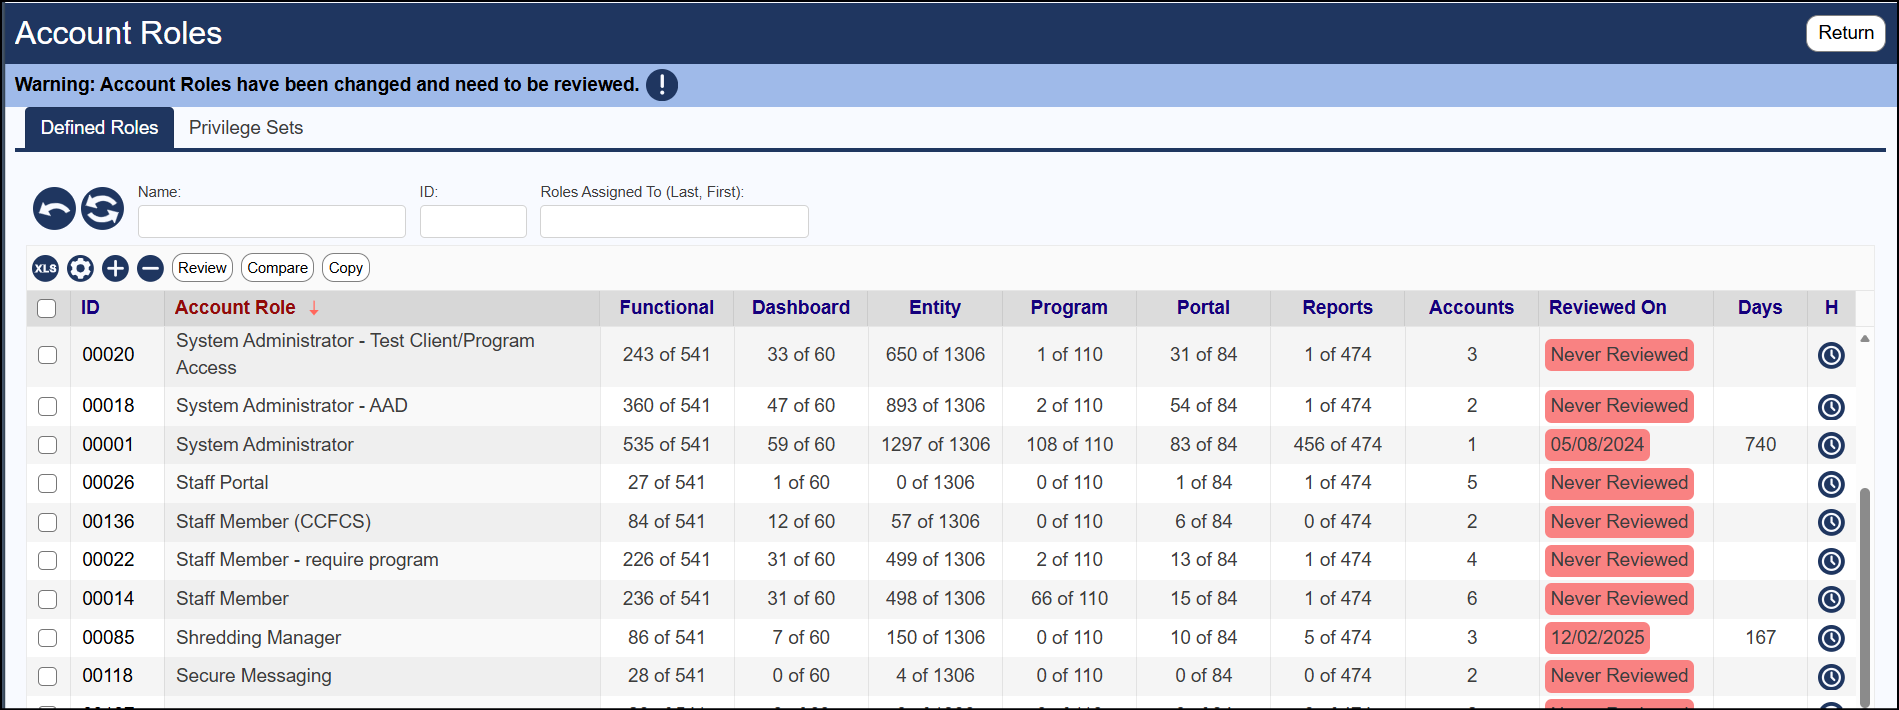
Viewing the Account Roles setup in IMPOWR
If you have access to Account Roles, you can view all of those which are setup in the system:
Example of a listing of organizational Account Role:
What are some of the rights available with Account Roles?
When a user clicks on any of the Account Roles setup in their IMPOWR instance, they can view the various components of the Account Role. At minimum, all IMPOWR users must be granted a login Functional Right.
Components of an Account Role:
- Functional Rights
- Dashboard Rights
- Entity Rights
- Portal Rights
- Account Statuses
- AI Touchpoints
- Entity Details
- Program Rights
- Reports
- Custom Pages
- Credential Categories
- SOP Categories
- Contract Categories
- Case Audit Categories
- Client Documents
- Work Orders
- Settings
- Menu Wizard
As mentioned, all IMPOWR users must be assigned an Account Role in order to access IMPOWR and do something in it.
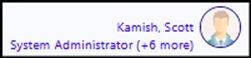
How can I tell what Account Role I have?
All users can tell what account role they have by looking in the upper right-hand corner of the screen, just under your name.

The Account Role you are using in IMPOWR is listed below your name. If you have more than 1 assigned Account Role, you will see something like that listed in the above example, which shows “(+6 more)”:
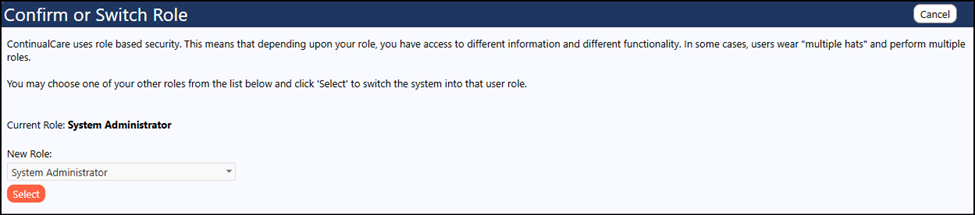
How can I change from one Account Role to another?
If a user has more than 1 account role, they can switch between account roles by clicking on the Account Role listed below their name. When they do that, the screen will display their current Account Role and will allow them to switch to one of their other assigned Account Roles by selecting that role from the drop-down list:
What Account Role will I be assigned to when I log into IMPOWR ?
IMPOWR remembers the Account Role the user used in their last IMPOWR session. When that user logs into IMPOWR the next time, whatever Account Role they were using when they last logged out of IMPOWR will be the Account Role they will log into IMPOWR with, in their new session.
Viewing Account Roles
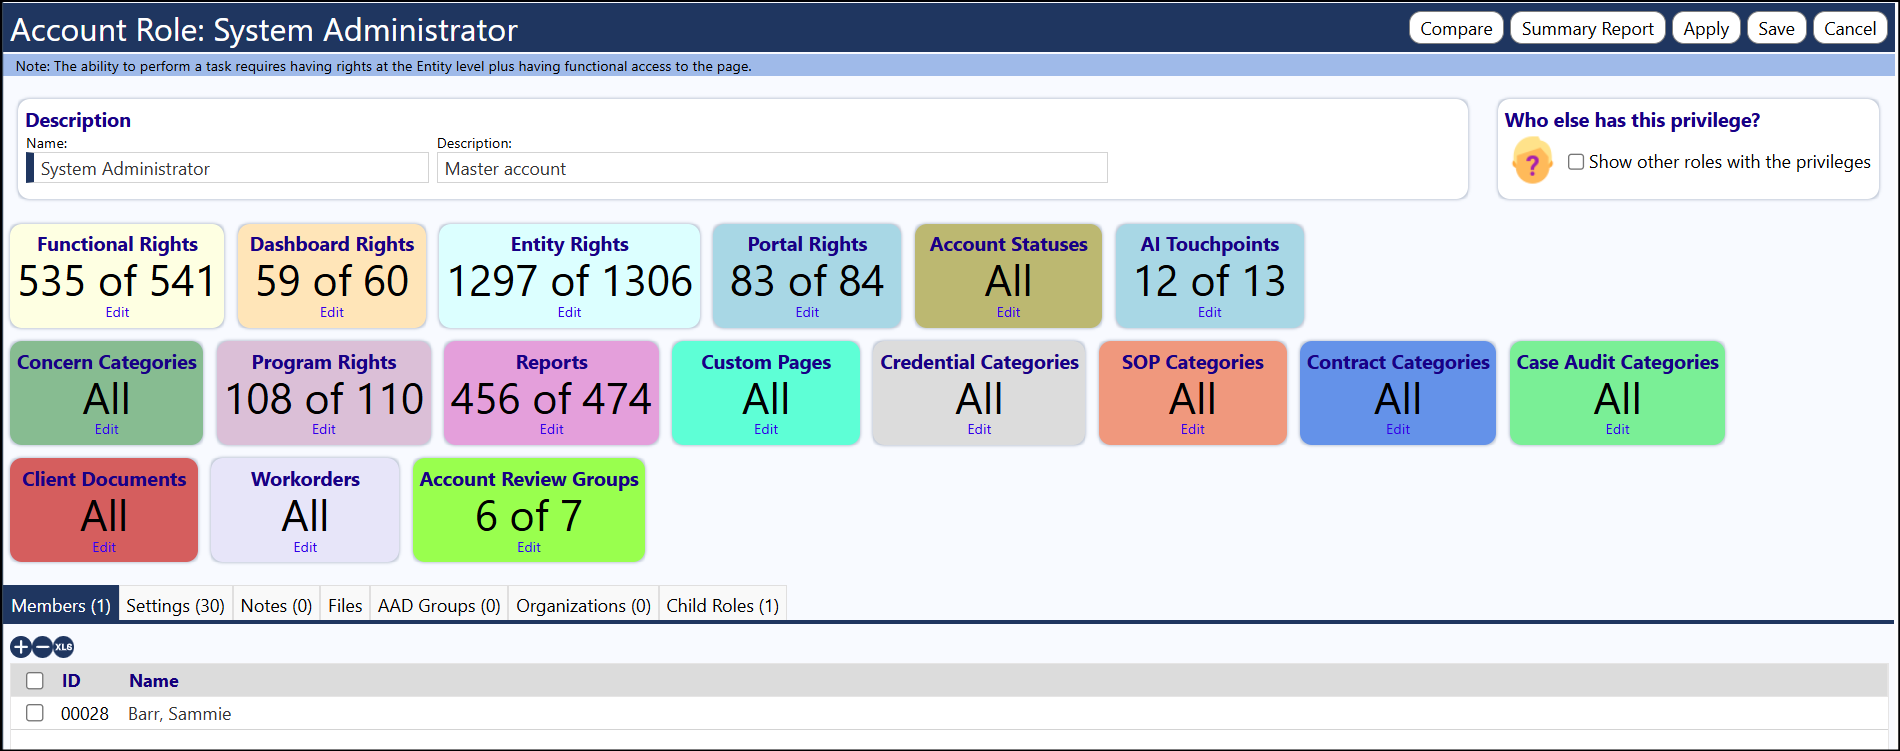
What does my Account Role include?
In order to understand Account Roles, we will go through each of the above components:
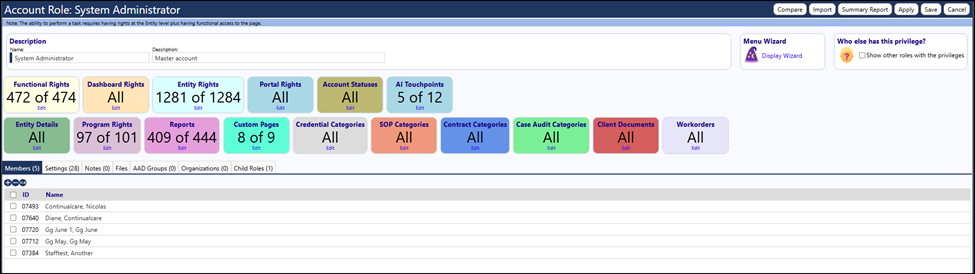
Account Roles consist of 5 key sections:

1.) Red:

This section consists of a way to compare one Account Role to another, summarize the Account Role settings in a Summary Report, Apply any changes you have made in the Account Role, Save any changes you have made in an Account Role, and Cancel out (e.g., Close or Exit out of) of the Account Role.
2.) Purple:

This section consists of the Account Role name and an optionally listed Description of the Account Role.
3.) Yellow
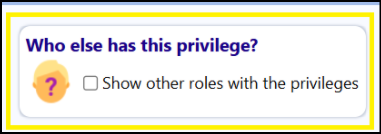
This section provides a way for you to see what other Account Roles have the same privileges as those in your Account Role.
4.) Blue:

This section is the ‘heart’ of all Account Roles. It is where the security rights and privileges (i.e., Functional Rights and Entity Rights) are assigned. It is also where you setup the Dashboard shortcuts, and provide access to Portals, Programs, Reports and Custom Pages. Additionally, it is where you can identify which Credentials, SOPs, Contracts, Case Audits, Client Documents, and Workorders a user can be provided access to.
5.) Orange:

This section is one of the locations where users can be assigned to an account role. It is also the location where default settings can be defined and where AAD Groups can be associated with the Account Role. The Notes and Files tabs work similarly to those that are setup on other pages – you can add notes, and upload files to this page. The Child Roles allow you to add a pre-defined set of privileges without having to add individual privileges. And the Organizations tab is used to restrict access to the Account Role to only those individuals who are affiliated with certain organizations.
Account Role Setup
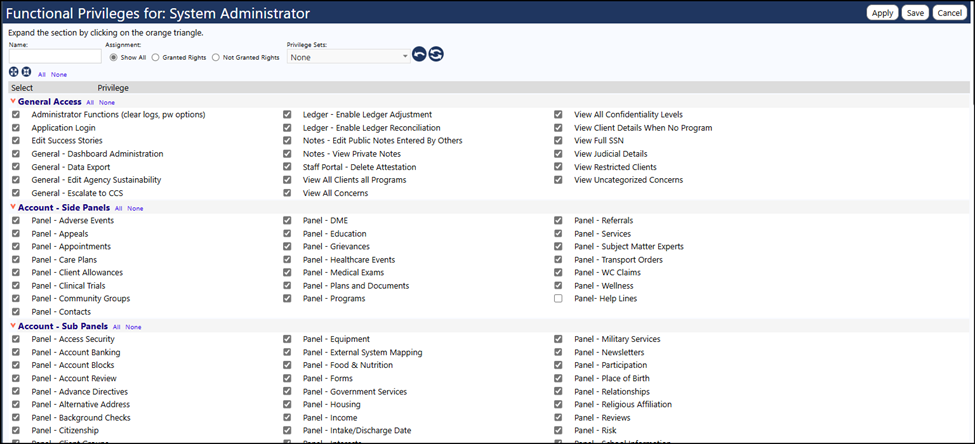
Functional Rights
Functional Rights are broken down by General Access, Account panels, Care & Treatment Plans (including Client Documents), External Access, Incidents & Compliance, Partners, Menus, Projects, Security Rights, Supervisory Rights, and Other pages.
When you view the Functional Rights, you can immediately see a search field (Name), assignment (to filter the list of rights to those you have or have not been granted), and a Privilege Set field. You can also see the various sub-sections that are managed by the Functional Right.
The search functionality works similar to that on other IMPOWR pages. Once you make an entry in the Name field or select an Assignment and click on the icon with the 2 arrows, the screen will refresh and will display using your selected filters. If you click on the icon with the 1 arrow, the screen will refresh again and will redisplay using no filters.

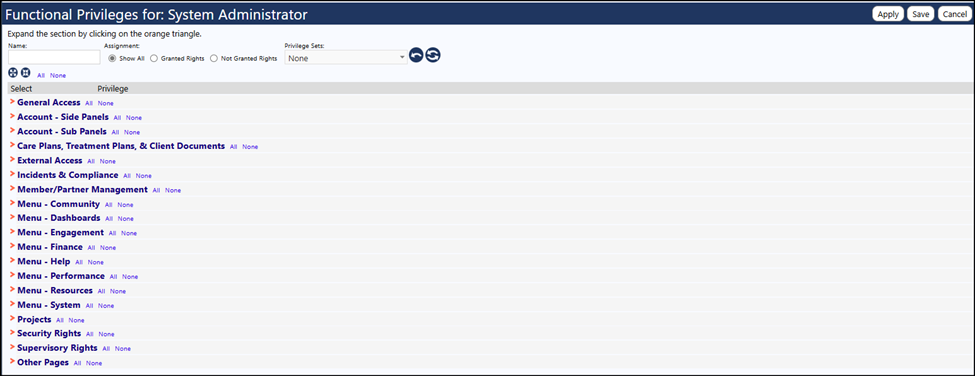
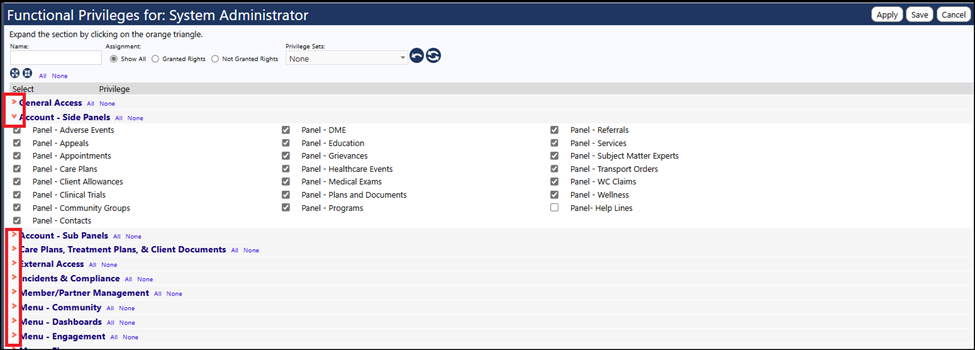
Viewing the Privilege List
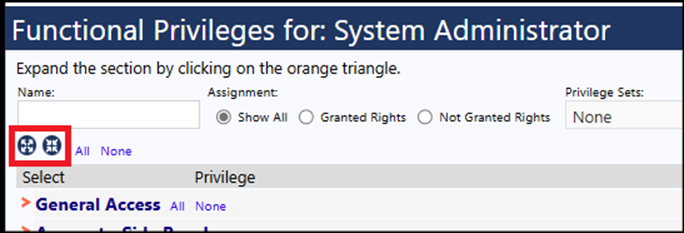
To view the individual privileges that can be assigned, users can either click on the orange arrows to the left of each section or utilize the Expand/Collapse buttons. If you click on the icon with the 4 outward facing arrows, the list will expand to show the actual Functional Rights. Clicking on the icon with the 4 inward facing arrows will collapse the list.
Orange Arrows:
Expand / Collapse icons:
Example of fully expanded Functional Rights list:
Privilege Sets are groupings of specific pre-defined privileges and rights and can be assigned to any Account Role. Although they are available for use, most IMPOWR organizations choose to setup Account Roles as outlined in this User Guide. It is for that reason that Privilege Sets will not be discussed further in this document. If you would like additional information on Privilege Sets, please reach out to your Continual Care Solutions account representative.
Once the selection list has been expanded, users with the Entity Rights to Add and Edit Account Roles can make whatever changes are necessary to the role. This is done by selecting or unselecting the checkbox to the left of the privilege.
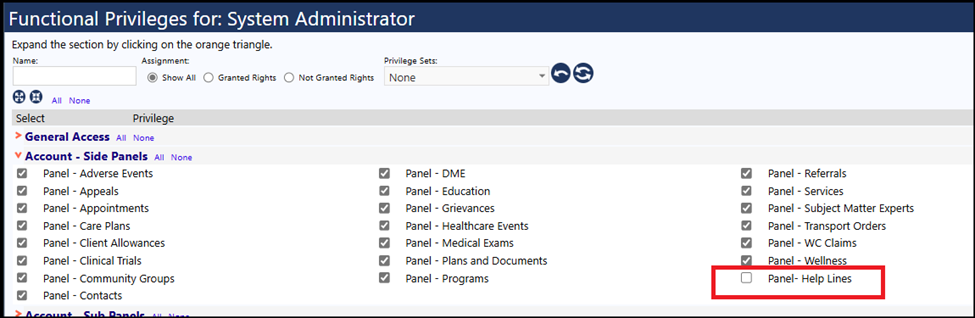
For example, Panel- Help Lines (the privilege that grants the ability for a user to see an account’s assigned Helpline in the Help Lines panel on the right-hand side of the account profile) is unchecked. That means users with the System Administrator Account Role do not have access to that panel. Even if they were granted Entity Rights to View, Add, Edit, or Delete the Help Line Panel, because they do not have access to that panel, that panel will not display in the account profile.
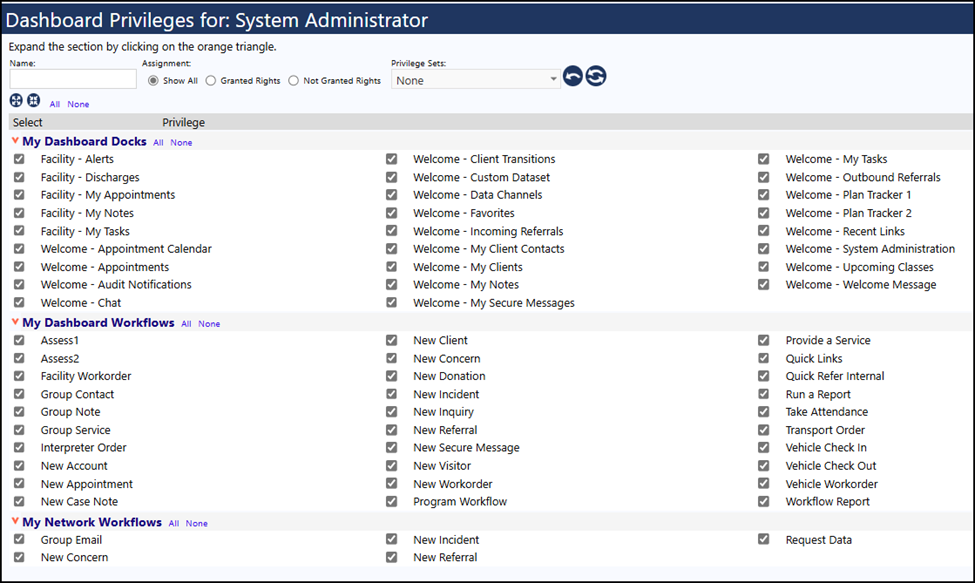
Dashboard Rights
The Dashboard Rights identifies which panels should be available to users to select for their MyDashboard page (which is an optionally set start screen for many staff members). The Dashboard Rights also identifies which shortcuts to various Dashboard Workflows (such as assigning services to groups, checking a vehicle in/out, and creating an internal quick referral, etc.) should display on the left-hand side of the MyDashboard page. Additionally, some privileges for networks are also made available.
Example of Dashboard Privileges:
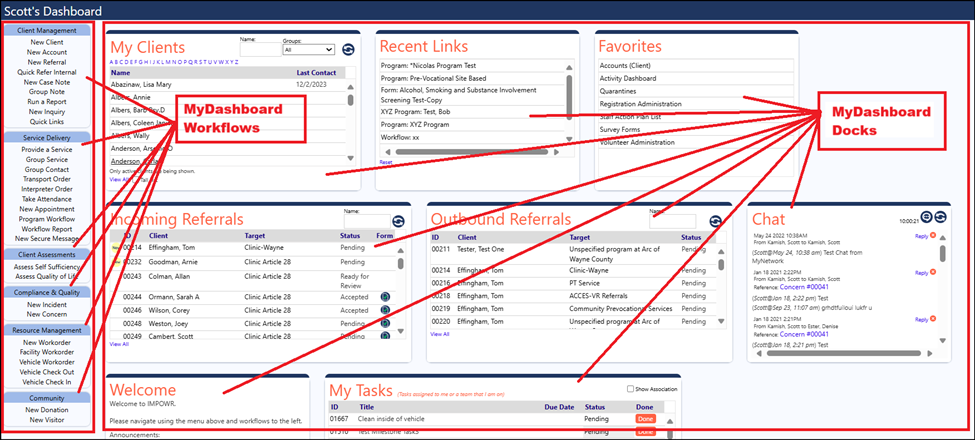
Example of where the Dashboard Rights are displayed on the MyDashboard page:
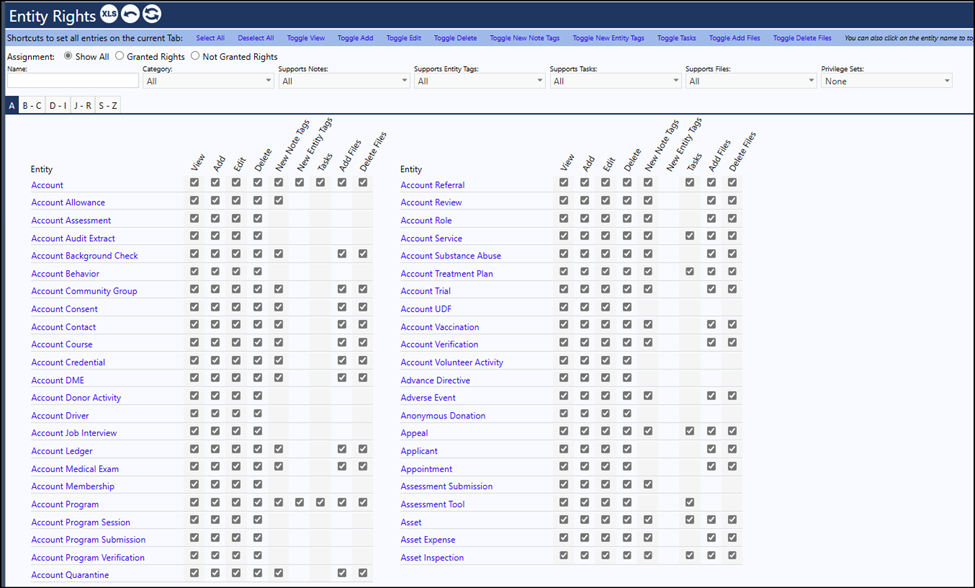
Entity Rights
Functional Rights are what pages and menu items you can access, but Entity Rights determine what you can or cannot do on those pages. The Entity Rights are where rights to View, Add, Edit, Delete, add Tasks, add Files, delete Files, and add Entity and Note Tags can be granted. Not all pages or menu items require Entity Rights. The Menu Wizard is very helpful in this area. And the ability to add some items on some pages also require you to be able to Edit those items. Whether or not that is the case depends on how the page was designed – it is not something you can visibly see in the Entity Rights or on the page – you would need to test to determine how it works.
To select or remove an Entity Right, users can just click on the checkbox or remove the checkmark from any of the rights.
If by chance someone clicks on the name of the Entity in the Entity Rights list, all of the checkmarks for that Entity Right will toggle. In other words, if View functionality is currently checked and someone clicks on the Entity Name, the View functionality will toggle to being unchecked. Clicking on the name of the Entity causes this toggling for all rights for that entity (i.e., everything in that row: View, Add, Edit, Delete, New Note Tag, New Entity Tage, Tasks, Add Files, and Delete Files).
Example of Entity Rights selection screen for the pages and menu items which begin with the letter “A”:
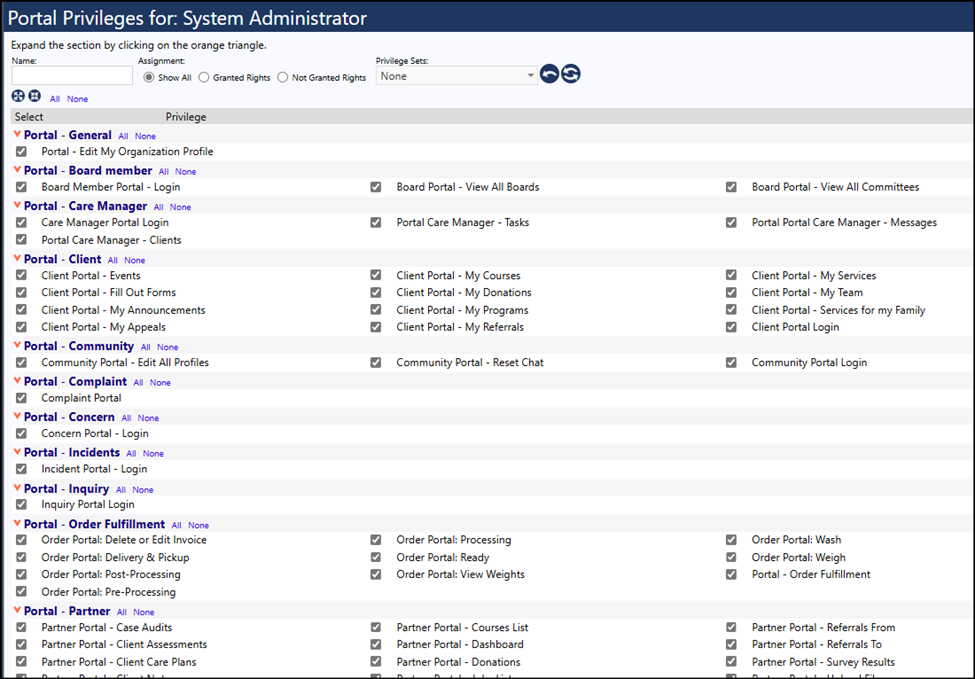
Portal Rights
Portals are just a subset of IMPOWR. They provide a limited view of the information in the main IMPOWR platform. IMPOWR currently has 20 different portals which are maintained via the Portal Management screen. The Portal Rights provide login rights and identify what users in the Account Role can do in the various IMPOWR portals. Sometimes Board Members or others are provided with Portal Rights only instead of providing them access to the main IMPOWR platform.
An example of what the Portal Privileges page looks like:
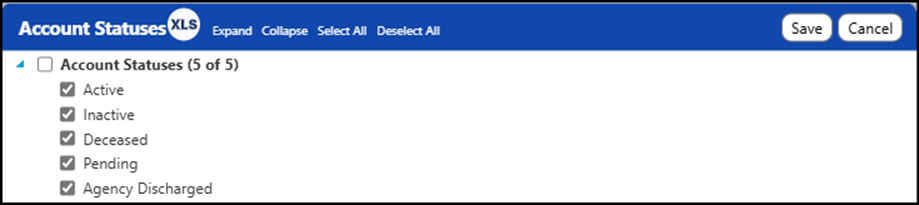
Account Statuses
The Account Statuses rights allow users to work with the various account statuses of Active, Inactive, Deceased, Pending, and Agency Discharged. For most IMPOWR users, if they have access to one status, they are typically granted access to all. But depending on how your organization wishes to manage accounts, it would make sense for some user Account Roles to only have access to the Active accounts and not the others, because they would fall under a need-to-know basis.
Example of the Account Statuses privileges:
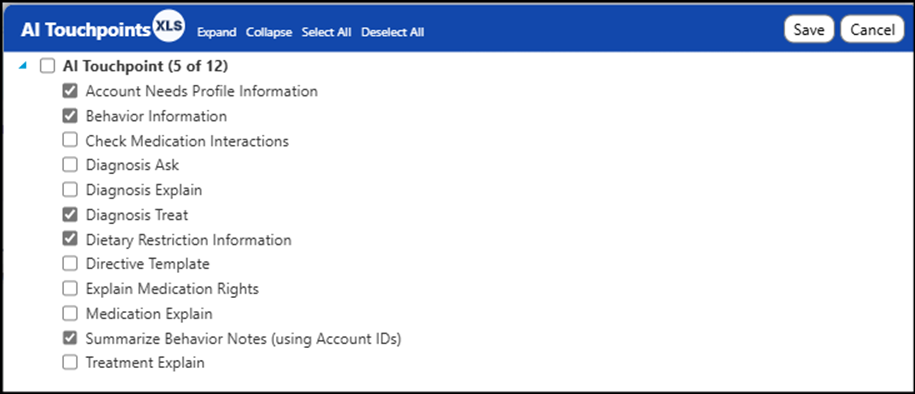
AI Touchpoints
The AI Touchpoints privileges are still evolving. AI is becoming integrated into everything, IMPOWR included! These AI Touchpoint privileges are used by Account Roles to turn on/off that AI integration. IMPOWR AI integration is just beginning, so not every part, page, or menu item has AI integrated yet. Because this is still ‘under construction’ and being worked out, only specific individuals at Continual Care Solutions currently works with these Account Role privileges.
AI Touchpoints privileges example:
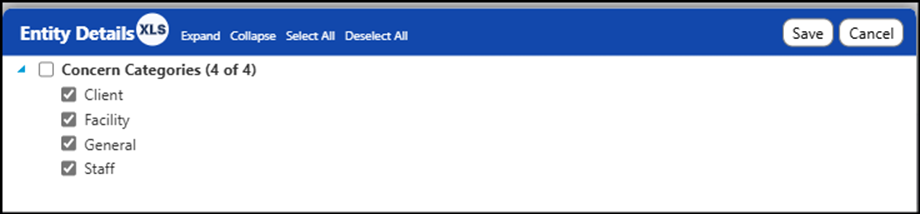
Entity Details
The label for Entity Details is a little confusing because when you open up the Entity Details users will find this privilege is related to Concern Categories. If you do not select any of these categories, not only will you not be able to view any concerns of that category type, but you will also not be able to save anything into that Concern Category.
Example of the Entity Details page. Similar to the other pages, to select any of the Concern Categories, just click the checkbox on.
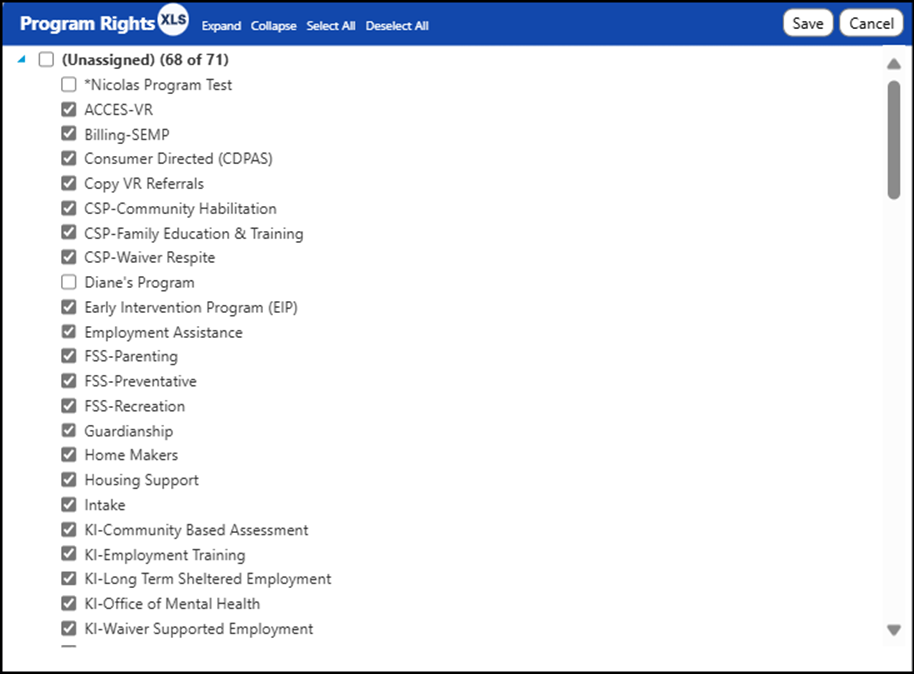
Program Rights
Program Rights are used for a few things including providing access to various programs, restricting who can access client information in programs, who can enroll clients in various programs, etc. Once the Program Rights window is open, users just need to click on the checkbox to the left of the programs they wish to have access to.
Example of Program Rights:
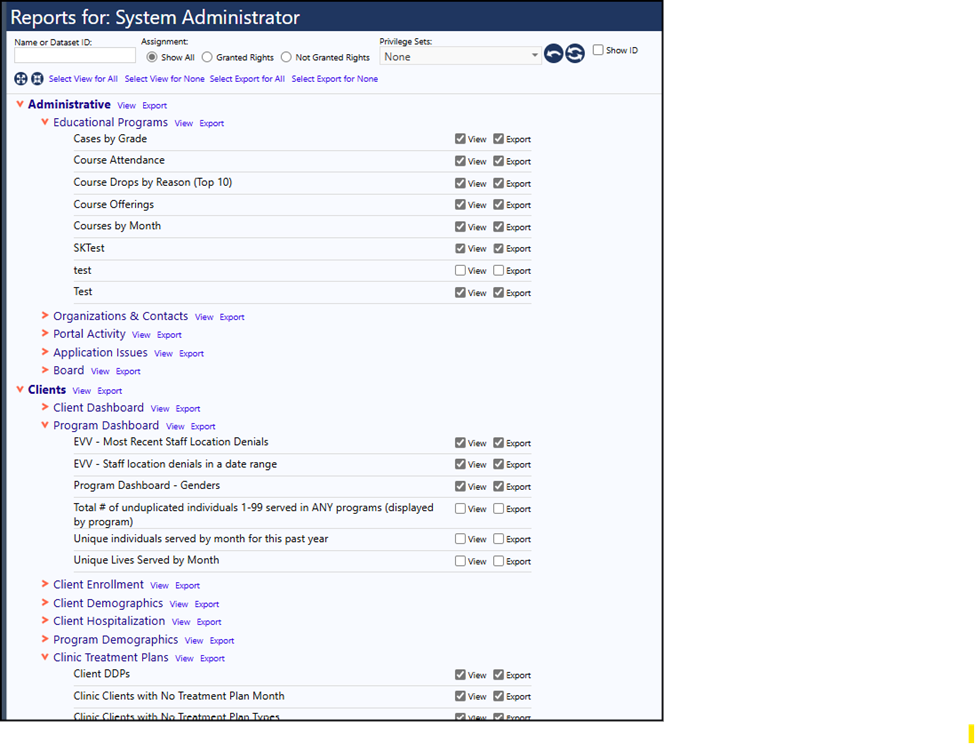
Reports
Reports Privileges must be set in order for a user be able to view and/or export a report. Even though a report might be in the system or even have been created by the user, if that report is not assigned to their Account Role, they will not be able to view that report.
An Example of the Reports Privileges. Similar to the Functional Rights, you can expand or collapse the list by clicking on the icons with 4 arrows or by clicking on the orange triangles.
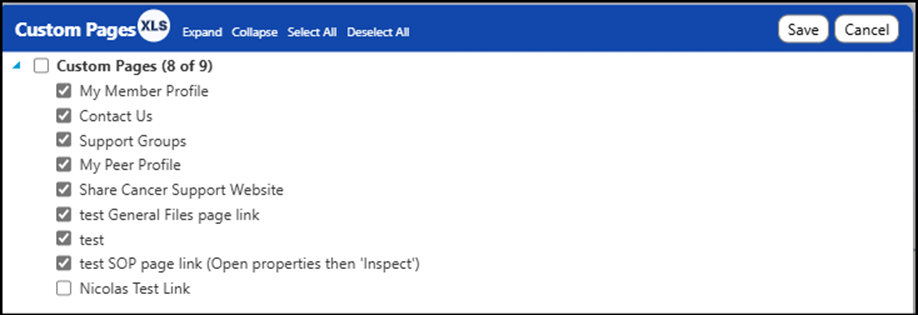
Custom Pages
When Custom Menus are created in IMPOWR, users have the ability to create custom pages.
Like other privileges, the Custom Pages must be selected in the Account Role in order to provide access to the page.
Example of Custom Pages privileges:
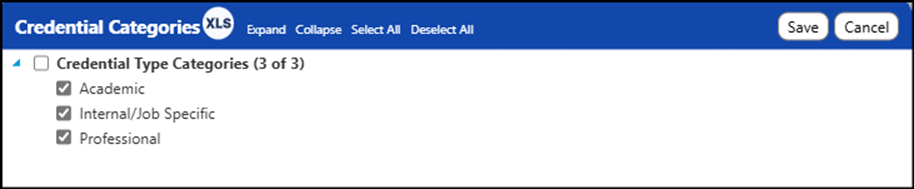
Credential Categories
When Credentials are created, they can be categorized in order to keep them in order – kind of like placing items in a file folder. When access is granted for a Credential Category, users in that Account Role can view and work with the credentials in that category. If the Credential Category is not granted, the user will not even see that category when trying to view the credentials. The categories are created in another area of IMPOWR.
Example of a Credential Category Privilege:
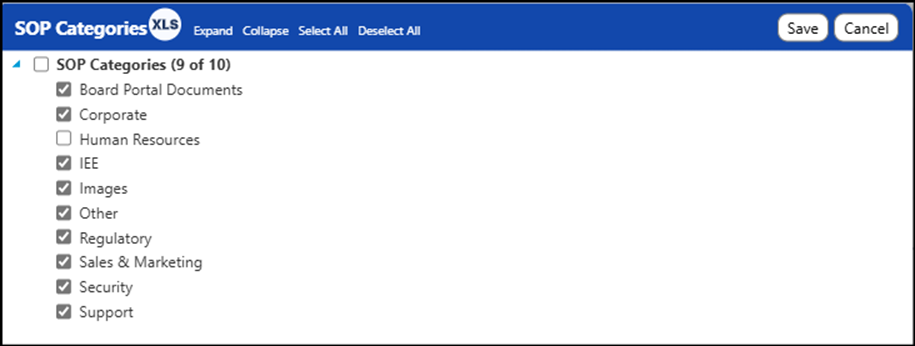
SOP Categories
SOP Categories work the same way as the Credential Categories. Users must be granted access to the individual SOP Categories in order to view and work with the SOP documents in that category. If the category privilege is not granted, the user will not see that category in the pages, so they will not be able to access any of the SOPs assigned to that category. This is one way to manage SOP documents… if a user has a confidential document that should only be viewed by a select group of individuals, the SOP Category can be assigned to their account role so they can view that document. Other Account Roles which do not have that SOP Category assignment will not see the category, and therefore, they will not see the document and cannot access it. SOP Categories can be used to ‘hide’ document in this way, so only those users who have a need-to-know role can be granted access to them. The categories are created in another area of IMPOWR.
SOP Categories privilege example:
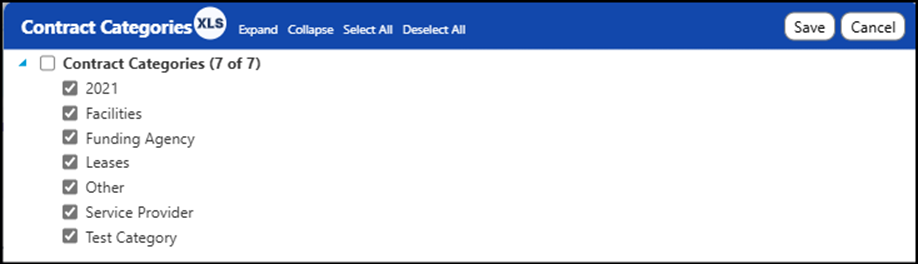
Contract Categories
Contract Categories work the same way as the Credential Categories. Users must be granted access to the individual Contract Categories in order to view and work with the Contracts in that category. If the category privilege is not granted, the user will not see that category in the pages, so they will not be able to access any of the Contracts assigned to that category. This is one way to manage access to Contracts. If an organization has a contract with someone on the leadership team, for example, that contract would most likely only be viewed by a select group of individuals, the Contract Category can be assigned to their account role so they can view that contract. Other Account Roles, which do not have that Contract Category assignment, will not see the category, and therefore, they will not see the contract, nor will they be able to access it. Just like with SOP Categories, Contract Categories can be used to ‘hide’ contracts in this way, so only those users who have a need-to-know role can be granted access to them. The categories are created in another area of IMPOWR.
Example of Contract Categories privilege:
Case Audit Categories
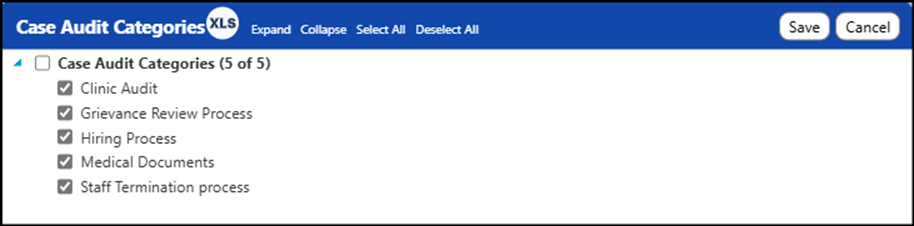
Case Audit Categories work exactly like SOP and Contract Categories. Access to the categories gets granted with this privilege. Without this privilege users cannot see nor access the Case Audits in the corresponding categories. The categories are created in another area of IMPOWR.
The following is an example of the privilege for Case Audit Categories:
Client Documents
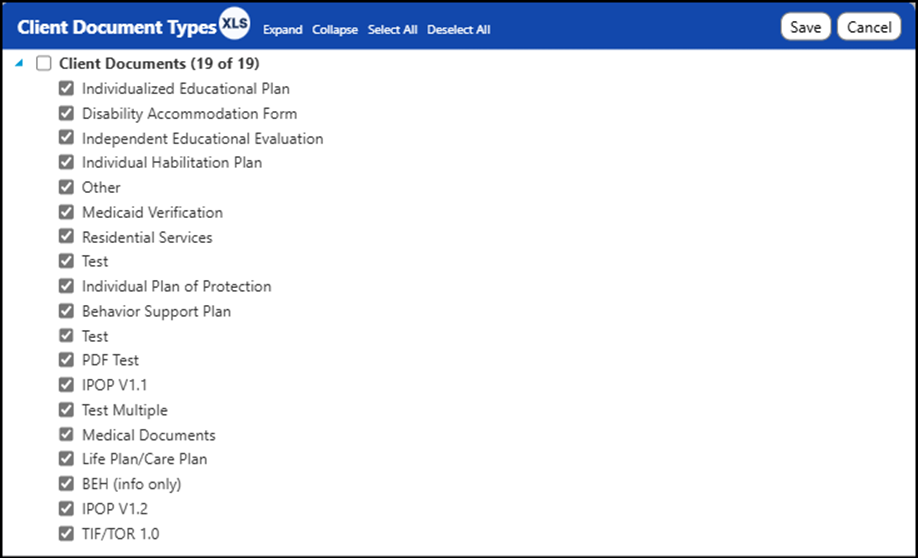
IMPOWR allows uses to create an almost unlimited number of Client Documents and each can be associated with a Client Document Type. Just like with categories, if someone is not granted access to the Client Document Type, they cannot view or work with them. Once the document is created, its associated Client Document Type displays in this privilege. In order to grant access to the Client Document, the user must have been granted access to the Client Document Type that is associated with that Document. That granting of privileges is done by selecting or de-selecting the various Client Document Types.
An example of what the Client Document Types privilege list is:
Work Orders
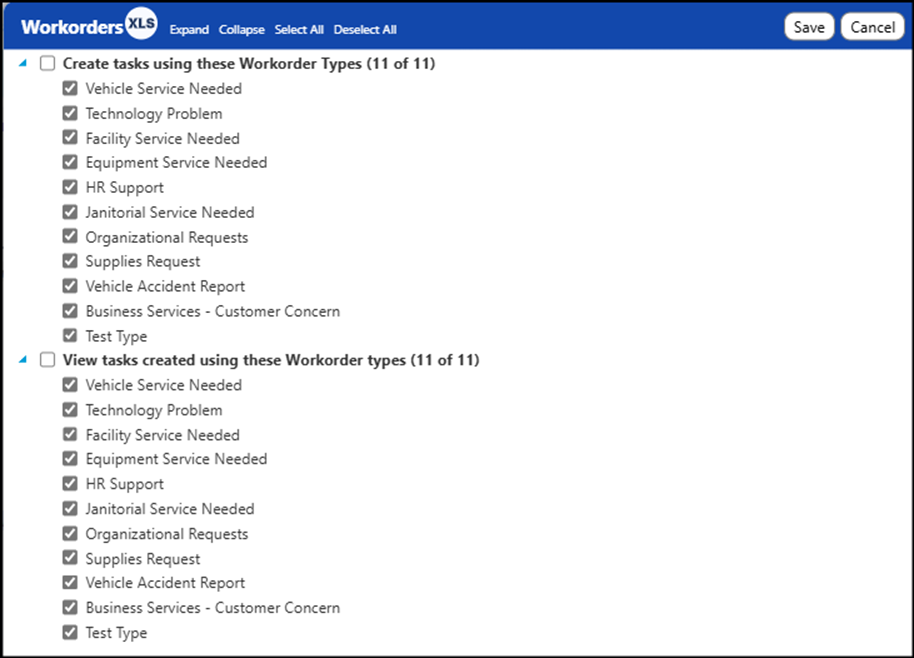
In IMPOWR, a Workorder is a Task, but Workorders can be submitted via User Interfaces that are much more user friendly and informative than tasks. Similar to the last few privileges, many different kinds of Workorders can be created in IMPOWR. But to be able to use them, a user must be granted privileges to either Create tasks using these (selected) Workorder Types and/or View tasks created using these (selected) Workorder Types.
The following is an example of what this privilege looks like:
Account Review Groups
IMPOWR allows users to review various components of Accounts in order to have a quick and easy way to ensure the account has been completed as desired. This section of the Account Role allows the selection of the various review groups of data.
The following is an example of what this privilege looks like:
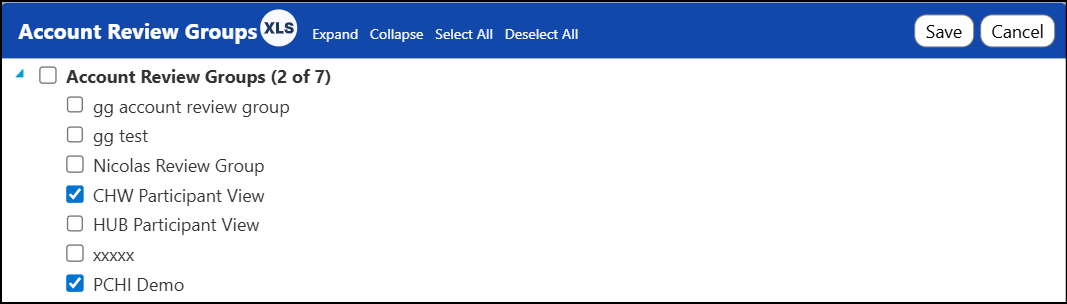
This setting controls the groups which are available to view:
Members
The Members tab displays the names and ID numbers of the accounts assigned to this Account Role. Users can be assigned to the Account Role directly in this tab, when they are added as a new account, or they can also be assigned to the Account Role from within the account profile.
An example of this tab is as follows:
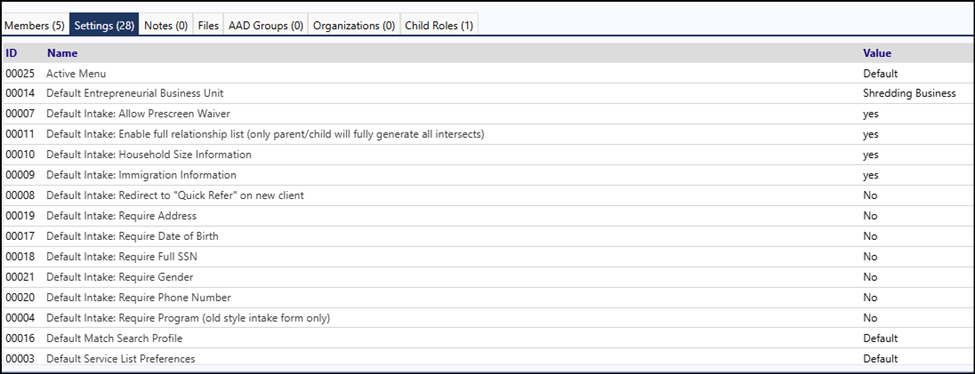
Settings
Settings can be found as one of the tabs in the Account Role. The Settings are default values setup for the role. Some examples of the settings which can be defaulted are the menu (either the standard or a custom menu), the default entrepreneurial business, the default intake form to use and ways in which the intake process should perform, the default account type when the intake process is used, the account role start page, and the workorder portal default type.
An example of the Setting tab privileges is:
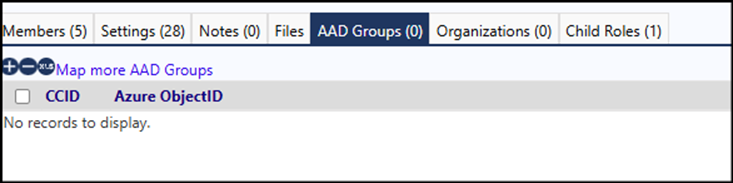
AAD Groups
The AAD Groups tab is tied to Azure Active Directory (AAD), or your Single Sign On (SSO) process if you are using one. Your organizational IT department would need to be directly involved if you are making any changes to this tab. This ties the Account Role to an AAD account group so that SSO users can be assigned the proper Account Role.
Example of tab:
Organizations
Organization settings can be used to provide organizational level security in addition to the standard security provisions.
Example:

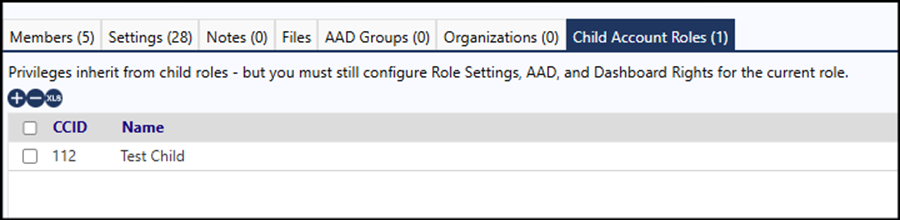
Child Roles
Child Roles are used to attach a predefined group of privileges to an existing Account Role. That predefined group is setup as another Account Role. Organizations use the Child Roles to manage Account Roles that are more complex, because when you make a change to that Child Account Role, any other Account Roles which have that child assigned will automatically get updated. Users do not have to go into every role to make those changes.
Example of using Child Account Roles: